Advertisement
Quick Links
Before attempting to connect or operate this product,
please read these instructions carefully and save this manual for future use.
ENGLISH VERSION
1. Remove the enclosure from the main body
by loosening the three enclosure fixing
screws using the provided tamperproof
screwdriver.
2. Detach the dome cover from the enclosure
by removing the three dome cover fixing
screws.
(At this moment, the dome cover and the
main body is still fixed with the dome wire.
Remove the fixing screw of the dome wire.)
3. Replace the dome cover.
• Peel off the protection film from the new
dome cover.
• Make sure that the waterproof packing on
the new dome cover is being stuck without
torsion or transformation.
Use only the attached waterproof packing of
the new dome cover.
• Put the enclosure, the new dome cover and
the holding plate together using the three
dome cover fixing screws. (Align the
grooves of the dome cover and the holding
plate, and then align the guide of the enclo
sure to the aligned grooves.) Then, fix the
dome wire using the removed fixing screw
after aligning the wire between the protru
sions on the holding plate.
Tightening torque of the dome cover fixing
screws: 0.78 N·m {8 kgf·cm}
4. Put the main body and the enclosure togeth
er using the three enclosure fixing screws.
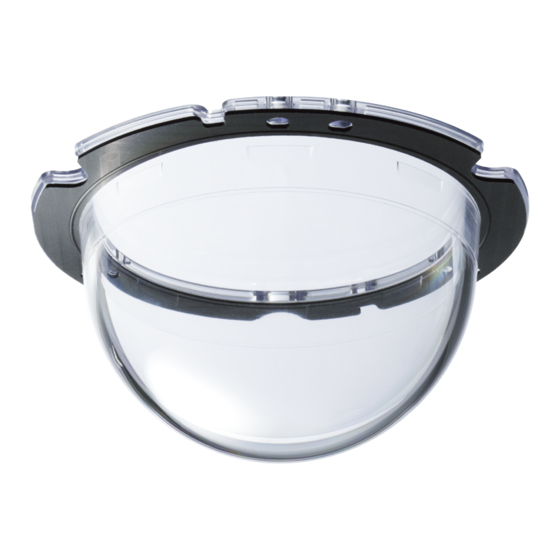
Dome Cover
WV-CW4C
Model No.
Loosen the three enclosure �
fixing screws.
Dome cover
Guide
Enclosure
Waterproof �
packing
Groove
Dome cover
Holding plate
Dome cover fixing �
screws (3 pcs.)�
�
Groove
Dome wire
Fixing screw
Protrusions
Available from A1 Security Cameras
www.a1securitycameras.com email: sales@a1securitycameras.com
VERSION FRANÇAISE
(FRENCH VERSION)
1. Retirer le boîtier du bloc principal en
desserrant les trois vis de fixation du
boîtier en utilisant le tournevis inviolable
qui est fourni.
2. Séparer le couvercle en dôme du boîtier
en retirant les trois vis de fixation du
couvercle en dôme.
(Dès cet instant, le couvercle en dôme et le boîtier principal sont toujours retenus par
le câble de dôme. Retirer la vis de fixation du câble de dôme.)
3. Remonter le couvercle en dôme.
• Décoller
l e
film
de
protection
couvercle en dôme neuf.
• S'assurer que la garniture d'étanchéité
du couvercle en dôme neuf est bien
prise sans subir de torsion ni de
transformation.
Se servir uniquement de la garniture
d'étanchéité fournie avec le couvercle
en dôme neuf.
• Réassembler l'enveloppe, le couvercle
en dôme neuf et la plaque de fixation
en utilisant les trois vis de fixation du
couvercle en dôme. (Aligner les gorges
du couvercle en dôme et de la plaque
de fixation puis aligner le guide de
l'enveloppe avec les gorges alignées.)
Ensuite, fixer le câble de dôme en utili
sant la vis de fixation qui a été retirée
après avoir pris soin d'aligner le câble
entre les parties saillantes de la plaque
de fixation.
Serrer les vis de fixation du couvercle en
dôme au couple de serrage prescrit:
0,78 N·m {8 kgf·cm}
4. Assembler le bloc principal et le boîtier en utilisant les trois vis de fixation du boîtier.
Panasonic System Communications
Company of North America,
Unit of Panasonic Corporation of North America
www.panasonic.com/business/
For customer support, call 1.800.528.6747
Three Panasonic Way, Secaucus, New Jersey 07094 U.S.A.
© Panasonic System Networks Co., Ltd. 2012
Desserrer les trois vis de �
fixation du boîtier.
Couvercle en dôme
du
Guide
Coffret
Garniture �
d'étanchéité�
Gorge
Couvercle en dôme
Plaque d'appui
Vis de fixation de couvercle �
en dôme (3 él.)
Gorge
Câble de �
dôme
Parties saillantes
Panasonic Canada Inc.
5770 Ambler Drive, Mississauga, Ontario, L4W 2T3 Canada
(905)624-5010
www.panasonic.ca
Printed in Japan
NE0906-3012
3TR004709DAA
Imprimé au Japon
Advertisement

Related Manuals for Panasonic A1 Security Cameras WV-CW4C


Summary of Contents for Panasonic A1 Security Cameras WV-CW4C
- Page 1 0.78 N·m {8 kgf·cm} www.panasonic.com/business/ For customer support, call 1.800.528.6747 Three Panasonic Way, Secaucus, New Jersey 07094 U.S.A. 4. Put the main body and the enclosure togeth © Panasonic System Networks Co., Ltd. 2012 Printed in Japan er using the three enclosure fixing screws.
- Page 2 4. ドライバービットを使って、カメ ラ本体とエンクロージャーをエン クロージャー固定ねじ3本で取り 付けます。 2. ドームカバー固定ねじ3本を外し ます。 エンクロージャーとドームカバー を分解し、ドームカバーを取り外 パナソニック システムお客様ご相談センター します。 (このとき、カメラ本体とドーム 受付:9時~17時30分 (土・日・祝祭日は受付のみ) カバーがドームワイヤーで接続さ れていますので、ドームワイヤー が取り付けられているねじを外 し、ドームワイヤーを取り外して 〒153-8687 東京都目黒区下目黒二丁目3番8号 ください。 ) ドームワイヤー 3TR004709DAA Panasonic System Networks Co., Ltd. 2012 NE0906-3012 Available from A1 Security Cameras www.a1securitycameras.com email: sales@a1securitycameras.com...