
Related Manuals for FMS 70mm Avanti V3


Summary of Contents for FMS 70mm Avanti V3
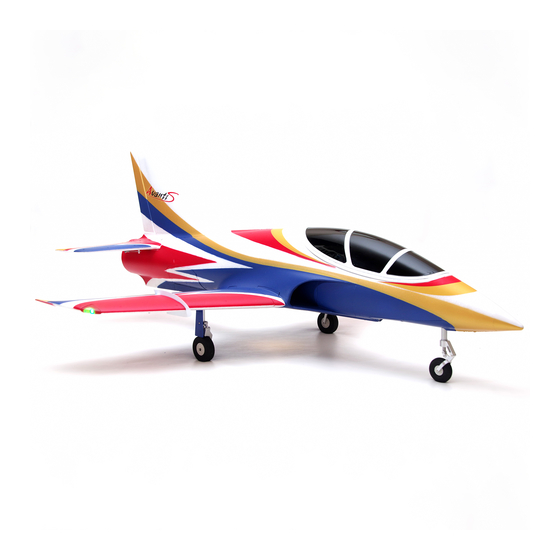
- Page 1 70mm Avanti V3 Instruction Manual Bedienungsanleitung Manuel d’utilisation 操作手册 FMSMODEL.COM POWERFUL STABLE RIGID 80A power system Smooth flying performance Strong durable EPO material...
- Page 3 WARNING WARNING: Read the ENTIRE instruction manual to become familiar with the features of the product before operating. Failure to operate the product correctly can result in damage to the product,personal property and cause serious injury. This is a sophisticated hobby product and NOT a toy. It must be operated with caution and common sense and failure to do so could result in injury or damage to the product or other property.
-
Page 4: Table Of Contents
• Screw-together assembly True to the FMS spirit, the 70mm Avanti V3 was evaluated from • Soft electronic wing connector nose to tail with no detail overlooked. Retaining the plug-type •... -
Page 5: Model Assembly
Model assembly Main wing installation 1.Install the wing spar through the fuselage pass-through as shown. 2. Slide the wing halves onto the wing spar. HKM3.0*16mm 3. Use the included screws to secure the wing halves to the fuselage. - Page 6 Model assembly Wing fence installation 1.Install the wing fences onto the wings as shown. Secure with foam-safe CA. Required Adhesives: Foam Safe Medium CA Horizontal and vertical stabilizer installation 1. Install the horizontal stabilizer onto the fuselage and connect the elevator servo leads as shown. HKM3.0*16mm 2.
- Page 7 Model assembly 3. Install the vertical stabilizer into the fuselage slot and connect the rudder servo lead. HKM3.0*16mm 4. Secure the vertical stabilizer using the included screws.
-
Page 8: Battery Installation
Battery installation 1.Pull back on the latch and remove the battery hatch. 2.Apply the hook tape to the cable end of the battery. 3.Slide the full charged battery into the battery compartment with the power supply cable toward the rear end of the plane. Note: The center of gravity can be adjusted by moving the battery forward or aft.Having the correct center of gravity is critical to achieving proper flight characteristics. - Page 9 Transmitter and model setup Before getting started, bind your receiver with your transmitter. Bank left Please refer to your transmitter manual for proper operation. CAUTION: To prevent personal injury, DO NOT install the propel- ler assembly onto the motor shaft while testing the control surfac- es.
-
Page 10: Clevis Installation
Clevis installation 1.Pull the tube from the clevis to the linkage. 2.Carefully spread the clevis, then insert the clevis pin into the desired hole in the control horn. 3.Move the tube to hold the clevis on the control horn. Control horn and servo arm settings More control throw Horns Arms... -
Page 11: Before Flying The Model
Before flying the model Flying course Find a suitable flying site Take off While applying power, slowly steer to keep the model straight. Find a flying site clear of buildings, trees, power lines and The model should accelerate quickly. As the model gains flight other obstructions. -
Page 12: Troubleshooting
Trouble shooting Problem Possible Cause Solution Aircraft will not respond to -Lower throttle stick and throttle trim to lowest settings. -ESC is not armed. the throttlebut responds to -Reverse throttle channel on transmitter. -Throttle channel is reversed. other controls. -Damaged spinner, propeller, -Replace damaged parts. -
Page 13: User Manual Of Brushless Speed Controller
User Manual of Brushless Speed Controller Thanks for purchasing our Electronic Speed Controller (ESC). High power system for RC model is very dangerous, please read this manual carefully. In that we have no control over the correct use, installation, application, or maintenance of our products,no liability shall be assumed nor accepted for any damages, losses or costs resulting from the use of the product. - Page 14 User Manual of Brushless Speed Controller Begin To Use Your New ESC IMPORTANT! Because different transmitter has different throttle range, please calibrate throttle range before flying. Throttle range setting (Throttle range should be reset whenever a new transmitter is being used) 1.Switch on the transmi t ter, move throttle stick to the top position.
- Page 15 Program the ESC with your transmitter (4 Steps) Note: Please make sure the throttle curve is set to 0 when the throttle stick is at bottom position and 100% for the top position. NO.1 Enter program mode 1.Switch on transmitter, move throttle stick to top position, connect the battery pack to ESC 2.Wait for 2 seconds, the motor should emit special tone like "beep-beep-"...