Table of Contents
Advertisement
Quick Links
Advertisement
Table of Contents

Related Manuals for Baumatic AS35SS


Summary of Contents for Baumatic AS35SS
- Page 1 AS35SS Cooker Hood...
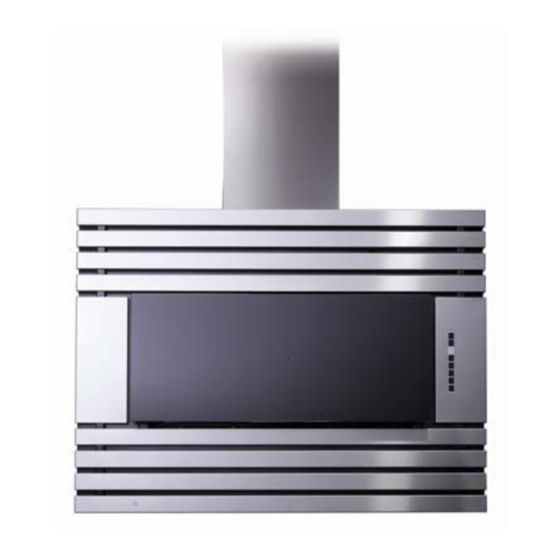
- Page 2 User Manual for your Baumatic AS35SS Cooker Hood Studio Solari 80 cm Chimney Hood in Stainless Steel NOTE : This User Instruction Manual contains important information, including safety & installation points, which will enable you to get the most out of your appliance. Please keep it...
-
Page 3: Table Of Contents
CONTENTS SPECIFICATION OF YOUR COOKER PAGE 3 HOOD IMPORTANT SAFETY PAGES 4 - 5 INFORMATION ENVIRONMENTAL NOTE PAGE 6 DESCRIPTION OF YOUR COOKER PAGE 7 HOOD USING YOUR COOKER HOOD PAGE 8 CLEANING YOUR COOKER HOOD PAGE 9 MAINTENANCE- PAGE 10 Removing and cleaning the grease filter Changing a light bulb... -
Page 4: Hood
Specifications of your AS35SS Cooker Hood Congratulations on purchasing a Baumatic Cooker Hood! To fully enjoy using your appliance long into the future, please firstly familiarise yourself with the specifications, safety advice and operational instructions included in this manual. You will also need this manual to install your cooker hood correctly. -
Page 5: Important Safety Information
Important Safety Information: Please Read this before installing & using. Coal/ oil cookers: Any installation work must 800 mm be carried out by a qualified DO NOT SET YOUR * NOTE - electrician or competent COOKER HOOD LESS THAN person. 700mm ABOVE YOUR COOKER! o When installed between The hood must be installed in... - Page 6 Important Safety Information: Please Read this before installing & using. o Ensure the ducting for ventilation measures are the extractor function being observed. Note has the same diameter as that it removes odours the outlet hole all the from your room, not way through.
-
Page 7: Environmental Note
Environmental Note Note : Before discarding an old appliance, switch off and disconnect it from the power supply. Cut off and render any plug useless. Cut the cable off directly behind the appliance to prevent misuse. This should be undertaken by a competent person. CONFORMITY TO W.E.E.E. -
Page 8: Description Of Your Cooker Hood
Description of your Cooker Hood Description of the hood (Fig. 1) 1. Control panel 2. Grease filter 3. Grease filter release handle 4. Halogen lamp 5. Cover screen 6. Telescopic chimney 7. Air outlet (used for filter version only) - Page 9 In case of possible working anomalies, before contacting service assistance, disconnect the electrical feed for at least 5 seconds by pulling out the plug, and then connect it again. If malfunction continues, contact the Baumatic Service Department on (0118) 933 6911.
-
Page 10: Cleaning Your Cooker Hood
Cleaning your Baumatic Cooker Hood: IMPORTANT!: Before cleaning, always ensure that you have switched your cooker hood OFF at the omni-polar switch, set at the wall from the cable: Cleaning Clean the external parts with Be sure to replace the... -
Page 11: Removing And Cleaning The
Maintenance- Cleaning the grease filter Removing the grease filter (Fig. 2) Figure 2- Open the cover screen (5) and then remove the grease filter (2) by pressing the spring clip (3). • You can now clean the grease filter. • Soak them for about one hour in hot water with a grease-loosening detergent then rinse off thoroughly with hot water. -
Page 12: Changing A Light Bulb
Maintenance – changing a light bulb. Replacing a bulb (Fig. 3) Warning! Disconnect the hood from the electricity before commencing this process. • Prior to touching the light bulbs ensure they are cooled down. • Carefully use a small screwdriver as a lever on the borders of the lamp in order to remove the light bulb. -
Page 13: Fitting The Carbon Filter
Maintenance – Fitting the carbon filter. Carbon filter (Fig. 4) Carbon filter (Fig. 4) If the appliance is being used to be used in If the appliance is being used to be used in recirculation mode then it is necessary to fit a recirculation mode then it is necessary to fit a carbon filter. -
Page 14: The Carbon Filter Saturation Signalling Device
THE CARBON FILTER SATURATION SIGNALLING DEVICE If you are using your cooker hood in recirculation mode then it is necessary to fit a charcoal filter (see page 17 for an explanation of recirculation and extractor modes). Your appliance is fitted with a device that will advise you when the carbon filter is saturated with fat, and needs to be either cleaned or replaced. -
Page 15: Electrical Connection
INSTALLATION INSTRUCTIONS – Electrical Connection. INSTALLATION INSTRUCTIONS - Electrical Before installation and usage, read all the instructions and make sure that the voltage (V) and the frequency (Hz) indicated on the identification plate (found inside your Cooker Hood) and all the data inside the appliance are exactly the same as the voltage and frequency in your home. -
Page 16: Before Beginning Installation Pages
INSTALLATION INSTRUCTIONS – Before beginning installation. PLEASE NOTE THAT YOU WILL HAVE TO DECIDE BEFORE INSTALLING YOUR COOKER HOOD WHETHER TO USE IT IN EXTRACTION MODE OR RECIRCULATION MODE. PLEASE TURN TO PAGE 17 NOW TO UNDERSTAND THE DIFFERENCES BETWEEN THESE TWO MODES. - Page 17 • Check inside the product and insure that there is no transit packaging or any other materials, such as packets of screws, guarantees etc. These should be removed and kept for future use. • If possible, disconnect and move freestanding or slot-in cookers from their position, to provide easier access to the rear wall and ceiling.
-
Page 18: Extraction Mode Or Recirculation Mode
COOKER HOOD- extraction mode or recirculation mode? What is the difference between extraction and recirculation modes? To get optimum performance from your cooker, the air will be taken out of the room via external ducting. Unfortunately if you live in a flat or the hood is too far from an outside wall, this may not be possible. -
Page 19: Installation Without A
For installation without a chimney. (Figure 5) • For ease of mounting, trace a central line on the wall (1). Position the cut- out template, so that the middle line printed on the top of it, corresponds to the central line that you have marked previously. -
Page 20: Installation With A Chimney
For installation with a chimney. (Figure 5) • For ease of mounting, trace a central line on the wall (1). Position the cut-out template, so that the middle line printed on the top of it, corresponds to the central line that you have marked previously. The bottom of the template should correspond to the lower part of the hood, once it is mounted (2). -
Page 21: Connecting To External
Connecting to external ducting (Figure 5b) • Install the flange supplied on the exit hole of the hood (5b). • (Figure 6) Connect the ducting hose (13) to the flange and then connect the other end to the external vent. Please note that the ducting hose is not supplied with the cooker hood. - Page 22 Troubleshooting If something has gone wrong with your Cooker Hood, checking against this chart might keep you from having to call for service. Symptom Solution • Check that the hood is connected to the electricity supply. The cooker hood will not start! •...
- Page 23 Baumatic appliance. * In addition, your appliance is covered by a 5 year parts warranty. Baumatic Ltd will provide free of charge the parts required to repair the appliance, only if they are fitted by a Baumatic engineer, for any defect that arises due to faulty materials or workmanship within a period of 5 years from the original purchase date.
- Page 24 +44 118 931 0035 Service Telephone +44 118 933 6911 Service Fax +44 118 986 9124 Spares Telephone +44 118 933 6922 Technical / Advice Telephone +44 118 933 6933 E-mail: sales@baumatic.co.uk technical@baumatic.co.uk Http (Internet site): www.baumatic.com Baumatic UK/cod. 1230000666...