Fishman TriplePlay Connect Installation Manual
Hide thumbs
Also See for TriplePlay Connect:
- Quick start manual (36 pages) ,
- Intro manual (8 pages) ,
- Training manual (5 pages)
Table of Contents
Advertisement
Advertisement
Table of Contents

Related Manuals for Fishman TriplePlay Connect


Summary of Contents for Fishman TriplePlay Connect
- Page 1 INSTALLATION GUIDE...
- Page 3 You now own a remarkable musical tool that will transform the way you play guitar! This guide will help get you up and running with TriplePlay Connect. If you don’t have experience making adjustments to your guitar, please consult our online documentation for step-by-step instructions.
- Page 4 Read Me First Installation of this product is a simple procedure, but we recommend this job only if you are experienced performing minor adjustments to your guitar. If you are uncomfortable with this work, consider having an experienced repair technician complete the installation. What is Connect? Connect translates your guitar performance into MIDI, a language understood by music software and hardware.
- Page 5 App Store. The Connect iOS App will unlock the full capabilities of the controller. The TriplePlay Connect iOS App is for iPad only and supports iOS 9.3 and up. Devices must have at least 1GB of Ram or more.
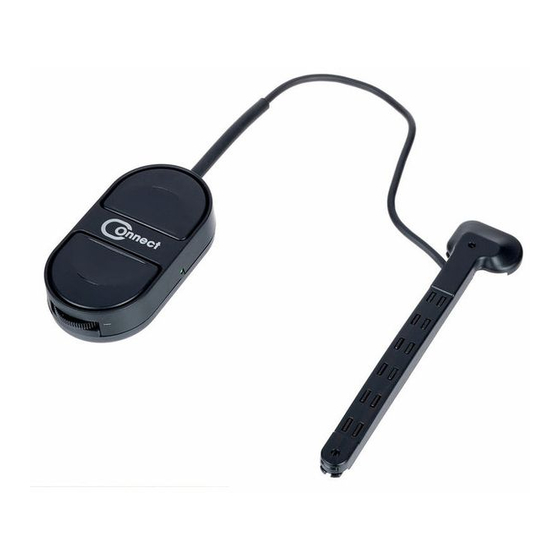
- Page 6 TriplePlay Connect Installation Kit Contents...
- Page 7 TriplePlay Connect Installation Kit Contents 1. String spacer tool (guitar shaped) 2. Mini-Screwdriver 3. Plastic controller mount with magnets (clear/black) 4. End pin mounting bracket 5. #1 Pickup Mounting Pad 6. #2 Pickup Mounting Pad 7. #3 Pickup Mounting Pad 8.
- Page 8 Controller Installation Mounting the TriplePlay Connect Controller Although the controller can be mounted wherever it is comfortable, most players prefer to attach the controller to the included mounting bracket held on by the strap button(endpin). The controller attaches to its mount via a magnetic plate.
- Page 9 Controller Installation - Option 1 Mounting the controller using an endpin bracket Fig 1...
- Page 10 Controller Installation - Option 2 Mounting the Connect controller directly on your guitar’s body In some cases the controller will need to attach directly to the guitar in order to make sure the wire attached to the pickup has enough length to allow the pickup to sit underneath the strings as close to the bridge as possible.
- Page 11 Controller Installation - Option 2 Mounting the Connect controller directly on your guitar’s body Fig 2...
- Page 12 On these guitars consider altering the instrument hardware or mounting the controller directly to the guitar’s own hardware (such as a tail- piece). Consult a professional technician or Fishman’s customer support depart- ment for specific suggestions.
- Page 13 Pickup Installation Mounting the TriplePlay Connect pickup Unlike the TriplePlay Connect controller, the TriplePlay Connect pickup must be precisely positioned as near as possible to the front of the guitar’s bridge. The pickup height should be as close as possible to the strings, without the strings touching the pickup, even when strummed aggressively.
- Page 14 Pickup Installation Fig 4 Four mounting pads are provided to accommodate instruments with varying distances between the gui- tar’s top and the strings (Fig 4). After you attach one of these mounting pads to your guitar, you’ll be able to remove and reattach the pickup in seconds.
- Page 15 Pickup Installation - Tremolo Bridge Attaching the mounting pad directly to the guitar’s top 1. Clean the area where you’ll mount the pickup with a soft, lint-free cloth. 2. With the thinnest mounting pad attached, slide the pickup beneath the strings and the guitar body near the bridge (Fig 5). Orient it so the output wire is closest to your low E string.
- Page 16 Pickup Installation - Tremolo Bridge Attaching the mounting pad directly to the guitar’s top Fig 6...
- Page 17 Pickup Installation - Tremolo Bridge Attaching the mounting pad directly to the guitar’s top 3. The pickup should be as close as possible to the strings, but not so close that the strings rattle against the pickup. Experiment with the four mounting pads to find the one that fits best.
- Page 18 Pickup Installation - Tune-o-matic Bridge Attaching the mounting pad to the tune-o-matic bridge bracket Fig 7 If your guitar has a tune-o-matic bridge, you can use the metal bridge brack- et, which fits between the bridge’s screw posts and the main bridge assembly. Choose the bracket which best fits your particular bridge mounting hardware.
- Page 19 Pickup Installation - Tune-o-matic Bridge 1. Check and make a note of the height of your outside strings using an accurate 6 inch scale (ruler). You will want to know this later in step 6. 2. Remove the strings and bridge, being careful not to allow the bridge to fall off and damage your guitar.
- Page 20 Pickup Installation - Fine Adjustments By this point you should have the pickup positioned quite close to the strings, but not so close that the strings rattle against it. Fine-tune the spacing using the included guitar-shaped pickup height spacer in conjunction with the pickup’s two height-adjustment screws (Fig 8 and Fig 9).
- Page 21 Pickup Installation - Fine Adjustments Fig 9 Verify the ideal 1mm distance using the included spacer tool. You may find at this point that one or more strings remain a little too close or a little too far from the pickup. Adjust the height of each saddle (when possible), so that all six strings are the same distance from the TriplePlay pickup’s pole pieces.
- Page 22 Strain Relief Attachment Strain relief attachment is included to protect the TP Connect in the event of an accidental cord pull. See the diagrams below for installation: Step 1 Step 2...
- Page 23 Strain Relief Attachment Step 3 Step 4...
- Page 24 FCC Compliance Statement FCC Compliance Statement Model # 494-000-604 This device complies with Part 15 of the FCC Rules. Operation is subject to the following two conditions: 1. This device may not cause harmful interference, and 2. This device must accept any interference received, including interference that may cause undesired operation..
- Page 25 (RMA) before delivering the product to Fishman, freight prepaid. Product repaired during the first year warranty period at the Fishman factory will be returned to the customer via UPS ground freight, prepaid by Fishman to any location within the continental United States. Product repaired after the first year warranty period at the Fishman factory will be returned at customer expense.
- Page 26 Fishman and Fishman Transducers are trademarks or tradenames of Fishman Transducers Inc. 514-300-177_r2 4/19...