
Related Manuals for Philips SE6582B/37


Summary of Contents for Philips SE6582B/37
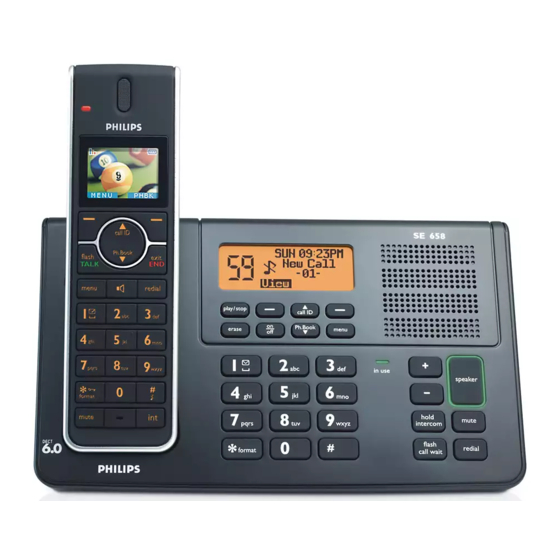
- Page 1 Register your product and get support at www.philips.com/welcome US-EN Telephone Answering Machine Warning Use only rechargeable batteries. Charge the handset for 24 hours before use. SE658...
-
Page 3: Table Of Contents
Table of contents Important Safety Instructions Environment and safety 7 Safety information Power requirements Battery requirements Telephone connection Environmental care Precautions Equipment Approval Information 2.7.1 Notification to the Local Telephone Company 2.7.2 Rights of the Phone Company Interference Information Hearing Aid Compatibility (HAC) 2.10 FCC RF Radiation... -
Page 4: Voice Mail
End a call Using the Redial list 8.4.1 Access Redial list 8.4.2 View redial number details 35 8.4.3 Save a redial number into the phonebook 8.4.4 Delete a redial number 8.4.5 Delete all redial numbers Use more of your phone Switch the handset off/on 37 Handset keypad lock/unlock... - Page 5 12.4 Select the Display Wallpaper (Handset only) 48 12.5 Select the Color Theme (Handset only) 12.6 Set the Display Contrast 12.7 Set the Backlight Time (Handset only) 12.8 Deactivate/Activate Auto Hang-Up (Handset only) Advanced settings 13.1 Easy Call 13.1.1 Set Easy Call to On or Off 50 13.1.2 Set Easy Call number 13.2...
- Page 6 15.1.2 Functions available during playback 15.2 Delete all messages (Handset only) 15.3 Turn the Answering Machine On/Off from the Handset (Handset only) 15.4 Play, Record, or Delete an Outgoing Message 15.5 Set the Answer mode 15.6 Answering Machine Settings 15.6.1 Ring Delay 15.6.2 Remote Access...
-
Page 7: Important Safety
1 Important Safety Instructions Some of the following information may not apply to your particular product; however, when using telephone equipment, basic safety precautions should always be followed to reduce the risk of fire, electric shock and injury to persons, including the following: Read and understand all instructions. - Page 8 telephone line has been disconnected at the network interface. 14 Never install or modify telephone wiring during a lightning storm. 15 Never install telephone jacks in wet locations unless the jack is specifically designed for wet locations. 16 Use caution when installing or modifying telephone lines to prevent electrical shock and/or fire.
-
Page 9: Environment And Safety
AAA 1.2V 600mAh (Hr11/45). IF THE INCORRECT TYPE OF BATTERIES ARE USED,A WARNING MESSAGE WILL BE DISPLAYED. Use only Philips Multi-Life 600mAh rechargeable NimH batteries. For servicing or replacement, you can purchase a suitable headset through service centre or retail shop. -
Page 10: Environmental Care
60950). Following a power cut, the call in progress is lost. Caution Users should ensure for their own protection that the electrical ground connections of the power utility, telephone lines and internal metallic water pipe system, if present, are connected together. This precaution may be particularly important in rural areas. -
Page 11: Equipment Approval
meets certain radio communications and operational requirements. Equipment Approval Information Your telephone equipment is approved for connection to the public switched telephone network and is in compliance with parts 15 and 68, FCC Rules and Regulations and the Technical Requirements for Telephone Terminal Equipment published by ACTA. -
Page 12: Interference Information
temporary discontinuance of service may be required.Where prior notice is not practicable and the circumstances warrant such action, the telephone company may temporarily discontinue service immediately. In case of such temporary discontinuance, the telephone company must: (1) promptly notify you of such temporary discontinuance;... -
Page 13: Hearing Aid Compatibility
Commission has prepared a helpful booklet, “How To Identify and Resolve Radio/TV Interference Problems”. This booklet is available from the U.S. Government Printing Office, Washington, D.C. 20402. Please specify stock number 004-000- 00345-4 when ordering copies. Notice: The changes or modifications not expressly approved by the party responsible for compliance could void the user’s authority to operate the... -
Page 14: Power Requirements
• Do not allow the charger to come into contact with liquids. • Never use any other battery than the one delivered with the product or recommended by Philips: risk of explosion. • Always use the cables provided with the product. -
Page 15: Electric, Magnetic And
Philips plays an active role in the development of international EMF and safety standards, enabling Philips to anticipate further developments in standardisation for early integration in its products. -
Page 16: Service Centers
Service Centers US service center Philips Accessories & Computer Peripherals North America1881 Route 46 WestLedgewood, NJ 07852 Phone: (800) 233-8413 E-mail support: http://www.support.philips.com/support ® The RBRC seal... - Page 17 ® The RBRC seal...
-
Page 18: Your Phone
Your phone Congratulations on your purchase and welcome to Philips! To fully benefit from the support that Philips offers, register your product at www.philips.com/welcome. What’s in the box Handset with belt clip Bracket for wall mounting rechargeable User manual Note In multihandset packs, you will find one or more additional handsets, chargers with power supply units and additional rechargeable batteries. -
Page 19: Overview Of Your Handset
Overview of your handset Event LED The event LED on your handset blinks when there is a new message recorded on your telephone answering machine. If you have subscribed to Caller Line Identification, the event LED also blinks when there is a new call, or a new voice mail message. - Page 20 When the handset is switched off: Long press (1 second) to switch it on. During a call: Hang up a call. In other modes: Press to return to idle mode. Menu key m In idle mode: Go to the main menu. Redial key r Access the Redial list in idle mode.
-
Page 21: Display Icons And Messages
Display icons and Messages Indicates that the battery is fully charged. This icon blinks during charge and when the battery is low. When the Icon is empty the battery is practically discharged. Note If Warning Batt flashes together with a blinking battery icon, batteries of the wrong type are installed in the handset. -
Page 22: Overview Of The Base Station
Overview of the base station Bottom Handset locator key a Locate handset. Long press more than 3 seconds to start the registration procedure. Display See 5.5 for an overview of the display. Speaker Play/Stop key p Play phone messages (the first message recorded will be played first). -
Page 23: Base Station Display
Speaker key l In idle mode: Pick up the line with the speaker on. During a call: End the call. The speaker key LED blinks when receiving an incoming call. It is steady on when the base is in talk mode. Hold/Intercom key i In idle mode: Initiate an internal call. -
Page 24: Conventions Used In This Manual
Action Meaning When A segment scrolls around the recording rim when recording an incoming or outgoing message. When Shows the base volume level adjusting when adjusting the volume. volume Conventions Used in this Manual This manual uses the following conventions. •... -
Page 25: Wall Mounting The Base
connectors at the back of the base station. Connect the other end of the line cord and power cable to their respective sockets. Note The line adaptor may not be attached to the line cord. In this case, you have to connect the line adaptor to the line cord first before plugging the line cord to the line socket. -
Page 26: Install Your Phone
Use the pedestal wall mounting to plug your base station. 5.20 5.20 Install your phone Before using the handset, the batteries have to be installed and fully charged. Warning When the batteries are inserted for the first time, the unit will not be able to start normally due to the low battery. -
Page 27: Remove/Attach Belt Clip
Place the handset on the charging cradle of the base station. A beep is emitted if the handset is placed correctly. The battery icon blinks during charge. The battery icon when the handset is fully charged. Note Optimal battery life is reached after 3 cycles of complete charging (over 15 hours) and discharging, allowing approximately 12 hours of talk-time and... -
Page 28: Using Multipacks
Handset screen Searching... 01/01 The display will show the word “Searching” and Antenna icon flashing until it locks onto its subscribed. Then the display shows the standby display. Using multipacks If you have purchased a multipack you will have additional handsets, chargers, power adaptors and AAA rechargeable batteries. -
Page 29: Handset Menu Structure
Handset menu structure The SE658 has six menus as shown in the following table. Menu Name Phonebook Personal Settings Clock and Alarm Advanced Settings Network Services Answer Machine Press the menu key m to enter menu mode. Use navigation keys n to navigate within the menus and all submenus. - Page 30 Personal Settings Personal Set Handset Name (Handset only) Handset Tones or Base Tones Language Wallpaper (Handset only) Color Theme (Handset only) Contrast Backlight Time (Handset only) Auto Hang-up (Handset only) Enter name Ring Volume No bar (off) (Handset only) One bar …...
-
Page 31: Clock And Alarm
Clock and Alarm Clock & Alarm Set Date/Time (Handset) Set Format Clock (Base station) Alarm (Handset only) Alarm Tone (Handset only) Getting started Enter date & time Time Format 12 Hours 24 Hours Date Format DD/MM MM/DD On Once On Daily Melody 1 Melody 2 Melody 3... - Page 32 Advanced Settings (Handset only) Advanced Set Easy Call (Handset only) Conference Call Barring XHD Sound Change PIN Register Unregister Reset Area Code Auto Prefix Flash Time Dial Mode First Ring Mode Off (by default) Number Enter number On (by default) Enter PIN Mode Number...
- Page 33 Network Services (Handset only) Netw. Services Call Forward (Handset only) Call Fwd Busy Call Fwd Unans Voicemail Voicemail 2 Info Info 2 Call Return Cancel Call BK Withhold ID Getting started Activate Enter Number: Deactivate Change Code Activation Deactivation Activate Enter Number: Deactivate Change Code...
-
Page 34: Answer Machine
Answer Machine Answer Machine Play (Handset only) Delete All (Handset only) Answer On/Off (Handset only) Record OGM Answer Mode Settings Repeat Next Previous Delete Answer & Rec. Play Record Message Delete Answer Only Play Record Message Delete Answer & Rec. Answer Only Ring Delay 3 Rings... -
Page 35: Using Your Phone
Using your phone Make a call 8.1.1 Predialling Enter the number. (A maximum of 24 digits including * and # are allowed. Press c Clear to delete the last digit.) Or long press to delete all. From the handset: Press t. (Or press l on the handset to start a call in speaker mode.) From the base: Press l. -
Page 36: Call From The Phonebook While Already On The Phone
Instead of scrolling n to browse the phonebook entries, you can press the numeric key corresponding to the first letter of the entry you wish to locate. For example, pressing 2 will show the entries starting with A. Pressing 2 again will show the entries starting with B, etc. -
Page 37: Using The Redial List
When auto hang-up is on, you can simply place the handset back to its base station or charger to end the call. This feature is activated by default. Note The call duration (MM:SS) will be displayed on the handset screen for about 5 seconds. - Page 38 Scroll n to Delete and press o Select. Delete? is displayed on the screen. Press o OK to confirm deletion. • A validation tone is emitted. Note Press c Back to discard the deletion. The screen returns to the redial list. 8.4.5 Delete all redial numbers Press r in idle mode, and press o Menu.
-
Page 39: Call Waiting
Use more of your phone Switch the handset off/on To switch the handset off, press and hold h in idle mode for at least 5 seconds. To switch it on, press and hold h for at least one second. Handset keypad lock/unlock Press and hold * for 3 seconds to lock/ unlock the keypad in idle mode. -
Page 40: Mute/Unmute Microphone
9.5.1 Adjust earpiece or speaker volume 9.5.1.1 Earpiece or Speaker volume in handset During a call, press u and d to select the volume level. • The earpiece/speaker volume will be displayed as volume bar (level 1 to 5). The selected volume is saved for the next call. -
Page 41: And External Call
If there is more than 1 registered handset, scroll n to select the unit to call and press o Select. • Once the intercom call is initiated the icon is displayed on the handset. Press t to answer an intercom call on the called handset, or l to answer on the base. -
Page 42: Clock And Alarm Settings
Scroll n to the number of the unit you wish to establish the conference call with and press o Select. Press t on the called handset or l on the base to answer the internal call, where both internal callers can talk. •... -
Page 43: Set Alarm (Handset Only)
Time Format is highlighted in the display. Press o Select, then scroll n to select 12Hours or 24Hours. Press o Select to select the option. • A validation tone is emitted and the screen returns to the Set Format menu. 9.9.2.2 Set Date Format Press m in idle mode, scroll n to... -
Page 44: Using Your Phonebook
10 Using your Phonebook Your phone can store up to 200 phonebook entries. Each phonebook entry can have a maximum of 24 digits for the phone number and 14 characters for the name. All names and numbers in the phonebook must be unique. Note Only one unit (handset or base station) can access the phonebook at a time. -
Page 45: Select Phonebook Melody
Press o Select to display the name. Press c Clear to erase the letters one by one. Edit the name and press o OK to confirm. Edit the number and press o OK to confirm. • A validation tone is emitted. Note While editing, press c Clear to delete the last digit or character entered or... -
Page 46: Direct Access Memory
Scroll n to Delete All and press o Select. Delete All? is displayed on the screen. Press o OK to confirm deletion. • A validation tone is emitted. 10.7 Direct Access Memory There are 7 direct access memories (corresponding to keys 3 to 9) included in the phonebook. -
Page 47: Using The Call Log
11 Using the Call log The call log stores the last 50 external calls and any new voice mail received. In idle mode, New Call appears on the handset or base display for new and unanswered calls. If you have subscribed to Caller Line Identification (CLI), and provided the identity of the caller is not withheld, the name (or number) of the... -
Page 48: Save Call List Entry Into The Phonebook
the caller’s number or name in the call log (see section 11.1 - “Access the Call log”). When you store an incoming number in the phonebook, the digits of the number will be saved exactly as they appear on the screen. If the first 3 digits of the incoming number corresponds to the local area code set in your phone, they will be... -
Page 49: Personal Settings
Change the Handset Name (Handset only) You can name the handset and display the handset name in idle mode. The default handset name of your handset is Philips. Press m in idle mode, scroll n to Personal Set and press o Select. -
Page 50: Activate/Deactivate Key Beep
Scroll n to Handset Tones on the handset or Base Tones on the base and press o Select. Then scroll n to Ring Tones and press o Select. Scroll n to your desired melody. The melodies will play as you scroll them. -
Page 51: Select The Color Theme
12.5 Select the Color Theme (Handset only) There are 4 color themes available on your handset. Press m in idle mode, scroll n to Personal Set, and press o Select. Scroll n to Color Theme and press o Select. Scroll n to your desired color theme. -
Page 52: Advanced Settings
13 Advanced settings These settings can be made from any registered SE658 handset. They cannot be made from the base station. 13.1 Easy Call When activated, this feature allows you to dial a preset number by pressing any key on the handset (except c Cancel). -
Page 53: Call Barring
Scroll n to Conference and press o Select. Scroll n to select On or Off and press o Select to confirm. • A validation tone is emitted and the screen returns to the Advanced Set menu. 13.3 Call Barring If activated, this function prevents dialing out to numbers beginning with designated barring numbers. -
Page 54: Change Pin
Press m in idle mode, scroll n to Advanced Set and press o Select. Scroll n to XHD Sound and press o Select. Scroll n to select On or Off and press o Select to confirm. • A validation tone is emitted and the screen returns to the Advanced Set menu. -
Page 55: Easy Registration
13.6.1 Easy registration Insert the unregistered handset in the base station to automatically begin registration. Registering… is displayed on the screen. • Upon successful registration, a validation tone is emitted and the handset number (1 to 8) will be assigned by the base automatically. -
Page 56: Set Area Code
Press m in idle mode, scroll n to Advanced Set and press o Select. Scroll n to Reset and press o Select. Reset? is displayed on the screen. Press o OK to confirm. • A validation tone is emitted. • The unit is reset to its default settings. -
Page 57: Change Flash Time
• A validation tone is emitted and the screen returns to the Advanced Set menu. Note If no detect string (blank) is entered, the prefix number will be automatically added to the predial number after t is pressed. For numbers starting with *, # or P, the prefix number will not be added to the predial number after t is pressed. -
Page 58: Default Settings
Language Wallpaper Wallpaper 1 Color Color 1 Theme Display Level 3 Contrast Backlight 20 Seconds Time Auto Hang- Handset Philips Name Time/Date MM/DD 12Hours Format Time/Date 00:00 01/01/2008 Set Alarm Alarm Tone Bell 2 Dial Mode Tone Parameter Default Value... -
Page 59: Call Forward
chapter may not be available in your SE658. These settings can be made from any registered SE658 handset. They cannot be made from the base station. Note The Call Forward, Call Forward when Busy, and Call Forward when Unanswered functions require activation codes (prefix and suffix) and a deactivation code. -
Page 60: Call Forward When Busy
Scroll n to Call Forward and press o Select. Scroll n to Change Code and press o Select. Scroll n to Deactivation and press o Select. Enter the deactivation code (maximum 14 digits) and press o • A confirmation tone will sound and the display will return to the Call Forward screen. -
Page 61: Change Call Forward When Busy Deactivation Code
14.2.2 Change Call Forward when Busy Deactivation Code Press m in idle mode, scroll n to Netw. Services, and press o Select. Scroll n to Call Fwd Busy and press o Select. Scroll n to Change Code and press o Select. Scroll n to Deactivation and press o Select. -
Page 62: Unanswered Deactivation
Repeat from step 5 until you are finished inputting both the prefix and suffix codes. 14.3.2 Change Call Forward when Unanswered Deactivation Code Press m in idle mode, scroll n to Netw. Services, and press o Select. Scroll n to Call Fwd Unans and press o Select. -
Page 63: Access Info Service
14.6.1 Access Info Service Press m in idle mode, scroll n to Netw. Services, and press o Select. Scroll n to Info and press o Select. You are now at the Info menu and Call is highlighted. Press o Select to connect to the information service account number. -
Page 64: Call The Cancel Call Back
correspondent. Your answering machine will not answer to this call and your call log will not record this call either. The Cancel call back feature enables you to deactivate the call back feature when you have activated it. 14.9.1 Call the Cancel Call Back Number Press m in idle mode, scroll n to Netw. -
Page 65: Telephone Answering Machine (Tam)
15 Telephone answering machine (TAM) Your phone features an answering machine that records unanswered calls when it is activated. The answering machine can store up to 59 messages. The maximum recording time is 3 minutes per message, or 30 minutes for all messages. -
Page 66: Functions Available During
15.1.2 Functions available during playback During playback, you can enable the following functions by pressing o Menu. Use n to scroll between the functions and press o Select to confirm. Repeat Replay the current message Next Listen to the next message. -
Page 67: Set The Answer Mode
• If Record Message is selected, a beep sounds and message recording starts automatically. • If Delete is selected and a personal outgoing message was previously recorded, Deleted is displayed. The predefined OGM is reinstated automatically. 15.5 Set the Answer mode There are 2 answer modes available: Answer Only and Answer &... -
Page 68: Answering Machine
15.6.2 Remote Access You can check the messages on your answering machine by calling in from an outside line and entering the remote access code*. The keypad on the phone you use to dial in acts like the functions on your answering machine. Note This feature is deactivated by default. -
Page 69: Handset Screening
15.6.3 Handset Screening When Handset call screening is set to On, you can press o Screen to start call screening for incoming messages. If you decide to pick up the call, press t. Once you pick up, the recording will stop automatically. -
Page 70: Frequently Asked
(-4 to 158ºF). Relative humidity • Operation: Up to 95% at 40°C • Storage: Up to 95% at 40°C 17 Frequently asked questions www.philips.com/support In this chapter, you will find the most frequently asked questions and answers about your phone. 17.1 Connection The handset does not switch on! •... -
Page 71: Sound
17.3 Sound Handset does not ring! Check that the Ring Volume is not set to no bars (Ringer Off), and make sure icon is not displayed on the screen (see section 12.2.1 - “Set the Ring Volume”). Caller does not hear me! Microphone may be muted: During a call, press s. - Page 72 My handset keeps going into idle mode! • If there are no key presses for 30 seconds, the handset will automatically return to idle mode. It will also return to idle mode automatically when you place the handset back on the base station (if auto hang-up feature is on).
-
Page 73: Index
18 INDEX Access Info Service 61 Access phonebook 42 Access Redial list 35 Access the Call log 45 Access the Call Return Service 61 Activate/Deactivate handset loudspeaker mode 38 Activate/Deactivate Remote Access 66 Activating Withhold ID 62 Adjust earpiece or speaker volume 38 Advanced settings 50 Advanced Settings menu tree 30 Answer a call 34... - Page 74 Delete all messages 64 Delete all phonebook entries 43 Delete all redial numbers 36 Delete Direct Access Memory 44 Dial mode 55 Direct Access Memory 44 Direct dialling 33 Display icons and Messages 19 Display languages 48 Easy Call 50 End a call 34 Establish a three-party conference call 39 Frequently asked questions 68...
- Page 75 Save a redial number 35 Save call list entry 46 Select phonebook melody 43 Select the Color Theme 49 Select the Display Wallpaper 48 Set a Call Barring number 51 Set Alarm 41 Set Alarm Tone 41 Set Auto Prefix 54 Set Call Barring Mode 51 Set Call Return Service Number 61 Set Date and Time 40...
- Page 76 ©2008 Koninklijke Philips Electronics N.V. All rights reserved Reproduction in whole or in part is prohibited without the written consent of the copyright owner Document order number: 3111 285 47071 (US-EN)