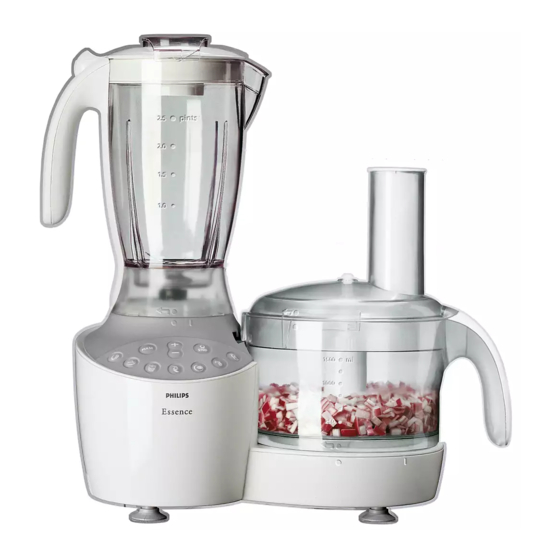
Philips HR7754/01 Recipes & Directions For Use
Philips food processor hr7754/01
Hide thumbs
Also See for HR7754/01:
- Service manual (7 pages) ,
- Recipes & directions for use (182 pages)
Advertisement
Available languages
Available languages
Quick Links
Download this manual
See also:
Service Manual
Advertisement

Related Manuals for Philips HR7754/01


Summary of Contents for Philips HR7754/01
- Page 1 Recipes & Directions for use...
- Page 5 ENGLISH 6...
- Page 6 60 minutes. Put the mains plug in the socket. Switch the appliance on again. Please contact your Philips dealer or an authorised Philips service centre if the automatic thermal cut-out system is activated too often. CAUTION: In order to avoid a hazardous situation, this appliance must never be connected to a timer switch.
- Page 7 Do not use the appliance if the mains cord, the plug or other parts are damaged. If the mains cord is damaged, it must be replaced by Philips, a service centre authorised by Philips or similarly qualified persons in order to avoid a hazard.
- Page 8 ENGLISH Using the appliance Smart Process Control This appliance is equipped with a Smart Process Control to ensure an optimal process and a perfect end result. Each process button is linked to a pre-programmed speed profile representing the optimal process for a specific accessory. You can increase or decrease the speed in three steps by pressing + or - button.
-
Page 9: Control Panel
Metal blade The metal blade can be used for chopping, mixing, blending and pureeing. Remove the protective cover from the blade. The cutting edges of the blade are very sharp Avoid touching them! Put the tool holder in the bowl and the blade on the tool holder. - Page 10 ENGLISH Put the selected insert in the insert holder before you place it onto the toolholder. Cutting edges are very sharp. Avoid touching CLICK them! Place the insert holder onto the tool holder that stands in the bowl. Put the lid on the bowl. Put the ingredients in the feed tube.
-
Page 11: Appliance Will Continue To Run At This Speed Until
Connect the knob from the bottom side of the disc and turn it until the lines match. Now the disc is locked. Turn the adjusting knob to adjust the thickness you prefer. Place the adjustable slicing disc on the tool holder. - Page 12 ENGLISH Fit the balloon beater onto the tool holder. Put the ingredients into the bowl, put the lid on the bowl and turn it to the right until you hear a click. Press the whisking process button on the control panel. The appliance will gradually increase the whisking speed within 15 seconds to max.
- Page 13 Tips Pour the liquid ingredients into the blender jar through the hole in the lid. The longer you let the appliance run, the finer the blending result will be. Pre-cut solid ingredients into smaller pieces before putting them in the blender. If you want to prepare a large quantity, process small batches of ingredients instead of trying to process a large quantity at once.
- Page 14 ENGLISH The process starts running and stops if the STOP- button is pressed. Press half of fruit firmly on the rotating cone. Tips Stop pressing from time to time to remove the pulp from the sieve. When you do so, switch off the appliance and remove the bowl along with the sieve and cone.
- Page 15 Drop the fruit or vegetables in the juice extractor through the feed tube. Press the ingredients firmly down with the pusher if necessary. Keep the pusher in the feed tube as much as possible to avoid splashing. Let the appliance run for another 20 seconds to obtain any juice still left in the fruit or vegetables.
- Page 16 Care Centre in your country (you will find its phone number in the worldwide guarantee leaflet). If there is no Customer Care Centre in your country, turn to your local Philips dealer or contact the Service Department of Philips Domestic Appliances and Personal Care BV.
- Page 17 Troubleshooting guide Problem Solution The appliance doesn't Turn the bowl/or lid clockwise until you hear a click. switch on. Make sure that the points on the bowl and on the lid are placed directly opposite each other. The appliance has The automatic thermal cut-out system has probably cut suddenly stopped off the power supply to the appliance because it has...
- Page 18 ENGLISH Quantities and preparation times Ingredients & Max. Proce Procedure results quanti butto access ^ / k Apples, 500g Cut the vegetables into pieces carrots, that fit into the tube. Fill the celeriac - tube with the pieces and slice shredding them while pressing the pusher lightly.
- Page 19 Ingredients & Max. Proce Procedure results quanti butto access Dough (for 750g ¨ / { Follow the same procedure as pizzas) - flour for bread dough. Knead the kneading dough for 1 minute. First put in the flour and then the other ingredients.
- Page 20 ENGLISH Ingredients & Max. Proce Procedure results quanti butto access Meats (lean) - 500g ¥ / P First remove any sinews or mincing bones. Cut the meat into cubes of 3cm. Press the pulse button to get a coarser chopping result.
- Page 21 Recipes Courgette Sandwich Spread Ingredients: - 2 courgettes - 3 cooked eggs - 1 small onion - 1 tbs. vegetable oil - parsley - 2-3 tbs. sour cream - lemon juice,Tabasco sauce, salt, pepper, curry- powder, paprika Wash and dry the courgettes and shred them with the fine shredding insert in the food- processing bowl.Transfer the shredded courgette to a dish, sprinkle salt on it and leave for about...
- Page 22 ENGLISH - 4 eggs - 500g sour cream - salt, pepper, 1-2 tbs. of flour if needed Put all the ingredients in the bowl and knead into a consistent dough. Let the dough rise for about 30min. Slice the leeks with the adjustable slicing disc (e.g. setting 3).
- Page 23 - 400 g cream cheese - 500 g strawberries Glaze: - 500 g strawberries - 250 ml water - 120 g sugar - 60 g cornstarch Garnishing: - 250 g cream Heat oven to 180cC. Cream margarine and sugar in the bowl with the metal blade. Blend in egg yolk, then stir in flour and flaked coconut.
- Page 24 ENGLISH separate bowl and cover it with a damp cloth and allow the dough to rise in a lukewarm place for 20 minutes. Chop the hazelnuts using the metal blade. Mix ingredients for the filling. Roll the dough out into a rectangular shape.
- Page 25 Shred the cheese. Puree the broccoli with the boiled potatoes and some of the cooking liquid of the broccoli. Put the broccoli puree and the remaining liquid and stock cubes into a measuring beaker and fill it up to 750ml.Transfer the soup to a pan and bring it to the boil while stirring.
- Page 26 ENGLISH Shred the peeled potatoes, the scraped carrots and the cleaned celery with the coarse shredding insert and add to the egg mixture. Stir the vegetables, the egg mixture and the sunflower seeds or corn from the cob together in a bowl. Heat the oil in a frying pan and fry 8 flat patties on both sides until they are golden brown.
- Page 29 CLICK CLICK CLICK...
- Page 31 CLICK...
- Page 35 CLICK...
- Page 38 ¥ h j k ¬ ¨ ∆ ˚ † “ ƒ ‘ ©...
- Page 39 ^ ¬ † D ¥ ¨ ¥ POLSKI ¨ { ¨ { ø ß † D ¥ P...
- Page 40 POLSKI ¥ P ¥ P ‘ © ø ß ¥ P ¥ P † D π ∂ ¥ P ¥ P ^ ¬...
- Page 41 ¥ P † D ø ß POLSKI...
- Page 42 POLSKI...
- Page 50 CLICK CLICK CLICK...
- Page 52 CLICK...
- Page 56 CLICK...
- Page 59 ¥ h j k ¬ ¨ ∆ ˚ † “ ƒ ‘ ©...
- Page 60 ^ ¬ † D ¥ ¨ ¥...
- Page 61 ¥ ¥ ¥ ^ ¬ ¨ { ¨ { ¨ { ¨ { ø ß † D...
- Page 62 ¥ P ¥ P ¥ P ‘ © ø ß ¥ P ¥ P † D π ∂ ¥ P ¥ P ^ ¬...
- Page 63 ¥ P † D ø ß...
- Page 72 CLICK CLICK CLICK...
- Page 73 CLICK...
- Page 78 CLICK...
- Page 82 ¥ h j k ¬ ¨ ∆ ˚ † “ ƒ ‘ ©...
- Page 83 ^ ¬ † D ¥ ¨ ¥ ¥...
- Page 84 ¥ ¥ ^ ¬ ¨ { ¨ { ¨ {...
- Page 85 ¨ { ø ß † D ¥ P ¥ P ¥ P ‘ ©...
- Page 86 ø ß ¥ P ¥ P † D π ∂ ¥ P ¥ P ^ ¬...
- Page 87 ¥ P † D ø ß...
- Page 97 CLICK CLICK CLICK...
- Page 98 CLICK...
- Page 102 CLICK...
- Page 106 ¥ h j k ¬ ¨ ∆ ˚ † “ ƒ ‘ ©...
- Page 107 ^ ¬ † D ¥ ¨ ¥ ¥ ¥ ¥ ^ ¬ ¨ { ¨ {...
- Page 108 ¨ { ¨ { ø ß † D ¥ P ¥ P ¥ P ‘ © ø ß ¥ P ¥ P † D...
- Page 109 ø ∂ ¥ P ¥ P ^ ¬ ¥ P † D ø ß...
- Page 117 CLICK CLICK CLICK...
- Page 118 CLICK...
- Page 122 CLICK...
- Page 126 ¥ h j k ¬ ¨ ∆ ˚ † “ ƒ ‘ ©...
- Page 127 ^ ¬ † D ¥ MAGYAR ¨ ¥ ¥ ¥ ¥...
- Page 128 MAGYAR ^ ¬ ¨ { ¨ { ¨ { ¨ { ø ß † D ¥ P ¥ P...
- Page 129 ¥ P ‘ © ø ß ¥ P ¥ P MAGYAR † D π ∂ ¥ P ¥ P ^ ¬...
- Page 130 MAGYAR ¥ P † D ø ß...
- Page 131 MAGYAR...
- Page 132 MAGYAR...
- Page 133 MAGYAR...
- Page 134 MAGYAR...
- Page 135 MAGYAR...
- Page 136 MAGYAR...
- Page 139 CLICK CLICK CLICK...
- Page 141 CLICK...
- Page 145 CLICK...
- Page 148 ¥ h j k ¬ ¨ ∆ ˚ † “ ƒ ‘ ©...
- Page 149 ^ ¬ † D ¥ P ¨ ¥ ¥ ¥...
- Page 150 ¥ ^ ¬ ¨ { ¨ { ¨ { ¨ { ø ß...
- Page 151 † D ¥ P ¥ P ¥ P ‘ © ø ß ¥ P ¥ P † D π ∂...
- Page 152 ¥ P ¥ P ^ ¬ ¥ P † D ø ß...
- Page 161 CLICK CLICK CLICK...
- Page 163 CLICK...
- Page 167 CLICK...
- Page 170 ¥ h j k ¬ ¨ ∆ ˚ † “ ƒ ‘ ©...
- Page 171 ^ ¬ † D ¥...
- Page 172 ¨ ¥ ¥ ¥ ¥ ^ ¬ ¨ { ¨ { ¨ {...
- Page 173 ¨ { ø ß † D ¥ P ¥ P ¥ P ‘ © ø ß ¥ P ¥ P...
- Page 174 † D π ∂ ¥ P ¥ P ^ ¬ ¥ P † D ø ß...
- Page 182 4222 002 26323...