Table of Contents
Advertisement
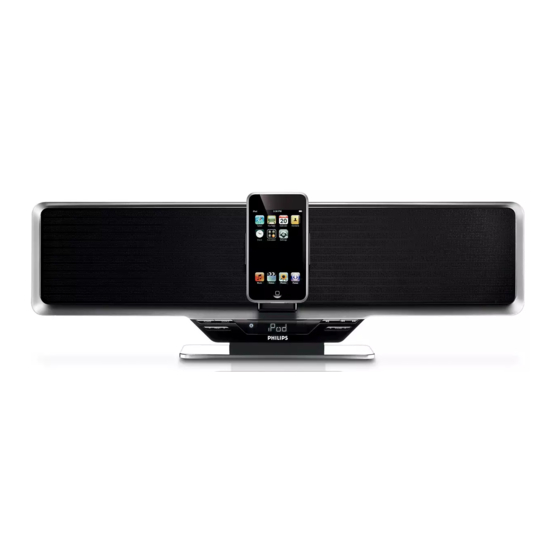
Docking Entertainment System
Register your product and get support at
www.philips.com/welcome
Thank you for choosing Philips.
Need help fast?
Read your Quick Start Guide and/or
User Manual first for quick tips
that make using your Philips product
more enjoyable.
If you have read your instructions
and still need assistance,
you may access our online help at
www.philips.com/welcome
or call
1-888-PHILIPS (744-5477)
while with your product.
(and Model / Serial number)
Philips vous remercie de
votre confiance.
Besoin d'une aide
rapide?
Le Guide rapide de début et Manuel de
l'utilisateur regorgent d'astuces destinées à
simplifier l'utilisation de votre produit Philips.
Toutefois, si vous ne parvenez pas à résoudre
votre probléme, vous pouvez accéder à
notre aide en ligne à l'adresse
www.philips.com/welcome
ou formez le
1-800-661-6162 (Francophone)
1-888-PHILIPS (744-5477) (English speaking)
Veillez à avoir votre produit à
portée de main.
(et model / serial nombre)
DC910
Gracias por escoger Philips
Necesita ayuda
inmediata?
Lea primero la Guía rápida del comienzo
o el Manual del usuario, en donde encontrará
consejos que le ayudarán a disfrutar
plenamente de su producto Philips.
Si después de leerlo aún necesita ayuda,
consulte nuestro servicio de
asistencia en línea en
www.philips.com/welcome
o llame al teléfono
1-888-PHILIPS (744-5477)
y tenga a mano el producto.
(y número de model / serial)
Advertisement
Table of Contents

Related Manuals for Philips DC910/37B


Summary of Contents for Philips DC910/37B
- Page 1 Thank you for choosing Philips. Need help fast? Read your Quick Start Guide and/or User Manual first for quick tips that make using your Philips product more enjoyable. If you have read your instructions and still need assistance, you may access our online help at www.philips.com/welcome...
- Page 2 Note : This equipment has been tested and found to comply with the limits for a Class B digital device, pursuant to part 15 of the FCC Rules. These limits are designed to provide reasonable protection against harmful interference in a residential installation. This equipment generates, uses, and can radiate radio frequency energy and, if not installed and used in accordance with the instruction manual, may cause harmful interference to radio communications.
- Page 3 Registering your model with PHILIPS makes you eligible for all of the valuable benefits listed below, so don't miss out. Complete and return your Product Registration Card at once, or register online at www.philips.com/welcome to ensure:...
-
Page 4: Important Safety Instructions
IMPORTANT SAFETY INSTRUCTIONS Clean only with dry cloth. Where the MAINS plug or an appliance coupler is used as the disconnet device, the disconnet device shall remain readily operable. materials Class II equipment symbol This symbol indicates that the unit has a double insulation system... - Page 5 Canada English: This digital apparatus does not exceed the Class B limits for radio noise emissions from digital apparatus as set out in the Radio Interference Regulations of the Canadian Department of Communications. Français: Cet appareil numérique n'emet pas de bruits radioélectriques dépassant les limites applicables aux appareils numériques de Class B prescrites dans...
-
Page 6: Table Of Contents
Contents General Information Environmental Information ... 7 Supplied accessories ... 7 Safety Information ... 7 Hearing Safety ... 8 Preparations Connections ... 9~10 Power Antenna connection Optional connection Connecting a USB mass storage device or SD/MMC memory card Connecting other equipment to your system Mounting the set onto wall ... -
Page 7: General Information
Congratulations on your purchase and welcome to Philips! To fully benefit from the support that Philips offers, register your product at www.philips.com/ welcome. This set complies with the FCC rules, Part 15 and with 21 CFR 1040.10. Operation is subject to the following two conditions: –... -
Page 8: Hearing Safety
General Information Hearing Safety Listen at a moderate volume. ● Using headphones at a high volume can impair your hearing. This product can produce sounds in decibel ranges that may cause hearing loss for a normal person, even for exposure less than a minute. -
Page 9: Preparations
POWERFUL BASS Connections The type plate is located at the bottom of the system. Power ● Before connecting the AC power adaptor to the wall outlet, ensure that all other connections have been made. ● DC jack is located at the bottom panel of the set. -
Page 10: Connecting Other Equipment To Your System
Preparations for the devices with USB cables: Insert one plug of the USB cable (not supplied) to the socket on the set. Insert the other plug of the USB cable to the USB output terminal of the USB device. for the memory card: ●... -
Page 11: Controls
Controls on the system SD / MMC – is the slot used to insert an SD/MMC memory card. USB port – jack for the external USB mass storage device. iPod dock – is used to dock your iPod player for playback or recharging through this system. -
Page 12: Controls On The Remote Control
Controls Controls on the remote control POWER – switches the system on or to Eco Power standby/normal standby with clock display. MENU – is equivalent to the MENU button on your iPod player. USB/SD – swicthes between USB and SD mode. SHUFFLE/REPEAT for USB/CARD ... -
Page 13: Basic Functions
IMPORTANT! – Make sure to complete the preparation procedures before operating the system. Switching the system on ● Press POWER. ➜ The system will switch to the last selected source. ● Press SOURCE on the set or iPod, TUNER, USB/CARD or AUX on the remote control. ➜... -
Page 14: Radio Reception
Radio Reception Tuning to radio stations Press SOURCE repeatedly (or TUNER on the remote control) to select the tuner source (FM). on the system (or TUNING +/- Hold on the remote control) and then release the button. ➜ The system will start searching for a radio station with sufficient signal strength. -
Page 15: Usb/Card
Using a USB mass storage device/SD/MMC memory card By connecting a USB mass storage device or SD/ MMC memory card to the Hi-Fi system, you can enjoy the device's or card’s stored music through the powerful speakers of Hi-Fi system. Playing a USB mass storage device/SD/ MMC memory card Compatible mass storage devices/cards... -
Page 16: Using Playback Features
USB/Card How to transfer music files from PC to a USB mass storage device/SD/MMC memory card By dragging and dropping music files, you can easily transfer your favorite music from PC to a USB mass storage device/SD/MMC memory card. For a flash player, you can also use its music management software for the music transfer. -
Page 17: Different Play Modes: Shuffle And Repeat
Different play modes: SHUFFLE and REPEAT You can select and change the various play modes before or during playback. The REPEAT modes can also be combined with PROGRAMME. SHUF ... all the audio files are played in random order REP ALL ... repeats all the audio files/ programme REP ... -
Page 18: Dock For Ipod
DOCK for iPod Playing Apple iPod using DC910 The set is equipped with a dock for iPod. By connecting Apple iPod to the set, you can listen to the sound of the docked iPod through the powerful speakers of the Hi-Fi system and view the iPod video (if available). -
Page 19: Aux
Listening to an external source This feature allows you to listen to music from the external equipment throught the powrful speakers of the Hi-Fi system. Use an Aux-in cable (supplied) to connect the AUX 1 or AUX 2 jack (3.5mm, located on the bottom panel) to an AUDIO OUT or headphone jack on an external device (such as TV, Laser Disc player, DVD player or CD... -
Page 20: Clock/Timer
Clock/Timer Clock setting The clock can be set in either 12-hour or 24-hour mode (12HR or 24HR for example). In standby mode, press and hold PROG/SET TIME on the remote control. Press VOLUME+/- on the system (or VOL +/- on the remote control) to switch between 12 hour and 24 hour display. -
Page 21: Sleep Timer Setting
Sleep timer setting The sleep timer enables the system to switch off by itself after a set period of time. In power on mode, press SLEEP on the remote control repeatedly to select a preset time. ➜ The selections are as follows (time in minutes): 120 ™... -
Page 22: Specifications
Specifications AMPLIFIER Output power ... 2 x 15 W RMS Signal-to-noise ratio ... ≥ 70 dBA Frequency response ... 20 Hz – 20 KHz, ± 3 dB Input sensitivity AUX ... 0.5 V (max. 2 V) Impedance loudspeakers ... 4 Ω TUNER FM wave range ... -
Page 23: Troubleshooting
Do not open the system as there is a risk of electric shock. If a fault occurs, first check the points listed below before taking the system for repair. If you are unable to remedy a problem by following these hints, consult your dealer or Philips for help. - Page 24 Philips is not liable for any damage to or loss of any programs, data, or other information stored on any media contained within the product, or any non-Philips product or part not covered by this warranty.
- Page 25 Philips Consumer Lifestyle A Division of Philips Electronics North America Corporation P.O. BOX 671539, Marietta, GA. 30006-0026 Meet Philips at the Internet http://www.philips.com/welcome DC910 CLASS 1 LASER PRODUCT Printed In China PDCC-ZYL-0835...