Sony HVL-F60RM Help Manual
Hide thumbs
Also See for HVL-F60RM:
- Operating instructions manual (64 pages) ,
- Operating instructions manual (42 pages) ,
- Help manual (92 pages)
Advertisement
Quick Links
Help Guide
Flash
HVL-F60RM
Use this Help Guide when you have issues or questions on how to use your flash unit.
Locating parts and controls/on-screen indicators
Locating parts and controls
Basic operations
Using the control wheel
Using the Quick Navi screen
Using the MENU screen
Direct setting
On-screen indicators
Preparations
Unpacking
Attaching/removing the flash unit to/from the camera
Attaching and removing the mini-stand
Turning on the power to the flash unit
Pairing with a radio wireless commander/receiver (for radio wireless flash photography)
Photographing
TTL flash photography (TTL)
1
Advertisement

Related Manuals for Sony HVL-F60RM


Summary of Contents for Sony HVL-F60RM
- Page 1 Help Guide Flash HVL-F60RM Use this Help Guide when you have issues or questions on how to use your flash unit. Locating parts and controls/on-screen indicators Locating parts and controls Basic operations Using the control wheel Using the Quick Navi screen...
- Page 2 Manual flash photography (MANUAL) High-speed sync photography (HSS) Multiple flash photography (MULTI) Firing a test-flash Selecting the wireless type (radio or optical) for controlling wireless flash photography Radio wireless flash photography Configuring the flash unit for radio wireless flash photography Wireless flash photography (with the receiver unit) Multiple radio wireless flash photography with flash power level ratio control Multiple wireless flash photography (group flash photography)
- Page 3 Resetting the settings for the Quick Navi screen (RESET) Restoring the factory default settings (INITIALIZE) Notes on using/cleaning the flash unit Notes on use Specifications Specifications Guide number Radio wireless features Trademarks Troubleshooting Warning indications 4-735-263-11(1) Copyright 2018 Sony Corporation...
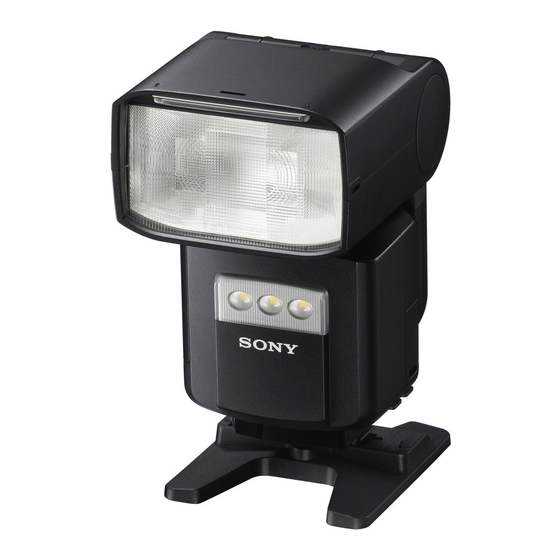
- Page 4 Help Guide Flash HVL-F60RM Locating parts and controls Flash unit (front side) Built-in wide panel Flashlamp LED light unit/AF illuminator Wireless control signal receiver (for optical wireless communications) Multi Interface foot DC IN terminal Connect the External Battery Adaptor (not supplied) to this terminal.
- Page 5 LINK lamp LCD panel Operation console Lock lever Release button Battery chamber door Mini-stand Shoes for the Multi Interface foot Tripod attachment hole Controls on the operation console LEVEL -/+ button By using either button, you can quickly adjust the flash compensation and the flash power level. TEST button Control wheel Center button...
- Page 6 When you press one of the buttons or use the control wheel, the backlight for the LCD panel lights for 8 seconds. The backlights for the LCD panel and the LEVEL -/+, Fn, and MENU buttons stay lit. OFF: All the backlights stay unlit. 4-735-263-11(1) Copyright 2018 Sony Corporation...
- Page 7 No function is assigned to this button at shipment. You can assign a function of your choice to the button. Hint To the control wheel, the individual direction button, and the center button, you can assign the function of your choice. Related Topic Customizing the button assignment (CUSTOM KEY) 4-735-263-11(1) Copyright 2018 Sony Corporation...
- Page 8 Help Guide Flash HVL-F60RM Using the Quick Navi screen You can press the Fn button on the flash unit to change the settings for photography, such as the selected flash mode, in accordance with the on-screen indications. Select the setting item of your choice and rotate the control wheel to change the setting option.
- Page 9 Flash power level ratio setting OFF/1(*) - 16 Receiver remote setting ON/OFF(*) OFF/A(*)/B/C/D/E(radio control) Wireless group setting RMT(*)/RMT2(optical control) Factory default setting Note The items and options available for setting vary depending on the flash mode. 4-735-263-11(1) Copyright 2018 Sony Corporation...
- Page 10 Help Guide Flash HVL-F60RM Using the MENU screen You can press the MENU button on the flash unit to change the settings on the MENU screen. Move the focus to the setting item of your choice with the direction buttons, and then press the center button to select the item.
- Page 11 WL POWER SAVE Wireless flash power-saving timer setting 60MIN(*)/240MIN/OFF VERSION Displays the version for this product's / RCV software RESET Resets settings for Quick Navi screen INITIALIZE Restores settings to their defaults Factory default setting 4-735-263-11(1) Copyright 2018 Sony Corporation...
- Page 12 POS SELECT” to a button of your choice, you can select a wireless group simply with the button when you use the LEVEL -/+ button to modify the flash compensation or the flash power level for the group that you use, for example, for multiple wireless flash photography. Related Topic Customizing the button assignment (CUSTOM KEY) 4-735-263-11(1) Copyright 2018 Sony Corporation...
- Page 13 Help Guide Flash HVL-F60RM On-screen indicators The following screen images are given as examples and may look different from what you actually see on the LCD panel. TTL flash mode Flash mode High-speed sync setting Flash range Memory Recall External Battery Adaptor state...
- Page 14 Lighting ratio control setting Wireless channel Flash distribution setting/Commander/Control unit flash setting Lighting ratio Wireless receiver mode (radio control) Receiver remote setting Wireless group setting Wireless controller mode (optical wireless communications) Wireless remote mode (optical wireless communications) 4-735-263-11(1) Copyright 2018 Sony Corporation...
- Page 15 The number in the parentheses indicates the quantity. Flash unit (1) Connector protect cap (1) Mini-stand (stored in the case) (1) Case (1) Bounce adaptor (1) Color filter (amber) (1) Color filter (green) (1) Carrying pouch (1) Set of printed documentation 4-735-263-11(1) Copyright 2018 Sony Corporation...
-
Page 16: Inserting Batteries
), and then slide the battery chamber door to open in the direction of the arrows ( Insert the batteries into the battery chamber as illustrated ( ). ( indicate the direction of the batteries.) Close the battery chamber door. Perform the step 1 operations in reverse order. 4-735-263-11(1) Copyright 2018 Sony Corporation... - Page 17 Turn off the power of the flash unit first. Press and hold the release button, rotate the lock lever away from “LOCK,” and then slide the unit out of the Multi Interface shoe. Note When you do not intend to use the flash unit, be sure to attach the terminal protection cap back to the Multi Interface foot. 4-735-263-11(1) Copyright 2018 Sony Corporation...
- Page 18 Help Guide Flash HVL-F60RM Attaching and removing the mini-stand When you have removed the flash unit from the camera to place and use it alone for wireless flash photography, attach the supplied mini- stand to the unit. To attach the mini-stand Press and hold the release button and rotate the lock lever away from “LOCK.”...
- Page 19 Use a tripod with the screw that is shorter than 5.5 mm in length. To a tripod with the longer screw, you cannot secure the mini-stand firmly with the screw, resulting in possible damage to the mini-stand. Note When you do not intend to use the flash unit, be sure to attach the terminal protection cap back to the Multi Interface foot. 4-735-263-11(1) Copyright 2018 Sony Corporation...
- Page 20 Help Guide Flash HVL-F60RM Turning on the power to the flash unit Turn the power switch to ON. When the flash unit is powered, on-screen indicators are displayed on the LCD panel. To turn off the power to the flash unit Turn the power switch to OFF.
- Page 21 In such a case, turn off the power switch on the flash unit and leave the flash unit unused for about 20 minutes to let it cool down. Continuous flashes heat up the batteries inside the flash unit. Take extra care when you remove the batteries. Related Topic Warning indications 4-735-263-11(1) Copyright 2018 Sony Corporation...
- Page 22 Help Guide Flash HVL-F60RM Pairing with a radio wireless commander/receiver (for radio wireless flash photography) To perform radio wireless flash photography with this flash unit, you need another flash unit that supports radio wireless communications in addition to this flash unit and must pair them both together.
- Page 23 On the receiver unit, the following screen is displayed. Select [OK] to establish pairing. On the commander unit, the following screen is displayed. Pairing is established. On the commander unit, you can continue pairing with other receiver units. Every time pairing is established with a receiver unit, the number of paired devices ( ) increases.
- Page 24 Related Topic Configuring the flash unit for radio wireless flash photography Wireless flash photography (with the receiver unit) 4-735-263-11(1) Copyright 2018 Sony Corporation...
- Page 25 Help Guide Flash HVL-F60RM TTL flash photography (TTL) TTL-flash mode measures the light from the subject that is reflected through the lens. TTL metering also has a P-TTL metering function, which adds a pre-flash to TTL metering, and an ADI metering function, which adds distance data to the P-TTL metering.
- Page 26 If flash compensation is made both on the flash unit and the camera, both compensation values are added up for flash firing. On the LCD panel of the flash unit, however, only the compensation value specified on the unit is displayed. 4-735-263-11(1) Copyright 2018 Sony Corporation...
- Page 27 Help Guide Flash HVL-F60RM Manual flash photography (MANUAL) MANUAL flash mode keeps the flash power level consistent regardless of the brightness of the subject or the settings of the camera. Select the M (Manual) shooting mode on the camera. Press the MODE button ( ) and rotate the control wheel to select [MANUAL].
- Page 28 If you assign “TTL/M SWITCH” to a button of your choice, you can switch the flash mode between TTL flash mode and MANUAL flash mode simply with the button. Related Topic TTL flash photography (TTL) Customizing the button assignment (CUSTOM KEY) 4-735-263-11(1) Copyright 2018 Sony Corporation...
- Page 29 It is recommended that you set the flash power level to at least MANUAL 1/2 for photography. The minimum value available for specifying the flash power level varies in accordance with the high-speed sync setting. When [ON] is selected: 1/128 When [OFF] is selected: 1/256 4-735-263-11(1) Copyright 2018 Sony Corporation...
- Page 30 Help Guide Flash HVL-F60RM Multiple flash photography (MULTI) This flash unit is capable of firing multiple times while the camera shutter is open (multiple flash photography). Multiple flash photography allows you to capture a series of movements of the subject in a single photo.
- Page 31 100* 100* 100* 100* 100* 100* 100* 100* 100* 100* 100* 100* 100* 100* 100* 100* 100* 100* 100* “100*” indicates 100 or greater. Note The maximum number that you can specify for the flash count in MULTI flash mode varies depending on the type and condition of the batteries. 4-735-263-11(1) Copyright 2018 Sony Corporation...
- Page 32 If this flash unit is specified as the commander unit for radio wireless photography, the TEST button will light in orange when all the flash units, including the receiver units, are ready to fire. 4-735-263-11(1) Copyright 2018 Sony Corporation...
- Page 33 : Radio wireless communications with the flash unit : Optical wireless communications with the flash unit Related Topic Configuring the flash unit for radio wireless flash photography Configuring the flash unit for optical wireless flash photography 4-735-263-11(1) Copyright 2018 Sony Corporation...
- Page 35 Help Guide Flash HVL-F60RM Configuring the flash unit for radio wireless flash photography This flash unit supports radio wireless communications for flash photography. Specify [CMD] for the commander unit attached to the camera; and [RCV] for the receiver unit (off-camera flash unit) of which flash operation is wirelessly triggered.
- Page 36 Related Topic Pairing with a radio wireless commander/receiver (for radio wireless flash photography) Selecting the wireless type (radio or optical) for controlling wireless flash photography 4-735-263-11(1) Copyright 2018 Sony Corporation...
- Page 37 : Commander unit (CMD) : HVL-F60RM (RCV) As the commander unit, you can use this flash unit or a radio wireless commander. Select the wireless (WL) flash mode on the camera.
- Page 38 During manual flash photography, you can enable adjustment on the commander unit by selecting [CMD LINK] for the flash power level setting on the Quick Navi screen. Related Topic Pairing with a radio wireless commander/receiver (for radio wireless flash photography) Selecting the wireless type (radio or optical) for controlling wireless flash photography Attaching and removing the mini-stand 4-735-263-11(1) Copyright 2018 Sony Corporation...
- Page 39 Before you perform multiple wireless flash photography, be sure to specify the flash unit as the commander unit or the receiver unit. Commander unit: HVL-F60RM or a radio wireless commander Receiver unit (off-camera flash unit): HVL-F60RM or a radio wireless receiver : Commander unit (CMD) : Wireless receiver : Receiver unit (RCV) Press the Fn button on the commander unit, select [RATIO CONTROL] on the Quick Navi screen, and then select [ON].
- Page 40 Commander unit: HVL-F60RM or a radio wireless commander Receiver unit (off-camera flash unit): HVL-F60RM or a wireless receiver Press the MODE button and select [GROUP] on the screen for flash mode selection.
- Page 41 Multi Terminal Connecting Cable, VMC-MM1 (not supplied). This releases the shutter on the other camera at the same time. : HVL-F60RM (CMD) : Another HVL-F60RM (RCV) Press the WL button on this flash unit and select [CMD]. Press the MENU button ( ) on the commander unit, select [REMOTE RELEASE], and then select [ON].
- Page 42 You can release the shutter of the camera with the receiver unit connected by pressing the center button on the flash unit specified as the commander unit. Related Topic Pairing with a radio wireless commander/receiver (for radio wireless flash photography) Selecting the wireless type (radio or optical) for controlling wireless flash photography 4-735-263-11(1) Copyright 2018 Sony Corporation...
- Page 43 When the value selected for the zoom setting on the commander unit is larger or smaller than the zoom setting values available on the receiver unit, the maximum or minimum value is selected for the zoom setting on the receiver unit. 4-735-263-11(1) Copyright 2018 Sony Corporation...
- Page 44 Help Guide Flash HVL-F60RM Notes on radio wireless flash photography During photography with off-camera flash units, P-TTL flash metering is automatically used instead of ADI metering. 4-735-263-11(1) Copyright 2018 Sony Corporation...
- Page 45 To specify the flash unit as the remote unit, select [RMT]. Hint Place the controller and remote units within a 5 m radius of the subject. Related Topic Selecting the wireless type (radio or optical) for controlling wireless flash photography 4-735-263-11(1) Copyright 2018 Sony Corporation...
- Page 46 : Built-in flash : Controller unit (CTRL) : HVL-F60RM (RMT) As the controller unit, you can use the built-in flash of an A-mount camera or another flash unit model (HVL-F20M, HVL-F32M, HVL-F43M, HVL-F45RM, HVL-F60M, etc.) available for a separate purchase.
- Page 47 Related Topic Selecting the wireless type (radio or optical) for controlling wireless flash photography Attaching/removing the flash unit to/from the camera Attaching and removing the mini-stand 4-735-263-11(1) Copyright 2018 Sony Corporation...
- Page 48 RMT2) of flash units including the commander unit. Before you perform multiple wireless flash photography, be sure to specify the flash unit as the controller unit or the remote unit. Controller unit: HVL-F60RM Remote unit (off-camera flash unit): HVL-F60RM or another flash unit model that supports optical wireless communications : Controller unit (CTRL) : Remote unit (RMT) : Remote unit (RMT2) Press the Fn button on the controller unit, select [RATIO CONTROL] on the Quick Navi screen, and then select [ON].
- Page 49 All flash units used for wireless flash photography must share the same wireless channel (CH). On this flash unit, you can specify the wireless channel by pressing the MENU button and selecting [ CH SET]. Consecutively firing multiple times (multiple flash photography) is not available during optical wireless flash photography. 4-735-263-11(1) Copyright 2018 Sony Corporation...
- Page 50 Help Guide Flash HVL-F60RM Using the sync terminal for flash photography You can connect another flash unit or camera to this flash unit with the sync cord (not supplied) to perform synchronized flash photography as described below. When a flash unit with the sync terminal (not supplied) is connected to this flash unit that is attached to a camera, the connected flash unit fires in synchronization with the camera.
- Page 51 When you use the flash unit connected to the sync terminal on this flash unit, set the shutter speed of the camera to the slower one of the following two or to a slower speed slower than either one. the synch speed of the camera the shutter speed recommended on the flash unit 4-735-263-11(1) Copyright 2018 Sony Corporation...
- Page 52 Depending on the camera, lens, and brightness settings for video shooting, the proper white balance may not be obtained. In such a case, adjust the balance on the camera. Depending on the size of the lens attached to the camera, the LED beam may be obstructed by the lens end. 4-735-263-11(1) Copyright 2018 Sony Corporation...
- Page 53 Help Guide Flash HVL-F60RM Selecting the flash coverage automatically (auto zoom) This flash unit automatically selects the appropriate flash coverage for the focal length of the lens on the attached camera within the range from 20 mm to 200 mm (auto zoom). You do not need to manually select the flash coverage most of the time.
- Page 54 Before storing this flash unit in the supplied case, be sure to push the wide panel and the bounce sheet back into the unit. Depending on the focal length specified for photography, the periphery of the screen may appear darker. In such a case, change the flash distribution pattern. Related Topic Selecting the flash coverage manually (manual zoom) 4-735-263-11(1) Copyright 2018 Sony Corporation...
- Page 55 Note Depending on the focal length specified for photography, the periphery of the screen may appear darker. In such a case, change the flash distribution pattern. Related Topic Selecting the flash coverage automatically (auto zoom) 4-735-263-11(1) Copyright 2018 Sony Corporation...
-
Page 56: Bounce Flash Photography
Help Guide Flash HVL-F60RM Bounce flash photography Using the flash unit with a wall directly behind the subject produces strong shadows on the wall. By directing the flash unit at the ceiling you can illuminate the subject with reflected light, reducing the intensity of the shadows and producing a softer light on the screen. - Page 57 When the flashlamp is tilted up, the flash range is not displayed on the LCD panel. Use a white ceiling or wall to bounce the flash light. A colored surface may tint the bounced light. High ceilings or glass are not recommended for the bounce surface. 4-735-263-11(1) Copyright 2018 Sony Corporation...
- Page 58 The bounce sheet is pulled out along with the wide panel from this flash unit. Push the wide panel back into the flash unit. Hint When you use the bounce sheet for flash photography, tilt up the flashlamp by 90°. 4-735-263-11(1) Copyright 2018 Sony Corporation...
- Page 59 When [AUTO] is selected for the flash coverage (zoom) of this flash unit, the coverage is adjusted automatically to the wide angle during 90° sideways bounce flash photography. In such a case, the flash range may be reduced compared to the one available for bounce flash photography with the flashlamp tilted back to the upright position. 4-735-263-11(1) Copyright 2018 Sony Corporation...
-
Page 60: Using The Bounce Adaptor
Insufficient attachment may prevent accurate compensation. To remove the bounce adaptor While pulling the tab on the bounce adaptor in the direction of the arrow ( ), pull out the bounce adaptor in the direction of the arrow ( 4-735-263-11(1) Copyright 2018 Sony Corporation... - Page 61 You can tilt down the flashlamp only when it is in the upright position or tilted sideways by 90° in either direction. When the physically long lens is used, the flash light may be obstructed by the lens end. 4-735-263-11(1) Copyright 2018 Sony Corporation...
- Page 62 If the focal length of the lens is greater than 300 mm, the AF illuminator may not light. In addition, when the flash unit is removed from the camera, the AF illuminator does not light. Depending on the camera to which the flash unit is attached, the AF illuminator may not light. 4-735-263-11(1) Copyright 2018 Sony Corporation...
- Page 63 Help Guide Flash HVL-F60RM Using color filters Depending on the ambient light during photography, the sufficient flash light may not reach the background of the subject and the photographed images may appear in unnatural colors. With the supplied color filters used for photography, the photographed images appear in natural colors.
- Page 64 [Auto] or [Flash] is specified for the white balance on the camera. 4-735-263-11(1) Copyright 2018 Sony Corporation...
- Page 65 When the batteries in the connected External Battery Adaptor are worn out and on the LCD panel is blinking, replacing the batteries does not turn off . It remains on the LCD panel until you perform flash photography once. When FA-EB1AM is in use, you cannot use [EXT.]. 4-735-263-11(1) Copyright 2018 Sony Corporation...
- Page 66 MENU screen once again. When you do not intend to use the registered preferences, select [OFF] in the procedure for registering the preference. Note While the preference is in effect, [RESET] on the MENU screen is disabled. 4-735-263-11(1) Copyright 2018 Sony Corporation...
- Page 67 Help Guide Flash HVL-F60RM Customizing the button assignment (CUSTOM KEY) You can assign a function of your choice to some of the controls on the operation console: the direction buttons, the center button, and the control wheel. Press the MENU button ( ) and select [CUSTOM KEY].
- Page 68 Remote release mode setting RECEIVER SET Individual receiver setting GROUP Wireless group setting RCV REMOTE Receiver remote setting CH SET Channel setting (radio control) CH SET Channel setting (optical control) OTHERS NOT SET No setting Factory default setting 4-735-263-11(1) Copyright 2018 Sony Corporation...
- Page 69 The information about the receiver unit, including the version, pairing registration number, model name. The information to be displayed varies depending on the radio conditions. When no receiver units are paired, [RCV] is not available for selection. 4-735-263-11(1) Copyright 2018 Sony Corporation...
- Page 70 The reset operation also resets the flash distribution setting, the LED brightness setting, and the remote release mode setting. While the reset process is in progress, do not turn off the power to this flash unit or remove the batteries. 4-735-263-11(1) Copyright 2018 Sony Corporation...
- Page 71 You can restore all the functional settings and the set values to the factory default settings. Press the MENU button ( ) and select [INITIALIZE]. Select [OK]. Note While the initialize process is in progress, do not turn off the power to this flash unit or remove the batteries. 4-735-263-11(1) Copyright 2018 Sony Corporation...
-
Page 72: Notes On Use
Help Guide Flash HVL-F60RM Notes on use In addition to this Help Guide, please read “Before use” in the Operating Instructions (supplied). While photographing This flash unit generates strong light, so it should not be used directly in front of the eyes. - Page 73 If fingerprints or debris are stuck to the lens or flashlamp, we recommend that you gently remove any debris and then wipe the lens or flashlamp clean with a soft cloth. 4-735-263-11(1) Copyright 2018 Sony Corporation...
-
Page 74: Specifications
Help Guide Flash HVL-F60RM Specifications Flash unit Flash control Flash control using pre-flash (P-TTL/ADI) Continuous flash 40 flashes at 10 flashes per second (Normal flash, flash power level 1/32, 105 mm, nickel-metal hydride performance batteries) Autoflash at low contrast and low brightness Operating range (While a 50mm lens with the aperture set at F5.6 is attached.) - Page 75 Number of flashes at the highest flash power level available in every 30 seconds (Acquired under our measurement conditions.) Functions in this manual depend on testing conditions at our firm. Design and specifications are subject to change without notice. 4-735-263-11(1) Copyright 2018 Sony Corporation...
- Page 76 Help Guide Flash HVL-F60RM Guide number Normal flash/STD flash distribution (ISO 100) Manual flash/35mm-format Flash coverage setting (mm) Flash power level BA(*1)(*2) BA(*1) 14(*2) 11.3 16.3 17.7 18.4 19.8 21.2 26.2 32.5 34.6 38.2 42.4 11.5 12.5 18.5 24.5 10.6 13.1...
- Page 77 APS-C format Flash coverage setting (mm) Shutter speed BA(*1)(*2) BA(*1) 14(*2) 1/250 10.8 12.9 15.3 16.7 1/500 10.8 11.8 1/1000 1/2000 1/4000 1/8000 1/16000 When the bounce adaptor is attached. When the wide panel is attached. 4-735-263-11(1) Copyright 2018 Sony Corporation...
- Page 78 The distance given above applies under conditions where there are no obstacles, shielding, or radio wave Communication interferences. distance The communication distance may be shorter depending on the positioning of the products, the ambient environment, and weather conditions. 4-735-263-11(1) Copyright 2018 Sony Corporation...
- Page 79 Help Guide Flash HVL-F60RM Trademarks “Multi Interface Shoe” is a trademark of Sony Corporation. 4-735-263-11(1) Copyright 2018 Sony Corporation...
- Page 80 BEEP] on the MENU screen, this state is also indicated by the beep sound. Indicates that the internal temperature is extremely high. While the flash unit is in this state, flash charge-up is suspended for about 8 seconds. This warning state is not indicated by the beep sound. 4-735-263-11(1) Copyright 2018 Sony Corporation...