
Related Manuals for Casio A5512CA


Summary of Contents for Casio A5512CA
- Page 1 Getting Ready Making and Answering Calls Address Book Pair Function Teens Mode Mail Camera EZweb EZ Navi Smart Mode Inputting Characters Other Functions Troubleshooting Remote Auto Lock A5512CA Index by CASIO...
- Page 2 Introduction Thank you for purchasing the A5512CA. Before using it for the first time, be sure to read the A5512CA Basic Manual (this PDF manual) so you know how to use it correctly. After you finish reading this manual, store it and the printed materials that come with the phone in a safe place for future reference.
-
Page 3: Cellphone Etiquette
Cellphone Etiquette Mind your manners! A cellphone always emits weak radio waves while it is turned on. Enjoy operation of your cellphone without forgetting to be considerate of those around you. k Some locations do not allow the use of cellphones. -
Page 4: Cellphone Basics
Cellphone Basics Features Camera EZ Navi Record photos and EZ Navi Walk, movies, and send Position Search, them by e-mail. and Area Message are all built-in. Page Page Pair Function Teens Mode Hot Key Call or send mail to Select either Hot Dial Limit the number of preset individuals or Hot Buzzer as the... -
Page 5: Manner Mode And Easy Voice Memo
Manner Mode and Easy Voice Memo Manner Mode Easy Voice Memo Use Manner Mode to turn off the If you cannot answer a call, ring tone so you do not bother Easy Voice Memo plays an others around you. answering message and records the caller’s message. -
Page 6: Never Use Your Cellphone While Driving
Never use your cellphone while driving! Holding a cellphone in your hand, talking on a cellphone, or looking at a cellphone display to send mail or to perform any other operation while driving is prohibited by law in Japan. (Revised Traffic Control Law, effective November 1, 2004) × Reading mail or looking × Holding a cellphone in at the display. -
Page 7: Beware Of Spam And One-Ring Calls
Beware of spam and one-ring calls! How to Combat Spam You can set up mail filters to block specific mail or mail identified as “ 未承諾広告※ ” (unsolicited advertisement), which often includes a lot of spam. Your cellphone has the following filters for blocking spam. -
Page 8: Disaster Message Board Service
Disaster Message Board Service Disaster Message Board The Disaster Message Board lets you use EZweb to register information about your well-being in case of a major disaster. The information you register can be accessed from anywhere in Japan over EZweb or the Internet. •... - Page 9 Disaster Message Board Top Screen Information Registration Screen 災害用伝言板 災害用伝言板 伝言板トップ 〜登録〜 被災状況 Registration 〜サービス提供中〜 無事です。 □ 安否情報の登録・確認が 被害があります。 □ できます。 自宅に居ます。 □ 避難所に居ます。 □ 登録 コメント見て □ 確認 削除 コメント入力(全角 1 0 0 文 Information Screen お知らせメール設定 ...
-
Page 10: Table Of Contents
Directly Connecting the Separately Available General-purpose 01 AC Adaptor for Charging ........................14 Turning On Power ......................15 Turning Off Power ......................15 A5512CA Initial Settings ....................16 Operation Basics ......................17 Display Indicators ......................18 Main Menu ........................19 Initializing E-mail and EZweb .................. - Page 11 Viewing Photos in the Smart Mode ................96 Inputting Characters ................ Inputting an E-mail Address ................... 99 Pictographs and Preset Phrases .................. 100 Other Functions ..............Troubleshooting ..............If you lose your A5512CA ..................... 104 Hot Key ........................106 Extension Mode ......................107 Index ..................
-
Page 12: Getting Ready
Getting Ready Before using the A5512CA for the first check the contents of the box it comes in. You should also familiarize yourself with basic operations, like how to charge the battery, how to turn on power, etc. Do you have everything? •... -
Page 13: Names Of Parts
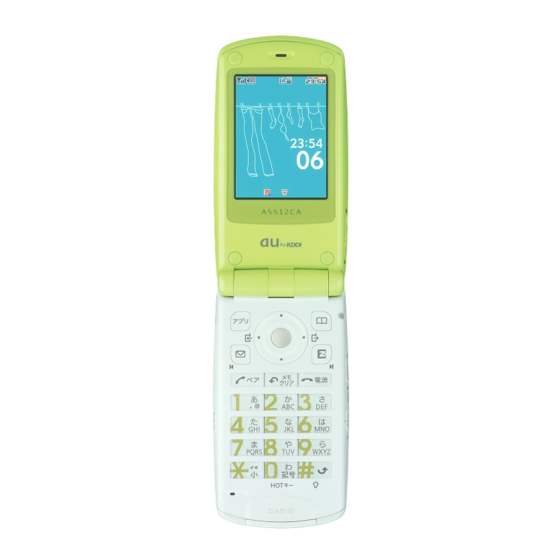
Names of Parts k Front k Back Earpiece Main display Sub display Incoming/ Charge LED lndicator (Incoming lndicator)/ Camera light/ Address book key Standby light Lens (camera) Cursor key Optical sensor Built-in antenna* Application key Lock EZ key Mail key Center key Memo/Clear key Send/Pair key... -
Page 14: Charging The Battery Pack
The battery pack that comes with the phone is not charged when you purchase it. Be sure to charge the battery pack before using the A5512CA for the first time. Charging takes about 120 minutes. You should re-charge the battery pack whenever the battery level icon... - Page 15 Trying to force a connection can damage the connectors. Plug the separately available general-purpose 01 AC adaptor power plug into a 100V AC outlet. Insert the A5512CA into the desktop holder. This will cause the A5512CA charge LED indicator to light red, and the battery ➔ ➔ ➔...
-
Page 16: Directly Connecting The Separately Available General-Purpose 01 Ac Adaptor
Check the shape of the connectors to ensure they are aligned correctly when you connect. Important! Orient the connector of the separately available general-purpose 01 AC adaptor so it is parallel to the A5512CA external connection jack when you connect them. -
Page 17: Turning On Power
*Using Extension Mode Extension Mode automatically turns off signal emission and limits functions you can use when the battery pack level goes low. It keeps the A5512CA operating longer when you are unable to recharge the battery pack right away. -
Page 18: A5512Ca Initial Settings
(Quit Initialization). The main menu will appear on the display (page 19). Note The table below shows the initial factory default setup of the A5512CA. Quitting initialization as shown in the above procedure will configure the setting shown below. Lock No. -
Page 19: Operation Basics
Operation Basics k Key functions Selects an item. • Displays incoming records. • Displays outgoing records. • Returns to the previous • Scrolls forward one menu • menu screen. screen. Displays the standby • shortcut icon. Displays the main menu. •... -
Page 20: Display Indicators
Display Indicators The following explains the main icons that appear on the standby screen. Main display This indicator: Indicates this: 1 2 3 4 Signal strength Battery level Phone is off hook ® Suspended EZ apps (BREW Unread mail Current time The date and time are set automatically in accordance with standard time information included in the received radio wave. -
Page 21: Main Menu
Main Menu Pressing while the standby screen is displayed displays the main menu. to select the icon you want, and then press (OK) to access the function associated with the icon. Photo Multi Media Player EZ Navi Barcode Reader Data Folder Movie Enjoy Tools Menu Tools... - Page 22 k Using Soft Keys Soft keys are the keys you use to execute the functions along the bottom of the screen. The table below explains the relationship between the soft keys and the on-screen functions. Note that the function of each soft key depends on the currently displayed screen.
-
Page 23: Initializing E-Mail And Ezweb
Initializing E-mail and EZweb An EZweb subscription is required to use e-mail and EZweb. If you did not apply when you purchased your phone, contact your nearest au shop or the au Customer Service Center. • You will be assigned an e-mail address automatically when you perform the EZweb initialization procedure. -
Page 24: Selecting English As The Display Language
Selecting English as the Display Language While the standby screen is displayed, press c . Use a to select “ 機能設定 ” (Settings), and then press c (OK). Press 3 (画面表示/照明) (Screen/Light), and then 5 (Set Language). Press 2 (English). This selects English as the display language. -
Page 25: Looking Up Your Current Phone Number And E-Mail Address
Looking Up My phone Your Current Phone Number number and mail address and E-mail Address While the standby screen is displayed, press c . Use a to select “settings,” and then press c (OK). Press 0 (Profile). Your current phone number and e-mail address will appear on the display. -
Page 26: Changing Your E-Mail Address
Changing Your E-mail Address E-mail address @ezweb.ne.jp △△△ Part you can change Domain name While the standby screen is displayed, press L . Press 6 (E-Mail Setup). Press 6 (Other). When the EZweb connection confirmation screen appears, press 1 (Yes). Press 1 ( Eメールアドレス... - Page 27 Enter your PIN, press お客様の暗証番号を入力 してください。下記の対 c (OK), use j to select 象サービスで1日に合計3回間 違えると、翌日までご利 用できなくなりますので “ 送信 ” (Send), and then ご注意ください。 press c (Select). Use d to 送信 リセット <対象サービス> select “ 承諾する ” (Accept), • auオンラインカスタマーサービス • 各種申込サービス and then press c (Select).
-
Page 28: Changing The Display Character Size
Changing the Display Character Size While the standby screen is displayed, press c . Use a to select “settings,” and then press c (OK). Press 3 (Screen/Light), 3 (Font Size), and then 1 (Batch Setup). Use j to select the character size you want, and then press c (OK). -
Page 29: Personal Identification Numbers And Passwords
Personal Identification Numbers and Passwords The A5512CA lets you use the numbers and passwords described below. Be sure to take steps so you do not forget your numbers and passwords, because you will need them to perform various operations and to access subscription services. -
Page 30: Making And Answering Calls
Making and Answering Calls Making a Call While the standby screen is displayed, use the number keys (0 to 9) of the keypad to enter the phone number you want to call. When calling a standard phone, you also need to enter the area code. -
Page 31: Answering A Call
Answering a Call Press N to answer an incoming call. After you finish a call, press to hang up. Note Display for Incoming Calls 0900007XXXX If the caller’s name is your address book, it appears on the display. If not, only the caller’s phone number is displayed. A message like this appears when the phone number of the caller is not provided for some reason. -
Page 32: Redialing (Outgoing Records/Incoming Records)
Redialing (Outgoing Records/ Incoming Records) While the standby screen is displayed, press l or r . r: Displays outgoing records. l: Displays incoming records. Use j to select the record whose number you want to dial. XXXX Press N. XXXX Note The phone stores up to 50 records each for the outgoing records and incoming records. -
Page 33: One-Ring Calls
One-ring Calls k What is a “one-ring call”? A “one-ring call” is an incoming call that rings your phone only once, which causes it to be stored in your incoming records. If you redial the number shown in your incoming records, often you are connected to a dating service or some other service that may charge you very high rates. -
Page 34: Changing The Ring Tone
Changing the Ring Tone While the standby screen is displayed, press c . Use a to select “settings,” and then press c (OK). Press 2 (Sound/Vib/LED). Press 1 (Incoming Call). - Page 35 Press 2 (Melody). Press 1 (Fixed Sound). Use j to select the ring tone you want, and then press c (OK). To hear the currently selected ring tone, press (Confirm) before pressing (OK). Note • The initial default ring tone setting is “Incoming Tone1”. •...
-
Page 36: Adjusting The Ring Tone Volume
Adjusting the Ring Tone Volume To adjust the ring tone volume, perform steps 1 through 3 under “Changing the Ring Tone” (page 32), and then continue with the following steps. Press 1 (Incoming Call). Press 1 (Volume). Use j to adjust the ring tone volume, and then press c (OK). -
Page 37: Adjusting The Earpiece Volume During A Call
Adjusting the Earpiece Volume during a Call During a call, use j to adjust the volume. : Increases volume. : Decreases volume. There are five volume levels for the earpiece volume. The display shows the current volume setting. Turning On Manner Mode While Manner Mode is turned on, the phone alerts you to incoming calls by vibrating. -
Page 38: Turning On Easy Voice Memo
Turning On Easy Voice Memo While the standby screen is displayed, hold down C for about one second. This turns on Easy Voice Memo. To turn off Easy Voice Memo, hold down C for about one second again. indicator is on the display while Easy Voice Memo is turned on. -
Page 39: Playing An Easy Voice Memo
Playing an Easy Voice Memo The message “ Call” and “ Easy V Memo” appear on the standby screen when there is one or more Easy Voice Memos recorded. Select “ Call,” and then press c (OK) to display the incoming records list. -
Page 40: Address Book
Address Book Creating a New Address Book Record While the standby screen is displayed, hold down & for about one second. Select “ <Name>,” and then press c (Edit). Enter the name and then press c (OK). To input text →... - Page 41 Enter the phone number, and then press c (OK). When entering the number of a standard phone, be sure to include the area code. Use d to select “ <E-Mail Adrs1>,” and then press c (Edit). XXXX If you do not want to enter an e-mail address, jump to step 9.
-
Page 42: Editing An Address Book Record
Editing an Address Book Address . . . Birthday . . . Record Group . . . Example: To edit the phone number of “Tom Carter” While the standby screen is displayed, press &. Use a to select the record you want to edit, and then press &... - Page 43 Use d to select “ 0900006XXXX”, and then press c (Edit). XXXX XXXX Make the changes you want, 0 9 0 0 0 0 6XXXX and then press c (OK). To delete characters, press C. Press & (Reg).
-
Page 44: Adding Outgoing Or Incoming Record Data To The Address Book
Adding Outgoing or Incoming Record Data to the Address Book While the standby screen is displayed, press l or r, use j to select the phone number you want to save, and then press & (Menu). : Displays outgoing records. : Displays incoming records. -
Page 45: Dialing From The Address Book
Dialing from the Address Book While the standby screen is displayed, press & and then use a to select the record whose phone number you want to dial. Press c (Disp) to display the details of the record. Use j to select the phone number, and then press N. -
Page 46: Pair Function
Pair Function Once you register a person as a “Pair partner,” you can make a call to that person or send that person e-mail using a simplified operation. Up to five persons can be registered as Pair partners. Registering a Pair Partner In order to register a person as a Pair partner, that person’s names, phone number, and other information needs to be in the address book already. -
Page 47: Making A Phone Call Or Sending Mail To A Pair Partner
Making a Phone Call or Sending Mail to a Pair Partner While the standby screen is displayed, press N. Use s to select the Pair partner. X X X X Use j to select “Call”, and then press c (OK). X X X X Selecting “Send E-Mail”... -
Page 48: Teens Mode
Teens Mode Teens Mode can be used to block spam, and to block inadvertent access to phone numbers and URLs included inside of mail messages. Teens Mode can also be used to restrict call time and the number of mail sends. Using Teens Mode k Teens Mode can be used to restrict mail reception and display contents. -
Page 49: Turning On Teens Mode
Turning on Teens Mode While the standby screen is displayed, press c. Use a to select “mode setting,” and then press c (OK). Press 3 (Teens Mode). Enter the lock number. Note • Input of the lock number is required when changing from Teens Mode to Normal Mode or Smart Mode. -
Page 50: Mail
Mail Your A5512CA supports two types of mail: e-mail and C-mail. Using E-mail To use e-mail, you need to apply for an EZweb subscription. If you did not apply when you purchased your phone, contact your nearest au shop or the au Customer Service Center. -
Page 51: Using C-Mail
Using C-mail C-mail lets you exchange text messages that contain up to 50 double-byte characters with another au cellphone that supports C-mail. Phone numbers are used as C-mail addresses. Page • au subscribers in the Kanto and Chubu areas do not need a separate subscription to use C-mail. -
Page 52: Creating And Sending E-Mail Messages
Creating and Sending E-mail Messages While the standby screen is displayed, press L, and then press 1 (Create New). Select , and then press c (Edit). : Address to which the e-mail will be sent. You can send an e-mail to up to five different addresses. Press 1 (Address Book), use a to select an addressee, and then press... - Page 53 Use j to select , and then press c (Edit). : Subject of the e-mail message. Enter the subject and then press c (OK). Use d to select , and then press c (Edit). : Body of the e-mail message. Enter the body text and then press c (OK).
-
Page 54: Reading Received E-Mail Messages
Reading Received E-mail Messages “ E-Mail” and appear on the standby screen to indicate that an e-mail message has been received. Received e-mail icon Select “ E-Mail” and then press c (OK). Press c (OK). Use j to select the unread e-mail you want to view, and then press c (Disp). -
Page 55: Reading An E-Mail Message With An Attached Photo Or Movie
Reading an E-mail Message with an Attached Photo or Movie To view the attached photo or movie, perform steps 1 and 2 under “Reading Received E-mail Messages” (page 52), and then perform the following steps. Use j to select the e-mail message, and then press c (Disp). -
Page 56: Replying To A Received E-Mail Message
Replying to a Received E-mail Message To reply to an e-mail message, perform steps 1 through 4 under “Reading Received E-mail Messages” (page 52), and then perform the following steps. Press % (Reply). This will display the e-mail composition screen. You can also display the e-mail composition screen by pressing &... -
Page 57: Avoiding Spam
Avoiding Spam You can use mail filters to block spam, to receive e-mail from specific sources only, etc. You can also block any e-mail that includes “未承諾広告※” (unsolicited advertisement) in the subject. k Configuring Mail Filter Settings ① While the standby screen is displayed, press L. 自動的に変更されますの ... -
Page 58: Creating And Sending C-Mail Messages
Creating and Sending Hold down C-mail Messages . . . While the standby screen is displayed, hold down L for about one second, and then press 1 (Create New). Select , and then press c (Edit). Press 1 (Address Book), use a to select an addressee, and then press c (Select). -
Page 59: Reading Received C-Mail Messages
Use j to select , and then press c (Edit). Enter the body text and then press c (OK). Press % (Send) or N. When the C-mail reaches the other party, the message “Completed” appears, and the message is stored in your sending records. -
Page 60: Camera Features
Camera Features Your A5512CA comes with a built-in 1.28-million effective pixel camera that you can use to record photos and movies. You can attach the photos and movies that you record to e-mail messages. Using the Camera Shooting a Photo (page 60) Recording a Movie (page 64) - Page 61 Photo and Movie Sizes The following shows the sizes of the photos and movies that can be recorded with your A5512CA. Photo Sizes Movie Sizes Phone Mode ...
-
Page 62: Camera
Camera Shooting a Photo While the standby screen is displayed, press c . Use a to select “photo,” and then press c (OK). Point the lens at the subject and then press c (Shutter). The phone will emit a shutter sound. You can also press ) in place of c . - Page 63 Note The initial photo mode setting when you purchase your A5512CA is Phone Mode (Wallpaper 240×320). Photo File Names (Inside the Photo Folder) 051012_1123 〜 0001 Example Photo File Name: Date: 2005 October 12 Time: 11:23 a.m. Serial number Shooting Techniques The following useful functions can be used when shooting photos.
-
Page 64: Viewing Photos
Viewing Photos While the standby screen is displayed, press c . Use a to select “data folder,” and then press c (OK). Use j to select “Photo Folder,” and then press c (Detail). Use j to select a folder, and then press c (Detail). - Page 65 Use a to select the photo you want, and then press c (Disp). The photo will appear on the display.
-
Page 66: Recording A Movie
Recording a Movie While the standby screen is displayed, press c , use a to select “movie,” and then press c (OK). Point the lens at the subject and then press c (Rec). The phone will emit a shutter sound to signal the start of recording. - Page 67 Note The initial default movie mode setting when you purchase your A5512CA is Mail Mode (High Quality L 176×144). The maximum recording time in Mail Mode is 15 seconds. Movie File Names (Inside the Movie Folder) 051012_1123 〜 0001 Example Movie File Name: Date: 2005 October 12 Time: 11:23 a.m.
-
Page 68: Viewing Movies
Viewing Movies While the standby screen is displayed, press c . Use a to select “data folder,” and then press c (OK). Use j to select “Movie Folder,” and then press c (Detail). Use j to select a folder, and then press c (Detail). - Page 69 Use a to select the movie you want, and then press c (Play). This will play the movie. To pause movie playback, press c ( ). Playback will stop automatically when the end of the move is reached.
-
Page 70: Attaching A Photo Or Movie To An E-Mail Message
Attaching a Photo or Movie to an E-mail Message k Sending a photo or move with e-mail After performing the first three steps under “Shooting a Photo” (page 60) or “Recording a Movie” (page 64), perform the following steps. Press % (E-Mail). Press 1 (Attach). -
Page 71: Using Photo Mail
Using Photo Mail Photo Mail automatically converts images so they can △△△ □□□ □□□ be viewed correctly on a non-au cellphone. In order to use Photo Mail, you need to change the receiver’s e-mail address to a special Photo Mail address. When you send an e-mail using the auto address converter, the e-mail address will be converted automatically as shown below. -
Page 72: Ezweb
EZweb Using EZweb To use EZweb, you need to apply for an EZweb subscription. If you did not apply when you purchased your phone, contact your nearest au shop or the au Customer Service Center. In addition to an EZweb subscription, you also need to perform an initialization procedure before you can use EZweb. -
Page 73: Displaying The Ez Top Menu
Displaying the EZ Top Menu While the standby screen is displayed press R, use j to select “Top Menu,” and then press c (OK). au style Information and sites recommended by au (Valuable Information) とくする情報 Free presents and valuable information for EZweb service subscribers (Latest News) 最新情報... -
Page 74: Viewing A Site
Viewing a Site Site access You can use access (connect to) EZweb from the EZ top menu. EZweb gives you access to a variety of useful and enjoyable sites. Use j to select the site you want, and then press c (Select). Use l or C to scroll back one screen. -
Page 75: Bookmarking Sites You Frequently Access
Bookmarking Sites You Bookmark Frequently Access Display the site you want to bookmark, and press & (BrowserMenu). Press 1 (New bookmark). New bookmark Save I tems • You may not be able to bookmark Ta ke sna pshot Re l oad some sites. -
Page 76: Downloading Chaku-Uta
® Downloading Chaku-Uta ® To download a Chaku-Uta , perform step 1 under “Displaying the EZ Top Menu” (page 71), and then perform the following steps. Use j to select “ カテゴリで EZトップメニュー style 探す ” (Category Search), and ┗ ... - Page 77 To download information, follow the instructions that EZハ゜スワート゛を入力してくだ さ い。 appear on the display. OK キャンセル Downloaded data is stored in the data folder. BrowserMenu E d i t Press c (Play), and then Down l oaded. 「曲タイトル△△△」 オフィシャる?au press % (Reg). Saved ...
-
Page 78: Viewing A Bookmarked Site
Viewing a Bookmarked Site While the standby screen is displayed, press R. Use j to select “Favorite Site,” and then press c (OK). Use j to select a site or folder, and then press c (OK). If you selected a folder, use j to select a site and then press c (OK). -
Page 79: Checking Charges
Checking Charges You can use EZweb to check call charges and communication charges, a list of fee-based services to which you are currently subscribed, and the charges for fee-based services. While the standby screen is displayed, press c11 . Use j to select the item you ■料金照会■ ... -
Page 80: Ez Navi Features
Position Search “ ” 安心ナビ位置確認 This service lets you perform an operation on your A5512CA phone and check the current location of another au phone that has Position Search enabled. There are two types of Position Search service available: “... - Page 81 “Going-out Menu” A menu of useful options you can use while you are out. The latest news and featured information オススメ (New) • “おためしナビ” (Navi Demo) provides a demo of voice navigation. 乗換検索 (Transfer Search) Searchable source of train transfer and timetable information ナビ...
-
Page 82: Ez Navi Walk Menu
EZ Navi Walk Menu Registering Your Home I live here Location You can use “My Spot” to register locations you go to often (your home, your place of work, your friends’ homes, shops, etc.) for quick and easy display of routes and maps when you need them. Example: Registering your current location as “Home”... - Page 83 Select “ 自宅 ” (Home), and then press & (Menu). Press 1 (Edit). Use j to select “No GPS Info,” and then press c (Edit). Press 1 (My Map). Press c (OK). Gett i ng GPS Info 自宅 was comp l e ted. Accu Leve l (A) ...
- Page 84 Press & (Reg). This registers your current location as home. Note • You also need to perform an initialization procedure before you can use this service. If you have not performed initialization yet, refer to “Initializing E-mail and EZweb” (page 21). •...
-
Page 85: Return Home
Return Home In order to use the following procedure to return home, you first need to register your home position. To perform the Return Home procedure, perform steps 1 through 3 under “Registering Your Home Location” (page 80), and then performing the following steps. -
Page 86: Smart Mode
Smart Mode Smart Mode lets you limit operation to the telephone function, address book, camera, e-mail, C-mail, EZweb, and other frequently used functions, which simplifies operation. Entering Smart Mode While the standby screen is displayed, press Use a to select “mode setting,”... -
Page 87: Exiting Smart Mode
Exiting Smart Mode While the standby screen is displayed, press Use j to select “SETTINGS,” and then press c (Select). Use j to select “SmartMode OFF,” and then press c (Select). Press 1 (Yes). This returns to Usual Mode. -
Page 88: Using The Smart Mode Main Menu
Using the Smart Mode Main Menu Smart Mode has its own special main menu. You can switch between the two available Smart Mode main menu styles by pressing & (Switch). & (Switch) & (Switch) Menu Item Description Photo1 Photo2 For selecting the photo or movie recording, CAMERA... - Page 89 Menu Item Description Calendar Calculator For using the calendar, calculator, and TOOLS Alarm Clock other tools Countdown Timer Stopwatch Incoming Tone Volume Wallpaper Easy-to-see For changing the incoming tone, wallpaper, and character size, for turning Manner Font Size SETTINGS Mode on and off, and for turning Smart Mode off Voice Mail Manner Mode...
-
Page 90: Adding Data To The Address Book In Smart Mode
Adding Data to the Address Book in Smart Mode While the standby screen is displayed, press &. Press 2 (Register), and then press c (Fix). Enter the name and then press c (OK). To input text “Inputting Characters” (page 98) →... - Page 91 Press 1 (Yes). Press 3 (Input By Myself). You can also select data in incoming records and outgoing records. Enter the phone number, and then press c (OK). When entering the number of a standard phone, be sure to include the area code.
- Page 92 Enter the e-mail address, and then press c (OK). To input an e-mail address → “Inputting an E-mail Address” (page 99) Press 2 (No). Press c (Reg). XXXX △△△ □□□ □□□ Note • In the Smart Mode, you can input “Name,” “Reading,” “Phone Number1,” “E-mail Address1,”...
-
Page 93: Using The Address Book In Smart Mode
Using the Address Book in Smart Mode While the standby screen is on the display, press & and then 1 (Look). Use a to select the address book record you want, and then press c (Select). Press 3 (Read Data). 1 (Call): Dials the number of the selected record. -
Page 94: Creating And Sending E-Mail Messages In Smart Mode
Creating and Sending E-mail Messages in Smart Mode While the standby screen is displayed, press Press 1 (E-Mail). Press 1 (Create Mail). Press 1 (Address Book). You can also input data with “Sending Records,” “Receiving Records,” and “Input By Myself.”... - Page 95 Use a to select the address book record you want, and then press c (Select). Press c (Select). △△△ □□□ □□□ If an address book record has more than one e-mail address, only the address that is specified as the usual e-mail address is displayed in the Smart Mode.
- Page 96 Enter the body text and then press c (OK). To input text “Inputting Characters” (page 98) → Press 2 (No). You could also press 1 (Yes) to select a photo in the data folder and attach it to the e-mail message. In Smart Mode, an e-mail message can have only one attachment.
-
Page 97: Shooting A Photo In The Smart Mode
Shooting a Photo in the Smart Mode While the standby screen is displayed, press c , use j to select “CAMERA,” and then press c (Select). Press 1 (Photo1). Photo 1 Wallpaper 240×320 Photo 2 VGA 640×480 Point the lens at the subject and then press c (Shutter). -
Page 98: Viewing Photos In The Smart Mode
Viewing Photos in the Smart Mode While the standby screen is displayed, press c , use j to select “DATA FOLDER,” and then press c (Select). Use j to select “Photo Folder,” and then press c (Select). Use j to select a folder, and then press c (Select). - Page 99 Press 1 (Play). 2 (Delete): Deletes data. 3 (Attach E-Mail): Displays a screen for composing an e-mail message with an attachment. To create an e-mail message → Perform the procedure starting from step 4 under “Creating and Sending E-mail Messages in Smart Mode”...
-
Page 100: Inputting Characters
Inputting Characters Input characters using keypad keys 0 through 9. The table below shows the characters each key cycles through when you press it. Number of Presses ̲ ˜ 0 . @ - ̲ / : ! ? ˜ ( ) # + , ^ ;... -
Page 101: Inputting An E-Mail Address
Inputting an E-mail Address k Inputting “mark@ezweb.ne.jp” In this example, we will input “mark@ezweb.ne.jp” for “E-Mail Adrs1.” To input “E-Mail Adrs1,” perform steps 1 through 7 under “Creating a New Address Book Record” (page 38), and then perform the following steps. Input “mark.”... -
Page 102: Pictographs And Preset Phrases
Pictographs and Preset Phrases The following procedure shows how to input pictographs and preset phrases on the text input screen. Press % (Char), and then (Image). You can also select a pictograph by pressing #. Use a to select the pictograph you want, and then press c (Select). - Page 103 Use j to select the preset XXXX phrase you want, and then △△△ press c (OK). Here we will select “Happy birthday!”. You can also input “Happy birthday!” by pressing The resulting input is “ Happy birthday!”. Note The following shows the input screens for symbols (double-byte) and emoticons.
-
Page 104: Other Functions
Other Functions In addition to the functions covered in this Basic Manual, your A5512CA also has the following features. Barcode Reader Serial Shot (Photo) You can use the camera to read QR You can shoot up to nine consecutive codes and barcodes. -
Page 105: Troubleshooting
Troubleshooting Reference Symptom What to check What to do Page The phone Is the battery pack does not turn Correctly install the battery pack. — installed correctly ? Is the battery pack Charge the battery pack. P.12 charged ? Are you holding down Hold down F for at least 1.5 seconds to F for at least 1.5 P.15... -
Page 106: If You Lose Your A5512Ca
Use the following procedure to specify a time frame, a phone number, and a number of calls count. Remote Auto Lock will disable your A5512CA if the specified number of calls is placed to it without being answered from the specified phone number during the specified time frame. - Page 107 Remote auto lock is triggered and you will hear an announcement about auto lock after your A5512CA receives the specified number of calls. Triggering of Remote Auto Lock will cause your A5512CA to turn off and then back on again automatically.
-
Page 108: Hot Key
Hot Key When you have Hot Key turned on, holding down 0 for about one second while the standby screen is displayed will dial a preset phone number or sound the Hot Buzzer. Hot Dial With Hot Dial, holding down 0 for about one second will dial a preset phone number. -
Page 109: Extension Mode
When the battery pack level goes low, Extension Mode automatically turns off signal emission and limits the functions you can use in order to conserve remaining power. It keeps the A5512CA operating longer when you are unable to recharge the battery pack right away. -
Page 110: Index
Hot Dial ..........106 Desktop holder ......10, 12 Disaster Message Board Service ..6 Included items ........10 Display indicators ......18 Incoming records ......30 Display language ......22 Inital settings Domain name ........24 A5512CA ......... 16... - Page 111 E-mail and EZweb ......21 Personal identification numbers and Inputting characters ......98 passwords ........27 Inputting an e-mail address ..... 99 Photo Inputting pictographs ..... 100 Photo Folder ........61 Inputting preset phrases ....100 Reshooting a photo ......61 Sending a photo by e-mail ....
- Page 112 Sales: KDDI Corporation 古紙配合率100%再生紙を使用しています Okinawa Cellular Telephone Company auオンラインマニュアル へのアクセスはこちら Manufactured by CASIO COMPUTER CO., LTD. Cellphone and PHS operators collect and recycle unused telephones, batteries and battery chargers at stores bearing the MN5650YAA-1 logo regardless of brand and...