Table of Contents
Advertisement
Quick Links
RCP7011MC.NA1UPP_RV0040M
VCR & DVD PLAYER / RECORDER
User manual
Thank you for choosing Philips.
Need help fast?
Read your Quick Use/Start Guide and/or
Owner's Manual first for quick tips
that make using your Philips product
more enjoyable.
If you have read your instructions
and still need assistance,
you may access our online help at
www.usasupport.philips.com
1-888-PHILIPS (744-5477)
while with your product
(and Model / Serial number)
Les Guide d'utilisation rapide et Manuel de
l'utilisateur regorgent d'astuces destinées à
simplifier l'utilisation de votre produit Philips.
Toutefois, si vous ne parvenez pas à résoudre
votre probléme, vous pouvez accéder à
or call
1-888-PHILIPS (744-5477) (English speaking)
Philips vous remercie de
votre confiance.
Besoin d'une aide
rapide?
notre aide en ligne à l'adresse
www.usasupport.philips.com
ou formez le
1-800-661-6162 (Francophone)
Veillez à avoir votre produit à
portée de main
(et model / serial nombre)
DVDR3320V
Gracias por escoger Philips.
Necesita ayuda
inmediata?
Lea primero la Guía de uso rápido o el
Manual del usuario, en donde encontrará
consejos que le ayudarán a disfrutar
plenamente de su producto Philips.
Si después de leerlo aún necesita ayuda,
consulte nuestro servicio de
asistencia en línea en
www.usasupport.philips.com
o llame al teléfono
1-888-PHILIPS (744-5477)
y tenga a mano el producto
(y número de model / serial)
Advertisement
Table of Contents

Related Manuals for Philips DVDR3320V/37B


Summary of Contents for Philips DVDR3320V/37B
- Page 1 Thank you for choosing Philips. Need help fast? Read your Quick Use/Start Guide and/or Owner's Manual first for quick tips that make using your Philips product more enjoyable. If you have read your instructions and still need assistance, you may access our online help at www.usasupport.philips.com...
- Page 2 Return your Product Registration Card today to get the very most from your purchase. Registering your model with PHILIPS makes you eligible for all of the valuable benefits listed below, so don't miss out. Complete and return your Product Registration Card at once to ensure:...
-
Page 3: Important Safety Instructions
IMPORTANT SAFETY INSTRUCTIONS Read these instructions. Keep these instructions. Heed all warnings. Follow all instructions. Do not use this apparatus near water. Clean only with dry cloth. Do not block any ventilation openings. Install in accordance with the manufacturer´s instructions. Do not install near any heat sources such as radiators, heat registers, stoves, or other apparatus (including amplifiers) that... -
Page 5: Table Of Contents
INTRODUCTION Symbol Used in this Manual ....6 About the Symbol Display ... . .6 Notes on Discs ......6 Recordable and Playable Discs . -
Page 6: Symbol Used In This Manual
Introduction To ensure proper use of this product, please read this owner’s manual carefully and retain for future refer- ence. Symbol Used in this Manual Indicates hazards likely to cause harm to the unit itself or other material damage. Note: Indicates special notes and operating fea- tures. -
Page 7: Recordable And Playable Discs
TDK (2.4x) Mitsubishi (4x, 8x) Ricoh (2.4x) Ricoh (2x, 4x, 8x) HP (2.4x, 4x) Philips (4x) Playable Discs DVD (8 cm / 12 cm disc) Discs such as movies that can be pur- chased or rented Audio CD (8 cm / 12 cm disc) -
Page 8: Restrictions On Video Recording
Restrictions on video recording You cannot record copy-protected video using this recorder. Copy-protected video includes DVD-Video discs and some satellite broadcasts. If copy-protected material is encountered during a recording, recording will pause or stop automatically and an error mes- sage will be displayed on-screen. Copyright •... -
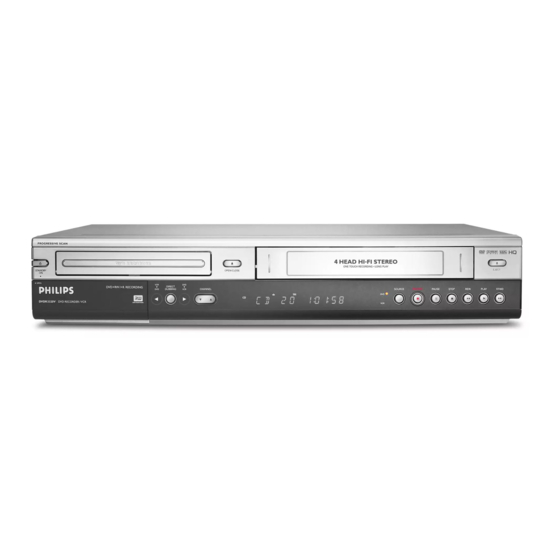
Page 9: Front Panel
Front Panel POWER button and indicator Switches the Recorder ON and OFF. Lights green when the Recorder is turned on. Disc Tray (DVD deck) Insert a disc here. OPEN/CLOSE (Z) Opens or closes the disc tray. Cassette Compartment (VCR deck) Insert a video cassette here. -
Page 10: Function Display Window
Function Display Window PRG TTL Indicates the type of disc loaded. Indicates repeat mode. Indicates when the recorder is in timer recording or a timer recording is programmed. The recorder is recording. Programmed playback active. Indicates current title. A disc is inserted in the DVD deck. A VHS tape is inserted in the VCR deck. -
Page 11: Remote Control
Remote Control AUDIO Selects an audio language (DVD) or an audio channel (CD). REW / FWD (m/M) - DVD: Search backward or forward. - VCR: Rewinds/Advances the tape during the STOP mode, for fast reverse/ forward picture search. CHAPTER Inserts a chapter marker when playing/ recording. -
Page 12: Rear Panel
Rear Panel ANT.IN Connect the antenna to this terminal. AC Power Cord Plug into the power source. AV 1 IN (VIDEO IN /AUDIO IN (Left/Right)) Connect the audio/video output of an external source (Audio system, TV/Monitor, VCR, Camcorder). AV OUT (VIDEO OUT/AUDIO OUT (Left/Right)) Connect to a TV with video and audio inputs. -
Page 13: Connecting An Antenna Or Cable Tv
Connecting an Antenna Connecting an Antenna or Cable TV or Cable TV a Antenna Disconnect the antenna from the rear of the TV and identify the antenna cable. If it is a round 75 ohm coaxial cable connect it directly to the jack marked ANT.IN on your Recorder. -
Page 14: Connection To An Amplifier
RF coaxial connection Connect the RF.OUT jack on the Recorder to the antenna in jack on the TV using the supplied 75-ohm Coaxial Cable (R). How to set the Recorder’s RF output channel 1. When the Recorder is turned off, press and hold CHANNEL (V/v) on the front panel for more than five seconds. - Page 15 Connecting to an amplifier equipped with two chan- nel digital stereo (PCM) or to an Audio/Video receiv- er equipped with a multi-channel decoder (Dolby Digital™, MPEG 2, or DTS) 1. Connect one of the Recorder’s DIGITAL AUDIO OUT jacks (COAXIAL X) to the corresponding in jack on your amplifier.
-
Page 16: Initial Settings
Initial Settings Initial Settings In this menu system, there are several ways to cus- tomize the settings provided. Most menus consist of three levels to set up the options, but some require greater depth for the variety of settings. General Operation 1. - Page 17 To Add or Erase Channels from Memory This feature allows you to add to or erase channels from memory manually. 1. Select the [CH. Add/Del] option. 2. Press B to move to the third level. [Edit] icon is highlighted. 3. Press and the Channel Edit menu appears.
-
Page 18: Language Settings
Display Mode Selects how to display a wide picture on the screen when [4:3] is selected in [TV Aspect]. [Letter Box] Displays a wide picture with bands on the upper and lower portions of the screen. [Pan Scan] Automatically displays a wide picture on the entire screen and cuts off the portions that do not fit. -
Page 19: Audio Settings
Disc Menu/Audio/Subtitle [Original] : Refers to the original language in which the disc was recorded. [Other code] : To select another language, press number buttons then to enter the corresponding 4-digit number according to the language code list in the reference chapter (see page 48). -
Page 20: Lock (Parental Control) Settings
Lock (Parental Control) Settings Rating Blocks playback of rated DVDs based on their con- tent. Not all discs are rated. 1. Select [Rating] option then press B. 2. To access the Rating, Password and Area Code features, you must input the 4-digit security code you created. -
Page 21: Recording Settings
Recording Settings Disc Record Mode You can set the picture quality for recording; XP (Excellent quality), SP (Standard quality), LP (Low quality), EP (Extend quality). 1. Select the [Disc Record Mode] option then press 2. Use v / V to select a desired Disc Record Mode (XP, SP, LP or EP). - Page 22 Finalize Finalizing a disc enables it to be played on a regular DVD player or computer equipped with DVD-ROM drives. Finalizing a Video mode disc creates a menu screen for navigating the disc. This is accessed by pressing LIST/ DISC MENU or TITLE.
-
Page 23: General Explanation Of On-Screen Display
General Explanation of General Explanation of On-Screen Display On-Screen Display Some DVDs require specific operation or allow only limited operation during playback. When this occurs, is displayed, action prohibited or not available. Displaying Information While Watching TV While watching TV, press DISPLAY to display/ remove the information displayed on-screen. -
Page 24: Playback
Playback VCR T ape Playback VCR T ape Playback Press VCR button to select the device to be operated. Basic Instructions 1. Insert a pre-recorded video cassette. indicator lights and the Recorder pow- ers on automatically. 2. If a tape without a safety tab is inserted the unit starts playback automatically. -
Page 25: Playing A Dvd
Counter Memory Function This feature is useful if there is a section of tape you want to view immediately after recording or if you want to return to the same point several times. 1. Begin recording or playing a tape. 2. -
Page 26: Time Search
Time Search To start playing at any chosen time on the disc: 1. Press DISPLAY during playback. The time search box shows the elapsed playing time. 2. Press v / V to select the time clock icon and [--:--:--] appears. 3. -
Page 27: Title Menu
Title Menu 1. Press TITLE. If the current title has a menu, the menu appears on the screen. Otherwise, the disc menu may not appear. 2. The menu offers features such as camera angles, spoken language and subtitle options, and chap- ters for the title. -
Page 28: Playing Audio Cd Or
Playing an Audio CD or Playing an Audio CD or MP3/W indow Media MP3/W indow Media files files The Recorder can play Audio CDs and MP3/Window Media Audio files on CD-ROM, CD-R/RW DVD+R/RW discs. Before playing MP3/Window Media [Notes on MP3/Window Media Audio Recordings] on page 30. -
Page 29: Notes On Mp3/Window Media
Program Playback with Program Playback with CD and MP3 / W indow CD and MP3 / W indow Media Audio files Media Audio files The program function enables you to store your favourite tracks from any disc in the player memory. Program can contain 99 tracks (Audio CD) or 256 tracks (MP3/Window Media Audio). -
Page 30: Viewing A Jpeg File
iewing a JPEG File iewing a JPEG File This unit can play JPEG files on CD-R/RW or DVD+R/RW discs. Before playing JPEG recordings, read [About JPEG image files] on page 31. 1. Insert a disc and close the tray. The JPEG menu appears on the TV screen. -
Page 31: Recording
Recording About DVD recording About DVD recording Notes: • This Recorder cannot record CD-R or CD-RW discs. • Fingerprints and small scratches on a disc can affect playback and/or recording performance. Please take proper care of your discs. • The company does not hold any responsibility to compensate the contents which should have been recorded, and any losses or damages (e.g. -
Page 32: Basic Recording From A Tv
Basic Recording from a TV Basic Recording from a TV Follow the instructions below to record a TV program. Recording starts immediately and continues until the disc or tape is full or you stop the recording. 1. Switch on the Recorder, select the device (VCR or DVD) for Recording and load a recordable disc or tape. -
Page 33: Timer Recording
To record one TV program while watching another 1. Press TV/VCR to select the TV mode during recording. The TV indicator appears. 2. Using the TV, select the channel to be viewed. Tip (VCR mode only) Always use PAUSE/STEP (X) for best results when making changes during recording . -
Page 34: Additional Information
Timer Recording Troubleshooting Even though the timer is set, the recorder will not record when: • There is no disc (or tape) loaded. • A non-recordable disc (or tape) is loaded. • Disc Protect is set to ON in the Disc menu (see page 24). -
Page 35: Dubbing From Vcr To Dvd
Dubbing from VCR to DVD Dubbing from VCR to DVD You can copy the contents of a VHS tape to a DVD using the DUBBING (DUB) button. This allows you to archive your old VHS tapes to DVD. 1. Insert a blank DVD disc in the DVD deck and close the disc tray. -
Page 36: Editing
Editing Title List and Chapter List Menu Overview Using the Title List menu you can edit video content. The editing features available in the Title List menu depend on whether you are editing video on DVD, and whether you’re editing Original content, or a Playlist. -
Page 37: Vr Mode: Original And Playlist Editing
VR Mode: Original and VR Mode: Original and Playlist Editing Playlist Editing Titles, Chapters and Parts Titles in the disc’s original content contain one or more chapters. When you insert a disc’s title into the Playlist, all the chapters within that title also appear. In other words, chapters in the Playlist behave exact- ly as chapters on a DVD-Video disc do. -
Page 38: Deleting An Original Or Playlist
Deleting an Original T Deleting an Original T If you choose to delete a title from the Original menu, the title is actually deleted from the disc and the remaining time available for recording increases. 1. Use b / B / v / V to choose a title you want to delete on the [Title List] menu then press OK. -
Page 39: Hide A Chapter / Title
Hide a Chapter Hide a Chapter You can skip playing chapters without deleting from the disc. 1. Use v V b B to choose a chapter you want to hide on the [Chapter List] menu, then press OK. Options appear on the left side of the screen. 2. -
Page 40: Overwriting Recording
Overwriting Recording Overwriting Recording To overwrite a new video recording on a previously recorded title, follow these steps. This feature is not available for DVD+Rs, that always record at the end of the Disc. 1. Select input source you want to record (TV chan- nel, AV1-2). -
Page 41: Playing Your Recordings On Other Dvd Players (Finalizing A Disc)
Playing our Recordings Playing our Recordings on Other DVD Players on Other DVD Players (Finalizing a Disc) (Finalizing a Disc) Most regular DVD players can play finalized discs recorded in Video mode, finalized DVD+R or DVD+RWs. Check the manual that came with the other player to check what formats of discs it will play. -
Page 42: Reference
Reference Language Codes Use this list to input your desired language for the following initial settings: Disc Audio, Disc Subtitle, Disc Menu. Language Code Language Abkhazian 6566 Fiji Afar 6565 Finnish Afrikaans 6570 French Albanian 8381 Frisian Ameharic 6577 Galician Arabic 6582 Georgian... -
Page 43: Troubleshooting
roubleshooting roubleshooting Check the following guide for the possible cause of a problem before contacting service. Symptom No power. The power cord is disconnected. No picture. The TV is not set to receive Recorder signal output. The video cable is not connected securely. - Page 44 Symptom The Recorder does not No disc is inserted. start playback. No tape is inserted. An unplayable disc is inserted. The disc is placed upside down. The disc is not placed within the guide. The disc is dirty. The Rating level is set. Video tape cannot be Is the cassette compartment empty? inserted.
-
Page 45: Reset The Recorder
Symptom Antenna or cables are loose. Picture or sound of broadcasting channel is Wrong Tuning Band is selected in the weak or missing. Recorder Setup menu. The disc was recorded in Video mode. Can’t play disc record- ed on this Recorder on Some players will not play even a another DVD player. -
Page 46: Specifications
Specifications Specifications General Power requirements Power consumption Dimensions (approx.) Mass (approx.) Operating temperature Operating humidity Signal system Recording Recording format Recordable discs Recordable time Video recording format Sampling frequency Compression format Audio recording format Sampling frequency Compression format VCR Specifications Head system Timer Tape speed... - Page 47 DVD Specifications Laser system Semiconductor laser, wavelength 650 nm Frequency response DVD (PCM 48 kHz): 8 Hz to 22 kHz, CD: 8 Hz to 20 kHz Signal-to-noise ratio More than 95dB Harmonic distortion Less than 0.008% Dynamic range More than 90 dB Inputs ANTENNA IN Antenna or CATV input, 75 ohms...
- Page 48 Ship product via a traceable carrier. When it is necessary for you to ship the product to Philips for repair, you will pay the shipping cost for shipment to Philips. Philips will pay the ship- ping costs when returning the product to you.