
Related Manuals for Philips HSB4383/98


Summary of Contents for Philips HSB4383/98
- Page 1 Register your product and get support at HSB4383/98 www.philips.com/welcome User manual...
-
Page 2: Table Of Contents
Find the correct viewing channel Select the correct TV system Select menu display language Turn on Progressive Scan Turn off progressive scan manually Use Philips EasyLink 5 Play Play discs Use the disc menu Select an audio language Select a subtitle language... - Page 3 10 Product information Specifi cations Amplifi er Disc Tuner (FM) Speakers General information Supported disc formats USB playability information 11 Troubleshooting 12 Appendix Mount to a wall What’s in the supplied mounting kit 34 What else you’ll need Mount the main unit and speakers...
-
Page 4: Important
1 Important Know these safety symbols This ‘bolt of lightning’ indicates uninsulated material within your unit may cause an electrical shock. For the safety of everyone in your household, please do not remove product covering. The ‘exclamation point’ calls attention to features for which you should read the enclosed literature closely to prevent operating and maintenance problems. -
Page 5: Notice
Notice Any changes or modifi cations made to this device that are not expressly approved by Philips Consumer Lifestyle may void the user’s authority to operate the equipment. Environmental information All unnecessary packaging has been omitted. - Page 6 HDMI, and HDMI logo and High-Defi nition Multimedia Interface are trademarks or registered trademarks of HDMI licensing LLC. DivX, DivX Certifi ed, and associated logos are trademarks of DivX, Inc. and are used under license. Offi cial DivX® Ultra Certifi ed product. Plays all versions of DivX®...
-
Page 7: Your Dvd Home Theater System
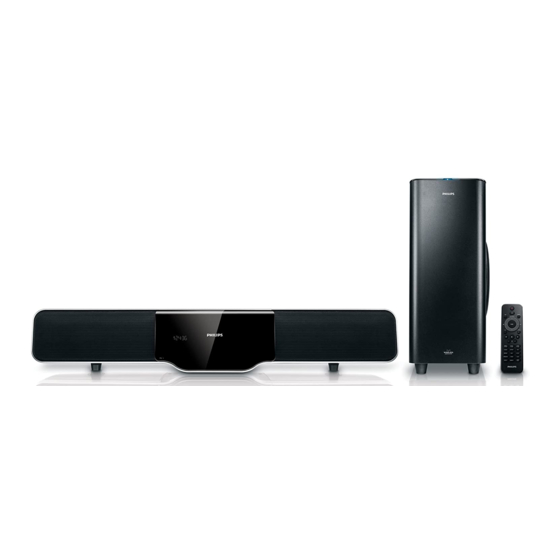
2 Your DVD Home Theater System Congratulations on your purchase, and welcome to Philips! To fully benefi t from the support that Philips offers, register your product at www.Philips.com/welcome. This DVD Home Theater System is designed to complement your home perfectly. Enjoy the DVD Home Theater System with multi-channel surround sound and excellent picture quality. -
Page 8: Overview Of The Main Unit
Overview of the main unit Caution • Use of controls or adjustments or performance of procedures other than herein may result in hazardous radiation exposure or other unsafe operation. a SOURCE • Select a source. b MP3 LINK • Jack for an external audio device. •... -
Page 9: Overview Of The Remote Control
Overview of the remote control • Turn on the unit or switch to standby mode. b Source selection keys • Select a source. OPTIONS • Access or exit the system setup menu. • For menus: navigate up/down. • Move an enlarged picture up/down. •... - Page 10 o ZOOM • For pictures or video: zoom in/out. p REPEAT A-B • Repeat a specifi c section within a track/disc. q REPEAT /PROGRAM • Selects or turns off repeat or shuffl e mode. • Program radio stations. r SUBTITLE •...
-
Page 11: Connect
3 Connect Place the unit Place the unit near to the TV. Keep the speakers at the normal listening ear-level and directly parallel to the listening area. Place the subwoofer at the corner of the room or at least one meter away from the Note •... -
Page 12: Option 1: Connect Through Hdmi
• Option 2: Connect through SCART (for a standard TV). • Option 3: connect through component video (for a standard TV or Progressive Scan TV). • Option 4: connect through composite video (CVBS) (for a standard TV). Option 1: Connect through HDMI HDMI IN Connect HDMI (High Defi... -
Page 13: Option 3: Connect Through Composite Video
Option 3: Connect through composite video Connect the yellow plugs of the supplied AV cable to: • VIDEO OUT socket on this unit. • the video input socket on the TV. Connect audio cables L AUDIO OUT R To play sound from the TV through this unit, connect audio cables (red/white - not supplied) to: •... - Page 14 Connect the power plug of the digital wireless subwoofer to the wall outlet.
-
Page 15: Get Started
Always follow the instructions in this chapter in sequence. If you contact Philips, you will be asked for the model and serial number of this apparatus. The model number and serial number are on the bottom of the apparatus. -
Page 16: Find The Correct Viewing Channel
• Go to the lowest channel on your TV, then press the Channel Down button until you see the Philips screen. • Press the source button repeatedly on the remote control of your TV. •... -
Page 17: Turn Off Progressive Scan Manually
HDMI connectors can be controlled by a single remote control. Note • Philips does not guarantee 100% interoperability with all HDMI CEC devices. Turn on the HDMI CEC operations on the TV or other connected devices. See TVs/ devices manual for details. -
Page 18: Play
5 Play Note • With some disc/fi le types, play may differ. Play discs Caution • Never look at the laser beam inside the unit. • Risk of product damage! Never play discs with accessories such as disc stabilizer rings or disc treatment sheets. -
Page 19: Play From Usb
Within fi ve seconds, press the delay time for audio output. Play from USB Note • Ensure that the USB device contains playable music, pictures or video. Connect the supplied USB extension cable • the USB device • socket Press USB to select the USB source. »... -
Page 20: Play Control
• For USB devices, press • A contents menu is displayed. Select a folder, then press OK. Select a fi le to play, then press • To return to the main menu, press until the ‘Previous’ folder is selected, then press OK. •... -
Page 21: Picture View Options
Picture view options Start slideshow of pictures During play, press OPTIONS. » The thumbnails of 12 pictures are displayed. Select a fi le, then press slideshow play. • To go to previous or next screen display, press / . • To select a picture, press the cursor buttons. -
Page 22: Adjust Settings
• You must turn on the HDMI CEC operations on the TV/devices before you can enjoy the EasyLink controls. See the TV/devices manual for details. Philips does not guarantee 100% interoperability with all HDMI CEC compliant devices. [Display Dim] Turn on or off adjustment of display brightness level. -
Page 23: Audio Setup
[Sleep Timer] Switches to standby automatically after the preset time. • [15 mins], [30 mins], [45 mins], [60 mins] – select the count down time before the apparatus switches to standby. • [Off] – disable sleep mode. [DivX(R) VOD Code] Display the DivX®... -
Page 24: Preference Setup
• [Soft] – warm color setting. • [Personal] – customize the color setting. Adjust the level of brightness, contrast, sharpness/tint and color saturation. [HDMI Video] – Select the HDMI video output resolution that is compatible with your TV display capability. Option Description [Auto]... - Page 25 Display the software version of this apparatus. • This information is required when you want to fi nd out if a newest software version is available at the Philips website that you may download and install on this apparatus. [Default]...
-
Page 26: Tune To Fm Radio Stations
7 Tune to FM radio stations Ensure that you have connected and fully extended the supplied FM antenna. Press RADIO. Press and hold / ( / ). When the frequency indication starts to change, release the button. » The FM tuner tunes to a station with strong reception automatically. -
Page 27: Adjust Volume Level And Sound Effect
8 Adjust volume level and sound effect Adjust volume level During play, press +/- to increase/ decrease the volume level. Select a sound effect Note • You cannot use different sound effects at the same time. Select a preset sound effect During play, press SOUND repeatedly to select: •... -
Page 28: Other Features
9 Other features Set the sleep timer When the unit is turned on, press SLEEP repeatedly to select a set period of time (in minutes). » The unit turns off automatically after the set period of time. • You can also set the sleep timer in the system setup menu . -
Page 29: Product Information
10 Product information Note • Product information is subject to change without prior notice. Specifi cations Amplifi er Rated Output Power 2X60+120WRMS Frequency Response 20 -20000 Hz, ± 3dB Signal to Noise Ratio >67dB Aux Input 500mV RMS 20kohm Disc Laser Type Semiconductor Disc Diameter... -
Page 30: General Information
General information AC power 110 - 127 V / 220 - 240 V, ~50/60 Hz Operation Power Main unit: 50W; Consumption Subwoofer: 100W Normal standby Power <4W Consumption Low Standby Power <1W Consumption Composite Video Output 1.0Vp-p, 75ohm Optical Input 0.5Vpp ±... -
Page 31: 11 Troubleshooting
If the problem remains unsolved, go to the Philips web site (www.Philips.com/support). When you contact Philips, ensure that your unit is nearby and the model number and serial number are available . No power •... - Page 32 • Check the disc type, color system and regional code. Check for any scratches or smudges on the disc. • Press OPTIONS to exit the system setup menu. • Disable the password for parental control or change the rating level. •...
-
Page 33: 12 Appendix
12 Appendix Mount to a wall Caution • Risk of product damage! Always consult professional personnel to safely mount the product to a wall. • Risk of injury! Ensure that no supply ducts such as gas, water or electricity are harmed when you drill the holes. - Page 34 Hook the main unit and speakers in place.
- Page 35 © 2009 Koninklijke Philips Electronics N.V. All rights reserved.