
Related Manuals for Philips 42PFL5422/96


Summary of Contents for Philips 42PFL5422/96
- Page 1 飛利浦多媒體液晶顯示器 使用手冊 型號:32PFL5422 37PFL5422 42PFL5422 32PFL5422 37PFL5422 42PFL5422 P/N: 4J.0D101.001...
- Page 2 <Memo>...
-
Page 3: Table Of Contents
目次 前言 ... 1 安全使用說明 ... 2 檢查包裝內容 ... 3 認識您的液晶顯示器 ... 3 前視圖 ...3 控制面板 ( 右側 ) ...4 外接裝置面板 ( 左側 ) ...5 連接 PC 視訊輸入 ... 6 連接耳機輸出 ... 6 連接電源線 ... 7 基本操作 ... 8 開機與待機 ...8 打開顯示器的電源... - Page 4 <Memo> 目次...
- Page 5 前言 感謝您選購了飛利浦多媒體液晶顯示器。 為能正確的操作使用,請仔細閱讀這本使用說明書 • 請妥善保管使用說明書及保證書,萬一在使用中產生疑問或發生問題 時,它也許能給您提供一些幫助。 • 生產機號在品質管理上是很重要的,請確認顯示器上的生產機號與保 證書上的生產機號是否一致。 為了安全起見,請特別注意下列之各事項 緊急處理方法: • 若有異常發生時,請拔掉電源插頭並與服務中心連絡。 • 若是發生有影無聲,有聲無影,發出怪聲或怪味等的故障情形下,仍 繼績使用顯示器是有危險性的,請立即拔掉電源插頭,連絡服務中心 進行維修。 • 請切勿自行拆下顯示器的後蓋,因為內部有觸電的危險,內部的檢查 及調整,請委託由專業服務人員處理。 當您使用顯示器時,為了您及府上的安全,請注意下列各事項: • 請切勿將電源插頭插於多重插座上。 • 請勿將後蓋的通風孔蓋住或置放障礙物,請將顯示器置放於通風良好 之處。 • 清潔時,請不要忘了拔下電源插頭。 • 使用電源電壓為 AC 100 - 240V,50/60 Hz。 • 本顯示器雖然經過嚴密和特殊環境的測試,您仍然有可能會發現在螢 幕上有極少數失去活性的亮點或暗點會顯示固定的顏色或呈現黑色。 請注意這並不會影響您所購買之產品的效能,因為通常這些亮點或暗 點在正常的觀看距離下是很難看見的。 •...
-
Page 6: 安全使用說明
安全使用說明 使用本機器前,請注意下列指示: 1. 請詳讀及妥善保存此說明書。 2. 請依照機器本身所標示之說明操作此機器。 3. 清潔機器時請將電源線拔掉,請用濕軟布擦拭,若不易擦拭乾淨則 可用軟布沾酒精擦拭,勿用乾布,噴霧式清潔劑或有機溶劑擦拭面 板,以免刮傷或傷害液晶表面處理造成刮痕或亮度不均勻現象。不 可以使用任何方式對面板做出刮戳磨拍打撞擊等動作。 4. 勿讓任何物體掉落或插入機器,並勿讓任何液體濺入機身,請勿將 本機器置於靠近水源處。 5. 請將機器放置於平穩的平面上,以避免掉落發生危險。 6. 機器外殼上的通風口,是提供本機散熱用,請勿將本機器平放於 床、沙發、地毯上以免阻礙通風孔之散熱功能;另顯示器安裝於電 視櫃或牆上時,下方及左右方應保持 10 公分通風空間,正上方保持 30 公分通風空間,勿將顯示器置於狹窄空間,避免裝置於任何阻礙 空氣流動的狹窄裝潢設施內;請確保本機橫向擺放,避免順 / 逆時 針旋轉 90 度之垂直擺放方式,以免散熱不良傷害電子零件。 7. 請使用機器上標示之電源電壓,若不清楚時,請向經銷商查詢以避 免發生危險。 8. 為防止電擊危險,插頭要完全置入插座,本機器的電源線插頭為 3 蕊,此為安全裝置,若您的插座無法使用,請找技術人員更換插 座,切勿自行將電源線插頭之第三蕊移除,以確保安全。 9. 電源線請勿靠近發熱器具,電源線上請勿上放置任何物品,亦避免 踐踏或損傷。... -
Page 7: 檢查包裝內容
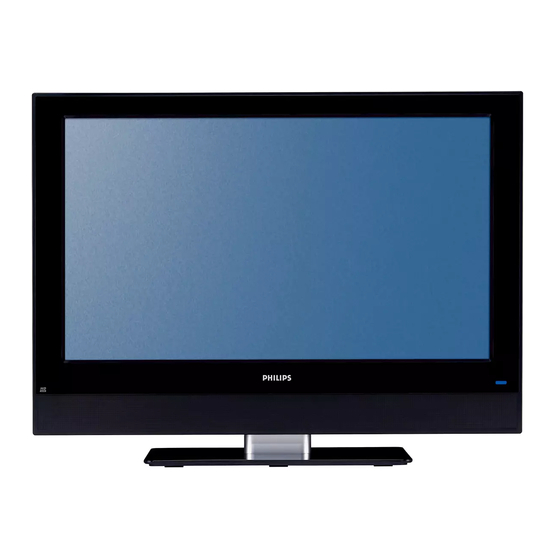
檢查包裝內容 在打開包裝後,請檢查下列所有物品和配件是否齊全: 多媒體液晶顯示器 (x1) 電源線 (x1) 本產品所提供的電源線類型可能會隨您購買地點不同而與上圖所示有所差異。 如果有任何物品和配件遺漏或損壞,請馬上與您購買產品的經銷商連 絡,並告訴他們詳細情況。 本使用手冊請妥善保存,以方便隨時參考。 如何正確處理產品包裝材料: • 產品的硬紙板包裝箱 ( 或包裝盒 ) 都是可以回收的。 • 請勿將所有塑膠袋放置在兒童容易拿取的地方。 • 若可能,請妥善收好所有的包裝材料,以方便將來運送本顯示器時使用。 認識您的液晶顯示器 前視圖 編號 名稱 說明 揚聲器 提供高音質且逼真的音效輸出。 • 當顯示器電源開啟時,此指示燈亮綠色。 • 當顯示器電源處於待機狀態時,此指示燈亮紅色。 • 當顯示器連接到電腦,且電腦進入休眠狀態時,此 電源指示燈 請參閱第 8 頁的 「開機與待機」 接收從遙控器傳送過來的訊號。 請勿將任何物體放置 遙控訊號感應窗... -
Page 8: 控制面板 ( 右側 )
控制面板 ( 右側 ) 編號 名稱 耳機插孔 CH ( 選擇 ) +/- 按鈕 VOLUME ( 音量 ) +/- 按鈕 MENU ( 選單 ) 按鈕 ( 電源 / 待機 ) 按鈕 認識您的液晶顯示器 說明 此插孔可讓您外接耳機以提供聲音輸出使用。當 外接耳機一接上時,顯示器內建的揚聲器會立刻 變成靜音狀態,所有聲音改由耳機輸出。請參閱 第 6 頁的 「連接耳機輸出」 螢幕顯示選單中,按這些按鈕可進行上下選擇。 請參閱第... -
Page 9: 外接裝置面板 ( 左側 )
外接裝置面板 ( 左側 ) 編號 名稱 PC D-SUB ( 電腦 視訊輸入 ) PC AUDIO ( 電腦 音訊輸入 ) 說明 用以連接至電腦的視訊 (D-Sub) 輸出端子。請參閱 第 6 頁的 「連接 PC 視訊輸入」 用以連接至電腦的視訊輸出所對應的音訊輸出端 子。請參閱第 6 頁的 「連接 PC 視訊輸入」 。 。 認識您的液晶顯示器... -
Page 10: 連接 Pc 視訊輸入
連接 PC 視訊輸入 1. 使用 Mini D-Sub 15 針訊號線 ( 需另購 ) ,將電腦 (PC) 的 D-Sub 視訊輸出埠連 接至顯示器的 PC D-SUB ( 電腦訊號輸 入 ) 端子。 2. 使用適當的立體聲音訊訊號線 (3.5mm Mini-jack 規格,需另購 ) ,將 PC 的音 源輸出插孔連接至顯示器的 PC AUDIO ( 電腦音源 ) 輸入端子。 若您要觀賞... -
Page 11: 連接電源線
連接電源線 1. 將電源線的一端連接到顯示器後方的 AC-IN 電源插孔。 2. 將電源線的另一端連接到電源插座上。 顯示器將會進入待機狀態, 且電源指示燈會亮紅色。 AC-IN 電源插孔 電源插座 電源線 請務必使用符合您當地電源規範的電源線。 勿使用外表已毀損的電源線。切勿 自行變更電源線的插頭種類。 當使用延長線或多頭插座時,請特別注意不要超 過其負載。 警告: 本顯示器是以最高的安全性為設計和製造原則,然而若不當使用,可能 會有觸電或引發火災的危險。本顯示器內部沒有您可以自行維修的零件。請勿 自行分解顯示器或嘗試進行維修,以免發生危險。 連接電源線... -
Page 12: 基本操作
基本操作 開機與待機 打開顯示器的電源 將電源線插入電源插座後,顯示器將會自動進入待機狀態,且電源指示 燈將會亮紅色。按顯示器上的 機,且電源指示燈會亮綠色。 讓顯示器進入待機狀態 在顯示器開機的狀態下,按顯示器上的 將進入待機模式,且電源指示燈將會亮紅色。 顯示器在待機狀態下仍會消耗少許電力 ( 約 1W)。 調整聲音 調整音量 • 按顯示器上的 VOLUME ( 音量 ) + 按鈕可增加音量。 螢幕上的音量指 示長度將會增加,代表音量正在增加。 • 按顯示器上的 VOLUME ( 音量 ) - 按鈕可降低音量。螢幕上的音量指 示長度將會減少,代表音量正在降低。 螢幕顯示選單 螢幕顯示選單架構 選單項目 • 色溫 • 亮度 •... -
Page 13: 瀏覽螢幕顯示選單
瀏覽螢幕顯示選單 您可以透過螢幕顯示選單調整各種不同的設定。 按顯示器上的 MENU ( 選單 ) 按鈕可顯示螢幕顯示選單 : 設定 影像 聲音 設定 影像選單裡包含影響畫質的設定 螢幕顯示選單中的操作 • 按顯示器上的 CH ( 選擇 ) +、CH ( 選擇 ) - 按鈕可以選取選單選項。 • 按顯示器上的 VOLUME ( 音量 ) + 或 VOLUME ( 音量 ) - 按鈕可以變 更設定。... -
Page 14: 影像選單
影像選單 選單中顯示的選項會因 為輸入訊號的種類不同 而異。 右圖所示的選單選項與 設定僅供參考。 選項 功能 調整影像的整體色彩。 暖色相當於較紅的影像,而冷色則相當於 色溫 較藍的影像。 亮度 用以調整影像的亮度。請參閱下述的 對比 用以調整影像的對比度。請參閱下述的 讓顯示器自動調整電腦輸入訊號的頻率、相位、水平位置與垂直 自動調節 位置,以正常顯示畫面。 手動調整電腦輸入訊號的相位、頻率、水平位置與垂直位置等設 手動調節 定,以正常顯示畫面。 畫面比例 選擇顯示器顯示畫面長寬比例。 調整對比 1. 先將對比度調到最高,再往下調整。 2. 在調整過程中,使亮部細節 ( 如大理石上的紋理 ) 由全白中慢慢浮 現,直到細節不再出現之對比最高值,即為最佳對比。如再降低, 亮部過暗,顏色飽和度及立體感則會消失。 調整亮度 1. 先將亮度調到最低,再往上調整。 2. 在調整過程中,使暗部細節 ( 如主播黑西裝上的紋理 ) 慢慢浮現,直 到細節不再出現之亮度最低值,即為最佳亮度。如再提高,黑色會... -
Page 15: 聲音選單
聲音選單 選單中顯示的選項會因 為輸入訊號的種類不同 而異。 右圖所示的選單選項與 設定僅供參考。 選項 功能 您可以從顯示器預設的幾種智慧聲音模式中選擇一種,以讓聲 智慧聲音 音的播放效果更加生動逼真。您也可以選擇個人設定模式,並 調整屬於您自行設定的智慧聲音模式。 虛擬環繞 開啟或關閉顯示器的環繞音效效果。 設定選單 選單中顯示的選項會因 為輸入訊號的種類不同 而異。 右圖所示的選單選項與 設定僅供參考。 選項 功能 語言 選擇螢幕顯示選單所使用的語言。 訊號來源 選擇觀賞來自其它輸入訊號來源的畫面。 復原設定 重設所有設定並還原回出廠的預設值。 設定 聲音 影像 智慧聲音 聲音 虛擬環繞 設定 聲音選單裡包含影響音質的設定 設定 設定 影像 語言 聲音... -
Page 16: 尺寸圖
尺寸圖 32PFL5422 268.1 117.9 847.3 600.1 653.1 Unit: mm 尺寸圖... -
Page 17: 37Pfl5422
37PFL5422 325.6 Unit: mm 尺寸圖... -
Page 18: 42Pfl5422
42PFL5422 325.6 1082.9 753.7 811.8 Unit: mm 尺寸圖... - Page 19 規格 機型 重量 ( 淨重 ) 尺寸 ( 寬 x 高 x 深,含底 座之概略值 ) 尺寸 ( 寬 x 高 x 深,不含 底座之概略值 ) 畫面尺寸 ( 概略值 ) 畫面比例 液晶面板解析度 液晶面板亮度 ( 典型值 ) 液晶面板對比度 ( 典型值 ) 1500:1 可視角度 ( 左 / 右 / 上 / 下 ) 88 /88 /88 /88 反應時間...
-
Page 20: 支援的 Pc 輸入訊號解析度
支援的 PC 輸入訊號解析度 水平頻率 (KHz) 解析度 640 × 480 31.5 640 × 480 640 × 480 37.5 640 × 480 37.86 720 × 400 31.47 800 × 600 35.16 800 × 600 37.9 800 × 600 46.9 800 × 600 48.08 1024 ×... -
Page 21: 故障排除
故障排除 若您在使用顯示器時遇到問題,請在致電客戶服務中心之前,檢查以下 列表內容,並嘗試以下步驟自行診斷和解決問題以節省您寶貴的時間。 故障現象 可能的原因 • 確定電源線已正確地插在有接地措施的電源插座上。 • 確定您所選擇的輸入來源已連接到正常運作的設備 上。 沒有畫面 • 確定顯示器的電源已經打開。 • 如果您的顯示器以 VGA 模式連接到您的電腦的話, 請按鍵盤上的任一鍵喚醒您的電腦。 • 確定您的顯示器並未接上耳機。 沒有聲音 • 檢查聲音選單中的選項設定。 可能受到了電器設備、汽車、機車或日光燈的干擾。 畫面扭曲或聲音異常 請試著將您的顯示器移到其他位置看看是否有所改善。 • 確定輸入來源訊號線穩固且正確地接在您的液晶顯示 器上。 顏色異常 • 使用螢幕顯示選單將色溫選項設定值恢復到預設值。 • 確定輸入來源訊號線已穩固且正確地接妥。 • 確定輸入來源在您顯示器的範圍內。 影像異常 • 比對輸入來源的規格和您的液晶顯示器的規格。 如果您使用的是 VGA 模式的話,請確定螢幕顯示選單 影像大小不正確... - Page 22 <Memo> 故障排除...
-
Page 23: User Manual
Philips LCD Display User Manual Model: 32PFL5422 37PFL5422 42PFL5422 32PFL5422 37PFL5422 42PFL5422... - Page 24 <Memo>...
- Page 25 Table of Contents Preface ... 1 Important safety information ... 2 Package contents ... 3 Getting to know your display ... 3 Front view ...3 Control panel (right side view) ...4 External terminals panel (left side view) ...5 Connecting the PC input ... 6 Connecting the headset audio output ...
- Page 26 <Memo> Table of Contents...
-
Page 27: Preface
Preface Thank you for purchasing this LCD Display. Please read this User Manual carefully to ensure the safety while operating this display. • Please keep this manual and the supplied warranty card in a safe place so that you can quickly obtain solutions in case you encounter problems when using the display. -
Page 28: Important Safety Information
Important safety information Before using the display, please pay attention to the following safety precautions: 1. Read this manual carefully and keep it in a safe place for future reference. 2. Operate the display according to the instructions. 3. Unplug the display from power source before cleaning. Do not use cream, liquid, aerosol or spray cleaners. -
Page 29: Package Contents
Package contents Unpack the display and check that all the following items are included: LCD display (x1) Power cord (x1) User Manual (x1) Warranty card (x1) AAA battery (x2) The type of power cable supplied may differ from that illustrated, dependant upon your region of purchase. -
Page 30: Control Panel (Right Side View)
Control panel (right side view) No. Name Description This socket is an audio output for connecting an external headset. The display's speakers will be muted whenever Headset socket the headset socket is being used. See headset audio output" on page CH (Selection) In the OSD menu, moves the selection highlight up or / button... -
Page 31: External Terminals Panel (Left Side View)
External terminals panel (left side view) Name PC D-SUB PC AUDIO Description Connect to the PC video (D-Sub) output of a PC. See "Connecting the PC input" on page Connect to the audio output to match that of the D-Sub video output on a PC. -
Page 32: Connecting The Pc Input
Connecting the PC input 1. Connect the VGA D-Sub output of your PC to the PC D-SUB terminal on the display using a Mini D-Sub (15-pin) cable (not provided). 2. Connect the audio output of your PC to the display's PC AUDIO terminal using an appropriate 3.5mm Mini-jack stereo audio cable (not provided). -
Page 33: Connecting Power
Connecting power 1. Connect one end of the power cord to the AC-IN power socket on the display. 2. Connect the other end of the power cord to the power outlet. The display will enter standby mode and the power indicator will light up red. AC-IN power socket Power outlet... -
Page 34: Basic Operations
Basic operations Power on and standby Turning the display on After plugging the display's power cable into a wall outlet and turning on the main power switch, the display will enter standby mode automatically. The power indicator will light up red. Press The display will turn on and the power indicator will change to green. -
Page 35: Navigating The Osd Menu
Navigating the OSD menu You can use the OSD menu to adjust the settings on your display. To display the OSD menu, press MENU on the display. Operations in the OSD menu • Press CH (Selection) • Press VOLUME (Volume) settings. -
Page 36: Picture Menu
Picture menu The available menu items are dependent on the input source being selected. The illustration is for reference only. Item Description Adjusts overall image color temperature. The warmer the color temperature, the reddish the image looks. The colder the color Color Temp temperature, the bluish the image becomes. -
Page 37: Sound Menu
Sound menu The available menu items are dependent on the input source being selected. The illustration is for reference only. Item Description You can select from several preset sound modes to achieve best Smart sound audio effects, or customize your own sound mode by selecting Personal. -
Page 38: Dimensions
Dimensions 32PFL5422 268.1 117.9 847.3 600.1 653.1 Unit: mm Dimensions... -
Page 39: 37Pfl5422
37PFL5422 325.6 Unit: mm Dimensions... -
Page 40: 42Pfl5422
42PFL5422 325.6 1082.9 753.7 811.8 Unit: mm Dimensions... -
Page 41: Specifications
Specifications Model Weight (Net) Dimensions (W × H × D, with stand) Dimensions (W × H × D, without stand) LCD panel size Aspect ratio Native resolution LCD panel brightness (typical) LCD panel contrast ratio (typical) Viewing angle (left/right/ up/down) Response time (Gray to Gray) Built-in speakers... -
Page 42: Supported Pc Input Signal Resolutions
Supported PC input signal resolutions Horizontal Resolution Frequency (KHz) 640 × 480 31.5 640 × 480 640 × 480 37.5 640 × 480 37.86 720 × 400 31.47 800 × 600 35.16 800 × 600 37.9 800 × 600 46.9 800 ×... -
Page 43: Troubleshooting
Troubleshooting Please check the following list before calling your nearest customer service center, and attempt the following steps to diagnose and fix the problem yourself: Symptoms Possible causes • Check that the power plug is securely inserted into both the AC-IN socket on the display and the wall outlet. •... - Page 44 The brightness of the LCD screen decreases by time. This Image looks dark or is a normal phenomenon and is not covered by product unclear warranty. Technical support If problems cannot be solved by following the troubleshooting tips above, please contact your dealer or your nearest customer support center for help. Troubleshooting...