
Summary of Contents for Pyle SereneLife SLFTRD18
- Page 1 SLFTRD18 Track Base Smart Digital Treadmill with Downloadable App www.PyleUSA.com...
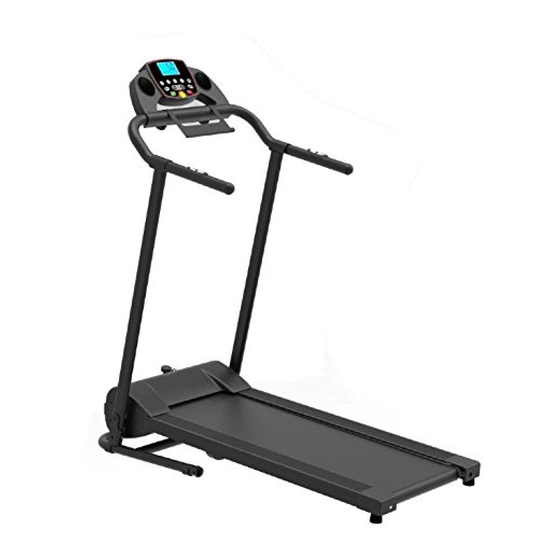
- Page 2 IMPORTANT: Read all instructions carefully before using this product. Retain this owner’s manual for future reference. The speci cations of this product may vary from this photo and are subject to change without prior notice. IMPORTANT SAFETY INSTRUCTIONS Basic precautions, including the following important safety instructions should always be followed when using this treadmill.
- Page 3 • Wear comfortable and suitable clothing when using the treadmill. Do not use the treadmill barefoot or in socks. Always wear appropriate, enclosed athletic footwear. Never wear loose or baggy clothing as it can become caught on the treadmill and create an entrapment hazard. •...
-
Page 4: Table Of Contents
PARTS LIST Part Part Description Description Base Frame Flange Nut M8 Main Frame Upper Motor Cover Left Stand Tube Lower Motor Cover Right Stand Tube Side Rail Handlebar Tube Left Rear Cover Tablet Holder Right Rear Cover EVA Protection Foot Pad Hex Screw M8X35 Front Roller Cross Screw M6X20... - Page 5 EXPLODED VIEW www.PyleUSA.com...
-
Page 6: Base Frame (
TOOL KIT Hex Screw M8X50 Spring Washer Hex Screw M8X15 Console Knob Safety Key Handlebar Cover Allen Key ASSEMBLY INSTRUCTIONS 5 easy steps to assemble your treadmill then you're ready to workout. Step 1 A. Place the treadmill in the upright position on a level at surface. B. -
Page 7: Left Stand Tube (
EXPLODED VIEW Main Control Cable Socket Step 2 A. Remove the four Head Hex Socket Screws (17) in the end of the Left Stand Tube (3) and Right Stand Tube (4). B. Attach the Handlebar (5) onto both ends of the Stand Tube (3 and 4), tighten the screws with the Allen Key provided. - Page 8 FOLDING INSTRUCTIONS TO FOLD Firmly grasp the rear end of the main frame with both hands. Carefully lift the end of the main frame up into the upright position until the Foot Lock Latch engages and securely locks the main frame into position. Make sure the main frame is securely latched before moving the treadmill.
- Page 9 OPERATING THE COMPUTER Flip the Master Power Switch that is located at the front of the treadmill to the ON position. Before beginning a workout session ensure that the Safety Tether Key is properly placed onto the Computer Console and the Safety Clip is securely attached to an article of your clothing. NOTE: Always stand on the side rails when you start the treadmill, never start the treadmill while you are standing on the running belt.
- Page 10 MODE: Press the MODE button to select di erent functions (time or distance) for setting exercise goals in manual program mode before training. SPEED (SPEED UP): Press the SPEED button to make upward adjustments for pre-setting target training time or distance in manual program mode before training.
- Page 11 CAL. (CALORIES): Displays the total calories burned during your workout. Press the START button on the computer to begin exercising, the LCD window will countdown 3 seconds with the LCD showing "3-2-1" before the running belt starts moving. The running belt starts moving with an initial speed of 0.6 MPH. You may press the SPEED or SPEED button on the computer console or handlebar to increase or...
- Page 12 CARE, MAINTENANCE & TROUBLESHOOTING GUIDE WARNING: To prevent electrical shock, please turn o and unplug the treadmill before cleaning or performing routine maintenance. WARNING: Always check the wear and tear components like spring knob and running belt to prevent injury. CLEANING After each exercise, ensure that the unit is wiped down and any sweat is removed from the unit.
-
Page 13: Power Cord
STORAGE Store the treadmill in a clean and dry indoor environment. Never leave or use the unit outdoors. Ensure the master power switch is o and the power cord is un-plugged from wall outlet. TROUBLESHOOTING GUIDE Problem Potential Causes Corrections 1. -
Page 14: Console
How to apply lubricant Lift one side of running belt. Pour some lubricant under the centre of the running belt on the top surface of the running deck. Run on the treadmill at a slow speed for 3 to 5 minutes to evenly distribute lubricant. NOTE: DO NOT over lubricate running deck. - Page 15 BELT ADJUSTMENT The running belt is pre-adjusted to the running deck at the factory, but after prolonged use it can stretch and require readjustment. To adjust the belt, turn on the main power switch of the treadmill and let the belt run at a speed of 8-10 KPH.
- Page 16 COMPATIBLE FITNESS APPLICATIONS iFitshow Android: Download your favorite application from the Google PlayStore. iPad/iPhone: Download your favorite application from the AppStore. Check if your mobile device con rms the requirements for the application. The requirements of each application are shown in the Google PlayStore or AppStore. How to use: Turn on the Bluetooth function of your mobile device.
-
Page 17: Safety Key
SLFTRD18 Track Base Smart Digital Treadmill with Downloadable App Features: • Smart Digital Treadmill Design • Get Connected with the ‘iFitShow’ App • Pairs to Your Device via Bluetooth Connectivity • Running & Training Data Statistics Readout • Built-in Hand Grip Sensors for Pulse Monitoring •...