Table of Contents
Advertisement
Quick Links
O
WNER'S
LCD Color TV
52Z3500A
52Z3500E
52Z3500T
57Z3500A
57Z3500E
57Z3500T
M
ANUAL
Owner's Record
You will find the model number and serial number on
the back of the TV. Record these numbers in the spaces
provided below. Refer to them whenever you call upon
your TOSHIBA dealer regarding this product.
Model number:
Serial number:
VX1A00054000
Advertisement
Table of Contents

Related Manuals for Toshiba 52Z3500A


Summary of Contents for Toshiba 52Z3500A
- Page 1 You will find the model number and serial number on the back of the TV. Record these numbers in the spaces provided below. Refer to them whenever you call upon your TOSHIBA dealer regarding this product. Model number: Serial number:...
-
Page 2: Table Of Contents
Introduction Welcome to Toshiba......3 Important Safety Instructions ..... . 3 Installation . -
Page 3: Introduction
Welcome to Toshiba • Thank you for purchasing this Toshiba LCD Color Television. This manual will help you use the exciting features of your new TV. • Instructions in this manual are based on using the remote control. • You also can use the controls on the TV if they have the same name as those referred to on the remote control. -
Page 4: Use
7) Never place the TV next to a stove where it will be exposed to oil, smoke, or steam, or in a location where there is a large quantity of dust. This may cause a fire or an electric shock. 8) Install the TV in a horizontal, stable location. -
Page 5: Service
4) Never stand or climb on the TV. Be especially careful in households with children to prevent them through climbing on top of the TV. It may move, fall over, break, become damaged or cause an injury. 5) When the TV will not be used for a long period of time, such as during vacation or travel, remove the power plug from the wall outlet for safety. -
Page 6: Cleaning
This is not a sign of malfunction. Exemptions • Toshiba is not liable for any damage caused by fires, natural disaster (such as thunder, earthquake, etc.), acts by third parties, accidents, owner’s misuse, or uses in other improper conditions. -
Page 7: Getting Started
The exact type and positioning of the antenna will depend upon your particular area. Your Toshiba dealer or service personnel can best advise you on which antenna to use in your area. Before connecting the antenna cable, turn off all main power switches. -
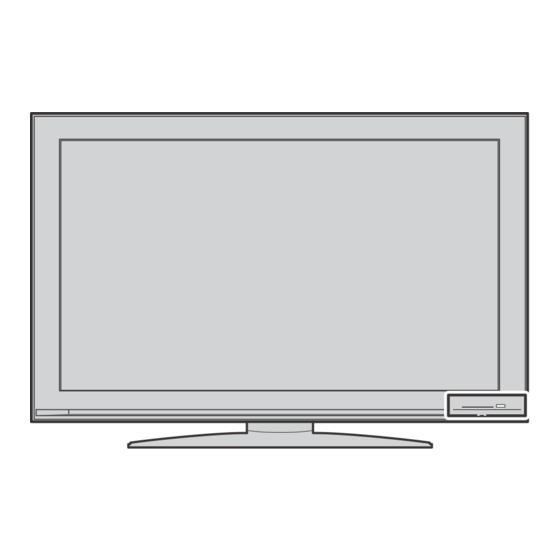
Page 8: Tv Front And Side Panel Controls
TV front and side panel controls • You can operate your TV using the buttons on the side panel or the remote control. The back and side of the panel provide the terminal connections to connect other equipment to your TV (- “Connecting your TV” pages 28 - 32). •... -
Page 9: Tv Back Panel Connections
TV back panel connections 15 16 12 o (C1) (COMPONENT VIDEO INPUT terminals) —High-definition component video and standard audio inputs (- page 28). 13 o PC/HDMI1 (AUDIO) (input terminals) — PC audio input terminals are shared with HDMI1 analog audio input terminals, and their use can be configured in the SET UP menu. -
Page 10: Learning About The Remote Control
Learning about the remote control Location of controls To select device mode (T/R/D)* * T: TV mode R: REGZA-LINK mode D: DVD mode To return to the previous program (T) ( - page 12) Volume – + (T/R/D) (These buttons adjust the volume level.) TOP MENU To access top Menu (R/D) (T/R/D)( - page 11) •... -
Page 11: Turning The Tv On
Turning the TV on Switching on the TV Connect the power cord to a wall outlet, the ! power indicator lights in red (standby mode). Press 1 on the remote control or ! on the TV right side panel. The ! power indicator lights in green. Note: If you watch black and white programs when the color system mode is set to Auto, color noise may appear on the screen. -
Page 12: Watching Tv Programs
Watching TV programs Selecting the menu language Choose from 9 different languages (English, Chinese (CS), Malay, Thai, Vietnamese, Russian, Arabic, Persian or French) for the on-screen display. to display SET UP menu. Press M, then press to select Language. Press Press to select the desired language. -
Page 13: Manually Setting Channels In The Channel Memory
Manually setting channels in the channel memory From the SET UP menu, press tuning. Press Q to display the Manual tuning menu. Press to select the program position you want to arrange. Manual tuning Prog. Label Select Sort MENU Back EXIT Watch TV Press Q to display the breakdown menu. -
Page 14: Using The Tv's Features
Picture adjustment Selecting the picture size Press to display the picture size list, then press to select the appropriate picture size (or press repeatedly to select required picture size directly). Ex. HDMI 1080i input signal Exact Scan Wide Super Live 2 Cinema 2 Super Live 1 Cinema 1... -
Page 15: Using The Picture Still
Exact Scan When receiving 1080i or 1080p signal format, this setting will display the image corrrectly without distortion or picture clipping. Use this setting for PC via HDMI. When receiving 1080i, 1080p or 720p signal format of HDMI input, this setting will display the image correctly without distortion or picture clipping. -
Page 16: Adjusting The Basic Picture Quality
Adjusting the basic picture quality to display the PICTURE Press M, then press menu. PICTURE Picture settings Active Backlight Control Cinema mode Film Stabilization meta brain PRO 100 xvYCC selection MENU Back EXIT Watch TV to select the Picture settings menu, then Press press Q. -
Page 17: Adjusting The Color Management
Adjusting the color management You can adjust the picture color quality by selecting from 6 base color adjustments : Red, Green, Blue, Yellow, Magenta or Cyan. From the PICTURE menu, press Color management on the 2nd page. to select On. Press 3D Color management to select Base color adjustment, then... -
Page 18: Sound Adjustment
Sound adjustment Setting the MTS (Multi-channel TV Sound) Auto mode The MTS Auto mode automatically recognize stereo/bilingual programs depending on the broadcast signal. Press M, then press to display the SOUND menu. SOUND Auto Dual Dual 1 Headphone Mode 1 Headphone level Bass Treble... -
Page 19: Using The Srs Wow® Surround Sound
® Using the SRS WOW surround sound ® SRS WOW is a special combination of SRS Labs audio technologies that creates a thrilling surround sound experience with deep, rich bass from stereo sound sources. Your TV’s audio will sound fuller, richer and wider. ®... -
Page 20: Using An External Woofer System
Alternatively, you may adjust the bass boost level directly using t. Press t to display Bass boost level. Bass boost While the Bass boost display is on the screen, press to adjust the Bass boost level. To turn off the Bass boost, press t to display Bass boost Off. -
Page 21: Activating Blue Screen
Activating blue screen With the blue screen function On, the screen will automatically turn blue and the sound will be muted when no signal is being received. From the FUNCTION menu, press Blue screen. to select On or Off. Press Note: In the PC input mode ( page 21), teletext mode (... -
Page 22: Using Regza-Link
Using REGZA-LINK This feature uses CEC (Consumer Electronics Controls) technology and allows the control of Toshiba REGZA-LINK compatible devices from the TV remote control via HDMI connection (- page 10). Notes: • Not all Toshiba products currently support REGZA-LINK. • Please consult your local dealers for more information on the availability of the REGZA-LINK compatible device. -
Page 23: To Set The Regza-Link
To set the REGZA-LINK to select the REGZA-LINK menu. Press M and to select Enable REGZALINK, then press Press to select On. REGZA-LINK Enable REGZA-LINK TV Auto Input Switch TV Auto Power Auto Standby Speaker Preference TV Speakers MENU EXIT Back Watch TV Note:... -
Page 24: Teletext
3-digit page number or pressing the corresponding colored button. For further information on your particular text system(s), see the broadcast teletext index page or consult your local Toshiba dealer. to access the text service, the first 14:57:55... -
Page 25: Using List Mode
Using LIST mode Press to access teletext. TEXT M00 14:58:55 Green Yellow The four choices at the bottom of the screen are now number – 100, 200, 300 and 400, which have been programmed into the TV’s memory. To view these pages, use the colored prompt buttons. e.g. -
Page 26: Using The Double-Window
Using the double-window • The double-window function allows you to split the screen into a Main and Sub window and watch two programs at the same time. You can display the TV program or the video input on the Main and Sub window. •... -
Page 27: Adjusting The Headphone Volume (Mode 2)
Adjusting the headphone volume (Mode 2) When you use the double-window, you can select the Headphone level. From the SOUND menu, press Headphone. to select Mode 2. Press to select Headphone level. Press Press to adjust the Headphone volume. Headphone level Using a headphone Connect a headphone to the headphone jack on the right side of the TV (- page 8). -
Page 28: Connecting Your Tv
Side connections You can connect a wide variety of auxiliary equipment via the terminals located on the right side of the panel o (2) and oHDMI3 Please always refer to the owner’s manual of the equipment to be connected for full details. Connection example TV right side view HDMI device... -
Page 29: Connecting An Hdmi Or Dvi Device
Connecting an HDMI or DVI device • When turning on your electronic components, turn on the TV first, and then the HDMI or DVI device. • When turning off your electronic components, turn off the HDMI or DVI device first, and then the TV. •... -
Page 30: Regza-Link Connection
• For proper operation, it is recommended that you use HDMI cables with the HDMI Logo ( • This feature is limited to models incorporating Toshiba’s REGZA-LINK. However, Toshiba is not liable for those operations. Refer to the individual owner’s manuals for compatibility information. -
Page 31: Selecting The Pc/Hdmi1 Audio Mode
Selecting the PC/HDMI1 audio mode You can select PC audio or HDMI audio when using this function (- page 29). Press M, then press to display the SET UP menu. SET UP Language English Manual setting AV connection Picture position MENU Back EXIT... -
Page 32: Connecting A Computer
Connecting a computer To connect a PC to the RGB/PC terminal on the TV: An analog RGB (15 pin) computer cable can be connected. TV back view TV back view Mini D-sub 15 pin Computer Conversion adapter (if necessary) Audio cable for PC-to-TV connection Connect a PC cable from the computer to the o RGB/PC terminal on the back of the TV. -
Page 33: Using The Pc Setting
Using the PC setting • In the PC input mode, you cannot select the Color, Tint, Sharpness, Black stretch, MPEG NR and DNR in the Picture setting menu, 3D color management, Active backlight control and Cinema mode (- page 16, 17). •... -
Page 34: Reference Section
Troubleshooting Before calling a service technician, please check the following table for a possible cause of the symptom and some solutions. Symptom and solution TV will not turn on • Make sure the power cord is plugged in, then press •... -
Page 35: Broadcast System
Power consumption 52Z3500A/E/T: 338W, <1W (standby) 57Z3500A/E/T: 474W, <1W (standby) Reference section Dimensions 52Z3500A/E/T: 1280 mm (W) 847 mm (H) 390 mm (D) 57Z3500A/E/T: 1365 mm (W) 896 mm (H) 390 mm (D) Mass (Weight) 52Z3500A/E/T: 44.8 kg 57Z3500A/E/T: 57.9 kg... - Page 36 Input/Output terminals o (1) Input 4 pin Phono jacks o (2) Input (Side) 4 pin Phono jacks o (C1) Input Component video Y, P Phono jacks o (C2) Input Component video Y, P Phono jacks O MONITOR Output Phono jacks O AUDIO Output Audio L + R (Fixed/Variable)