Table of Contents
Advertisement
Advertisement
Table of Contents

Related Manuals for Toshiba D-RW2SU/D-RW2SC


Summary of Contents for Toshiba D-RW2SU/D-RW2SC
- Page 1 D-RW2SU / D-RW2SC ® REC MODE ON/STANDBY 1VMN22607 / E7A71CD 2006...
-
Page 2: Introduction
Introduction Precautions WARNING: TO REDUCE THE RISK OF FIRE OR ELECTRIC SHOCK, DO NOT EXPOSE THIS APPLIANCE TO RAIN OR MOISTURE. CAUTION RISK OF ELECTRIC SHOCK DO NOT OPEN CAUTION: TO REDUCE THE RISK OF ELECTRIC SHOCK, DO NOT REMOVE COVER (OR BACK). NO USER SERVICEABLE PARTS INSIDE. -
Page 3: Important Safeguards
IMPORTANT SAFEGUARDS 1. Read Instructions - All the safety and operating instructions should be read before the appliance is operated. 2. Retain Instructions- The safety and operating instructions should be retained for future reference. 3. Heed Warnings - All warnings on the appliance and in the operating instructions should be adhered to. -
Page 4: Installation Location
Introduction Precautions (cont’d) Installation Location For safety and optimum performance of this unit: ● Install the unit in a horizontal and stable position. Do not place anything directly on top of the unit. Do not place the unit directly on top of the TV. ●... - Page 5 Maintenance ■ SERVICING ● Please refer to relevant topics on “Troubleshooting” on pages 148-152 before returning the product. ● If this unit becomes inoperative, do not try to correct the problem by yourself. There are no user- serviceable parts inside. Turn off, unplug the power plug and please call TACP’s Consumer Solution Center mentioned on page 157.
-
Page 6: Table Of Contents
Introduction Table of contents Introduction ■ Precautions ......2 ■ Table of contents ......6 ■... - Page 7 Playback ■ Basic playback ......80 Playback ........Playing back a DVD-VIDEO / Video CD / CD.
-
Page 8: Features
Introduction Features This DVD unit not only plays DVDs and CDs but also offers features for you to record to DVD discs and edit them after that. The following features are offered with this unit. Recording This unit is compatible with both DVD-RW which is rewritable repeatedly, and DVD-R which is available for recording once. -
Page 9: Choosing A Disc
• Handle the disc according to the disc instruction manual. • Toshiba cannot guarantee that all discs bearing the DVD or CD logos will operate as expected. Additionally, Toshiba cannot guarantee that discs recorded in this device will operate properly in other DVD players, recorders and/or personal computer drives. - Page 10 Microsoft Corporation in the United States and/or other countries. • Toshiba is not liable for any damage or loss caused directly or indirectly by the malfunction of this recorder, including, without limitation, any one of the following: • Failure to record contents intended to be recorded by the consumer.
- Page 11 DVD and CD discs, Toshiba cannot guarantee that product will play every feature of every DVD bearing the DVD logo and/or every CD bearing the CD logo. As one of the creators of DVD technology, Toshiba DVD players are manufactured using the highest standards of quality, and as a result, such incompatibilities are rare.
-
Page 12: Structure Of Disc Contents
Introduction Choosing a disc (cont’d) Structure of disc contents Normally, DVD video discs are divided into titles, and the titles are subdivided into chapters. Video CDs/Audio CDs are divided into tracks. DVD video disc Title 1 Chapter 1 Chapter 2 Chapter 1 Video CDs/Audio CD Track 1... - Page 13 Discs and purposes The table shows main functions which are available on this recorder per disc category. This will help you choose discs. DVD-RW disc Video mode Characteristics on this Suitable for saving data in recorder Video mode format to play on compatible devices.
-
Page 14: Index To Parts And Controls
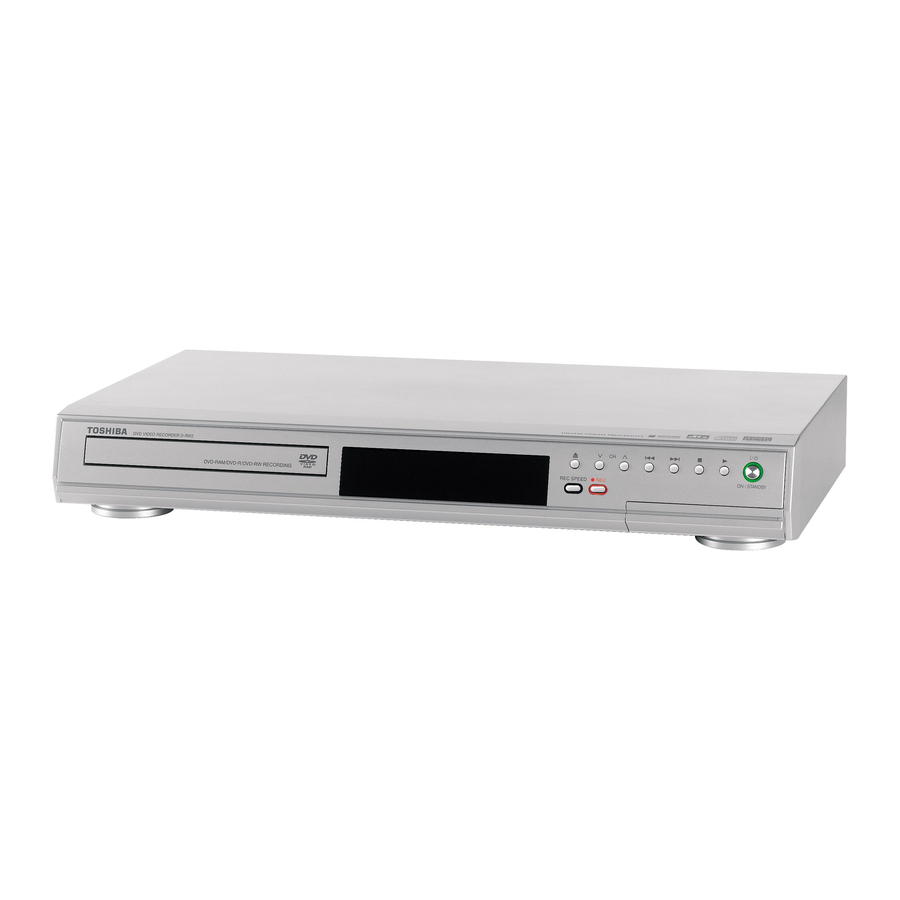
Introduction Index to parts and controls Front Panel 1. Disc tray Place a disc when open. 2. Display Refer to “Front Panel Display Guide” on page 18. 3. A (OPEN/CLOSE) button* Press to open or close the disc tray. 4. CH button Press to change the channel up and down. -
Page 15: Rear Panel
Rear Panel COMPONENT VIDEO IN VIDEO OUTPUT S-VIDEO ANTENNA AUDIO IN (L1) 1. ANTENNA IN jack Use to connect an antenna. 2. VIDEO IN jack (LINE1) Use to connect external equipment with a standard video cable. 3. VIDEO OUT jack Use to connect a TV monitor, AV receiver or other equipment with a standard video cable. - Page 16 Introduction Index to parts and controls (cont’d)
- Page 17 1. OPEN/CLOSE A button* Press to open or close the disc tray. 2. Number buttons Press to select channel numbers. Press to select a title/chapter/track on display. Or press to enter values for the settings in the Setup menu. 3. REPEAT button Press to display the Repeat menu.
-
Page 18: Front Panel Display Guide
Introduction Index to parts and controls (cont’d) Front Panel Display Guide 1. Current Status of the unit :Appears when disc playback is paused. :Appears when playing a disc. :Appears when the timer programming has been set or in progress. Flashes when all Timer Recordings have been finished, or when a program cannot be performed for some reason. -
Page 19: Preparation Of The Remote Control
Introduction Preparation of the remote control Installing batteries in the remote control ■ Install two “AA” size batteries (supplied) matching the polarity indicated inside battery compartment of the remote control. Open the cover. Insert batteries. Make sure to match the + and - on the batteries to the marks inside the battery compartment. -
Page 20: On Screen Menu
Introduction On Screen menu This unit uses following On Screen menu for most operations: Setup menu, Title list, Playlist, Original and Display menu. They allow you to change the playing status of disc during playback. The Display menu also gives you information on the status of the disc. Display menu Press [DISPLAY] to call up the Display menu. - Page 21 <DVD-R,DVD-RW (Video mode)> Disc Format Finalize <DVD-RW (VR mode)> Disc Format Finalize Disc Protect OFF <Audio CD, MP3, WMA, JPEG, Video CD> CD Playback Mode Random Play Program Play PBC (Video CD only) Slide Show 1. Format (DVD-RW only): Allows you to erase all of the recorded content on the disc.
- Page 23 Connections Connect your recorder to your TV or stereo system. ● Connection to a TV ● RF modulator Connection ● Connection to a cable box or satellite ● Connection to an Audio System...
-
Page 24: Connection To A Tv
Connections Connection to a TV Connect your TV and the antenna to this recorder for recording and to view broadcast signals on the TV. Antenna Cable TV signal (Back of TV) Disconnect Note • RF output is for tuner pass through only. DVD Playback through the RF is not possible. Please see the next page for connection options. - Page 25 Make one of the following connections, depending on the capabilities of your existing equipment. Basic Audio Audio cable (supplied) This unit VIDEO OUT COMPONENT VIDEO IN VIDEO OUTPUT VIDEO OUT S-VIDEO ANTENNA COAXIAL AUDIO IN AUDIO OUT (L1) AUDIO OUT AUDIO OUT After you have completed the connections •...
-
Page 26: Rf Modulator Connection
Connections RF modulator Connection If your TV has Antenna in jack only, it is still possible to connect this unit to your TV by using a Stereo Audio/Video RF modulator. In this case, follow the instructions below. 1) The antenna input jack of your TV may have been already occupied. If so, disconnect the RF cable from your TV, and then connect the RF cable to the ANTENNA IN jack of this unit. -
Page 27: Connection To A Cable Box Or Satellite Box
Connections Connection to a cable box or satellite box (Cable box or CableTV Satellite box) signal RF cable Connect ■ With this setup: • You can record any unscrambled channel by selecting the channel on the cable box or satellite box. Be sure that the cable box or satellite box is turned on. -
Page 28: Connection To An Audio System
Connections Connection to an Audio System • When you change the connections, all devices should be turned off. • Refer to the operation manual accompanying external devices for more information. Method 1 Stereo system Audio cable (supplied) COMPONENT VIDEO IN VIDEO OUTPUT S-VIDEO ANTENNA... -
Page 29: Basic Setup
Basic Setup Read this chapter for necessary settings to get started. ● Initial setting ● Channel setting ● Selecting TV stereo or SAP ● Setting the clock ● Selecting TV aspect ratio... -
Page 30: Initial Setting
Basic Setup Initial setting Start Turn on this unit for the fi rst time, you need to follow these steps. Press [I/y ON/STANDBY]. Turn the TV on. Select the input to which the unit is connected. “Initial Setting” will automatically appear. Using [K / L], select your desired language for the on screen menu. - Page 31 Press [ENTER] to start Channel Preset. Initial Setting Channel Preset The unit will start getting channels available in your area. After channel setting is finished, “Clock Setting” will appear. Then press [ENTER]. Initial Setting Clock Setting Follow the steps 3 to 7 on pages 41-43 for “Manual Clock Setting”.
-
Page 32: Channel Setting
Basic Setup Channel setting Setting channels automatically Start If you have changed antenna connection, we recommend you to program channels which are available in your area with the following procedures. Press [SETUP]. Setup Required Setting Playback Display Recording Clock Channel Disc Using [K / L], select “Channel”. - Page 33 ■ To select a channel You can select a channel by directly entering channel with the Number buttons on the remote control. Notes for using the Number buttons: • When selecting cable channels which are higher than 99, enter channel numbers as a three-digit number.(For example: 117, press [1], [1], [7]) •...
-
Page 34: Adding/Deleting Channels
Basic Setup Channel setting (cont’d) Adding/deleting channels Start The channels you no longer receive or seldom watch can be deleted from the memory. You also may add channels into the memory. Press [SETUP]. Using [K / L], select “Channel”. Press [ENTER]. Channel menu will appear. - Page 35 Select the channel number to add or delete. Press [{] or [CH ] to move to a lower channel number. Press [B] or [CH ] to move to a higher channel number. Press the Number buttons to select a channel number directly. ] works on the memorized channel in this unit.
-
Page 36: Selecting Tv Stereo Or Sap
Basic Setup Selecting TV stereo or SAP Start You can select a sound channel to output from TV. “Stereo” has been selected as the default. Press [SETUP]. Using [K / L], select “Required Setting”. Press [ENTER]. Setup Required Setting Playback Display Recording Clock... - Page 37 Notes on TV channel audio • This unit CANNOT record in both Stereo (main) and SAP (sub) at the same time. • If you want to record a TV program available in second audio or stereo on a DVD-RW/R, you have to select either Stereo or SAP in the “...
-
Page 38: Setting The Clock
Basic Setup Setting the clock Auto Clock Setting Start Set the clock before you try the Timer Recording. If a Public Broadcasting Station (PBS) is available in your area, follow “Auto Clock Setting” below. If not, follow “Manual Clock Setting” on page 41. Make sure •... - Page 39 If you do not know your PBS channel number: Using [K / L], select “Auto”. Press [ENTER]. The setting will be activated. Auto Clock Setting Auto Manual If you know your PBS channel number: Using [K / L], select “Manual”. Press [ENTER].
- Page 40 Basic Setup Setting the clock (cont’d) Notes • The clock may set itself automatically after you connect the antenna/cable signal to this unit and plug in the power cord. In this case, the current time will appear on the front panel display. •...
-
Page 41: Manual Clock Setting
Manual Clock Setting Start Press [SETUP]. Using [K / L], select “Clock”. Press [ENTER]. Using [K / L], select “Clock Setting”. Press [ENTER]. Clock Clock Setting Auto Clock Setting Daylight Saving Time Clock Setting menu will appear. Press [ENTER] again. Default date will appear. - Page 42 Basic Setup Setting the clock (cont’d) Using [K / L], enter the date (month / day / year). Press [{ / B] to move the cursor. Clock Setting Using [K / L], enter the time (hour / minute). Press [{ / B]. Clock Setting The cursor will move on to AM.
- Page 43 Note • Your clock setting will be lost if there is a power failure or this unit has been unplugged for more than 30 seconds, set the clock manually. Press [K / L] to select “AM” or “PM”. Press [ENTER]. The settings will be activated.
-
Page 44: Setting The Daylight Saving Time
Basic Setup Setting the clock (cont’d) Setting the Daylight Saving Time Start When “Daylight Saving Time” is “ON”, the unit clock will automatically move forward one hour at 2:00a.m. on the fi rst Sunday in April and move back one hour at 2:00a.m. on the last Sunday in October. - Page 45 Using [K / L], select “ON” or “OFF”. Press [ENTER]. Choose “ON” when currently observing the daylight saving time. Daylight Saving Time Press [SETUP] to exit.
-
Page 46: Selecting The Tv Aspect Ratio
Basic Setup Selecting the TV aspect ratio Start You can select the TV aspect ratio to match the formats of what you are playing with the unit and your TV screen (4:3 standard or 16:9 widescreen TV). “4:3 Letter Box” has been selected as the default. Press [SETUP]. - Page 47 Note If you have a standard TV: Select “4:3 Letter Box”, so that black bars appear on the top and bottom of the screen. Select “4:3 Pan & Scan” for a full height picture with both sides trimmed. If you have a widescreen TV: Select “16:9 Wide”.
-
Page 49: Recording
Symbols in this Section The following icons show the recordable discs for each function described in this section. : Video mode DVD-RW disc : VR mode DVD-RW disc : DVD-R disc Most instructions are based on the remote control operation, unless otherwise noted. You can use the buttons on the remote control and those on the front panel of the unit as well when they have the same function. -
Page 50: Information On Dvd Recording
Recording Information on DVD recording Information This unit can record to DVD-R and DVD-RW discs. DVD-R discs can only be recorded once, and cannot be erased. DVD-RW discs can be recorded and erased many times. DVD-R discs can only be recorded in Video mode, while DVD-RW discs can select a recording format between Video mode and VR mode. -
Page 51: Information On Copy Control
Information on copy control For recording copy protected contents, refer to the following. Disc type/Format VR mode Video mode DVD-RW Video mode DVD-R ★ Recordable — Not Recordable Making discs playable in other DVD players (Finalize) This unit * You cannot finalize discs recorded in other DVD recorders. After recording, you must finalize the disc in order to play on other units. -
Page 52: Selecting The Recording Format
Recording Selecting the Recording format Choosing the recording format of a brand-new disc Start When inserting a brand-new disc, the unit automatically starts to format. You have to select your desired format before inserting the brand-new disc. “Video mode” has been selected as the default. - Page 53 Notes • The recording format setting is effective only for DVD-RW discs. You cannot change the recording format on DVD-R discs. DVD-R discs will always be in Video mode. • You cannot mix two formats on one DVD-RW disc. When you load a disc once recorded before, the recording format cannot be changed even if you change it in the Setup menu.
-
Page 54: Reformatting A Disc
Recording Selecting the Recording format (cont’d) Reformatting a disc If you are using a DVD-RW disc, you can reformat the disc. 1) Press [SETUP]. 2) Using [K / L], select “Disc”. Press [ENTER]. Disc menu will appear. 3) Using [K / L], select “Format”. Press [ENTER]. Format menu will appear. -
Page 55: Recording Audio Select (Xp)
Recording Audio Select (XP) You can enjoy high quality sound recording. This function works only when the recording mode is set at XP. “Dolby Digital” has been selected as the default. 1) Press [SETUP]. 2) Using [K / L], select “Recording”. Press [ENTER]. -
Page 56: Basic Recording
Recording Basic recording Start Press [I/y ON/STANDBY]. Turn the TV on and be sure to select the input to which the unit is connected. Press [OPEN/CLOSE A] . The disc tray will open. Insert your disc with its label facing up. Align the disc to the disc tray guide. - Page 57 Using [REC MODE], select a recording mode. Refer to “Recording Mode” on page 65. Using [CH ] or the Number buttons, select a desired channel to record. Press [REC I] to start recording. “I” mark will be displayed for 5 seconds. Press [PAUSE F] to stop recording temporarily.
- Page 58 Recording Basic recording (cont’d) Notes • Recording starts immediately and continues until the disc is full or you stop recording. • When the clock setting has not been made, the space for a date and time of title names in the Original list or Playlist will be blank.
-
Page 59: One-Touch Timer Recording
Recording One-touch Timer Recording Start This is a simple way to set the recording time in blocks of 30 minutes. Check that the disc you are recording onto has enough space for the time you set. When the recording fi nishes the recorder automatically goes into standby. -
Page 60: Recording Time
Recording One-touch Timer Recording (cont’d) Notes • The remaining recording time will appear on the front panel display during a One-touch Timer Recording. Press [DISPLAY] to see it on the TV screen. • You cannot pause a One-touch Timer Recording. •... -
Page 61: Timer Recording
Recording Timer Recording Start You can program the unit to record up to 8 programs within a month in advance. Daily or weekly program recordings are also available. • Be sure to set the clock before setting a timer programming. •... - Page 62 Recording Timer Recording (cont’d) Using [K / L], enter the Date. Press [B]. Timer Programming Date Start 1. JAN/01 --:-- When pressing [L] at the current date, The Date will change as follows. <e.g. January 1st> Daily (Everyday) MON-SAT (Monday to Saturday) MON-FRI (Monday to Friday) SAT (Saturday) FRI (Friday)
- Page 63 Using [K / L], select the channel number to record. Press [B]. Timer Programming Date Start 1. JAN/01 12:57AM To record from external input, select L1 or L2, which is found at the before channel 1. Using [K / L], select a recording mode. Timer Programming Date Start...
-
Page 64: Standby Mode
Recording Timer Recording (cont’d) Notes • If you have not set the clock yet: A manual clock setting menu will appear instead of the Timer Programming list at step 1. Continue with step 4 in “Manual Clock Setting” on page 41 before setting a timer programming. •... - Page 65 ■ Recording Mode You can select a recording mode among 6 options, and the recording time will depend on the recording mode you select as follows. * Discs recorded in SLP or SEP on this recorder may not be played back on other DVD recorders or DVD players.
-
Page 66: Information
Recording Timer Recording (cont’d) Checking, canceling, or correcting the timer programming information 1) Press [I/y ON/STANDBY]. indicator disappears from the front panel display. 2) Press [TIMER PROG.]. Timer Programming list will appear. 3) Check the information on the list to be edited. Timer Programming Date Start... -
Page 67: Hints For Timer Recording
Hints for Timer Recording • If there is a power failure or this unit has been unplugged for more than 30 seconds, the clock setting and all timer programming will be lost. • If a disc is not on the tray, the indicator appears momentarily around the start point as the unit attempts to record. -
Page 68: Settings For An External Source
Recording Settings for an external source Connection to an external source Connect the external source properly to the unit by using input jacks either LINE2 (Front) or LINE1 (Rear). When connecting an external equipment with monaural output to this unit, use AUDIO L jack of LINE2 (Front). Use S-Video or Video cable and an Audio cable (commercially available) for this connection. - Page 69 Using [K / L], select “Select Video”. Press [ENTER]. Required Setting Select Video TV Aspect TV Audio Select Using [K / L], select “L2 (Front)” or “L1 (Rear)”. Press [ENTER]. Select Video L1 (Rear) L2 (Front) Using [K / L], select the input jack type to connect.
-
Page 70: Recording From An External Source
Recording Settings for an external source (cont’d) Recording from an external source Start Before recording from an external source, see the instructions for the connection on page 68. Turn the TV and this unit on, and be sure to select the input of the TV to which the unit is connected. - Page 71 Using [CH ] or the Number buttons, select the input of the unit which the external equipment is connected. (L2 or L1) • To use the input jacks on the back of this unit, select “L1” position by pressing [0], [0], [1] with the Number buttons on the remote control or the •...
-
Page 72: Setting Disc Protection
Recording Setting disc protection Start To prevent accidental recording, editing or erasing the titles, you can protect them from the setup menu. Press [SETUP]. Using [K / L], select “Disc”. Press [ENTER]. Disc menu will appear. Using [K / L], select “Disc Protect OFF Disc Format... - Page 73 Notes • The Disc Protect setting is available only when a disc with VR mode is inserted. To cancel the disc protect: • When you insert a disc protected with this unit, “Disc Protect ON will appear instead of “OFF ON”.
-
Page 74: Finalizing The Discs
Recording Finalizing the discs Start You will need to fi nalize discs recorded in this unit to play in other DVD players. (Refer to page 51.) Finalizing may take several minutes up to an hour. (A disc recorded in Video mode can take up to 15 minutes. A disc recorded in VR mode can take up to 60 minutes.) Since the process of the fi... - Page 75 To cancel finalizing... (DVD-RW only) • To cancel finalizing at step 4, press [STOP C], select “Yes” with [s / B], then press [ENTER]. Finalizing is cancelled and the unit will be in stop mode. • If appears when pressing [STOP C], you cannot cancel finalizing because the finalizing has been in certain progress.
-
Page 76: Auto Finalize
Recording Finalizing the discs (cont’d) Auto finalize Start You can fi nalize discs automatically by using Auto Finalize function. You can use this function to fi nalize discs after fi nishing all Timer Recordings and at the end of the disc space. Press [SETUP]. - Page 77 Note • Auto Finalize is not applicable to VR format discs. Using [K / L], select “Disc Full” or “End of Timer Rec”. Press [ENTER]. Auto Finalize Disc Full End of Timer Rec Option window will appear. Using [K / L], select “ON”. Press [ENTER]. Your setting will be activated.
- Page 79 Symbols in this Section The following icons show the playable discs for each function described on this section. : Video mode DVD-RW disc : VR mode DVD-RW disc : DVD-Video disc : DVD-R disc : Audio CD : CD-R/RW disc with MP3 files : CD-R/RW disc with WMA files : CD-R/RW disc with JPEG files : Video CD...
-
Page 80: Playback
Playback Basic playback Playback Start Press [I/y ON/STANDBY]. Turn the TV on and be sure to select the input to which the unit is connected. Press [OPEN/CLOSE A]. The disc tray will open. Insert your disc with its label facing up. Align the disc to the disc tray guide. - Page 81 Press [TOP MENU] to display the title list. You can change “Original” or “Playlist” of VR mode using [MENU / LIST]. <Video mode> Title List JAN/ 1/06 1:00AM CH12 XP <VR mode> Playlist JAN/ 1/06 1:00AM CH12 XP Original JAN/ 1/06 1:00AM CH12 XP Press [TOP MENU] to resume play.
- Page 82 Playback Basic playback (cont’d) Notes • For DVD-R (Video mode) and DVD-RW (Video mode) discs which are already finalized, a title menu will be displayed instead of thumbnails. • You can resume play from where you stopped playing the disc. (Resume play) Refer to page 88 for details about resume play.
-
Page 83: Playing Back A Dvd-Video / Video Cd / Cd
Playing back a DVD-VIDEO / Video CD / CD Start Note • Some discs may start playback automatically. Press [I/y ON/STANDBY]. Turn the TV on and be sure to select the input to which the unit is connected. Press [OPEN/CLOSE A] to open the disc tray. The disc tray will open. -
Page 84: Playing Mp3, Wma, Jpeg Disc
Playback Basic playback (cont’d) Playing MP3, WMA, JPEG disc Start In stop mode, press [TOP MENU] to call up the menu. •To exit the menu, press [TOP MENU] again. Using [K / L], to select a desired folder (group) or track. Press [ENTER]. When selecting track: Playback will start. - Page 85 (including CD-R containing MP3/WMA files). Because this area of technology is still evolving, Toshiba cannot guarantee that all recordable discs will produce optimal playback quality. The technical criteria set forth in this owner’s manual are meant only as a guide.
-
Page 86: Playing Discs Using The Disc Menu
Playback Basic playback (cont’d) Playing discs using the Disc menu A DVD disc contains a Disc menu that describes the contents or allows you to customize the playback. For example, the menu may offer choices for subtitle languages, special features, or chapter selection. Sometimes these are displayed automatically when you start playback, otherwise only appear when you press [MENU / LIST]. -
Page 87: Pbc Function For Video Cds
PBC function for Video CDs This unit conforms to ver.1.1 and ver.2.0 of the Video CD standard playback control (PBC) function. This enables you to play back interactive software using menu screens. Refer to the information accompanying the Video CD. Ver.1.1 (without PBC function): You can still enjoy playback of pictures and music from the CD. -
Page 88: Further Playback
Playback Further playback Resume Play You can resume play from where you stopped playing the disc last. 1) During playback, press [STOP C]. The resume message will appear. Resume ON 2) Press [PLAY B]. In a few seconds, play will resume from the point at which it stopped last. -
Page 89: Fast Forward / Fast Reverse
Fast forward / Fast reverse 1) During playback, press [FWD D] or [REV E]. Every time you press [FWD D] or [REV E], approximate speed will be changed as follows. Fast forward or fast reverse playback across titles (for DVD discs) or tracks (for WMA and MP3) is not possible. -
Page 90: Special Playback
Playback Special playback Zoom 1) During playback, press [ZOOM]. Zoom menu will appear. 2) Using [K / L], select a desired zoom factor to zoom. Press [ENTER]. <eg. DVD-Video> 0:04:01 There are four options (x1.0, x1.2, x1.5 and x2.0), these are displayed excluding the current zoom rate. -
Page 91: Searching By Title, Chapter Or Track
Searching by Title, Chapter or Track Using [SKIP H / G] 1) During playback, press [SKIP G] to skip the current title, chapter or track and move to the next. The title, chapter or track will move forward by one at a time. -
Page 92: Repeat Play
Playback Special playback (cont’d) Repeat Play 1 During playback, press [REPEAT]. Repeat menu will appear. <DVD-Video> Title Chapter A - B <Audio CD, Video CD> Track <MP3, WMA, JPEG files> Track Group • Option menu will change depending on the disc being played. -
Page 93: Program Play
Program Play You can program the disc to play in your desired order. 1) Press [SETUP] in stop mode. 2) Using [K / L], select “CD Playback Mode”. Press [ENTER]. CD Playback Mode menu will appear. 3) Using [K / L], select “Program Play”. Press [ENTER]. -
Page 94: Selecting The Format Of Audio And Video
Playback Selecting the format of audio and video You can select the format of audio and video as you prefer depending on the contents of the disc you are playing. Switching subtitles Many DVD-Video discs have subtitles in one or more languages –... -
Page 95: Switching Virtual Surround System
3) Using [K / L], select a desired audio soundtrack or audio channel. Press [ENTER]. <DVD-Video> Audio soundtrack will switch. <DVD-RW VR mode with main and sub channel> Audio channel menu will appear. 0:04:01 1. L/R 2. L 3. R Using [K / L], select a desired audio channel. -
Page 96: Switching Camera Angles
Playback Selecting the format of audio and video (cont’d) Switching camera angles Some DVD-Video discs contain scenes which have been shot simultaneously from a number of different angles. For these discs, the same scenes can be viewed from different angles. 1) During playback, press [DISPLAY]. -
Page 97: Adjusting Black Level
Adjusting Black Level You can adjust the Black Level Setting to make the dark areas of the TV picture brighter. 1) During playback, press [DISPLAY]. The Display menu will appear. 2) Using [{ / B], select . Press [ENTER]. 0:04:01 Noise Reduction menu will appear. -
Page 99: Editing
Symbols in this Section The following icons show the playable discs for each function described on this section. : DVD-RW disc recorded in VR mode Original : DVD-RW disc recorded in VR mode Playlist : DVD-RW disc recorded in Video mode : DVD-R disc Most instructions are based on the remote control operation, unless otherwise noted. -
Page 100: Information On Disc Editing
Editing Information on disc editing Guide to a title list Title list allows you to check the titles recorded on the disc easily. You can choose a title to play from this screen and easily edit the titles as you prefer. Press [TOP MENU]. -
Page 101: Editing Discs
Editing discs Type of title Item Video Deleting titles Mode Editing title names Adding or deleting chapter marks DVD-RW VR Mode Setting pictures for thumbnails Original Deleting parts of titles Dividing a title DVD-RW Combining titles VR Mode Adding titles to a Playlist Playlist Erasing all Playlist DVD-RW VR mode... -
Page 102: Editing Discs
Editing Editing discs Deleting titles Start You can delete titles which you do not need any more. Be advised that the titles once deleted cannot be brought back to the disc. Be sure to read “Notes for deleting titles” on page 101 before you delete the title. Press [TOP MENU]. - Page 103 Using [K / L], select “Title Delete”. Press [ENTER]. Playlist JAN/ 1/06 1:00AM CH12 XP Confirmation window will appear. Using [K / L], select “Yes”. Press [ENTER]. After that, “Are you sure?” will appear, so select “Yes” with [K / L] and then press [ENTER]. Playlist - Title Delete JAN/ 1/06 1:00AM CH12 XP “Wait for a moment.”...
- Page 104 Editing Editing discs (cont’d) After this operation is completed, press [RETURN] or [STOP C] to exit. Data will be written onto the disc momentarily.
-
Page 105: Editing Title Names
Editing title names You can change the title names from this menu. The names you input for the titles will be displayed on Title List / Original / Playlist. Follow steps 1 to 3 on page 102 to display the Edit menu. - Page 106 Editing Editing discs (cont’d) To enter a title name, follow the steps for “Guide to edit title name” on next page. Playlist - Edit Title Name character area for entering title names When you finish entering a title name, press [ENTER]. Confirmation window will appear.
-
Page 107: Guide To Edit Title Name
Guide to edit title name [ Step1 ] : Select a desired character set using [K/L], then press [ENTER]. [ Step2 ] Follow the list below, press the Number buttons repeatedly until the desired letter appears. Select Press <space> <space> (*1) (*1) PQRS... -
Page 108: Adding Or Deleting Chapter Marks
Editing Editing discs (cont’d) Adding or deleting chapter marks Note • When the number of chapter marks in the Playlist comes to 999 in total, you cannot add any more chapter mark. You can add or delete chapter marks on each title. Once a chapter is marked, you can use it for the chapter search feature. - Page 109 Using [K / L], select “Yes”. Press [ENTER]. The chapter mark will be added or deleted depending on what you selected. Playlist - Chapter Mark - Add Chapter JAN/ 1/06 1:00AM CH12 XP “Wait for a moment.” will appear, and the operation may take a while to be completed.
-
Page 110: Setting Pictures For Thumbnails
Editing Editing discs (cont’d) Setting pictures for thumbnails You can set a picture to each title for a thumbnail. It helps you to remember the contents of the title you are playing. The beginning picture has been selected as the default. - Page 111 Note • If a selected picture for a thumbnail is deleted by deleting parts of a title, a default picture will be selected. Using [K / L], select “Yes”. Press [ENTER]. Playlist - Index Picture JAN/ 1/06 1:00AM CH12 XP “Wait for a moment.”...
-
Page 112: Deleting Parts Of Titles
Editing Editing discs (cont’d) Deleting parts of titles You can delete a specifi c part of a title. Even when parts of title are deleted from the Playlist, the original title will remain as it is. The disc space to record will not be increased. Follow steps 1 to 3 on page 102 to display the Edit menu. - Page 113 Use [SKIP H / G], [REV E], [FWD D], [PLAY B] and [PAUSE F] to decide the start point, then press [ENTER]. Then use [SKIP H / G], [REV E], [FWD D], [PLAY B] and [PAUSE F] again to move to the end point, and press [ENTER]. A cursor will move to “Preview”.
- Page 114 Editing Editing discs (cont’d) Using [K / L], select “Delete”. Press [ENTER]. Confirmation window will appear. Playlist - Scene Delete JAN/ 1/06 1:00AM CH12 XP Using [K / L], select “Yes”. Press [ENTER]. After that, “Are you sure?” will appear, so select “Yes” with [K / L] and then press [ENTER].
- Page 115 Notes • Original titles once edited will not remain as recorded originally. When you want to leave the original as it is, edit the Playlist as you prefer. • You cannot select “Scene Delete” when the number of chapter marks is more than 900. After this operation is completed, press [RETURN] and then [RETURN] or [STOP C] to exit.
-
Page 116: Dividing A Title
Editing Editing discs (cont’d) Dividing a title You can divide a title into two new titles. Follow steps 1 to 3 on page 102 to display the Edit menu. Edit menu will appear. Use [SKIP H / G], [REV E], [FWD D], [PLAY B] and [PAUSE F] to decide the point at which you will divide the title. - Page 117 Note • You cannot divide a title of the disc on which the number of recording title comes up to the maximum (99), and the number of recording chapter comes up to the maximum (999). Using [K / L], select “Yes”. Press [ENTER]. The title will be divided into two new titles.
-
Page 118: Combining Titles
Editing Editing discs (cont’d) Combining titles You can combine two titles into a single title. Follow steps 1 to 3 on page 102 to display the Edit menu. Using [K / L], select “Title Combining”. Press [ENTER]. <eg. DVD-RW VR mode Playlist> Playlist JAN/ 1/06 1:00AM CH12 XP Title Combining setting window will appear. - Page 119 Notes • You cannot combine the same titles into a single title. • If one of two titles in the original is deleted, the combined new title will be deleted automatically. • Selection order for the combining is affected in the combined new title. Using [s / B], select “Yes”.
-
Page 120: Adding Titles To A Playlist
Editing Editing discs (cont’d) Adding titles to a Playlist You can add a title in the Playlist as you prefer. You can add up to 99 titles to a Playlist. Follow step 1 on page 102 to display the Playlist. Using [K / L / s / B] to go to the next of the final title, “Add New Title”... - Page 121 Note • When a Playlist contains 99 titles or more, or 999 chapters or more, “Add New Title” cannot be selected. Using [K / L / s / B], select a desired title. Press [ENTER]. Playlist - Add New Title JAN/ 1/06 1:00AM CH12 XP “Wait for a moment.”...
-
Page 122: Erasing All Playlist
Editing Editing discs (cont’d) Erasing all Playlist You can erase all titles in the Playlist. Follow step 1 on page 102 to display the Playlist. Using [K / L / s / B] to go to the next of the final title, “Add New Title”... - Page 123 Note • Deleting a Playlist will not increase the available recording space on disc. Using [s / B], select “Yes”. Press [ENTER]. Playlist - Delete Playlist Add New Title Delete Playlist Final confirmation window will appear. Using [s / B], select “Yes”. Press [ENTER]. All titles in the Playlist will be erased.
-
Page 124: Setting Or Releasing The Title Protection
Editing Editing discs (cont’d) Setting or releasing the title protection To prevent accidental editing, or erasing the titles, you can protect them from the Edit menu. You can cancel the title protection feature after it is applied. Follow steps 1 to 3 on page 102 to display the Edit menu. - Page 125 After this operation is completed, press [RETURN] and then [RETURN] or [STOP C] to exit. Data will be written onto the disc momentarily. To protect the whole disc (DVD-RW VR mode Only): Select “Disc Protect OFF select “Yes”. Refer to “Setting disc protection” on page 72. •...
-
Page 126: Setting Or Clearing All The Chapter Marks In One Title
Editing Editing discs (cont’d) Setting or clearing all the chapter marks in one title You can insert chapter marks at a specifi ed time you selected for titles with more than 5 minutes. Once a chapter is marked, you can use it for the chapter search feature. - Page 127 Notes • The interval of chapter marks may be slightly longer or shorter than the one specified at step 2. • You cannot select a chapter mark interval that exceeds the length of a title. Using [K / L], select “Yes”. Press [ENTER]. Marks will be added or deleted.
-
Page 129: Function Setup
Function Setup You can change the default settings to customize performance to your preference. ● Tour of the Setup menu ● Language setting ● Display setting ● Audio setting ● Settings for Parental lock level ● Settings for Progressive Scan Mode ●... -
Page 130: Tour Of The Setup Menu
Function Setup Tour of the Setup menu The following table is the contents which you can set and the default settings. Refer to the following table for useful operation. Setup Items (highlight is the default) 1.Language setting Disc Menu Language Pages 132-134 Audio Language Subtitle Language... - Page 131 Setup Items (highlight is the default) 3.Audio setting Digital Out Pages 137-139 Dynamic Range Control 4.Parental setting Parental Lock Pages 140-142 (Change password) 5.Video setting Progressive Pages 143-146 Still Mode Notes • If you change the setting in the Setup menu, the information of the contents stays on even when the power is switched off. •...
-
Page 132: Language Setting
Function Setup Language setting Start Press [STOP C] if you are playing a disc. Press [SETUP]. Using [K / L], select “Playback”. Press [ENTER]. Playback menu will appear. Using [K / L], select “Language”. Press [ENTER]. Language menu will appear. - Page 133 Using [K / L], select a desired item. Press [ENTER]. Disc Menu Language (Default : English) Set the language for the Disc Menu. Language Disc Menu English Audio Original Subtitle • Using [K / L], select a setting. Press [ENTER]. Your setting will be activated.
- Page 134 Function Setup Language setting (cont’d) Notes • Only the languages supported by the disc can be selected. • Audio Language setting may not be available on some discs. • Some DVD-Video discs allow you to change subtitle selections only via the disc menu. If this is the case, press [MENU/LIST] and choose the appropriate subtitle language from the selection on the disc menu.
-
Page 135: Display Setting
Function Setup Display setting Start Press [STOP C] if you are playing a disc. Press [SETUP]. Using [K / L], select “Display”. Press [ENTER]. Display menu will appear. Using [K / L], select a desired item. Press [ENTER]. OSD Language (Default : English) Set the language for OSD. - Page 136 Function Setup Display setting (cont’d) Angle Icon (Default : ON) Set to “ON” or “OFF”. Display OSD Language English Angle Icon Screen Saver 10 minutes FL Dimmer Bright • Using [K / L], select a setting. Press [ENTER]. Your setting will be activated. Screen Saver (Default : 10 minutes) Set the time to activate the screen saver function on the screen.
-
Page 137: Audio Setting
Function Setup Audio setting Start Choose the appropriate Audio settings for your equipment. It will only affect DVD discs during playback. Press [STOP C] if you are playing a disc. Press [SETUP]. Using [K / L], select “Playback”. Press [ENTER]. Playback menu will appear. - Page 138 Function Setup Audio setting (cont’d) Settings for PCM (Default : 48kHz) Digital Out - PCM 48kHz 96kHz • Using [K / L], select a setting. Press [ENTER]. Your setting will be activated. 48kHz : If your amplifier/decoder is NOT compatible with 96kHz PCM, select “48kHz”.
- Page 139 Note • Dynamic Range Control function is available only on the discs which are recorded in the Dolby Digital format. Settings for DTS (Default : OFF) Digital Out - DTS • Select a setting using [K / L], then press [ENTER]. Your setting will be activated.
-
Page 140: Settings For Parental Lock Level
Function Setup Settings for Parental lock level Start Some DVD-Video discs feature a Parental Lock level. Playback will stop if the ratings exceed the levels you set, it will require you to enter a password before the disc will playback. This feature prevents your children from viewing inappropriate material. - Page 141 Using [K / L], select the desired level. Press [ENTER]. Parental Lock (Default : All) Set the Parental Lock level. Playback Audio Video Language Parental Lock • Using [K / L], change the parental level. Press [ENTER]. All : If you select “All”, Parental Lock is not active. The disc will play in full. Ratings 1 to 8 : Some discs contain scenes not suitable for children.
- Page 142 Function Setup Settings for Parental lock level (cont’d) Notes • Parental lock function may not be available on some discs. • With some DVDs, it may be difficult to find if they are compatible with parental lock. Be sure to check if the parental lock function operates in the way that you have set.
-
Page 143: Settings For Progressive Scan Mode
Function Setup Settings for Progressive Scan Mode Start This unit is compatible with the Progressive Scan System. The feature provides you with the higher defi nition images than the traditional output system does. To utilize this feature, you must set Progressive Scan mode to “ON”... - Page 144 Function Setup Settings for Progressive Scan Mode (cont’d) Using [K / L], select “Progressive”. Press [ENTER]. Video Progressive Still Mode Using [K / L], select “ON”. Press [ENTER]. Video - Progressive Confirmation window will appear. Using [{ / B], select “Yes”. Press [ENTER]. Video - Progressive Activating progressive scan: Check your TV has progressive scan...
- Page 145 Notes • If your TV is compatible with Progressive Scan (525p / 480p), you must use the Component Video cable (commercially available) to connect this unit to the TV. (See Method 2 on page 25.) Make sure the “P.SCAN” appears on the front panel display.
-
Page 146: Settings For Still Mode
Function Setup Settings for Still Mode Note • Frame is one complete video image and made up of 2 fields (There are 30 frame per second of NTSC video). Press [STOP C] if you are playing a disc. Set the type of still image in pausing mode. Follow steps 1 to 3 on page 143 to display the Video setting menu. -
Page 147: Others
Others ● Troubleshooting ● Language code ● Glossary ● Specifications... -
Page 148: Troubleshooting
Others Troubleshooting Before requesting service for this unit, check below for a possible cause of the problem you are experiencing. Some simple checks or a minor adjustment on your part may eliminate the problem and restore proper operation. Power ■ The power does not turn on. •... - Page 149 Playback ■ The disc does not play. • No disc is inserted. • A blank disc is inserted. • The disc is upside down. Insert the disc with the labeled side facing up. • The disc is not correctly inserted. •...
-
Page 150: Error Message
Others Troubleshooting (cont’d) Others ■ The unit does not operate properly. ● When static electricity, etc., causes the unit to operate abnormally, unplug the unit and then plug it in again. ■ The disc tray does not open when you press [OPEN/CLOSE ●... - Page 151 Error message Recording Error This program is not recordable in Video mode. Recording Error Cannot record on this disc. Recording Error This program is not allowed to be recorded on this disc. Recording Error This disc is protected and not recordable.
-
Page 152: Frequently Asked Questions
Others Troubleshooting (cont’d) Error message Recording Error You cannot record on this disc as Power Calibration Area is full. Recording Error This disc is already finalized. * If you are still having trouble with the unit after checking “Troubleshooting”, write down the error code and the error description before calling the TACP’s Consumer Solution Center or, for Canada, TCL customer support line mentioned on pages 157 and 158. -
Page 153: Language Code
Others Language code Language Code Abkhazian 4748 Afar 4747 Afrikaans 4752 Albanian 6563 Amharic 4759 Arabic 4764 Armenian 5471 Assamese 4765 Aymara 4771 Azerbaijani 4772 Bashkir 4847 Basque 5167 Bengali;Bangla 4860 Bhutani 5072 Bihari 4854 Bislama 4855 Breton 4864 Bulgarian 4853 Burmese 5971... -
Page 154: Glossary
Others Glossary ■ Analog audio An electrical signal that directly represents sound. Compare this to digital audio which can be an electrical signal, but is an indirect representation of sound. See Digital audio. ■ Aspect ratio The width of a TV screen relative to its height. Conventional TVs are 4:3 (in other words, the screen is almost square);... - Page 155 ■ Playlist From this list you can play contents of a disc as your desired order or in sequence. Also it is allowed to search a specific scene directly. ■ Progressive Scan (525p/480p) A type of display that does not split each frame into fields, and instead scans directly through all the scanlines of each frame in order.
-
Page 156: Specifications
Others Specifi cations • This model complies with the below specifications. • Designs and specifications are subject to change without notice. • This model may not be compatible with features and/or specifications that may be added in the future. General ■... -
Page 157: Limited United States Warranty
Digital Audio Video (“DAV”) Product - Exchange Warranty Toshiba America Consumer Products, L.L.C. (“TACP”) makes the following limited warranties to original consumers in the United States. THESE LIMITED WARRANTIES EXTEND TO THE ORIGINAL CONSUMER PURCHASER OR ANY PERSON RECEIVING THIS DAV PRODUCT AS A GIFT FROM THE ORIGINAL CONSUMER PURCHASER AND TO NO OTHER PURCHASER OR TRANSFEREE. -
Page 158: Canadian Warranty Information
Others...