Table of Contents
Advertisement
Advertisement
Table of Contents

Related Manuals for Toshiba 27AF44


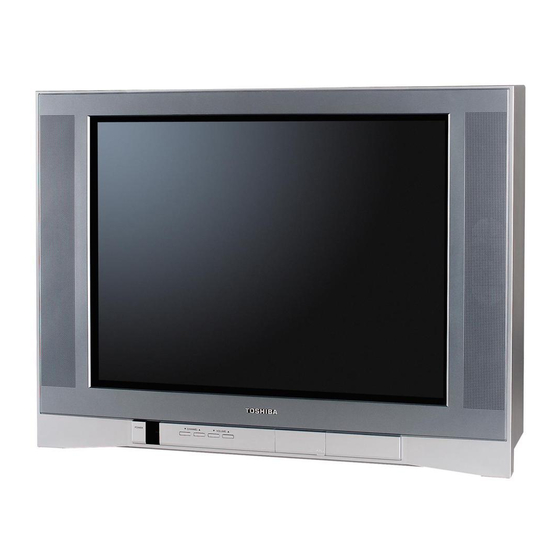
Summary of Contents for Toshiba 27AF44
- Page 1 27AF44 3N11501A[E] COVER 8/1/18, 12:25...
-
Page 2: Important Safety Information
Dear Customer, Thank you for purchasing this Toshiba TV. This manual will help you use the many exciting features of your new TV. Before operating the TV, please read this manual completely, and keep it nearby for future reference. Safety Precautions... -
Page 3: Important Safety Instructions
Important Safety Instructions 1) Read these instructions. 2) Keep these instructions. 3) Heed all warnings. 4) Follow all instructions. 5) Do not use this apparatus near water. 6) Clean only with a dry cloth. 7) Do not block any ventilation openings. - Page 4 Care For better performance and safer operation of your TOSHIBA TV, follow these recommendations and precautions: 27) Always sit approximately 10–25 feet away from the TV and as directly in front of it as possible. The picture can appear dull if you sit too far to the left or right of the TV, or if sunlight or room lights reflect on the screen.
-
Page 5: Table Of Contents
Important Safety Information ... 2-4 Welcome to Toshiba... 6 Exploring your new TV ... 6 Selecting a location for the TV ... 6 Connecting your TV ... 7 Connecting a VCR ... 7 Connecting a cable converter box ... 8 Connecting a DVD player/satellite receiver and a VCR ... -
Page 6: Welcome To Toshiba
Congratulations! You have purchased one of the finest color TVs on the market. The goal of this manual is to guide you through setting up and operating your Toshiba TV as quickly as possible. You may need to purchase other audio or video cables to connect your equipment. -
Page 7: Connecting Your Tv
Connecting your TV If you haven’t connected electronic equipment before, or you have been frustrated in the past, you may wish to read this section. (Cables are not supplied.) • A coaxial cable is the standard cable that comes in from your antenna or cable converter box. -
Page 8: Connecting A Cable Converter Box
Connecting a cable converter box This television has an extended tuning range and can tune most cable channels without using a cable company supplied converter box. Some cable companies offer “premium pay channels” in which the signal is scrambled. Descrambling these signals for normal viewing requires the use of a descrambler device, which is generally provided by the cable company. -
Page 9: Connecting A Dvd Player/Satellite Receiver And A Vcr
Your TV is capable of using ColorStream (component video). Connecting your TV to a component video compat- ible DVD player, such as a Toshiba DVD player with ColorStream greatly enhance picture quality and performance. DVD player with ColorStream... -
Page 10: Connecting Two Vcrs
Connecting two VCRs This connection allows you to record (dub/edit) from one VCR to another VCR. You will also be able to record from one TV channel while watching another channel. Stereo VCR / Playback To antenna IN from ANT OUT to TV CH 3 CH 4... -
Page 11: Using The Remote Control
With the remote control, you can operate your TV, most VCR and DVD player models, and cable TV converters together, even if they are different brands. If you will be using your TV with a Toshiba VCR or DVD player, your remote control is already programmed and ready to use. -
Page 12: Programming The Remote Control For Use With A Vcr, Dvd Player, Or Cable Tv Converter
This remote control is pre-programmed to operate Toshiba VCRs and DVD players. To control VCRs, DVD players, or cable converters other than Toshiba models, you must follow the steps below to program your remote control. 1. While holding down the CODE button, press the button for the device you want to control (VCR, DVD, or CABLE). -
Page 13: Vcr, Dvd Player, And Cable Tv Converter Codes
VCR, DVD player, and cable TV converter codes DVD PLAYER CABLE TV CONVERTER 3N11501A[E] P07-16 8/1/18, 12:25... -
Page 14: Learning About The Remote Control
Learning about the remote control POWER turns the TV on and off Sleep programs the TV to turn off at a set time (page 28) TV/Video selects the video input source (page 27) Channel + / – cycles through programmed channels (page 16) TV/VCR/DVD/Cable select TV, VCR, DVD, or CABLE mode (page 11) Channel Numbers... -
Page 15: Setting Up Your Tv
Setting up your TV After you have installed the batteries and programmed the remote control, you need to set some preferences on the TV using the menu system. You can access the menu system with the buttons on the remote control. •... -
Page 16: Adding Channels To The Tv's Memory
Adding channels to the TV’s memory Your TV will stop on specific channels that are stored in the TV’s channel memory when you press Channel + or –. Use the steps below to set all active channels in your area automatically. Programming channels automatically Your TV can automatically detect all active channels and store them in its memory. -
Page 17: Using The Tv's Features
Using the TV’s features Adjusting the channel settings Switching between two channels You can switch between two channels without entering an actual channel number each time. To switch between two channels: 1. Select the first channel you want to view. 2. -
Page 18: Using Thev-Chip (Parental Control) Feature (U.s. V-Chip System Only)
To clear your favorite channels: 1. Select a channel you want to clear. 2. Press MENU, then press 3. Press to highlight FAVORITE CH. 4. Press to display the FAVORITE CH menu. SET/CLEAR will be highlighted. PICTURE AUDIO SETUP OPTION FAVORITE CH : CH 12 SET/CLEAR SET CLEAR... -
Page 19: Blocking Programs By Ratings
3. Press to display the V-CHIP menu. PICTURE AUDIO SETUP OPTION V-CHIP BLOCKING RESET PIN CODE SELECT [0-9] ENTER EXIT 4. Use the Channel Number buttons (0–9) to enter your PIN code. If you are accessing the V-Chip menus for the first time, select a four-digit number to be your PIN code. - Page 20 MPAA Ratings For adults only. NC17 Not intended for anyone 17 or under. Restricted. Under 17 requires an accompanying parent or adult guardian. PG13 Parents strongly cautioned. Some material may be inappropriate for children under 13. Parental guidance suggested. Some material may not be appropriate for children.
- Page 21 To use the V-Chip to block programs by rating: 1. Press MENU, then press 2. Press to highlight V-CHIP. 3. Press to display the V-CHIP menu. 4. Use the Channel Number buttons (0–9) to enter your PIN code. If you are accessing the V-Chip menus for the first time, select a four-digit number to be your PIN code.
-
Page 22: Blocking Unrated Movies Or Programs
Blocking unrated movies or programs Some movies and programs are not rated. You can block these movies and programs using the V-Chip. To block unrated movies or programs: 1. Press MENU, then press 2. Press to highlight V-CHIP. 3. Press to display the V-CHIP menu. -
Page 23: Locking Video Input
To unlock channels: 1. Press MENU, then press 2. Press to highlight LOCK and then press the LOCK menu. 3. Use the Channel Number buttons (0–9) to enter your PIN code, then press ENTER. The LOCK menu appears. 4. Press to highlight CH LOCK and press the CH LOCK menu. -
Page 24: Labeling Channels
Labeling channels Channel labels appear over the channel number display each time you turn on the TV, select a channel, or press the Recall button. You can choose any four characters to identify a channel. To create channel labels: 1. Select a channel you want to label. 2. -
Page 25: Setting The Clock
Setting the clock You must set the clock before you can program the ON/OFF timer. To set the clock: (Example: 8:30 AM) 1. Press MENU, then press 2. Press to highlight ON/OFF TIMER. PICTURE AUDIO SETUP OPTION LANGUAGE ENGLISH CH LABEL START FAVORITE CH START... -
Page 26: Setting The Off Timer
5. Press to set the desired hour, then press PICTURE AUDIO SETUP OPTION ON/OFF TIMER CLOCK 12:00 AM ON TIMER 7:00 AM CH 001 CLEAR OFF TIMER 12:00 AM CLEAR SELECT ADJUST EXIT 6. Set the desired minutes and channel, as in step 5. 7. -
Page 27: Adjusting The Picture Quality
Adjusting the picture quality You can adjust the picture quality to your personal preferences, including the contrast, brightness, color, tint, and sharpness. The qualities you choose will be stored automatically in your TV’s memory so you can recall them at any time. To adjust the picture quality: 1. -
Page 28: Setting The Sleep Timer
Setting the sleep timer You can set the TV so it turns off automatically. To set the sleep timer: Repeatedly press SLEEP on the remote control to set the length of time until the TV turns off. The clock will count down 10 minutes for each press of the SLEEP button (120, 110, ...10, 0). -
Page 29: Adjusting The Sound
Adjusting the sound Muting the sound Press MUTE to temporarily turn off the sound. While the sound is off, the screen will display the word MUTE in the lower right-hand corner. To restore the sound, press MUTE again. Selecting stereo/SAP broadcasts You can listen to high-fidelity stereo sound with the Multi-channel TV Sound (MTS) feature. -
Page 30: Adjusting The Sound Quality
Adjusting the sound quality You can change the sound quality of your TV by adjusting the bass, treble, and balance. To adjust the sound quality: 1. Press MENU, then press PICTURE AUDIO SETUP OPTION BASS TREBLE BALANCE SURROUND STABLE SOUND SELECT ADJUST 2. -
Page 31: Using The Surround Sound Feature
Using the surround sound feature The surround sound feature expands the audio listening field wider and deeper to create exceptional sound quality from the TV’s speakers. The feature uses stereo signals from a TV broadcast or video input. To turn on the surround sound feature: 1. -
Page 32: Appendix
Appendix Troubleshooting Before calling a service technician, please check the following table for a possible cause of the problem and some solutions. Problem TV will not turn on No picture, no sound No sound, picture OK Poor sound, picture OK Poor picture, sound OK Poor reception of broadcast channels Cannot receive above channel 13... -
Page 33: Specifications
Specifications Picture Tube Type 27 (676.6 mm diagonal) Television system NTSC standard Channel coverage VHF: 2 ~ 13 UHF: 14 ~ 69 Cable TV: 4A, A-5 ~ A-1, A-I, Power source 120V AC, 60 Hz Power consumption 135 W Audio power 5.0W + 5.0W Speaker type 1-13/16 x 3-7/8 inches (46 x 99 mm) x 2 pcs. -
Page 34: Limited United States Warranty
WHICH AN ACTION MAY BE BROUGHT, OR THE EXCLUSION OR LIMITATION OF INCIDENTAL OR CONSEQUENTIAL DAMAGES; THEREFORE, THE ABOVE LIMITATIONS OR EXCLUSIONS MAY NOT APPLY TO YOU UNDER SUCH CIRCUMSTANCES. FST PURE ® is a registered trademark of Toshiba America Consumer Products, L.L.C. 8/1/18, 12:27 www.toshiba.com/tacp. REV. MAR02... -
Page 35: Limited Canada Warranty
OR THE EXCLUSION OR LIMITATION OF INCIDENTAL OR CONSEQUENTIAL DAMAGES; THEREFORE, THE ABOVE LIMITATIONS OR EXCLUSIONS MAY NOT APPLY TO YOU UNDER SUCH CIRCUMSTANCES. ® FST PURE is a registered trademark of Toshiba America Consumer Products, L.L.C. 8/1/18, 12:27 www.toshiba.ca REV. MAR02... - Page 36 TEL.: (514) 856-4100 VANCOUVER: 22171 FRASERWOOD WAY, RICHMOND, B.C., V62 1J5, CANADA TEL.: (604) 303-2500 ® ® ColorStream , FST Pure and StableSound trademarks of Toshiba America Consumer Products, L.L.C. PRINTED IN THAILAND 04/01 3N11501A[E] P29-BACK ® are registered 8/1/18, 12:27...