Table of Contents
Advertisement
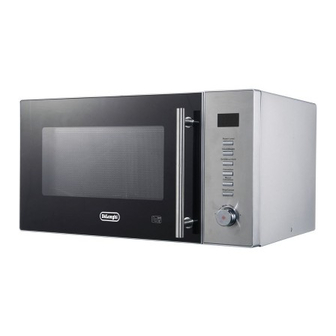
MICROWAVE OVEN
Installation & User Instructions
Important
WARNING : if the door or door seals are damaged, the oven must not be operated until it has
been repaired by a competent person;
WARNING : it is hazardous for anyone other than a competent person to carry out any service
or repair operation that involves the removal of a cover which gives protection against
exposure to microwave energy;
WARNING : liquids and other food must not be heated in a sealed container since they are
liable to explode;
WARNING : accessible parts may become hot during. Young children should be kept away.
Please keep for future reference
600/6211
Advertisement
Table of Contents
Troubleshooting

Related Manuals for DeLonghi D90N30ESLRIII-XC


Summary of Contents for DeLonghi D90N30ESLRIII-XC
- Page 1 MICROWAVE OVEN 600/6211 Installation & User Instructions Please keep for future reference Important WARNING : if the door or door seals are damaged, the oven must not be operated until it has been repaired by a competent person; WARNING : it is hazardous for anyone other than a competent person to carry out any service or repair operation that involves the removal of a cover which gives protection against exposure to microwave energy;...
-
Page 3: Table Of Contents
Contents Safety Information Material you can use in microwave oven Material to avoid using in the microwave oven Utensils Setting up your oven Oven components and accessories Turntable installation Microwave cooking principle Microwave food packaging symbols Accessories included Installation Please note Electrical connection Earthing Installation Operating your microwave oven Control Panel... -
Page 4: Safety Information
Safety Information Please read these instructions fully before installation Important IMPORTANT SAFETY INSTRUTIONS READ CAREFULLY AND KEEP FOR FUTURE REFEREBE 1. The temperature of accessible surfaces may get hot when the appliance is operating especially the metal top area and the warming rack if any. - Page 5 Safety Information Important Please read these instructions fully before installation If smoke is observed, press the “Stop” button and leave the door closed in order to stifle any flames. Disconnect the power cord, and / or shut off power at the fuse or circuit breaker panel.” 12.
- Page 6 24. The turntable and turntable ring assembly must always be used in the oven during cooking.Place the cookware gently on the turntable and handle it carefully to avoid possible breakage. 25. Incorrect use of dish for browning food may cause turntable to break. 26.
- Page 7 38. Read and follow the specific:"Precaution for avoiding possible exposure to excessive microwave energy". 39 . As with most cooking appliances,close supervision is necessary to reduce the risk of a fire in the oven cavity.This microwave oven is intended for heating food and beverages.Drying of food or clothing and heating of warming pads, slippers,sponges, damp cloths and similar may lead to risk of injury,ignition or fire.
- Page 8 53. Do not let cord hang over edge of table or counter. 54. Do not attempt to repair the oven yourself,please consult an authorised service agent. 55. Do not attempt to operate this oven with the door open since open-door operation can result in harmful exposure to microwave energy.It is important not to try and override or tamper with the safety interlocks.
-
Page 9: Material You Can Use In Microwave Oven
Materials you can use in microwave oven Utensils Remarks Shielding only. Small smooth pieces can be used to cover thin parts of meat or Aluminum foil poultry to prevent overcooking Arcing can occur if foil is The foil should be a least 1 inch (2.5cm) away from oven walls. too close to oven walls. -
Page 10: Utensils
Utensils CAUTION Personal Injury Hazard Tightly-closed containers could explode. Closed containers should be opened and plastic pouches pierced before cooking. See above for further instructions "Materials you can use in microwave oven or to be avoided in microwave oven." There may be certain non-metallic utensils that are not safe to use for microwaving. -
Page 11: Setting Up Your Oven
If you have damaged or missing parts, call the 0345 640 3030 Customer Helpline: OVEN COMPONENTS AND ACCESSORIES Wave Guide Cover (Please do not remove this cover that is attached to the oven cavity to protect the magnetron.) Your oven comes with the following accessories Glass Turntable x1 Baking plate x1 Baking Plate... -
Page 12: Microwave Cooking Principle
0345 640 3030 MICROWAVE OVEN Installation & User Instructions Please keep for future reference 600/6211 Important WARNING : if the door or door seals are damaged, the oven must not be operated until it has been repaired by a competent person; WARNING : it is hazardous for anyone other than a competent person to carry out any service or repair operation that involves the removal of a cover which gives protection against exposure to microwave energy;... -
Page 13: Installation
Installation Please note Electrical connection This oven is fitted with a plug and must be only connected to a properly installed earthed socket. In accordance with the appropriate regulation, the socket must only be installed and the connecting cable must only be replaced by a qualified electrician. -
Page 14: Earthing Installation
Installation EARTHING INSTALLION Plug replacement (UK & Ireland only) Any electrical work that is required to Should you need to replace the plug; the wires install this appliance MUST be carried out by a in the power cable are coloured in the following qualified electrician. -
Page 15: Operating Your Microwave Oven
Operating Your Microwave Oven Control Panel MENU ACTION SCREEN Cooking time, power, action indicators, and clock time are displayed POWER LEVEL Press this button to set microwave cooking power level. CLOCK / WEIGHT Press this button to set the weight or cooking time Press this button to set the clock Grill/Micro + Grill Press this button to set a microwave and grill combination... -
Page 16: Setting The Clock
Operating Your Microwave Oven Setting the Clock Your microwave oven is equipped with a clock, you must set the clock when you first install your oven or after a power failure. The time can be displayed in either the 12-hour or 24-hour notation. Do not forget to reset the clock when you switch to and from summer or winter time. -
Page 17: Quick Start
Operating Your Microwave Oven Example: Setting cooking time for 20 minutes on power 80% 1. Press button 3 times and the display shows P-80 2. Turn to adjust the cooking time to 20:00. 3. Press to start cooking. When the cooking is finished, the oven will display END and beep every two minutes until the oven door is opened or button is ressed. -
Page 18: Speed Defrost
Defrost The defrosting function is the gentle thawing of uncooked food. Flat foodstuff thaws better than bulky food. Distribute the food as evenly as possible on the turntable. The oven allows the defrosting food based on the time you entered. The longest defrosting time you can set is 95 minutes. -
Page 19: Multi-Stage Cooking
Operating Your Microwave Oven Multi-stage Cooking Your Microwave oven can be programmed to cook food in up to 3 stages (auto function and quick start cannot be set in multi-stage cooking and defrost could be set in the first stage only). Example: you wish to defrost food and cook it without having to reset the oven after each stage instantly by pressing button. -
Page 20: Convection Cooking
Operating Your Microwave Oven 2. Press and the LED displays “1”, 3. Press to start cooking. AUTO FUNCTION CHART Auto Cooking Auto Manual Weight Power Time 1 portion / 230 g 5:00 2 portions / 460 g Baked POTATO 8:00 P-100 3 portions / 690 g 12:00... - Page 21 Example: to cook at 170 for 40 minutes. 1. Press button once and the LED will display “200 ”. Continually to press untill 170 is displayed on the screen. to until 40 :00 is displayed on the screen. Turn the Press to start the cooking.
-
Page 22: Microwave+ Convection Cooking
cooking Microwave+Convection This function is to combine cooking by using both microwave energy and convection heating.No preheating is required as the microwave energy is immediately available. the maximum cooking time is 9 hours and 30minutes. you can press during cooking to check the cooking temperature. 1. -
Page 23: Grill Cooking
Grill Cooking This function allows food to be cooked and grilled for the browning at the same time without microwave, Grill cooking is particularly useful for thin slices of meat, steaks, chops, kebabs, sausages of piece of chicken. It is also suitable for hot sandwiches and au gratin dishes. - Page 24 Operating Your Microwave Oven Output Time Foodstuff Quantity Remarks Level (Mins) Liquids Caution: Stir liquid prior during P100 heating/reheating, let liquid stand for at least 10 seconds Milk, 1 cup 150g (=100%) after cooking and always take care when adding ingredients to hot liquids.
- Page 25 Fish 5 - 7 Cover, turn once, leave to stand for 3 minutes. Fresh fish 300g 80%) 4 - 5 Cover, turn once, leave to stand for 3 minutes. Fillet of fish 300g 80%) P100 Frozen fish 400g 8 - 10 Cover, leave to stand for 3 minutes.
-
Page 26: Cleaning Your Microwave Oven
Cleaning your Microwave Oven Attention Your microwave oven should be cleaned regularly to prevent grease and food particles from building up on the inside surface. The accumulated grease /food particles may cause a fire hazard. r of your microwave oven after each use. To clean the oven interior, use a mild detergent solution, such as washing-up liquid, with warm water on a soft cloth. -
Page 27: Troubleshooting And Maintenance
Trouble Shooting and Maintenance Normal Condition Microwave oven interfering with TV reception. Radio and TV reception maybe interfered with when microwave oven is operation. It is similar to the interference of small electrical appliances such as food mixers, vacuum cleaners and electric fans. This is normal . -
Page 28: Troubleshooting
Trouble Shooting Maintenance Check for problems by using the chart below. If the microwave oven still does not work properly, contact the nearest authorised service centre. PROBLEM POSSIBLE CAUSE a. Plug not secure in power socket, or not switched on. b. -
Page 29: Questions And Answers
QUESTIONS AND ANSWERS When the oven is plugged into a wall outlet for the first time, it does not work properly. What's wrong? The microcomputer used in the oven control may temporarily become scrambled and fail to function as programmed. Unplug the oven from the wall outlet and then plug it back in. -
Page 30: Technical Specifications
Technical Specifications D90N30ESLRIII-XC 1400 Watt 900 Watt 2200 Watt 1250 Watt Grill power input: 2450 MHz 300x539x465mm Approx. 17.6Kg We apologize for any inconvenience caused by any minor inconsistencies in these instructions, which may occur as a result of product improvements and development. - Page 32 PRODUCT GUARANTEE This product is guaranteed against manufacturing defects for a period of Year This product is guaranteed for twelve months from the date of original purchase. Any defect that arises due to faulty materials or workmanship will either be replaced, refunded or repaired free of charge where possible during this period by the dealer from whom you purchased the unit.