Advertisement
Quick Links
Installation of TH 19X Thermostat in
TH 180 AP and TH 182 AP Aspirator
Wall Box
Product Description
These instructions describe the recommended
method for replacing the thermostat in the
TH 180 AP or TH 182 AP Aspirating Wall Box
with a TH 19X Thermostat using the 192-648
Aspirator Adapter Kit. The TH 180 AP/TH 182
AP has only two air line connections; therefore,
1-pipe and 3-pipe devices should not be
installed in it.
Product Number
192-648
Warning/Caution Notations
WARNING
CAUTION
Installation
Disassembly
NOTE:
The numbers found in parentheses in
this procedure correspond to the
numbers shown in Figure 1. See
Table 1 for a parts list of the Aspirator
Adapter Kit.
1. Remove and discard the old cover.
2. Remove the two screws holding the old
thermostat in place and remove the
thermostat.
CAUTION:
Supply air will bleed out of the terminal
until the new thermostat is installed.
3. Remove the five screws (5) holding the old
terminal plate (4) and gasket (2). Remove
the terminal plate and gasket. Discard the
gasket.
Item Number 129-102+4, Rev. BA
Personal injury or loss of life
may occur if you do not
perform a procedure as
specified.
Equipment damage or loss of
data may occur if you do not
follow a procedure as
specified.
Installation Instructions
Document No. 129-102
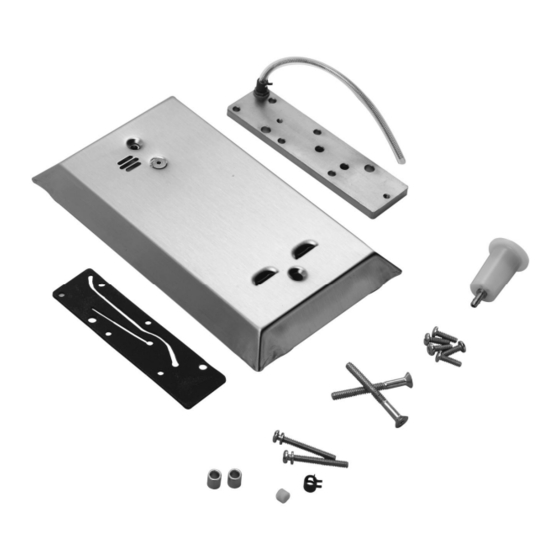
Table 1. 192-648 Aspirator Adapter Kit Parts List.
Item
Description
1
Filter
2
Gasket
3
O-rings
4
Terminal plate
5
Screws 4-40 × 1/2-inch long
6
Screws 4-40 × 1-inch long
7
Tubing retainer
8
Aspirator nozzle
9
Aspirator plate
10
Seal gaskets
11
Cover
12
Cover screws 6/32 × 1-3/8 inch long
13
Spacer post
Assembly
NOTE:
The numbers found in parentheses in
this procedure correspond to the
numbers shown in Figure 1. See
Table 1 for a parts list of the Aspirator
Adapter Kit.
1. Replace the supply air filter (1) with the new
filter provided in the kit.
NOTE: Be sure the gasket fits over the two
locator posts.
2. Make sure the gasket surface is clean.
Place the new gasket (2) into the wall box.
March 6, 2018
Quantity
1
1
2
1
5
2
1
1
1
3
1
2
2
Page 1 of 3
Advertisement

Related Manuals for Siemens TH 180 AP


Summary of Contents for Siemens TH 180 AP
- Page 1 Product Description These instructions describe the recommended method for replacing the thermostat in the TH 180 AP or TH 182 AP Aspirating Wall Box with a TH 19X Thermostat using the 192-648 Aspirator Adapter Kit. The TH 180 AP/TH 182 AP has only two air line connections;...
- Page 2 O-rings located in the 7. Set the thermostat to the desired setting. terminal plate. This will lubricate the O-rings and Page 2 of 3 Siemens Industry, Inc.
- Page 3 155-067P25 (TH192-3) Information in this publication is based on current specifications. The company reserves the right to make changes in specifications and models as design improvements are introduced. © 2018 Siemens Industry, Inc. Siemens Industry, Inc. Your feedback is important to us. If you have comments Document No.