
Related Manuals for The Singing Machine SDL9050 FESTIVAL


Summary of Contents for The Singing Machine SDL9050 FESTIVAL
- Page 1 SDL9050 FESTIVAL INSTRUCTION MANUAL www.singingmachine.com The Singing Machine® is a registered trademark of The Singing Machine Co.,Inc.
- Page 2 Warnings WARNING: TO PREVENT FIRE OR SHOCK HAZARD, DO NOT EXPOSE CAUTION THIS UNIT TO RAIN OR MOISTURE. RISK OF ELECTRIC SHOCK CAUTION: TO PREVENT ELECTRIC SHOCK, MATCH WIDE BLADE OF DO NOT OPEN PLUG TO WIDE SLOT AND FULLY INSERT. CAUTION: TO REDUCE THE RISK OF ELECTRIC SHOCK, DO NOT REMOVE COVER (OR BACK).
- Page 3 Included Please make sure the following items are included. Main Unit Wired Microphone x2 AC Adapter Manual — E2 —...
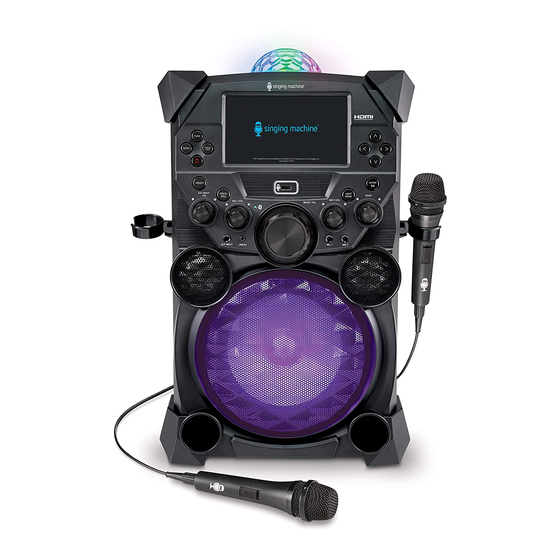
- Page 4 Location of Controls (Top/Front) 1. Disco Ball 15. Bluetooth Indicator 2. TFT LCD Color Screen 16. MASTER VOLUME Control 3. VOCAL/PAIR Button 17. Navigation LEFT 3 Button 4. FUNCTION (Monitor ON/OFF) Button 18. Navigation UP 5 Button 5. MENU Button 19.
- Page 5 Location of Controls (Rear) 1. Handle 3. HDMI Jack 2. DC IN Jack Location of Controls (Playback Display) Song Total Time Lead Vocal Status Song Title Song Current Record Status Elapsed Time Playlist Playback Status Battery Status Master Volume: 0-20 Echo Control: 0-8 —...
- Page 6 Connection Connecting the Microphone(s) Microphones: Connect a microphone into Mic jack 1 u and the other microphone into Mic jack 2 v (if desired). Note: Do not drop or tap the Mic as damage to the Mic or speakers may occur. Do not twirl the microphone by cord as it will cause damage to the encased wiring.
- Page 7 Connection Connecting to AC Power Insert the AC power cord into a conveniently located AC outlet having 230V, 50Hz. Note: Make all connections before connecting to AC power. Energy Saving (Auto Power System-APS) The unit will automatically enter the Standby mode after 15 minutes in the following situations: 1.
- Page 8 Rechargeable Battery This unit comes with a built-in rechargeable battery pack that will allow the unit to be used without being connected to AC power. The Battery indicator (top right of the display) will show the battery charge left indicated by the amount of bars. The rechargeable battery pack must NOT to be replaced by the user.
- Page 9 Karaoke Store PC Installation The Karaoke Store application can be installed on Microsoft Windows computers running Vista, Windows 7, and Windows 8 or higher. The Karaoke Store application requires connection to the Internet (a high-speed connection is recommended). Insert the USB Flash Drive into a powered USB slot on your computer.
- Page 10 Karaoke Store Mac Installation The Karaoke Store application can be installed on Apple Macintosh computers running OS X 10.8 and higher. The Karaoke Store application requires connection to the Internet (a high- speed connection is recommended). Insert the USB Flash Drive into a powered USB slot on your computer.
- Page 11 Operation Light Mode There are four Light modes. Repeatedly press the LIGHT MODE button to select a mode as follows: Light Modes 1: The unit will synchronize to the music being played. Light Mode 2: The unit will light up with random colors and patterns.
- Page 12 Operation Playing Songs from the USB Connect the unit as described previously. Press the ON/STANDBY button to turn the unit on. Insert a USB flash containing MP3 or MP4 files drive into the USB port on the unit so it faces upward. We have a large selection of karaoke music available for download through our Karaoke Store.
- Page 13 Operation Playing Songs from the USB (Continued) Use the Navigation 5 Up and 6 Down buttons to navigate through the list of songs that you have previously downloaded on your USB. Press the ENTER button to start the playback. The HD karaoke video will play on the screen.
- Page 14 Operation Playing Songs from the USB (Continued) Rotate the ECHO control to add an echo effect to your voice. Rotate towards MAX to increase the echo effect. VOCALS: To sing with the lead singer on the recording, press the VOCAL/PAIR button; “ ”...
- Page 15 Operation Playing Songs from the USB (Continued) SEARCHING BY ARTIST OR TITLE: While in the USB menu, select Search using the Navigation 3 Left and 4 Right buttons, then press the ENTER button. The alphabet will appear at the bottom of the screen. Select the desired starting letter using the MASTER VOLUME control, then press the ENTER...
- Page 16 Operation Playing Songs from the USB (Continued) SEARCHING BY GENRE, ARTIST or TITLE: To filter by Genre, Artist or Title, select the Genre, Artist, or Title using the Navigation3Left and4Right buttons, then press the ENTER button. The alphabet will appear at the bottom of the screen;...
- Page 17 Operation Playing Songs from the USB (Continued) USING THE PLAYLIST: To play your previously created playlist, select Playlist using the Navigation 4 Right and 3 Left buttons, then press the ENTER button; the row under Playlist will be highlighted. Select the desired selection using the Navigation 4 Right and 3 Left buttons as follows: TO PLAY ALL: Select Play All and...
- Page 18 Operation Playing Songs from the USB (Continued) CREATING FAVORITES: To create a favorite playlist, select a song using the Navigation 5 Up and 6 Down buttons, then scroll to the Favorite column using the Navigation 4 Right or 3 Left button.
- Page 19 Operation Using a Bluetooth Device Connect the unit as described previously. Press the ON/STANDBY button to turn the unit on. Press the Navigation 4 Right or 3 Left button to select the Bluetooth mode, then press the ENTER button. You can also repeatedly press the FUNC button to select the Bluetooth mode.
- Page 20 Using a Bluetooth Device (Continued) Note: You can view the lyrics on your mobile device/tablet and get more songs by downloading the “The Singing Machine Mobile Karaoke App”; refer to the Welcome Kit for full app download instructions. You can control your Bluetooth...
- Page 21 Operation Using a Bluetooth Device (Continued) RECORD YOUR VOCAL PERFORMANCE: To record your singing as well as the music, press the REC button. Recording will begin and the record icon at the bottom right corner of the monitor will blink red and blue.
- Page 22 Operation Playing Songs from the Recorded Files Connect the unit as described previously. Press the ON/STANDBY button to turn the unit on. Press the Navigation 4 Right or 3 Left button to select the Recordings mode and press the ENTER button to continue.
- Page 23 Operation Playing Songs from the Recorded Files (Continued) You can sing along with your previously recorded song. Simply connect microphone(s) and slide the ON/OFF switch on the microphone to the ON position. Adjust the MIC VOLUME 1 or 2 control as desired. Increasing this will increase the volume of the the respective microphone(s).
- Page 24 Operation Using the LINE IN Jack Connect an external unit to the LINE IN jack. Press the ON/STANDBY button to turn the unit on. Connect the external unit to the LINE IN Jack on the front of this unit. Connecting an external unit will allow the audio to be played through your Singing Machine.
- Page 25 Operation Using the LINE IN Jack (Continued) Adjust the MIC VOLUME 1 or 2 control as desired. Increasing this will increase the volume of the respective microphone. Rotate the ECHO control to add an echo effect to your voice. Rotate towards MAX to increase the echo effect.
- Page 26 Operation Using the EXTERNAL INPUT Jack Connect the unit as described previously. Press the ON/STANDBY button to turn the unit on. Connect the external unit to the EXTERNAL INPUT Jack on the front of this unit. Connecting an external unit will allow the audio to be played through your Singing Machine.
-
Page 27: Troubleshooting Guide
Troubleshooting Guide Should this unit exhibit a problem, check the following before seeking service: No Power • Power is not on; press the ON/STANDBY button to turn power on. • Make sure the unit is connected to AC power. • Confirm the AC adapter is connected securely to the back of the unit •... - Page 28 Updating the Firmware Make sure the USB Flash Drive is securely plugged into the USB slot before running the update. DO NOT interrupt the update. If interrupted during the update process, the software can become corrupted and the unit will no longer function properly. 1.
-
Page 29: Specifications
The Bluetooth® word mark and logos are registered trademarks owned by Bluetooth SIG, Inc. and any use of such marks by The Singing Machine Company, Inc. is under license. Other trademarks and trade names are those of their respective owners. - Page 30 Visit Our Website: www.singingmachine.com Singing Machine is distributed in the UK and Europe by: Copyright © 2019 All Rights Reserved. PDT Limited Unit 4b, Greengate Industrial Estate, White Moss View, Middleton, Manchester, M24 1UN, United Kingdom PRINTED IN CHINA info@pdtuk.com 9050-xxxx-ENG01-PDT...