Table of Contents
Advertisement
Available languages
Available languages
Advertisement
Chapters
Table of Contents

Related Manuals for Sylvania SDPF751B


Summary of Contents for Sylvania SDPF751B
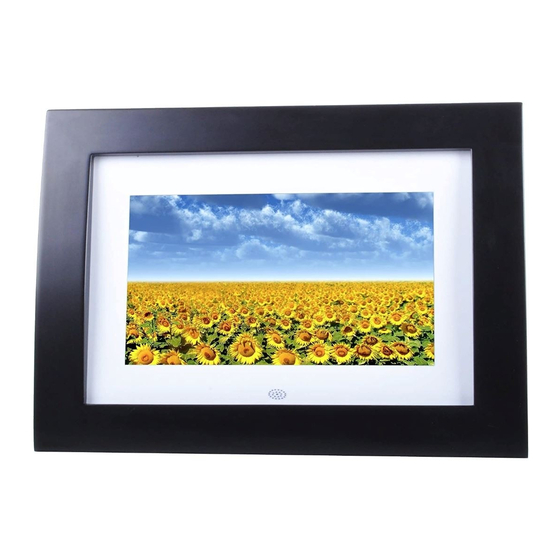
- Page 1 SDPF751B DIGITAL PHOTO FRAME USER’S MANUAL...
-
Page 2: Table Of Contents
Table of Contents Important Safety Instructions Introduction Installing your unit Main unit controls System connection Using your SD card Remote control Using your digital photo frame Browsing images Image settings Calendar Settings Troubleshooting Settings Description Technical Specifications... -
Page 3: Important Safety Instructions
Important Safety Instructions 1. Read these instructions. 2. Keep these instructions. 3. Heed all warnings. 4. Follow all instructions. 5. Do not use this apparatus near water. 6. Clean only with dry cloth. 7. Do not block any ventilation openings. Install in accordance with the manufacturer’s instructions. -
Page 4: Introduction
Introduction Congratulations on your purchase of Digital Photo Frame, model SDPF751B. Before operating the unit, please read this manual thoroughly, and retain it for future reference. This manual will help you use many of the exciting useful features that will make your Digital Photo Frame viewing more enjoyable. -
Page 5: Main Unit Controls
Main Unit Controls Power on, Press exit key then press set up button enter into Menu. / Press long(above 2 seconds) to power on and off. System Connection Power connection Plug one end of the supplied AC power adapter into the DC input jack of the unit, tnen plug the other end into the AC power receptacle. -
Page 6: Using Your Sd Card
Using your SD card Upon using an SD card, insert it to the corresponding slot flatly with the label side facing you. Note: Please don’t disconnect USB device or plug out SD/MMC/MS card while they are working with the unit. Function failure may occur in case of wrong operations. -
Page 7: Using Your Digital Photo Frame
Using Your Digital Photo Frame through the remote control Make sure you have at least one image file on your memory cards or USB flash device. Switch on the frame and insert memory cards into the unit, it will automatically start slideshow. -
Page 8: Image Settings
Image Settings While viewing an individual image, press “SETUP” button on the remote control, you will then be given a list of possible features to change: Image size: Select image size on screen, option includes Auto Fit/Optimal/ Full. Slide show effect: Adjust the transition effect between images in a slideshow. -
Page 9: Troubleshooting
Troubleshooting Symptom Digital Photo Frame can’t power on. No photo files on the memory card. The file doesn’t pay. Settings Description Cause The power connector to the unit is not securely inserted. Card is broken. Incompatible file format Corrective Actions Make sure you connect the AC adaptor to the frame properly. -
Page 10: Technical Specifications
Technical Specifications 1. To reduce the risk of fire or electric shock, do not expose this apparatus to rain or moisture. The apparatus shall not be exposed to dripping or splashing and that no objects filled with liquids, such as vases, shall be placed on the apparatus. - Page 11 SOMMAIRES Instructions importantes de sécurité Introduction Installation de l’appareil Contrôle de l’appareil principal Connexion du système Utilisation de votre carte SD Utilisation de la télécommande Utilisation de votre cadre photo numérique Navigation de l’image Réglages de l’image Réglages du calendrier Dépannage Description des réglages Spécifications techniques...
-
Page 12: Instructions Importantes De Sécurité
Instructions importantes de sécurité 1. Lire ces instructions. 2. Garder bien ces instructions. 3. Respecter tous les avertissements. 4. Suivre ces instructions. 5. Ne pas utiliser cet appareil près de l’eau. 6. Nettoyer seulement avec un chiffon sec. 7. Ne pas bloquer les ouvertures de ventilation. Installer conformément selon les instructions du fabriquant. -
Page 13: Introduction
Introduction Félicitations de votre achat de Cadre photo numérique, le modèle SDPF751B. Avant de faire fonctionner l'appareil, veuillez lire attentivement ce manuel et le conserver pour référence future. Ce manuel vous aidera à utiliser la plupart des fonctionnalités utiles passionnant qui fera de votre cadre photo numérique visualisation plus agréable. -
Page 14: Contrôle De L'appareil Principal
Contrôle de l’appareil principal 1.SETUP/OFF : démarrer l’appareil, appuyer sur la touche de retrait, puis appuyer sur la touche de programmation, pour entrer dans le menu, appuyer un peu plus long temps (plus de 2 secondes) pour démarrer ou atteindre. 2.EXIT : appuyer sur la touche de retrait pour retourner à... -
Page 15: Utilisation De Votre Carte Sd
Using your SD card À l'aide d'une carte SD, insérez-le à l'emplacement correspondant à plat avec l'étiquette face à vous. Note: Ne pas déconnecter un périphérique USB ou la prise en SD / MMC / MS lors qu'ils travaillent avec l'unité. La défaillance de la fonction peut se produire en cas d'opérations mauvaises. -
Page 16: Utilisation De Votre Cadre Photo Numérique
Utilisation de votre cadre photo numérique par la télécommande Assurez-vous d'avoir au moins un fichier image sur votre carte mémoire ou clé USB. Connecter sur le cadre, et insérer la carte de mémoire dans l’appareil, cet appareil lancera automatiquement le diaporama. Appuyez sur le bouton "EXIT"... -
Page 17: Réglages De L'image
Réglages de l’image Lors de l'affichage d'une image individuelle, appuyez sur "SETUP" de la télécommande, vous obteniez une liste de fonctionnalités possible de changer: Format d'image: Taille de l'image sur l'écran, l'option comprend Auto Fit / Optimal / complète. Effet du diaporama. : Réglez l'effet de transition entre les images dans un diaporama. -
Page 18: Dépannage
Dépannage Symptôme Cadre photo numérique ne Le connecteur d’alimentation de peut pas sous tension. l’appareil n’est pas correctement inséré. Aucun fichier de photo sur La carte est en panne. la carte mémoire. Le fichier ne lit pas. Le format du fichier incompatible Description des réglages Réglages Réglages... -
Page 19: Spécifications Techniques
Spécifications techniques Format de Multimédia Support de la carte mémoire Port USB Entrée de puissance Sortie de puissance Accessoires Langage 1. Pour réduire le risque d'incendie ou de choc électrique, n'exposez pas cet appareil à la pluie ou à l'humidité. L'appareil ne doit pas être exposé à des gouttes ou des éclaboussures et aucun objet rempli de liquide ne peut être placé...