Table of Contents
Advertisement
Advertisement
Table of Contents

Related Manuals for Suzuki GP-3


Summary of Contents for Suzuki GP-3
- Page 1 SUZUKI PIANOS GP-3 MINI-GRAND DIGITAL PIANO OWNER’S MANUAL SUZUKI...
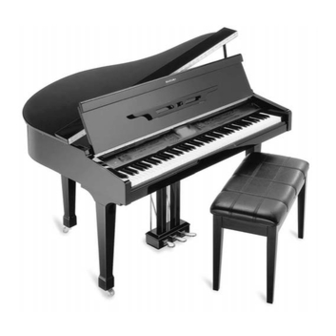
- Page 3 WELCOME! We would like to express our appreciation and congratulate you for purchasing this Suzuki Mini Grand digital piano. This piano has been designed to provide you with years of musical enjoyment. State of the art electronics are combined with an elegant cabinet that will add beauty and sophistication to any home environment. Listed Below are just a few of the features that your new piano is equipped with: •...
-
Page 4: General Precautions
GENERAL PRECAUTIONS CAUTION: TO REDUCE THE RISK OF ELECTRIC SHOCK, REFER SERVICING TO QUALIFIED SERVICE PERSONNEL INSTRUCTIONS PERTAINING TO A RISK OF FIRE, ELECTRIC SHOCK OR INJURY: The lightning flash with arrowhead symbol, within an equilateral triangle, is intended to alert the user to the presence of uninsulated or “dangerous voltage”... -
Page 5: Taking Care Of Your Digital Piano
TAKING CARE OF YOUR DIGITAL PIANO This Suzuki digital piano will supply you with years of musical enjoyment if you follow the simple rules listed below. IMPORTANT SAFETY INSTRUCTIONS WARNING When using electrical products, basic safety precautions should always be followed, includ- ing the following: SAFETY Power Source - The product should always be... -
Page 6: Table Of Contents
TABLE OF CONTENTS ASSEMBLY ... 7 CONNECTOR PANEL ... 16 Video Output ... 16 Headphone Input ... 16 Audio In & Out ... 16 MIDI Jacks ... 16 USB ... 16 Microphone Input ... 16 PANEL CONTROLS... 17 Memory Card Slot ... 27 DISK DRIVE ... -
Page 7: Assembly
ASSEMBLY PLEASE DO NOT ATTEMPT TO ASSEMBLE YOUR PIANO BEFORE READING THESE INSTRUCTIONS! IF YOU HAVE ANY QUESTION OR PROBLEMS, DO NOT CALL OR RETURN PRODUCT TO THE STORE Visit www.suzukimusic.com/GP-3 OR CALL THIS TOLL FREE HELP LINE 1-800-854-1594... - Page 8 ASSEMBLY UNPACKING YOUR NEW GRAND PIANO A. You should have 3 cartons as pictured. • Large Carton: Grand Piano • Medium Carton: 3 piano legs and piano pedal assembly • Small Carton: Piano bench • You will need 2 people to set up this large product. Do not attempt to set up your piano by yourself.
- Page 9 ASSEMBLY UNPACKING YOUR NEW GRAND PIANO (continued) D. Inner carton. • Locate the back of the inner carton. It is marked with a sticker. • Use a SMALL knife to slit the center, top and bottom tape. • Remove the foam pieces as shown. This will reveal the bottom of the piano.
- Page 10 ASSEMBLY UNPACKING PIANO LEGS & PEDAL ASSEMBLY A. Get the Medium Sized box labeled ‘Grand Pedal/Grand Leg’. • Carefully slit the tape and open the box as shown. • Lift out all the parts inside this box and gently remove the protective plastic covering.
- Page 11 ASSEMBLY ATTACHING THE LEGS TO THE PIANO. A. Assembly Positions. You will see the following areas on the bottom of your piano. 1. Right Piano Leg Position 2. Pedal Assembly Position 3. Left Piano Leg Position 4. Back Piano Leg Position 5.
- Page 12 ASSEMBLY PEDAL ASSEMBLY ATTACHMENT A. Pre-Pedal Assembly. • Tighten both knobs on the bottom of the pedal assembly clockwise as shown, until they are as close to the pedal board as possible. • After your piano has been placed in its final position, these 2 knobs will be adjusted down to stabilize the pedals.
- Page 13 ASSEMBLY PEDAL ASSEMBLY ATTACHMENT (continued) IMPORTANT! • Remember! It is important that one person hold the piano while the other person performs the installation functions. Be careful not to push or pull the piano over while installing these parts. D. The Support Rods. •...
- Page 14 ASSEMBLY INSTALLING THE LEFT LEG A. Pad the Piano. • Make a thick pad by folding a blanket or quilt in quarters. Place it so the pedal assembly will land on it. Using 2 or 3 persons, lift the piano and pivot onto the pad. B.
- Page 15 ASSEMBLY POSITIONING YOUR NEW GRAND PIANO WARNING • When positioning the piano in your home it is recommended that you carry it to the final position. The solid brass casters may be damaged by rough surfaces and the casters may damage some flooring surfaces like hardwood or tile.
-
Page 16: Connector Panel
Panel. Please use the included cord or similar RCA type cord to plug the GP-3 video output jack to the similar style Video Input Jack on your PHONE 1 / PHONE 2 - You can play in total silence, without disturbing others in the room, by plugging a set of headphones into one of the appropriate sockets. -
Page 17: Panel Controls
PANEL CONTROLS Mini Grand Digital Piano GP-3 POWER MASTER VOLUME This Suzuki piano’s control panel is designed for ease of use and intuitive playing. The following is a brief description of the features and functions located on the control panel. - Page 18 PANEL CONTROLS LED Light Bar Display RHYTHM CONTROL SYNC – TEMPO + ONE TOUCH INTRO/ENDING START/STOP FILL-IN FILL TO VAR TEMPO - Press one of the TEMPO buttons, the current tempo value will appear on the display. You can use the TEMPO +, TEMPO – buttons, or the +/– VALUE buttons to increase or decrease the tempo of Orchestrated Accompaniment Pat- terns and other Recorded features.
- Page 19 PANEL CONTROLS RHYTHM CONTROL SYNC INTRO/ENDING – TEMPO + ONE TOUCH START/STOP FILL-IN FILL TO VAR SYNC (SYNCHRONIZED START) - Synchronized Start mode engages the auto accompaniment standby mode. This means that your selected Auto Accompaniment pattern will begin when you press the piano keys to the left of the split point.
- Page 20 PANEL CONTROLS RHYTHM CONTROL SYNC INTRO/ENDING START/STOP – TEMPO + ONE TOUCH ACCOMP FILL-IN FILL TO VAR FADE FILL IN - This function provides the Orchestrated Rhythm Accompani- ment with a short rhythm pattern of one or two measures for each style. Function: Press the FILL IN button at any time while the Accompaniment is playing.
- Page 21 LATIN QUICK SELECT RHYTHM STYLE BUTTONS - There a total of 100 Rhythm Style Accompaniments in the GP-3 Piano. There are ten Rhythm Styles that can be selected quickly by pressing one of the ten quick select RHYTHM STYLE buttons.
- Page 22 PANEL CONTROLS UPPER LAYER CURSER LOWER SCREEN VALUE LEFT RIGHT – ESCAPE CURSOR - The CURSOR button group allows you to access and highlight different areas within the LCD Display screen. Please note - After your selection has been highlighted Press the Enter button to engage your selected item.
- Page 23 PANEL CONTROLS CURSER SCREEN LEFT RIGHT ESCAPE DATA WHEEL CONTRAST VALUE ENTER – GRAND PIANO - This button will reset the piano to its default (power up) settings while engaging the Grand Piano voice for all 88 piano keys. Note: The Grand Piano Button is very useful to quickly escape from any feature and/or functions modes that are currently engaged.
- Page 24 PANEL CONTROLS GRAND PIANO SOUND GROUP PIANO REVERB SAXOPHONE EFFECTS REGISTRATION MEMORY STORE VIBES ORGAN GUITAR FLUTE SYNTH LEAD SYNTH SYNTH FX (QUICK SELECT INSTRUMENT VOICE) SOUND GROUP - There are sixteen voices that can be selected quickly by pressing one of the Instru- ment Voice select buttons.
- Page 25 PANEL CONTROLS ACCOMP PLAY/PAUSE COMPOSER MEL 1 MEL 2 MEL 3 STOP RECORD BEG MARK ACCOMP (ACCOMPANIMENT) - Music Recorder Section - The ACCOMP button is used to record the selected auto Accompaniment Rhythm Style for your music recording session. See Record Section of the manual for further information.
- Page 26 PANEL CONTROLS ACCOMP COMPOSER MEL 1 MEL 2 MEL 3 PLAY/PAUSE STOP RECORD BEG MARK PLAY/PAUSE - Press the PLAY/PAUSE button to hear previously recorded tracks. Press the PLAY/PAUSE button again to pause the recording or playback. See Record Section of the manual for further information. STOP - Press the STOP button to stop the recording or playback.
-
Page 27: Memory Card Slot
PANEL CONTROLS COMPOSER ACCOMP MEL 1 MEL 2 PLAY/PAUSE STOP RECORD MEL 3 MEL 4 RESET METRONOME BEG MARK END MARK METRONOME - The METRONOME button toggles the metronome feature on and off and accesses the Metronome menu. The tempo can be increased or decreased using the TEMPO + and - buttons. -
Page 28: Disk Drive
DISK DRIVE DISK DRIVE - The disk drive is located under the piano keys on the right hand Piano Power On/Off Indicator LED Light Floppy Disk Drive “In Use” Indicator LED Light side of the unit. It is used to play a floppy disk. Please see the Disk section of this manual for more information. -
Page 29: Pedals
PEDALS PIANO PEDALS SOFT PEDAL - When the left pedal is engaged the piano volume is reduced and the timbre slightly altered on the notes that are played. FUNCTION PEDAL - This center pedal can be used to trigger various events, such as start/stop and Fill In. -
Page 30: Display Screen
DISPLAY SCREEN CURSER ESCAPE The Main Performance Menu Screen is shown and explained below. How to select and engage a Menu Item on the LCD Display Screen: MAIN PERFORMANCE SCREEN The sound channel mode. Auto Accompaniment: When auto accompaniment is engaged, this area shows the chord that is playing. -
Page 31: Demo
DEMONSTRATION SONGS PLAYING THE DEMONSTRATION SONGS - This piano has thirteen different demonstration songs that are designed to showcase the different Instrument Voices that are available on this Mini Grand Piano. The LCD Screen Display will show the demonstration song name. All the demonstration songs will play back repeatedly until the Start/Stop or Demo Button is pressed. -
Page 32: Piano Voices
PIANO VOICES - SOUND CHANNEL MODES ASSIGNING DIFFERENT PIANO SOUND CHANNEL MODES Depending on your playing style this piano can be set up to play in 4 different Piano Sound Channel Modes: Upper, Layer, Lower and Drum. TO SELECT AND ENGAGE ONE OF DIFFERENT SOUND CHANNEL MODES PRESS ONE OF THEIR RESPECTIVE BUTTONS. -
Page 33: Voice Selection
PIANO VOICES - VOICE SELECTION VOICE SELECTION FOR UPPER, LAYER AND LOWER SOUND MODES THERE ARE TWO WAYS TO SELECT AN INSTRUMENT VOICE SCROLL THROUGH THE INSTRUMENT VOICES VALUE – DATA WHEEL UPPER LAYER LOWER There are 128 GM (General MIDI) Instrument Voices available on this piano. -
Page 34: Quick Select
PIANO VOICES - QUICK SELECTION SOUND GROUP PIANO VIBES SAXOPHONE FLUTE Quick Select Sound Group Buttons Shown Above. To select an Instrument Voice for your Piano follow the easy steps shown below: QUICK SELECT SOUND GROUP For all 88 Key voice selections (Upper Mode) PIANO VIBES SAXOPHONE... - Page 35 PIANO VOICES - SELECTING ALL VOICES SELECTING ONE OF THE 128 VOICES SOUND GROUP PIANO VIBES SAXOPHONE FLUTE SCREEN LEFT RIGHT CURSER ENTER Press a quick select SOUND GROUP buttons twice, to engage an Instrument Voice selection menu on the display screen. NOTE: Each Sound Group button is assigned eight related voices in two groups of four.
- Page 36 PIANO VOICES - EFFECTS AND RESET GRAND PIANO - This button will reset the piano to its default (power up) GRAND PIANO REVERB - The reverb effect is engaged automatically when the power is turned REVERB EFFECTS - The EFFECTS button will add chorus, flanger or the delay effect to the EFFECTS The Grand Piano, Reverb and Chorus Buttons can reset your piano’s current functions or add Digital Effects to your selected...
-
Page 37: Rhythm Section
RHYTHM SECTION - SELECTING A RHYTHM RHYTHM STYLE SELECTION - Your Suzuki GP-3 Piano has a large variety of exciting musical “Rhythm Styles” that you can “play along with” to back up your own performance. You can choose from a simple piano or percussion accompa- niment to a full band or orchestra. - Page 38 RHYTHM SECTION - SELECTING A RHYTHM RHYTHM STYLES SWING BIG BAND BOSSANOVA ACOUSTIC OLDIES SCREEN LEFT RIGHT CURSER ENTER SELECTING ONE OF THE 100 RHYTHM STYLES FROM THE RHYTHM STYLE BUTTON GROUPS. Press one of the quick select RHYTHM STYLE buttons twice, to display the Rhythm Style selection menu on the display screen.
- Page 39 RHYTHM SECTION - SELECTING A RHYTHM SELECTING A RHYTHM STYLE USING LCD DISPLAY PANEL CONTROLS CURSER VALUE – Selecting a Rhythm Style using only the Cursor and Value Buttons Highlight the Rhythm Style name area using the CURSOR buttons. STYLE 1 : Grand Piano 1 : Big Band Press the VALUE + and - buttons or turn the Data Wheel to cycle...
-
Page 40: Starting And Stopping The Rhythm Style
RHYTHM SECTION - PLAYING THE RHYTHM SYNC Intro, Fill-In and Ending Patterns fitting each different Rhythm Style are permanently stored in your instrument, allowing a versatile Rhythm Performance. START/STOP STRAIGHT START INTRO - Begin the Rhythm Performance with an Intro Pattern. INTRO/ENDING START/STOP SYNCHRONIZED START - Begin the Rhythm Performance when you play a... -
Page 41: Fade
RHYTHM SECTION - PLAYING THE RHYTHM FADE - Finish the Rhythm Performance by “fading out” and the Rhythm Volume START/STOP FADE ADJUST THE TEMPO CONTROLS - The Tempo of the Rhythm Pattern can be – TEMPO + TEMPO - There is a four-beat indicator next to the TEMPO buttons that visually VALUE –... -
Page 42: Auto Accomp. (Auto Base Chord)
AUTO ACCOMPANIMENT SYNC Simply by playing a chord on the keyboard, the AUTO ACCOMPANIMENT function automatically plays an accompaniment pattern which matches perfectly the selected rhythm. With a real accompaniment as a background, you can concentrate on playing the melody. HOW AUTO ACCOMPANIMENT WORKS Accompaniment Piano Key Area... -
Page 43: One Finger
AUTO ACCOMPANIMENT - TYPES HOW TO PLAY CHORDS Basic Mode (One Finger) ONE FINGER Accompaniment Piano Key Area There are 3 different ways to specify chords on the Keyboard. For beginner players, a left hand chord can be specified with just one finger. -
Page 44: Fingered
AUTO ACCOMPANIMENT - TYPES FINGERED MODE - The fingered mode is ideal if you already know how to play ACCOMP : Fingered 1 2 3 4 5 6 7 8 9 0 1 2 3 4 5 6 7 8 9 0 1 2 3 4 5 6 7 8 9 0 1 2 1 2 3 4 5 6 7 8 9 0 1 2 3 4 5 6 7 8 9 0 1 2 3 4 5 6 7 8 9 0 1 2 1 2 3 4 5 1 2 3 4 5 6 7 8 9 0 1 2 3 4 5 6 7 8 9 0 1 2 3 4 5 6 7 8 9 0 1 2 1 2 3 4 5 6 7 8 9 0 1 2 3 4 5 6 7 8 9 0 1 2 3 4 5 6 7 8 9 0 1 2 1 2 3 4 5 1 2 3 4 5 6 7 8 9 0 1 2 3 4 5 6 7 8 9 0 1 2 3 4 5 6 7 8 9 0 1 2 1 2 3 4 5 6 7 8 9 0 1 2 3 4 5 6 7 8 9 0 1 2 3 4 5 6 7 8 9 0 1 2 1 2 3 4 5 One Finger... -
Page 45: Piano
AUTO ACCOMPANIMENT - TYPES PIANO CHORD MODE MANUAL BASS SPLIT POINT ACCOMP : Piano 1 2 3 4 5 6 7 8 9 0 1 2 3 4 5 6 7 8 9 0 1 2 3 4 5 6 7 8 9 0 1 2 1 2 3 4 5 6 7 8 9 0 1 2 3 4 5 6 7 8 9 0 1 2 3 4 5 6 7 8 9 0 1 2 1 2 3 4 5 6 1 2 3 4 5 6 7 8 9 0 1 2 3 4 5 6 7 8 9 0 1 2 3 4 5 6 7 8 9 0 1 2 1 2 3 4 5 6 7 8 9 0 1 2 3 4 5 6 7 8 9 0 1 2 3 4 5 6 7 8 9 0 1 2 1 2 3 4 5 6 1 2 3 4 5 6 7 8 9 0 1 2 3 4 5 6 7 8 9 0 1 2 3 4 5 6 7 8 9 0 1 2 1 2 3 4 5 6 7 8 9 0 1 2 3 4 5 6 7 8 9 0 1 2 3 4 5 6 7 8 9 0 1 2 1 2 3 4 5 6 One Finger... -
Page 46: Selecting Chord Type
AUTO ACCOMPANIMENT - HOW TO USE SELECTING YOUR AUTO CHORD TYPE ACCOMP CURSER ENTER – TEMPO + ONE TOUCH ACCOMP Press the ACCOMP button, Its indicator LED will turn on. The LCD Display Screen will show the accompaniment “Chord” menu. ACCOMP : Fingered 1 2 3 4 5 6 7 8 9 0 1 2 3 4 5 6 7 8 9 0 1 2 3 4 5 6 7 8 9 0 1 2 1 2 3 4 5 6 7 8 9 0 1 2 3 4 5 6 7 8 9 0 1 2 3 4 5 6 7 8 9 0 1 2 1 2 3 4 5 1 2 3 4 5 6 7 8 9 0 1 2 3 4 5 6 7 8 9 0 1 2 3 4 5 6 7 8 9 0 1 2 1 2 3 4 5 6 7 8 9 0 1 2 3 4 5 6 7 8 9 0 1 2 3 4 5 6 7 8 9 0 1 2 1 2 3 4 5... -
Page 47: Starting And Stopping The Auto Accomp
AUTO ACCOMPANIMENT - HOW TO PLAY PLAYING IN THE AUTO ACCOMPANIMENT MODE ACCOMP SYNCHRONIZED START SYNC SYNCHRONIZED INTRO START SYNC INTRO/ENDING – TEMPO + RHYTHM CONTROL SYNC INTRO/ENDING START/STOP FILL-IN Press the ACCOMP button its LED indicator light will turn on. Select the Chord Fingering Mode (see previous page). -
Page 48: Fill-In
AUTO ACCOMPANIMENT - HOW TO PLAY FILL IN - You can insert a fill-in pattern any time during the rhythm performance. START/STOP FILL-IN FILL TO VAR FILL IN - You can insert a fill-in pattern any time during the Accompaniment FILL-IN FILL TO VAR ENDING - Finish the Accompaniment Orchestration with an Ending Pattern. -
Page 49: Setup
SETUP The SETUP Function is used to set up or to adjust various parameters related to the operation of this piano. The SETUP button will access menus for Performance, Harmony, Key Mode, Sustain, Reverb, Chord mode, Effects, Pedal, Percussion, and Metronome Mode. USING THE SETUP MENU SETUP SCREEN... -
Page 50: Velocity
SETUP - PERFORMANCE MENU SETUP MODE PERFORMANCE SETUP MENU SETUP ENTER CURSER SPLIT POINT FUNCTION Press the SETUP button. The first Set Up Menu Screen will appear on the LCD Screen The Performance Listing will be highlighted. Press the ENTER button to access the Performance menu. Use the CURSOR buttons to access the following options shown below. -
Page 51: Transpose
SETUP - PERFORMANCE MENU PERFORMANCE- SETUP MENU SETUP ENTER TRANSPOSE - CURSER VALUE – LCD SCREEN DISPLAY HOLD Press the SETUP button. The first Set Up Menu Screen will appear on the LCD Screen The Performance Listing will be highlighted. Press the ENTER button to access the Performance menu. -
Page 52: Tune
SETUP - PERFORMANCE MENU PERFORMANCE- SETUP MENU SETUP ENTER SCREEN LEFT RIGHT TUNE CURSER FIXED LEVEL Press the SETUP button. The first Set Up Menu Screen will appear on the LCD Screen The Performance Listing will be highlighted. Press the ENTER button to access the Performance menu. Use the SCREEN RIGHT BUTTON and the CURSOR buttons to access the following options shown below. -
Page 53: Octave Shift
SETUP - PERFORMANCE MENU PERFORMANCE- SETUP MENU SETUP ENTER SCREEN LEFT RIGHT FADE TIME CURSER OCTAVE SHIFT Press the SETUP button. The first Set Up Menu Screen will appear on the LCD Screen. The Performance Listing will be highlighted. Press the ENTER button to access the Performance menu. Use the SCREEN RIGHT BUTTON and the CURSOR buttons to access the following options shown below. -
Page 54: Harmony
SETUP - HARMONY MENU HARMONY SETUP MENU SETUP CURSER ENTER CURSER HARMONY HARMONY TYPES Press the SETUP button. Use the CURSOR button to highlight the Harmony menu. Press the ENTER button to access the Harmony menu. Use the CURSOR button to select a harmony type, then use the VALUE buttons to turn that harmony type on or off. -
Page 55: Key Mode
SETUP - KEY MODE MENU KEY MODE SETUP MENU SETUP CURSER MANUAL BASS ENTER CURSER LOWER HOLD Press the SETUP button. Use the CURSOR button to highlight the Key Mode menu. Press the ENTER button to access the Key Mode menu. Use the CURSOR button to select a key mode type, then use the VALUE buttons to turn that key mode type on or off. -
Page 56: Sustain
SETUP - SUSTAIN MENU SUSTAIN - SETUP MENU SETUP CURSER ENTER SUSTAIN CURSER Press the SETUP button. Use the CURSOR button to highlight the Sustain menu. Press the ENTER button to access the Sustain menu. Use the CURSOR button to select a sustain type, then use the VALUE buttons to adjust your selected sustain type on or off. -
Page 57: Reverb
SETUP - REVERB MENU REVERB - SETUP MENU SETUP SCREEN LEFT RIGHT ENTER REVERB CURSER REVERB TYPES Press the SETUP button. Use the SCREEN RIGHT button to access the second page of the setup menu options. Press the ENTER button to access the Reverb menu. Use the CURSOR button to access the following options: Reverb simulates the effect of playing in a big room or hall where the sound reverberates off the walls and ceiling. -
Page 58: Effects
SETUP - EFFECTS MENU EFFECTS (CHORUS) - SETUP MENU SETUP SCREEN LEFT RIGHT EFFECTS (CHORUS) CURSER ENTER CURSER EFFECT TYPES Press the SETUP button. Use the SCREEN RIGHT button to access the second page of the setup menu options. Use the CURSOR button to highlight the Effects menu. Press the ENTER button to access the Effects menu. -
Page 59: Chord (Auto Accompaniment Fingering)
SETUP - CHORD MENU CHORD - SETUP MENU SETUP SCREEN LEFT RIGHT CURSER CHORD MODE (AUTO ACCOMPANIMENT MODE) ENTER CURSER ONE FINGER FINGERED MODE - PIANO CHORD MODE - Press the SETUP button. Use the SCREEN RIGHT button to access the second page of the setup menu options. -
Page 60: Pedal Menu
SETUP - PEDAL MENU PEDAL ASSIGN - SETUP MENU SETUP SCREEN LEFT RIGHT CURSER PEDAL ASSIGN ENTER CURSER Press the SETUP button. Use the SCREEN RIGHT button to access the second page of the setup menu options. Use the CURSOR button to highlight the Pedal menu. Press the ENTER button to access the Pedal menu. -
Page 61: Percussion (Drum Kit Assign)
SETUP -PERCUSSION MENU PERCUSSION (DRUM KIT SELECTION) - SETUP SCREEN LEFT RIGHT ENTER PERCUSSION (DRUM KIT SELECTION) VALUE – Press the SETUP button. Use the SCREEN RIGHT button to access the third page of the setup menu options. Press the ENTER button to access the Percussion menu. Use the –... -
Page 62: Metronome
SETUP - METRONOME MENU METRONOME - SETUP MENU SETUP SCREEN LEFT RIGHT CURSER METRONOME ENTER CURSER Press the SETUP button. Use the SCREEN RIGHT button to access the third page of the setup menu options. Use the CURSOR button to highlight the Metronome menu. Press the ENTER button to access the Metronome menu. -
Page 63: Registration Memory
REGISTRATION MEMORY REGISTRATION MEMORY STORE REGISTRATION A registration is a particular group settings such as style, voice, chord and other parameters or features that you have engaged. You can save these Settings or your “set up” so that it can be recalled by press- ing a single button. -
Page 64: Record
RECORD FUNCTIONS OUTLINE OF A MUSIC RECORDER (OR SEQUENCER) A music recorder records your performance in a similar way to a tape recorder. This instrument’s music recorder allows you to record and save up to 5 different ways. You may want to record your entire performance at one time (especially if you are using Auto Accompaniment to provide the Orchestration), or build up a complex arrangement with several different parts playing together, like an en- sembles score. - Page 65 RECORD FUNCTIONS RECORD FEATURES - continued Auto Accompaniment Track (Accomp Button) The Auto Accompaniment track will record chord changes, style, tempo, variation, intro, fill-in and ending. Pressing The ACCOMP track button and the Record Button will select the accompaniment track for recording. If ACCOMP Record track button has been selected and it’s LED Indica- tor light is Flashing, then the auto accompaniment will be synchronized to start when the piano keys are played.
-
Page 66: Recording
RECORDING The piano mode. HOW TO RECORD RECORDING PLAY/PAUSE STOP RECORD PLAY/PAUSE STOP RECORD MEL 2 MEL 3 MEL 4 RESET The top line displays which melody track is recording. Record Melody 3 Record Accomp 1 : 3 / = 100 The current bar (1) and The current beat (3). -
Page 67: Playback
RECORDING - PLAYBACK PLAYBACK PLAY/PAUSE STOP RECORD PLAY/PAUSE STOP RECORD PLAY/PAUSE STOP RECORD COMPOSER ACCOMP MEL 1 MEL 2 MEL 3 PLAY/PAUSE STOP RECORD To listen to your recording follow these simple steps. To Playback Your Recorded Music Press the PLAY/PAUSE button. The Play Buttons LED Indicator will stay on until the playback is com- plete. -
Page 68: Mark
RECORDING - MARK MARK HOW TO USE BEG. MARK AND END MARK BUTTONS PLAY/PAUSE BEG MARK END MARK PLAY/PAUSE RECORD BEG MARK END MARK COMPOSER ACCOMP MEL 1 MEL 2 MEL 3 PLAY/PAUSE STOP RECORD The mark feature allows you to isolate a section of a track of your recording. -
Page 69: Song
SONG - PLAY ALONG SONG This piano includes a range of songs covering a variety of genres that are enjoy- able to listen to, or to play along with. You can begin practicing with just one hand, and you can even practice at your own tempo. This instrument will even evaluate and grade your performance for you! SONG The SONG button will access a play along music lesson guide that can be used... -
Page 70: Using The Lesson Feature
SONG - LESSON The name of the selected song. Bumble Bee Use “Play” to listen to the Play selected parts of the song. Test Use “Test” to be graded on your performance of the selected parts of the song. PLAY ALONG SONG - LESSONS USING THE LESSON FEATURE - From Song Selected Menu Screen Shown Example: To test Left Hand Play (listen to right hand only and play left CURSER... - Page 71 SONG - LESSON LESSON FEATURES TEST - Pressing the ENTER button engages the TEST mode when highlighted. TEST MODES TEST RESULTS STOP THE SONG MODE You may test yourself on the right hand melody, the left hand accompa- niment or both hands by highlighting the appropriate area and using the VALUE buttons to toggle those parts on, Y (Yes) or off, N (No).
-
Page 72: Disk
SD MEMORY CARD The Card / Disk features on this piano allows the user to Record or Playback from two different Memory Storage Formats. Suzuki offers this option to ensure that the Suzuki Piano Line always features the latest in digital technology. -
Page 73: Load Song
SD MEMORY CARD - LOAD SONG Load Song METRONOME CARD/DISK CURSER ENTER PLAY/PAUSE START/STOP Load Song retrieves one of your previously stored Music Performances or MIDI File songs from the SD Memory Card. Since the Standard MIDI file that you have on the SD Memory Card and your musical performance in the pianos music recorder share the same memory, selecting a song file may bring up a confirmation pop up screen, saying it will overwrite the song that is currently in the sequencer... -
Page 74: Save Song
1 2 3 4 5 6 7 8 9 0 1 2 3 4 5 6 7 8 9 0 1 2 3 4 5 6 7 8 9 0 1 2 1 2 3 4 5 6 7 8 9 0 1 2 3 4 5 6 7 8 9 0 1 2 3 4 5 6 7 8 9 0 1 2 1 2 3 4 5 Make sure the SD Memory Card has has room to store song data files on it. (The GP-3 will also let you know if there is no space left to Save.) Select the Save Song Menu Item. -
Page 75: Play Disk
SD MEMORY CARD - PLAY CARD PLAY CARD METRONOME CARD /DISK MIDI SONG The Play Card function lets you play all SMF MIDI Song Files that are on the SD Memory Card. CARD MENU 1 2 3 4 5 6 7 8 9 0 1 2 3 4 5 6 7 8 9 0 1 2 3 4 5 6 7 8 9 0 1 2 1 2 3 4 5 6 7 8 9 0 1 2 3 4 5 6 7 8 9 0 1 2 3 4 5 6 7 8 9 0 1 2 1 2 3 4 5 1 2 3 4 5 6 7 8 9 0 1 2 3 4 5 6 7 8 9 0 1 2 3 4 5 6 7 8 9 0 1 2 1 2 3 4 5 6 7 8 9 0 1 2 3 4 5 6 7 8 9 0 1 2 3 4 5 6 7 8 9 0 1 2 1 2 3 4 5 1 2 3 4 5 6 7 8 9 0 1 2 3 4 5 6 7 8 9 0 1 2 3 4 5 6 7 8 9 0 1 2 1 2 3 4 5 6 7 8 9 0 1 2 3 4 5 6 7 8 9 0 1 2 3 4 5 6 7 8 9 0 1 2 1 2 3 4 5 Load Song... - Page 76 SD MEMORY CARD - PLAY CARD MENUS Various Menu Screens FILE DATA LYRICS MUTE CHANNEL SOLO CHANNEL Playback Options Load Song function has various menu screens that allow you to view Song Lyrics and to play along with the SD Memory Card. CARD MENU 1 2 3 4 5 6 7 8 9 0 1 2 3 4 5 6 7 8 9 0 1 2 3 4 5 6 7 8 9 0 1 2 1 2 3 4 5 6 7 8 9 0 1 2 3 4 5 6 7 8 9 0 1 2 3 4 5 6 7 8 9 0 1 2 1 2 3 4 5 6 1 2 3 4 5 6 7 8 9 0 1 2 3 4 5 6 7 8 9 0 1 2 3 4 5 6 7 8 9 0 1 2 1 2 3 4 5 6 7 8 9 0 1 2 3 4 5 6 7 8 9 0 1 2 3 4 5 6 7 8 9 0 1 2 1 2 3 4 5 6...
-
Page 77: Format
SD MEMORY CARD - UTILITY UTILITY - Selecting Utility will access the Card Utility Screen. CARD MENU 1 2 3 4 5 6 7 8 9 0 1 2 3 4 5 6 7 8 9 0 1 2 3 4 5 6 7 8 9 0 1 2 1 2 3 4 5 6 7 8 9 0 1 2 3 4 5 6 7 8 9 0 1 2 3 4 5 6 7 8 9 0 1 2 1 2 3 4 5 6 1 2 3 4 5 6 7 8 9 0 1 2 3 4 5 6 7 8 9 0 1 2 3 4 5 6 7 8 9 0 1 2 1 2 3 4 5 6 7 8 9 0 1 2 3 4 5 6 7 8 9 0 1 2 3 4 5 6 7 8 9 0 1 2 1 2 3 4 5 6 1 2 3 4 5 6 7 8 9 0 1 2 3 4 5 6 7 8 9 0 1 2 3 4 5 6 7 8 9 0 1 2 1 2 3 4 5 6 7 8 9 0 1 2 3 4 5 6 7 8 9 0 1 2 3 4 5 6 7 8 9 0 1 2 1 2 3 4 5 6 Load Song... -
Page 78: Delete
SD MEMORY CARD - UTILITY UTILITY MENU - continued Delete - Delete is used to remove unwanted files from the disk to make more space available. Disk Utility 1 2 3 4 5 6 7 8 9 0 1 2 3 4 5 6 7 8 9 0 1 2 3 4 5 6 7 8 9 0 1 2 1 2 3 4 5 6 7 8 9 0 1 2 3 4 5 6 7 8 9 0 1 2 3 4 5 6 7 8 9 0 1 2 1 2 3 4 5 1 2 3 4 5 6 7 8 9 0 1 2 3 4 5 6 7 8 9 0 1 2 3 4 5 6 7 8 9 0 1 2 1 2 3 4 5 6 7 8 9 0 1 2 3 4 5 6 7 8 9 0 1 2 3 4 5 6 7 8 9 0 1 2 1 2 3 4 5 1 2 3 4 5 6 7 8 9 0 1 2 3 4 5 6 7 8 9 0 1 2 3 4 5 6 7 8 9 0 1 2 1 2 3 4 5 6 7 8 9 0 1 2 3 4 5 6 7 8 9 0 1 2 3 4 5 6 7 8 9 0 1 2 1 2 3 4 5 Format... -
Page 79: Disk
DISK DISK FEATURES - INSERT THE DISK - Insert the 3.5” disk into the disk drive with the label side up REMOVE THE DISK - To remove the diskette press the eject button on the disk DISK MAIN MENU SCREEN METRONOME DISK MIDI... -
Page 80: Load
DISK - LOAD SONG Load Song - METRONOME CARD / DISK MIDI SONG CURSER ENTER PLAY/PAUSE START/STOP Load Song retrieves one of your previously stored Music Performances or MIDI File songs from the floppy disk. Since the Standard MIDI file that you have on disk and your musical performance in the pianos music recorder share the same memory, selecting a song file may bring up a confirmation pop up screen, saying it will overwrite the song that is currently in the sequencer (music... -
Page 81: Playing
DISK - SAVE SONG SAVE SONG 1 2 3 4 5 6 7 8 9 0 1 2 3 4 5 6 7 8 9 0 1 2 3 4 5 6 7 8 9 0 1 2 1 2 3 4 5 6 7 8 9 0 1 2 3 4 5 6 7 8 9 0 1 2 3 4 5 6 7 8 9 0 1 2 1 2 3 4 5 1 2 3 4 5 6 7 8 9 0 1 2 3 4 5 6 7 8 9 0 1 2 3 4 5 6 7 8 9 0 1 2 1 2 3 4 5 6 7 8 9 0 1 2 3 4 5 6 7 8 9 0 1 2 3 4 5 6 7 8 9 0 1 2 1 2 3 4 5 1 2 3 4 5 6 7 8 9 0 1 2 3 4 5 6 7 8 9 0 1 2 3 4 5 6 7 8 9 0 1 2 1 2 3 4 5 6 7 8 9 0 1 2 3 4 5 6 7 8 9 0 1 2 3 4 5 6 7 8 9 0 1 2 1 2 3 4 5 1 2 3 4 5 6 7 8 9 0 1 2 3 4 5 6 7 8 9 0 1 2 3 4 5 6 7 8 9 0 1 2 1 2 3 4 5 6 7 8 9 0 1 2 3 4 5 6 7 8 9 0 1 2 3 4 5 6 7 8 9 0 1 2 1 2 3 4 5... - Page 82 DISK - PLAY DISK PLAY DISK METRONOME CARD / DISK MIDI SONG The Play Disk function lets you play all SMF MIDI Song Files that are on the floppy disk. DISK MENU 1 2 3 4 5 6 7 8 9 0 1 2 3 4 5 6 7 8 9 0 1 2 3 4 5 6 7 8 9 0 1 2 1 2 3 4 5 6 7 8 9 0 1 2 3 4 5 6 7 8 9 0 1 2 3 4 5 6 7 8 9 0 1 2 1 2 3 4 5 6 1 2 3 4 5 6 7 8 9 0 1 2 3 4 5 6 7 8 9 0 1 2 3 4 5 6 7 8 9 0 1 2 1 2 3 4 5 6 7 8 9 0 1 2 3 4 5 6 7 8 9 0 1 2 3 4 5 6 7 8 9 0 1 2 1 2 3 4 5 6 1 2 3 4 5 6 7 8 9 0 1 2 3 4 5 6 7 8 9 0 1 2 3 4 5 6 7 8 9 0 1 2 1 2 3 4 5 6 7 8 9 0 1 2 3 4 5 6 7 8 9 0 1 2 3 4 5 6 7 8 9 0 1 2 1 2 3 4 5 6 1 2 3 4 5 6 7 8 9 0 1 2 3 4 5 6 7 8 9 0 1 2 3 4 5 6 7 8 9 0 1 2 1 2 3 4 5 6 7 8 9 0 1 2 3 4 5 6 7 8 9 0 1 2 3 4 5 6 7 8 9 0 1 2 1 2 3 4 5 6...
- Page 83 DISK - PLAY DISK MENUS Load Song Various Menu Screens FILE DATA LYRICS MUTE CHANNEL SOLO CHANNEL Playback Options Load Song function has various menu screens that allow you to view Song Lyrics and to play along with the disk. DISK MENU 1 2 3 4 5 6 7 8 9 0 1 2 3 4 5 6 7 8 9 0 1 2 3 4 5 6 7 8 9 0 1 2 1 2 3 4 5 6 7 8 9 0 1 2 3 4 5 6 7 8 9 0 1 2 3 4 5 6 7 8 9 0 1 2 1 2 3 4 5 6 1 2 3 4 5 6 7 8 9 0 1 2 3 4 5 6 7 8 9 0 1 2 3 4 5 6 7 8 9 0 1 2 1 2 3 4 5 6 7 8 9 0 1 2 3 4 5 6 7 8 9 0 1 2 3 4 5 6 7 8 9 0 1 2 1 2 3 4 5 6...
-
Page 84: Utiliyt
DISK - UTILITY UTILITY - Selecting Utility will access the Disk Utility Screen. Copy - Card Disk is used to duplicate a file from the Disk to a Memory Card or DISK MENU 1 2 3 4 5 6 7 8 9 0 1 2 3 4 5 6 7 8 9 0 1 2 3 4 5 6 7 8 9 0 1 2 1 2 3 4 5 6 7 8 9 0 1 2 3 4 5 6 7 8 9 0 1 2 3 4 5 6 7 8 9 0 1 2 1 2 3 4 5 1 2 3 4 5 6 7 8 9 0 1 2 3 4 5 6 7 8 9 0 1 2 3 4 5 6 7 8 9 0 1 2 1 2 3 4 5 6 7 8 9 0 1 2 3 4 5 6 7 8 9 0 1 2 3 4 5 6 7 8 9 0 1 2 1 2 3 4 5 1 2 3 4 5 6 7 8 9 0 1 2 3 4 5 6 7 8 9 0 1 2 3 4 5 6 7 8 9 0 1 2 1 2 3 4 5 6 7 8 9 0 1 2 3 4 5 6 7 8 9 0 1 2 3 4 5 6 7 8 9 0 1 2 1 2 3 4 5 Load Song... - Page 85 DISK - UTILITY UTILITY MENU - continued Delete - Delete is used to remove unwanted files from the disk to make more space available. Disk Utility 1 2 3 4 5 6 7 8 9 0 1 2 3 4 5 6 7 8 9 0 1 2 3 4 5 6 7 8 9 0 1 2 1 2 3 4 5 6 7 8 9 0 1 2 3 4 5 6 7 8 9 0 1 2 3 4 5 6 7 8 9 0 1 2 1 2 3 4 5 6 1 2 3 4 5 6 7 8 9 0 1 2 3 4 5 6 7 8 9 0 1 2 3 4 5 6 7 8 9 0 1 2 1 2 3 4 5 6 7 8 9 0 1 2 3 4 5 6 7 8 9 0 1 2 3 4 5 6 7 8 9 0 1 2 1 2 3 4 5 6 1 2 3 4 5 6 7 8 9 0 1 2 3 4 5 6 7 8 9 0 1 2 3 4 5 6 7 8 9 0 1 2 1 2 3 4 5 6 7 8 9 0 1 2 3 4 5 6 7 8 9 0 1 2 3 4 5 6 7 8 9 0 1 2 1 2 3 4 5 6 Format...
-
Page 86: Playing And Singing Karaoke
PLAYING AND SINGINGWITH THE KARAOKE DISKS Your GP-3 Mini-Grande Digital Piano includes Karaoke features which allow the entire family to join in on the musical fun. The GP-3 package includes a Suzuki Microphone and demonstration karaoke disks, while the connection panel contains microphone volume and reverb controls. -
Page 87: Midi & Video Output
MIDI & VIDEO OUT JACKS MIDI stands for Musical Instrument Digital Interface. This is a world wide standard communica- tion interface that enables electronic musical instruments and computers (of all brands) to communicate with each other so that instructions and other data can pass between them. This exchange of information makes it possible to create a system of MIDI instruments and devices that offers far greater versatility and control than is available with isolated instruments. -
Page 88: Midi
MIDI MIDI CHANNELS - The MIDI system in this unit has 16 channels numbered from BASIC MIDI SETUPS 1-16. Each of the channels is responsible for a voice. When the instrument receives from an external device, the active channel is determined by the control message. - Page 89 MIDI MIDI LOCAL CONTROL MODE - Local control refers to the fact that normally, MIDI INPUT CHANNEL SELECTION - You may select an individual MIDI channel MIDI SPLIT INPUT LOWER CHANNEL MODE - This MIDI input channel mode MIDI OUTPUT CHANNEL SELECTION - You may select an individual MIDI MIDI SLIT OUTPUT LOWER CHANNEL MODE - This MIDI output channel mode this Suzuki piano controls the internal tone generator.
-
Page 90: Midi Implementation Chart
MIDI IMPLEMENTATION CHART Function Basic Channel Channel changed Default Mode Note Number Velocity: Note On Velocity: Note Off Pitch Bender Control Change: 0 MIDI IMPLEMENTATION CHART 7, 10 64, 66, 67 80, 81 98, 99 100 ,101 Program Change System Exclusive Sys. -
Page 91: Voice List
VOICE LIST Please note: The MIDI program number for any voice listed is one less than the display number. Group A Piano PIANO 1 : Grand Piano 3 : Elec. Piano Chromatic Percussion VIBES 9 : Celesta 11 : Music Box Organ ORGAN 17 : Hammond Org 18 : Percuss. -
Page 92: Style List
STYLE LIST Group A BIG BAND 1 : Big Band 1 BIG BAND 2 : Miller Band 3 : Latin Big Band 4 : Broadway BOSSA 9 : Cool Bossa BOSSA 10 : Pop Bossa 11 : Fast Bossa 12 : Bossa Nova SWING 17 : Swing Trio SWING... -
Page 93: Drum Kit List 1
DRUM KIT LIST DRUM KIT LIST 1 Note: In the first title row the number in the bracket, after the kit name, is the MIDI program number. The Drum kits name and number that are shown on the LCD display are listed in the second title row. The “No.” refers to MIDI note number, and “Key” refers to the key on the piano. -
Page 94: Drum Kit List 2
DRUM KIT LIST DRUM KIT LIST 2 Note: In the first title row the number in the bracket, after the kit name, is the MIDI program number. The Drum kits name and number that are shown on the LCD display are listed in the second title row. The “No.” refers to MIDI note number, and “Key” refers to the key on the piano. -
Page 95: Specifications
SPECIFICATIONS SPECIFICATIONS PIANO 88-note, Graded Hammer-Action piano POLYPHONY: 64 VOICES 128 Voices 16 quick select voice buttons VOICE MODE Upper Layer (dual) voice Lower (split) voice AUTO ACCOMPANIMENT STYLE 100 Auto accompaniment styles ten quick select style buttons AUTO BASS CHORD MODE One Finger Fingered Piano... -
Page 96: Questions / Problems
The serial number of the piano should be directly underneath the piano on the right hand side near the floppy disk drive. Where can I buy recorded disks to play in my piano? Visit www.suzukimusic.com/GP-3. You may purchase from other outlets but please remember to order only Standard MIDI File ( SMF ) floppy disks. - Page 97 NOTES...
-
Page 98: Warranty
WARRANTY This product, except the exterior cosmetic parts, is warranted by the Suzuki Corporation to the original purchaser to be free from defects in material and workmanship under normal use as follows: 1. For a period of one year from the date of purchase, the Suzuki Corporation will pay the labor charges to repair the defective product. - Page 100 SUZUKI Mini-Grand Digital Piano GP-3 OWNER’S MANUAL SUZUKI P.O. BOX 261030 SAN DIEGO, CALIFORNIA 92196 (858) 566-9710 Visit us on the web at www.suzukimusic.com Copyright 2005 Suzuki Musical Instrument Corporation...