Advertisement
Quick Links
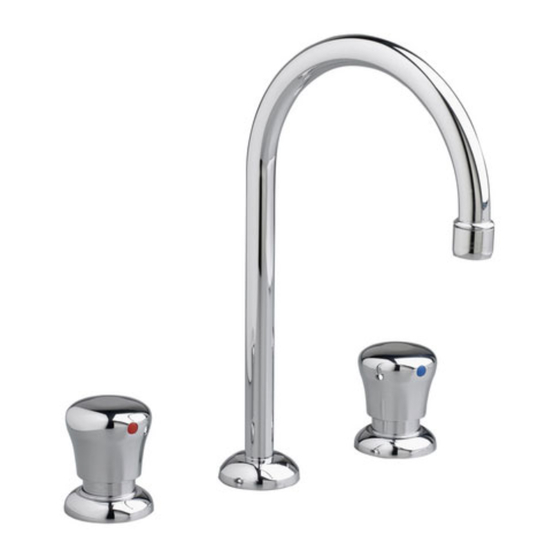
METERING
SPREAD LAVATORY
FAUCETS
Thank you for selecting American-Standard...the
benchmark of fine quality for over 100 years.
To ensure that your installation proceeds smoothly--please
read these instructions carefully before you begin.
Recommended tools
Tubing Cutter
1
PREPARE TUBE AND TEE ASSEMBLY
Remove COUPLING NUT (1) and FERRULE (2) from each
VALVE (3) and slide onto TUBING (4).
2
8"
2
REMOVE HANDLE AND
ACTUATOR ASSEMBLY
Remove HANDLE (1) by
removing INDEX BUTTON (2)
and SET SCREW (3) with a
2.5mm hex wrench.
Pull off HANDLE (1).
Remove ACTUATOR
.
ASSEMBLY (4)
Replace WASHER (5) with
new Washer (5) that is
provided in separate bag.
Attention; Sealing washer (5) should be
replaced everytime valve actuator (4)
is removed.
Installation
Instructions
1340.725
1340.825
1340.855
1340.865
1340.827
1340.857
Channel Locks
1
4
1
2
MOUNTING
SURFACE
3
3
2
1
REMOVE
REPLACE
4
5
1340.725
1340.825
1340.827
Adjustable Wrench
Plumbers' Putty or Caulking
3
VALVE ASSEMBLY (1340.825; 1340.855; 1340.865)
Install LOCKNUTS (1), METAL WASHERS (3) and RUBBER
WASHERS (2) onto valve shanks.
Push TUBING (12) ends into VALVE (4) side outlets. Insert
VALVES (4) into mounting holes from underside of ledge.
Thread of VALVE BODY (4) should extend at least 5/16 inch above
MOUNTING SURFACE (9). If necessary, adjust LOCKNUT (1).
Place RUBBER RING (8) into ESCUTCHEONS (7) and thread onto
valves until snug against internal stop.
Tighten LOCKNUT (1) to secure VALVE (4) position.
Slide FERRULE (10) and COUPLING NUT (11) to outlet of VALVE (4)
and tighten COUPLING NUT (11) firmly.
Place WASHER
(14)
Thread VALVE ACTUATORS (13) onto VALVES (4) and torque VALVE
ACTUATOR 12-15 ft. lbs, (12-20Nm).
Connect water supply to VALVES (4) with 1/2" IPS FLEXIBLE
SUPPLIES or 3/8" O.D. BULL-NOSE RISERS. Use adjustable wrench
to tighten connections. Do not over tighten. Be careful not to kink
copper supply when bending. Use tubing cutter to cut to proper length.
9
MOUNTING
SURFACE
7
8
9
5/16''
MIN.
MOUNTING
4
SURFACE
2
3
1
1340.855
1340.857
Certified to comply with ANSI A112.18.1M
M 9 6 8 4 9 2 R ev. 1. 5
2.5mm Hex Wrench
on top of VALVE ASSEMBLY
13
8
7
8
10
11
4
HOT
12
5
6
11
1/2" IPS FLEXIBLE
SUPPLIES or 3/8" O.D.
BULL-NOSE RISERS
COUPLING NUT
1340.865
.
(4)
14
10
4
COLD
Advertisement

Related Manuals for American Standard Metering 1340.725


Summary of Contents for American Standard Metering 1340.725
- Page 1 Installation Instructions METERING 1340.725 1340.825 SPREAD LAVATORY 1340.855 FAUCETS 1340.865 1340.827 1340.857 1340.725 1340.825 1340.855 Thank you for selecting American-Standard...the 1340.827 1340.857 1340.865 benchmark of fine quality for over 100 years. Certified to comply with ANSI A112.18.1M To ensure that your installation proceeds smoothly--please read these instructions carefully before you begin.
- Page 2 VALVE ASSEMBLY (1340.725) For Cold or Tempered Water Supply Valve assembly is same as two handle lavatory faucets. See Step 3 instructions for assembly, (1340.725 Single Valve Faucet) is for Cold or Tempered water only. MOUNTING SURFACE 5/16'' MIN. MOUNTING SURFACE COLD OR TEMPERED...
- Page 3 INSTALL HANDLES Remove INDEX BUTTON (1; 2) and loosen SET SCREW (3) with a 2.5mm hex wrench. Install HANDLES (4) onto VALVE STEM (5). 2.5mm HEX WRENCH Tighten SET SCREWS (3) with 2.5mm Hex Wrench. Replace INDEX BUTTONS. Red (1) in Left HANDLE (4) Blue (2) in Right HANDLE (4).