Sony ICD-PX333 Manual
Hide thumbs
Also See for ICD-PX333:
- Quick start manual (4 pages) ,
- Specifications (3 pages) ,
- Help manual (287 pages)

Related Manuals for Sony ICD-PX333


Summary of Contents for Sony ICD-PX333
- Page 1 Your message… Creating Your Own Audio Message to microSD 20190405-21.docx © 2016 MegaVoice Ltd. Page 1 of 51...
-
Page 2: Table Of Contents
Sony ICD-PX333 recorder ............................7 Setting up the Sony IC recorder........................... 9 Formatting a microSD card from the Sony IC recorder ..................10 Connecting the Sony IC recorder to a PC ......................12 Understanding the Sony IC recorder folder structure ..................13 Select a folder for recordings .......................... - Page 3 Herald: Preparing the file structure ........................39 Envoy S/2S: Preparing the file structure ....................... 40 Envoy E/2E Series: Preparing the file structure ..................... 41 Miscellaneous ................................42 Formatting the distribution SD card ........................42 File Renaming Utility .............................. 43 Methods of Card Duplication ............................ 44 USB microSD Card Duplicator ..........................
-
Page 4: Table Of Figures
Table of Figures Figure 1: Sony ICD-PX333 digital voice recorder ......................7 Figure 2: Sony IC recorder File Structures ........................13 Figure 3: Olympus VN-722PC recorder ........................16 Figure 4: Headset with microphone, earphones and two 3.5mm jacks ..............30 Figure 5: Headset with microphone, earphones and two 3.5mm jacks .............. -
Page 5: Document Overview
Document Overview This document is intended to provide the basics for recording your own audio message(s) using a hand-held digital voice recorder with the end result of producing an audio collection on microSD card for distribution. It will get you started using the sample voice recorder with tips on how to create your own audio messages. It will also show you how to copy your message files from the recorder to an SD card and arrange them appropriately so they will play on your MegaVoice player. -
Page 6: The Digital Voice Recorder
The Digital Voice Recorder Choosing a recorder The first step in creating your own audio message is acquiring a digital voice recorder. There are many available for purchase. They can range in price from about $30 to several hundred dollars. Features and quality differ greatly based on price and model. -
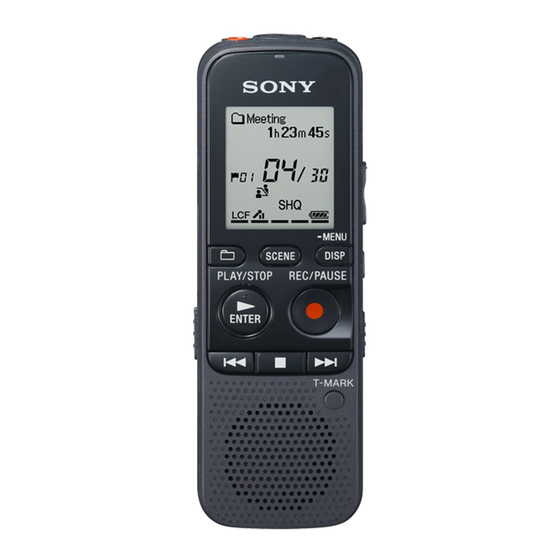
Page 7: Sony Icd-Px333 Recorder
Sony ICD-PX333 recorder One of the recorders that MegaVoice chose for this project is the Sony ICD-PX333. It is a popular model and has the features we wanted at a reasonable price. Sony voice recorders are rated highly and have positive reviews. - Page 8 It will give you an idea of the functionality and operation of the device we used. It is well done and easy to search. Some of the basic instructions for the Sony in this document are taken directly from this manual.
-
Page 9: Setting Up The Sony Ic Recorder
Setting up the Sony IC recorder Insert the batteries that came with the IC recorder. When you insert batteries for the first time, or when you insert batteries after the IC recorder has been without batteries for more than 1 minute, “Set Date&Time”... -
Page 10: Formatting A Microsd Card From The Sony Ic Recorder
Formatting a microSD card from the Sony IC recorder If we want to make recordings to a microSD card, one of the first things we need to do is to format the card using the recorder. Insert a microSD card in the card reader on the side of the device. - Page 11 Notes: Use the IC recorder’s built-in formatting function to format the memory media. Do not use your computer to format the media. Switch the memory media to the one to be formatted before you start the format operation. ...
-
Page 12: Connecting The Sony Ic Recorder To A Pc
Connecting the Sony IC recorder to a PC Using the USB-to-mini-USB cable that came with the device, insert the mini-USB connector in the recorder and the other end to a USB port on your PC. This will provide a view of the file structure on the IC recorder from the PC. -
Page 13: Understanding The Sony Ic Recorder Folder Structure
Understanding the Sony IC recorder folder structure Below is a picture of Windows File Explorer. Both the recorder and microSD cards are recognized as separate “volumes” – IC RECORDER (F:) and MEMORY CARD (I:) respectively. The folder structure is proprietary for the IC recorder. It must not be altered for the recorder to function correctly. - Page 14 Tip: The current active folder is always displayed at the top of the window on the recorder. MegaVoice recommends that you create a special folder for your files and always record to that folder. This applies to both the Built in Memory and any SD card you want to use in the recorder. Simply navigate to the VOICE folder and create a new folder there.
-
Page 15: Select A Folder For Recordings
Select a folder for recordings Now let’s set the current recording folder to the new “MegaVoice” folder we just added. Disconnect the recorder from the PC. 2. Press (folder). The folder selection window is displayed. 3. Select a folder. Press + to select the desired folder (MegaVoice), and then press PLAY/STOP・ENTER. -
Page 16: Olympus Vn-722Pc Recorder
Olympus VN-722PC recorder Another recorder that MegaVoice chose for this project is the Olympus VN-722PC. It too is a popular model and has the features we wanted at a reasonable price. Olympus voice recorders are rated highly and have positive reviews. -
Page 17: Setting Up The Olympus Recorder
Setting up the Olympus recorder Insert the batteries that came with the Olympus recorder. When you insert batteries for the first time, or when you insert batteries after the recorder has been without batteries for more than 1 minute, “Set TIme&Date” appears. -
Page 18: Formatting A Microsd Card From The Olympus Recorder
Formatting a microSD card from the Olympus recorder If we want to make recordings to a microSD card, one of the first things we need to do is to format the card using the recorder. Insert a microSD card in the card reader on the side of the device. Press the Menu button and navigate to the Device Menu using the + or –... -
Page 19: Connecting The Olympus Recorder To A Pc
Connecting the Olympus recorder to a PC Creating Your Own Audio Message to microSD 20190405-21.docx © 2016 MegaVoice Ltd. Page 19 of 51... -
Page 20: Select A Folder For Recordings
Select a folder for recordings The recorder provides five folders: [A], [B], [C], [D] and [E]. Each folder can store up to 200 files. Choose one of the five folders for your MegaVoice recordings. Creating Your Own Audio Message to microSD 20190405-21.docx ©... -
Page 21: Recording Your Message
Recording Your Message General recording advice Below is some recording advice suggested by MegaVoice’s audio specialist. 1. Find a good acoustic environment for producing your recordings. If you can’t provide a special room at the very least find a place that is reasonably quiet with little to no wind or background noise. Noise may be heard when the unit is placed near an AC power source, a fluorescent lamp or a mobile phone during recording or playback. -
Page 22: The Sony Ic Recorder
The Sony IC recorder Recording a message The following steps are the basic recording procedures using the specified microphone sensitivity and recording mode. Before making a recording, be sure to check the battery indicator. Noise may be recorded if an object, such as your finger, etc., accidentally rubs or scratches the IC recorder during recording. - Page 23 4. Press REC/PAUSE in the stop mode. The operation indicator ) flashes in orange, and then lights in red. You do not need to press and hold REC/PAUSE while recording. The new file will be automatically recorded as the last file in the current folder. A.
-
Page 24: Monitoring Your Recording
Monitoring your recording If you connect headphones to the (headphone) jack, you can monitor the recording as you make it. 1. Connect headphones to the (headphone) jack. 2. Press VOL -/+ to adjust the monitoring volume. Monitoring volume does not affect to the recording level. Notes: If the cord of headphones touches the IC recorder while you are monitoring the recording, the IC recorder may record a rustling noise. -
Page 25: Using Vor
Using VOR You can set the VOR (Voice Operated Recording) function to “ON,” to make the IC recorder start recording when the IC recorder detects sound, and pause when no sound is heard, eliminating recording during soundless periods. 1. In the stop or recording mode, select DISP/MENU - “VOR,” and then press PLAY/STOP ENTER. -
Page 26: Noise Reduction
Noise reduction The Sony IC recorder provides several features to address noise reduction. They are discussed below. You can set the LCF (Low Cut Filter) function to cut a low frequency to reduce the roaring noise from wind; therefore you can record a file more clearly. - Page 27 The Noise Cut Function reduces ambient noise other than the human voice, which makes the human voice clearer when you listen to the playback sound. 1. In the stop or playback mode, slide the NOISE CUT switch to “ON.” 2. Select DISP/MENU - “Detail Menu” - “Noise Cut Level,” and then press PLAY/STOP ENTER.
-
Page 28: Reviewing Your Recordings
Reviewing your recordings To search forward (Cue): Press and hold + during playback and release it at the point you wish to resume playback. To search backward (Review): Press and hold during playback and release it at the point you wish to resume playback. The IC recorder searches at slow speed with playback sound. -
Page 29: Reviewing The Mp3 Files
Reviewing the MP3 files The file naming convention the Sony IC recorder uses when creating MP3 files is YYMMDD_NNN.MP3 where YYMMDD is the date of the recording and NNN is a rolling sequence number managed by the recorder. Note: The file sequence number is per folder. It always begins with 001 and is incremented automatically by 1 for each new recording. -
Page 30: Our Recommendation
“click” sound from pressing any of the buttons. Their only solution was to use the option of an external microphone. Below is a link to an inexpensive headset (pictured) on Amazon.com that will work with the Sony IC recorder. Any similar model will work as long as it provides two 3.5mm jacks for connecting the microphone and earphones to the recorder. - Page 31 1. Connect an external microphone ( ) to the (microphone) jack when the IC recorder is in the stop mode. “Select Input” appears in the display window. If “Select Input” is not displayed, set it in the menu. 2. Press – + to select “MIC IN,”...
-
Page 32: The Olympus Vn-722Pc Recorder
The Olympus VN-722PC recorder Recording a message Creating Your Own Audio Message to microSD 20190405-21.docx © 2016 MegaVoice Ltd. Page 32 of 51... - Page 33 Creating Your Own Audio Message to microSD 20190405-21.docx © 2016 MegaVoice Ltd. Page 33 of 51...
-
Page 34: Monitoring Your Recording
Monitoring your recording You can monitor the recording as you are making it by listening on earphones (optional) plugged into the voice recorder’s EAR jack. Use the +/– button to adjust the recording monitor volume. Creating Your Own Audio Message to microSD 20190405-21.docx ©... -
Page 35: Using Noise Reduction And Vcva
Using Noise Reduction and VCVA Creating Your Own Audio Message to microSD 20190405-21.docx © 2016 MegaVoice Ltd. Page 35 of 51... -
Page 36: Our Recommendation
3. The earphones allow you to monitor your recording Below is a link to an inexpensive headset (pictured) on Amazon.com that will work with the Sony IC recorder. Any similar model will work as long as it provides two 3.5mm jacks for connecting the microphone and earphones to the recorder. - Page 37 Notes: Connecting an external microphone to the voice recorder’s MIC jack disables the built-in microphone. Microphones with plug-in power supplies can be used. When [Rec Mode] is set to stereo, recording with an external mono microphone records on the left channel only....
-
Page 38: Creating A Microsd Card For Distribution
Creating a microSD Card for distribution While the Sony IC recorder provides the convenience of recording messages directly to a microSD card, you will not be able to use that SD card “as is”. To make an SD card usable with a MegaVoice player, the files will still have to be renamed and arranged in the appropriate file structure according to the rules of the target player. -
Page 39: Herald: Preparing The File Structure
Herald: Preparing the file structure Please click on the link below and review the section titled “Structure Requirements” in the Herald User Guide to properly structure your audio for playback on the Herald: https://megavoice.com/pdf/herald-english-user-guide.pdf Creating Your Own Audio Message to microSD 20190405-21.docx ©... -
Page 40: Envoy S/2S: Preparing The File Structure
Envoy S/2S: Preparing the file structure Please click on the appropriate link below for your player and review the section titled “Folder Structure Requirements” in the User Guide to properly structure your audio for playback: Envoy S Series: https://megavoice.com/pdf/envoy-s-audio-bible-english-user-guide.pdf Envoy 2 S Series: https://megavoice.com/pdf/envoy-2-s-series-audio-bible-english-user-guide.pdf Creating Your Own Audio Message to microSD 20190405-21.docx ©... -
Page 41: Envoy E/2E Series: Preparing The File Structure
Envoy E/2E Series: Preparing the file structure Please click on the appropriate link below for your player and review the section titled “Folder Structure Requirements” in the User Guide to properly structure your audio for playback: Envoy E Series: https://megavoice.com/pdf/envoy-e-series-audio-bible-english-user-guide.pdf Envoy 2 E Series: https://megavoice.com/pdf/envoy-2-e-series-audio-bible-english-user-guide.pdf Creating Your Own Audio Message to microSD 20190405-21.docx... -
Page 42: Miscellaneous
Miscellaneous Formatting the distribution SD card It is recommended to format your distribution microSD card before loading files to it. Using a microSD USB adaptor (See Figure 7: SanDisk microSD-to-USB adaptor), connect the card to your Computer. Make sure the capacity of the card is sufficient to hold all of your messages. -
Page 43: File Renaming Utility
File Renaming Utility Because the examples in this guide are very simple ones, you could easily rename all the files manually using the File Explorer on your PC or Mac. But if your distribution microSD is going to contain many (perhaps hundreds?) of audio files organized in numerous folders, it would become a complicated and time consuming task, prone to error. -
Page 44: Methods Of Card Duplication
Methods of Card Duplication USB microSD Card Duplicator Card duplicator overview There are many duplicator systems available on the market. Some are made specifically for SD or microSD cards. Others have USB ports that can be used to access different types of flash media via USB. The latter, of course, is more functional. -
Page 45: Microsd To Usb Adaptor
microSD to USB adaptor A duplicator that provides USB ports allows to you replicate different types of flash media as well as SD or microSD. But in order to use a device like this with microSD cards it is necessary to use a microSD-to-USB adaptor. -
Page 46: Using The Ez Dupe Duplicator
Using the EZ DUPE duplicator For the purpose of this guide, MegaVoice has tested and used a very simple USB/microSD card duplicator from EZ DUPE. It is a 1-to-2-device system. It has 3 USB ports – one for the “master” and two for the “targets” (copies). - Page 47 EZ DUPE strongly recommends that the capacity of the master card match the capacity of the target cards. In other words, it may be problematic to duplicate a 2GB card to different size card(s). Connect the EZ DUPE to power and turn it on. It will beep once it has initialized. Load the master microSD card to an adaptor and place it in the left-most USB connection (labeled as “1”...
-
Page 48: Figure 9: Ez Dupe Function Selection
Figure 9: EZ DUPE Function Selection Figure 10: EZ DUPE Copy in progress Creating Your Own Audio Message to microSD 20190405-21.docx © 2016 MegaVoice Ltd. Page 48 of 51... -
Page 49: Figure 11: Ez Dupe Compare In Progress
Figure 11: EZ DUPE Compare in progress Figure 12: EZ DUPE Copy and Compare completion Creating Your Own Audio Message to microSD 20190405-21.docx © 2016 MegaVoice Ltd. Page 49 of 51... -
Page 50: Using Sabercopy To Duplicate Microsd Cards
SaberCopy SaberCopy can easily be used to duplicate microSD cards. It is free software available from MegaVoice. All you need for this is: A Windows computer The SaberCopy software A USB hub (preferably a powered hub) Enough microSD card adaptors for the master card and copies The advantages of using SaberCopy over the EZ-Dupe USB duplicator device are: It is much cheaper since SaberCopy is free! -
Page 51: Technical Support
Technical Support Contact MegaVoice for assistance: https://megavoice.com/audio-tools/request-support-for-loading-audio-content-on-audio-bibles/ EZ DUPE microSD card duplicator: http://www.ezdupe.com/ Sony support for the ICD PX333: https://esupport.sony.com/US/p/model-home.pl?mdl=ICDPX333 Olympus support for the VN-722PC: https://learnandsupport.getolympus.com/support/vn-722pc Creating Your Own Audio Message to microSD 20190405-21.docx © 2016 MegaVoice Ltd. Page 51 of 51...