Table of Contents
Advertisement
Chapter 1 Product Description ............................................................................................................................................ 1
1.1 Components Description ....................................................................................................................................... 1
1.2 Main Functions...................................................................................................................................................... 2
1.3 Technical Specifications ....................................................................................................................................... 3
1.3.1 Environment Specifications ....................................................................................................................... 3
1.3.2 Performance Specifications ....................................................................................................................... 3
Chapter 2 Hardware Installation .......................................................................................................................................... 4
2.1 Installation Preparation ......................................................................................................................................... 4
2.1.1 Notes ......................................................................................................................................................... 4
2.1.2 Ambient Requirements .............................................................................................................................. 5
2.2 Installing RDU-SIC G2 Card ................................................................................................................................. 5
Chapter 3 Web Page Of RDU-SIC G2 ................................................................................................................................ 6
3.1 Login Preparation .................................................................................................................................................. 6
3.1.1 Checking IP Address Connectivity ............................................................................................................. 6
3.1.2 Checking Browser Version ........................................................................................................................ 6
3.1.3 Checking Browser Setting ......................................................................................................................... 6
3.2 Log In RDU-SIC G2 ............................................................................................................................................ 10
3.2.1 Login Page .............................................................................................................................................. 10
3.2.2 Forgetting Password ................................................................................................................................ 10
3.3 Homepage Of RDU-SIC G2 ................................................................................................................................ 11
3.3.1 Time Calibrating Link ............................................................................................................................... 12
3.3.2 Clearing Time-Out ................................................................................................................................... 12
3.3.3 Logout...................................................................................................................................................... 12
3.3.4 Real-Time Alarm Pop-Up Setting ............................................................................................................ 12
3.4 Menu Items ......................................................................................................................................................... 12
3.4.1 Device Information ................................................................................................................................... 13
3.4.2 Safe Shutdown ........................................................................................................................................ 14
3.4.3 Alarm Management ................................................................................................................................. 16
3.4.4 Data & History ......................................................................................................................................... 19
3.4.5 Device Options ........................................................................................................................................ 21
3.4.6 System Options ....................................................................................................................................... 26
3.4.7 Help ......................................................................................................................................................... 33
Chapter 4 Maintenance ..................................................................................................................................................... 35
4.1 Restoring Default Setting .................................................................................................................................... 35
4.2 FAQ .................................................................................................................................................................... 35
Appendix 1 Glossary ......................................................................................................................................................... 37
Appendix 2 Standard Configuration List ............................................................................................................................ 38
Contents
Advertisement
Table of Contents

Related Manuals for Emerson Liebert Vertiv RDU-SIC G2


Summary of Contents for Emerson Liebert Vertiv RDU-SIC G2
-
Page 1: Table Of Contents
Contents Chapter 1 Product Description ............................1 1.1 Components Description ............................1 1.2 Main Functions..............................2 1.3 Technical Specifications ............................3 1.3.1 Environment Specifications ........................3 1.3.2 Performance Specifications ........................3 Chapter 2 Hardware Installation ............................4 2.1 Installation Preparation ............................4 2.1.1 Notes ................................. -
Page 3: Chapter 1 Product Description
Chapter 1 Product Description Chapter 1 Product Description The RDU-SIC G2 card is a network management card. It can make the intelligent equipment (such as UPS, PDU, air conditioner and so on) developed by Vertiv have the capacity of network communication. The RDU-SIC G2 card can also connect to the environment monitoring equipment, including IRM series temperature &... -
Page 4: Main Functions
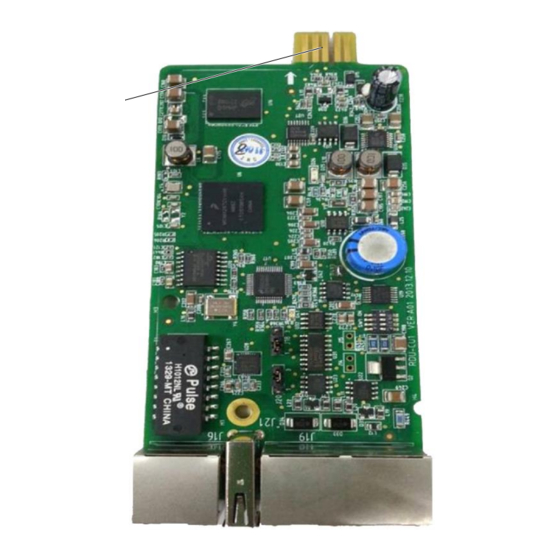
Chapter 1 Product Description Network port The RDU-SIC G2 card provides one network port which adopts 10/100M Base-T self-adaptable Ethernet port. Its position is shown in Figure 1-1. See Table 1-2 for default configuration of the network port. Table 1-2 Default configuration parameters of the network port Parameter IP address Subnet mask... -
Page 5: Technical Specifications
Chapter 1 Product Description Main function Description Monitoring unit Collecting the system information of RDU-SIC G2 1. Setting the network information such as IP, subnet mask, gateway and DNS; 2. Controlling whether the upper monitoring system (RDU-M manager) can visit the Network setting RDU-SIC G2;... -
Page 6: Chapter 2 Hardware Installation
Chapter 2 Hardware Installation Chapter 2 Hardware Installation This chapter expounds the hardware installation of the RDU-SIC G2. 2.1 Installation Preparation 2.1.1 Notes When installing RDU-SIC G2, take the following precautions to avoid personnel injury and device damage by accident. Always cut off the power before performing any installation operation on the RDU-SIC G2 Ensure that the external devices are connected to the correct ports of the RDU-SIC G2 Wear an ESD-proof glove during installation... -
Page 7: Ambient Requirements
Chapter 2 Hardware Installation The jumper setting of the RDU-SIC G2 card is normal mode by default. 2.1.2 Ambient Requirements Operation environment The RDU-SIC G2 must be installed indoor. Refer to Table 1-5 for specific requirement. ESD-proof To make the static electricity reduce to zero, you must take measures as follows: Keep proper temperature and humidity in the data center (see Table 1-5). -
Page 8: Chapter 3 Web Page Of Rdu-Sic G2
Chapter 3 Web Page Of RDU-SIC G2 Chapter 3 Web Page Of RDU-SIC G2 This chapter introduces how to log in the RDU-SIC G2 through Web browser and relevant functions of the RDU-SIC 3.1 Login Preparation To ensure that the RDU-SIC G2 page function can be normally used, please refer to this section for selecting and setting browser options. - Page 9 Chapter 3 Web Page Of RDU-SIC G2 Figure 3-2 Choosing the Connections tab 2. In the window shown in Figure 3-2, click the button LAN Settings to pop up the window shown in Figure 3-3. Figure 3-3 LAN setting 3. Consult the network manager of your area, ask if you need to set a proxy server and get the configuration method. If there is no need to set a proxy server, do not tick any option.
- Page 10 Chapter 3 Web Page Of RDU-SIC G2 Figure 3-4 Security setting 1 2. In the window shown in Figure 3-4, choose Local intranet and click the Custom level button to pop up the window shown in Figure 3-5. Figure 3-5 Security setting 2 3.
- Page 11 Chapter 3 Web Page Of RDU-SIC G2 Figure 3-6 Enabling file download 5. In the window shown in Figure 3-7, set Enable for Initialize and script ActiveX controls not marked as safe for scripting. Figure 3-7 Enabling ActiveX controls 6. In the window shown in Figure 3-8, add the IP address of the RDU-SIC G2 into the trusted site list. RDU-SIC G2 Card User Manual...
-
Page 12: Log In Rdu-Sic G2
Chapter 3 Web Page Of RDU-SIC G2 Figure 3-8 Adding trusted sites 3.2 Log In RDU-SIC G2 3.2.1 Login Page 1. Open the IE browser, and enter the IP address of the RDU-SIC G2 in the address box, the login page will appear, as shown in Figure 3-9. -
Page 13: Homepage Of Rdu-Sic G2
Chapter 3 Web Page Of RDU-SIC G2 Figure 3-10 Page of getting password Type your username, and click the Submit button, your password will be sent to the email box or phone which you have configured before. Clicking the Return button cancels the operation. ... -
Page 14: Time Calibrating Link
Chapter 3 Web Page Of RDU-SIC G2 3.3.1 Time Calibrating Link The lower left part displays the system time of RDU-SIC G2. Clicking the RDU-SIC G2 time will jump to the time calibrating page. For detailed operation, refer to Date/Time Setting in 3.4.6 System Options. 3.3.2 Clearing Time-Out When there is no operation on the page within 15min, the page will become uncontrollable, as shown in Figure 3-12. -
Page 15: Device Information
Chapter 3 Web Page Of RDU-SIC G2 3.4.1 Device Information Click the Device Info menu in the left, the submenus will appear. When you click the specific device, the right part will display the relative information of the device, including Sampling, Control, Setting and Alarm. ... -
Page 16: Safe Shutdown
Chapter 3 Web Page Of RDU-SIC G2 You can set several signals at the same time, and at most 16 signals can be set at the same time for each time. Alarm Clicking the Alarm tab can enter the alarm page, which displays alarm signals of selected device, as shown in Figure 3-18. - Page 17 Chapter 3 Web Page Of RDU-SIC G2 Click the Add Schedule Shutdown button, the task will be successfully added. As shown in Figure 3-21, a new task has been added in the schedule shutdown task list. The tasks in the task list will be executed automatically according to their Enable/Disable status.
-
Page 18: Alarm Management
Chapter 3 Web Page Of RDU-SIC G2 The procedures for adding a server shutdown task are as follows: 1. Select a UPS from the drop-down box of UPS Name; 2. In the Server IP field, type the IP address of the server to be closed; 3. - Page 19 Chapter 3 Web Page Of RDU-SIC G2 including: Index, Device Name, Signal Name, Alarm Level, Trigger valve, Start Date/Time, Confirmed by, Confirmed on Date/Time and End Date/Time, as shown in Figure 3-26. Figure 3-26 History alarm query Click the Download button to download the query results. Alarm Notification 1.
- Page 20 Chapter 3 Web Page Of RDU-SIC G2 Figure 3-28 SMS/Email server configuration On the page shown in Figure 3-28, you can perform SMS Modem Configuration for alarm notification reminding through SMS or phone, you can also perform Email Server Configuration for alarm notification reminding through email, the procedures are as follows: SMS Modem Configuration 1) Connect an SMS Modem through USB port according to need, and choose Port Type, the page will display...
-
Page 21: Data & History
Chapter 3 Web Page Of RDU-SIC G2 Figure 3-29 Scheduled notification configuration Note 1. Scheduled notification configuration must be used together with user alarm notification configuration; otherwise, you cannot select User Name, Notification by and Language Type; 2. For scheduled notification configuration, the notification method ‘Phone’ is not supported; 3. - Page 22 Chapter 3 Web Page Of RDU-SIC G2 2. Export SNMP MIB As shown in Figure 3-31, you can export MIB information according to device type. After selection, click the Download button to export MIB information. Figure 3-31 Export SNMP MIB History Data Click the History Data under the Data &...
-
Page 23: Device Options
Chapter 3 Web Page Of RDU-SIC G2 Figure 3-33 Historical curve History Log Click the History Log under the Data & History menu, the page shown in Figure 3-34 pops up. Figure 3-34 History log On the page shown in Figure 3-34, choose the log type (for instance, ‘Control Log’) and set the start time and the end time (for instance, from 2014-07-30 00:00:00 to 2014-07-30 23:59:59). - Page 24 Chapter 3 Web Page Of RDU-SIC G2 Figure 3-35 Add/modify/delete equipment As shown in Figure 3-35, you can add/modify/delete a new device, the procedures are as follows: Adding a new device 1) Choose the device type in the Device Type textbox; 2) Type the device name in the Device Name textbox, or use the default device name;...
- Page 25 Chapter 3 Web Page Of RDU-SIC G2 Figure 3-37 Reboot page After the system reboots, adding a device becomes effective. 10) Log in the RDU-SIC G2 webpage again and the added device will appear in the list on device management page. ...
- Page 26 Chapter 3 Web Page Of RDU-SIC G2 Figure 3-39 Install/Uninstall Device Type Click the Browse… button to download configure package (file format of .iru) from local content, and click the Install button to install the new device type. Note The device type number supported by the system is related to the system remaining memory and the size of driver configuration package, but the number cannot exceed 64.
- Page 27 Chapter 3 Web Page Of RDU-SIC G2 Figure 3-41 Modify device name On the page shown in Figure 3-41, you can modify the device name. Type the new device name and click the Set button to make all setting effective. ...
-
Page 28: System Options
Chapter 3 Web Page Of RDU-SIC G2 3.4.6 System Options On the RDU-SIC G2 homepage, click the System Options menu in the left part, eight submenus appear, including: Monitoring Unit, Network Setting, User Management, Date/Time Setting, Restore System, Site Setting, System Upgrade and System Title. - Page 29 Chapter 3 Web Page Of RDU-SIC G2 Click the Network Setting under the System Options menu, and then click the Access Management tab, the page shown in Figure 3-46 pops up. Figure 3-46 Access management In the event of adding visitor, in the textbox of IP Address of RDU Manager, type the new IP address of the RDU manager, and click the Add Visitor button to finish the configuration.
- Page 30 Chapter 3 Web Page Of RDU-SIC G2 4) Set the User Type: ‘Authenticated & Encrypted’, ‘Authenticated & Not Encrypted’, ‘Not Authenticated & Not Encrypted’; 5) Select Authentication Protocol: ‘MD5’, ‘SHA’; 6) Select Privacy Protocol: ‘DES’; 7) Self-define Authentication Password and Privacy Password. ...
- Page 31 Chapter 3 Web Page Of RDU-SIC G2 Figure 3-49 Remote service setting The remote service setting includes three parts: Request RDU remote, Cancel RDU remote and Replace Host. Meanwhile, you can set the communication parameters of remote service system. Request RDU remote: used to establish remote service relationship 1) Type the self-defined customer name in the End-User textbox;...
- Page 32 Chapter 3 Web Page Of RDU-SIC G2 Figure 3-50 User management On the page shown in Figure 3-50, you can add user, modify user and delete user. Add user 1. Type username in the User Name textbox; 2. Choose the user authority; 3.
- Page 33 Chapter 3 Web Page Of RDU-SIC G2 Table 3-1 User security level Security level User group User authority Level A Browser All users can browse equipment information Level B Operator The operators can send control command to intelligent equipment The engineers can get the following access: Send control command to intelligent Level C Engineer equipment;...
- Page 34 Chapter 3 Web Page Of RDU-SIC G2 Figure 3-53 Restore System Click the Reboot RDU-SIC G2 button to reboot the system. Click the Restore System button to restore all the default settings. Note If you use the restore function, the RDU-SIC G2 may lose the original configuration solution. After the restore operation, make sure to wait two minute for the RDU-SIC G2 conducting complete initializing work before re-accessing it through Web.
-
Page 35: Help
Chapter 3 Web Page Of RDU-SIC G2 Figure 3-55 System upgrade On the page shown in Figure 3-55, click the Browse… button to download configure pack (.rdu file format) from the local catalogue, and then click the Install button to upgrade the system. ... - Page 36 Chapter 3 Web Page Of RDU-SIC G2 The About RDU-SIC G2 page displays Software Version, Serial Number and Identify Code of RDU-SIC G2, as shown in Figure3-57. Figure 3-57 About RDU-SIC G2 RDU-SIC G2 Card User Manual...
-
Page 37: Chapter 4 Maintenance
Chapter 4 Maintenance Chapter 4 Maintenance This chapter expounds the maintenance of RDU-SIC G2, including restoring default setting and FAQ. 4.1 Restoring Default Setting Restoring default setting can be finished through two modes: software or hardware. For software restoring, refer to Restore System in 3.4.6 System Options. Hardware restoring includes restoring admin password (default username: ‘admin’, password: ‘Vertiv) and IP address of RDU-SIC G2 (the default IP address is 192.168.0.252). - Page 38 Chapter 4 Maintenance Figure 4-2 Typing ‘cmd’ 2) Press the Enter key, the page shown in Figure 4-3 pops up. Type ‘ping’ and IP address in the command line (for instance, ‘ping 10.163.162.135’ ) and check whether the communication is successful. Figure 4-3 Communication test Step 3: If the above-mentioned steps cannot handle the problem, please use the jumper cap on the card to restore default IP.
-
Page 39: Appendix 1 Glossary
Appendix 1 Glossary Appendix 1 Glossary Alternating Current Critical Alarm Direct Current Digital Input Internet Explorer, a Web browser developed by Microsoft@ Frequently Asked Questions File Transfer Protocol, used to transfer large chunks of data HTML Hypertext Mark-Up Language, used to create Web pages HTTP Hypertext Transfer Protocol, used to convey HTML Light Emitting Diode... -
Page 40: Appendix 2 Standard Configuration List
Appendix 2 Standard Configuration List Appendix 2 Standard Configuration List Description Number Unit RDU-SIC G2 intelligent port monitoring card User manual- RDU-SIC G2 Card User Manual (V1.1, Chinese & English Version)-16mo-Glue Binding Whole set cable -UH52SA1SL2-UH52SA1Z UPS USB cable -ROHS Whole set or other labels –... - Page 41 Appendix 3 Hazardous Substance or Elements Announcement Appendix 3 Hazardous Substance or Elements Announcement Hazardous Substances Parts Plumbum Hydrargyrum Cadmium Chrome PBDE PBDE ○ ○ ○ ○ ○ PCBA × ○ ○ ○ ○ ○ Cables × ○: Means the content of the hazardous substances in all the average quality materials of the part is within the limits specified in SJ/T-11363-2006;...