
Related Manuals for E-Mu SP-12

Summary of Contents for E-Mu SP-12
-
Page 1: Owners Manual
SP-12 SAMPLING PERCUSSION SYSTEM OWNERS MANUAL By Craig Anderton Version 2.3 © 1985 E-mu Systems, Inc. Scotts Valley, CA. All Rights Reserved... -
Page 2: Table Of Contents
CONTENTS TABLE OF CONTENTS INTRODUCTION...6 WHAT IS IT? ... 7 SP-12 GROUND RULES... 8 Activating and De-activating Modules ... 8 Accessing Functions Within the Module... 8 What’s a Default?... 8 SETTINGS AND VALUES ... 9 Entering ... 9 Leading Zeroes... 9 Segment and Song Modes... - Page 3 CONTENTS PLAYING BACK SEGMENTS ... 21 SETTING TEMPO... 22 PROGRAMMING THE METRONOME ... 23 PART 2: RECORDING SEGMENTS ...24 ERASING A SEGMENT ... 26 “DIMENSIONING” A SEGMENT ... 26 Part 1: Standard Dimensioning... 27 Part 2: Real-Time Dimensioning... 28 UNDERSTANDING AUTO CORRECT... 29 SETTING AUTO CORRECT ...
- Page 4 CONTENTS CHANGING THE SONG DRUM SOUND MIX... 47 SETTING SONG TEMPO ... 48 PROGRAMMING TEMPO CHANGES WITHIN A SONG... 49 JUMPING TO A SUB-SONG... 50 PROGRAMMING TRIGGER OUTPUTS ... 50 STARTING AT A SPECIFIED POINT IN THE SONG... 51 EFFICIENT USE OF MEMORY ... 52 PART 4: SAMPLING YOUR OWN SOUNDS ...53 SAMPLING: AN OVERVIEW ...
- Page 5 SMPTE ... 92 APPENDIX E: TIPS ON CREATING REALISTIC DRUM PARTS ... 93 APPENDIX F: TIPS ON USING CASSETTE INTERFACES ... 94 APPENDIX G: HOW THE SP-12 WORKS... 96 APPENDIX H: SPECIAL FUNCTIONS (SET-UP #23) ... 97 © E-mu Systems, Inc. 1985 Enhanced by The Emulator Archive 2002 www.emulatorarchive.com...
-
Page 6: Introduction
INTRODUCTION INTRODUCTION WHAT IS IT SP-12 GROUND RULES SETTINGS AND VALUES THE TRANSITORY NATURE OF SEGMENT MODE BEEP MESSAGES © E-mu Systems, Inc. 1985 Enhanced by The Emulator Archive 2002 www.emulatorarchive.com Page 6... -
Page 7: What Is It
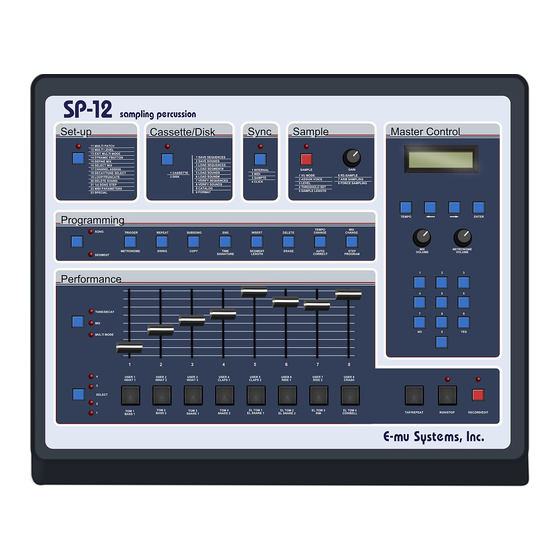
INTRODUCTION WHAT IS IT? The SP-12 is the latest member of E-mu’s family of high - technology musical instruments. It combines the most popular features of our first drum machine, the Drumulator, along with the Emulator II’s sampling capabilities, modular design, and extensive use of display messages. -
Page 8: Ground Rules
A default is the setting or value that a function assumes until changed; the default Is generally the most common option for a given function. Example: Most metronomes click every quarter note, so the SP-12’s metronome defaults to quarter notes. However, this default setting can be easily changed to any one of several other values. -
Page 9: Settings And Values
INTRODUCTION SETTINGS AND VALUES There are two ways of altering the SP-12’s parameters. One is to alter a slider setting this is typically done when changing levels, pitch, and so on. The other is to specify a numeric value with the keypad. This is typically done when telling the SP-12 how many measures long a segment should be, the time signature, and so on. -
Page 10: The Transitory Nature Of Segment Mode
(in the case of Left Arrow) through the values. The Current Song Display When you first turn on the SP-12, the display will show the Current Song and tempo for that song. The Current Song remains as is until changed. -
Page 11: Part 1: Getting Ready
GETTING READY PART 1: GETTING READY 1A SETUP INSTANT GRATIFICATION! BACKGROUND: THE PERFORMANCE MODULE SELECTING DRUM SOUNDS ADJUSTING THE MIX TUNING THE DRUMS/CHANGING DECAY BACKGROUND: ADDITIONAL SOUNDS ACCESSING/EXITING MULTILEVEL ACCESSING/EXITING MULTIPITCH ACCESSING DYNAMICS STORING (DEFINING) A MIX AUDITIONING (SELECTING) A MIX ASSIGNING DRUM SOUNDS TO OUTPUT CHANNELS PLAYING BACK SEGMENTS SETTING TEMPO... -
Page 12: Setup
IMPORTANT!! Before you turn on your SP-12: There is a 115/230 Volt selector switch on the back of the SP-12, next to the ON/OFF switch. Make sure the AC voltage indicated on the switch agrees with the AC voltage present in your part of the world. -
Page 13: Instant Gratification
1B INSTANT GRATIFICATION! Yes, the SP-12 is an extremely versatile device. But that versatility means that in order to learn about all the options, you’ll have to spend a few hours with the SP-12 and this manual. If you’re patient enough to actually do that right now, we salute your willpower. -
Page 14: Background: The Performance Module
1D SELECTING DRUM SOUNDS The row of eight large buttons (Drum Play buttons) along the bottom of the SP-12 play the different drum sounds. The SELECT button (left of Play buttons) chooses between four different banks of drum sounds. -
Page 15: Adjusting The Mix
GETTING READY 1E ADJUSTING THE MIX 1. Press the TUNE-MIX-MULTI switch (towards the upper left corner of the Performance module) until the MIX LED lights. The display graphically shows the level of each drum in the selected bank. 2. Vary the slider above the corresponding Drum Play button to vary the level of each individual drum. -
Page 16: Tuning The Drums/Changing Decay (Set-Up 18)
1. You may tune or change the decay time of any of the drum sounds. Cymbals may also be tuned, but due to the nature of the SP-12’s tuning change software, the sound will probably be different from your expectations of a “tuned cymbal”... -
Page 17: Accessing/Exiting Multilevel (Set-Up 12 & 13)
GETTING READY 1H ACCESSING/EXITING MULTILEVEL (SET-UP 12 & 13) 1. Activate the SET-UP module by pressing its button. Its LED will glow, and the display will ask for a function from the list printed to the right of the SET-UP button. -
Page 18: Accessing/Exiting Multipitch (Set-Up 11 & 13)
GETTING READY 1I ACCESSING/EXITING MULTIPITCH (SET-UP 11 & 13) 1. Activate the SET-UP Module by pressing its switch. Its LED will glow, and the display will ask for a function from the list printed to the right of the SET-UP switch. -
Page 19: Accessing Dynamics (Set-Up 14)
NO. 1K STORING (DEFINING) A MIX (SET-UP 15) The SP-12 memorizes up to eight different mixes; each mix contains the level data for all four banks. When creating a song, this mix information can be stored as part of the song so that different songs (or different sections of the same song) have different mixes. -
Page 20: Auditioning (Selecting) A Mix (Set-Up 16)
ENTER. 1M ASSIGNING DRUM SOUNDS TO OUTPUT CHANNELS The MIX OUT jack carries a mono mix of the SP-12’s drums; MIX VOLUME regulates the overall level. However, the SP-12 also has eight individual output channels. These are typically used in the studio to send different sounds to different mixing console channels. -
Page 21: Playing Back Segments
A rear panel jack parallels the RUN/STOP switch for remote applications. 5. Repeat step 2 to select another segment. If the SP-12 is running, the new segment will begin playing as soon as the current segment ends. If the current segment ends and the SP-12 stops (RUN/STOP light goes off), the new segment you’ve selected is empty. -
Page 22: Setting Tempo
“remembered” by the SP-12 only while you are in segment mode. If you switch over to song mode (as described later), the SP-12 acquires the tempo of the selected song. If you then switch back to segment mode, the SP- 12 will retain this song tempo. -
Page 23: Programming The Metronome
The metronome produces an accented click on the first beat of each measure and a softer click on the other beats. 1. The SP-12 must be stopped (RUN/STOP light off), and the SEGMENT light must be on. -
Page 24: Part 2: Recording Segments
RECORDING SEGMENTS PART 2: RECORDING SEGMENTS 2A OVERVIEW 2B ERASING A SEGMENT 2C “DIMENSIONING” A SEGMENT 2D UNDERSTANDING AUTO CORRECT 2E SETTING AUTO CORRECT RECORDING A SEGMENT IN REALTIME 2G RECODING A SEGMENT IN STEP TIME 2H ERASING A SPECIFC DRUM SOUND ERASING A SPECIFIC NOTE OF A DRUM TRACK COPYING AND APPENDING SEGMENTS 2K ADDING SWING... - Page 25 Selecting the desired bank of drum sounds for recording (this may be changed at any time during the recording process). In real time, entering record mode and playing drum sounds (the SP-12’s memory remembers what you play) in time with the metronome; in step time, entering record mode and stepping through each step of the segment, playing drum sounds as required at the various steps.
-
Page 26: Erasing A Segment
To erase: 1. Stop the SP-12, confirm that you are in segment mode, and press ERASE. 2. The display helpfully mentions that you can erase either a sound or segment. -
Page 27: Part 1: Standard Dimensioning
RECORDING SEGMENTS Part 1: Standard Dimensioning 1. Set the time signature by pressing TIME SIGNATURE. The display will probably show the 04/4 default time signature and a cursor will be flashing under the first digit. There are three ways to enter the desired time signature numerator (number of beats per measure): Press the Right Arrow button once to increase the numerator value by one. -
Page 28: Part 2: Real-Time Dimensioning
2. After the appropriate number of beats and measures have gone by, press RUN/STOP a second time. If you do not press RUN/STOP precisely on the beat, it will be auto corrected by the SP-12 (see next section for more information on Auto Correct). -
Page 29: Understanding Auto Correct
RECORDING SEGMENTS 2D UNDERSTANDING AUTO CORRECT Auto correct lets you create patterns with perfect timing by placing whatever drum sound you play on your choice of the nearest eighth note, eighth note triplet, sixteenth note, sixteenth note triplet, thirty-second note, or thirty-second note triplet. (For more information on rhythmic notation, see Appendix B.) To understand how this works, consider Fig. - Page 30 (such as sixteenth or even thirty-second notes). You may change Auto Correct while you are in segment mode, whether the SP-12 is running or stopped. If you change Auto Correct while the SP-12 is running, the change takes effect at the end of the segment.
-
Page 31: Setting Auto Correct
RECORDING SEGMENTS 2E SETTING AUTO CORRECT To set Auto Correct, the SP-12 must be in segment mode. The SP12 can be stopped or running (recording). 1. Press AUTO CORRECT. The display shows the current Auto Correct value (default is 1/Il). - Page 32 RECORDING SEGMENTS Change tempo by pressing the TEMPO button. Change Auto Correct by pressing AUTO CORRECT and using the Left and Right Arrow buttons. Change the mix by selecting MIX with the TUNE/MIX/MULTI button and varying the sliders. Real time level changes are not recorded along with the segment;...
-
Page 33: Recording A Segment In Step Time
Set the initial pitch, mix, and other parameters as desired. Press the STEP PROGRAM button; the SP-12 will automatically go into step time record mode. There are two ways to step through the segment: Hold RUN/STOP to run through the segment at the current tempo setting, or use the Right and Left Arrow buttons to increment a step at a time in either direction. -
Page 34: Erasing A Specific Drum Sound
When you are in segment mode and editing a segment, you may erase a drum/percussion sound wherever it appears in the segment. 1. Stop the SP-12, confirm that you are in segment mode, and press ERASE. 2. The display helpfully mentions that you can erase either a sound or segment. -
Page 35: Copying And Appending Segments
(e.g. segment 23 to be copied into segment 23), the SP-12 will go into append mode and the display will ask you how many times you want the segment to play, up to 99 times. For example, if you want segment 23 to play through three times instead of just once, you would enter 03. -
Page 36: Adding Swing
While in segment mode, you may specify that a segment have a particular rhythmic swing to it. The SP-12 defaults to a “swing factor” of 50%, which means that each quarter note is weighted so that the first eighth note takes up 50% of the quarter note, and the second eighth note takes up the other 50%. -
Page 37: Swapping Drum Sounds
RECORDING SEGMENTS 2L SWAPPING DRUM SOUNDS After recording the segment, you might come to the realization that a part would sound better with, say, the Electric Snare than the regular Snare. No problem! Just swap sounds... 1. Activate the SET-UP module and key in 23 (SPECIAL) then 18 (special function “swap sound”). -
Page 38: Clearing The Memory
3. Key in 12 to clear all memory. The display will ask if you really want to do this. If so, press YES. 4. Key in 15 to clear all sound memory (this erases all samples in the SP-12). The display will ask if you really want to do this. If so, press YES. -
Page 39: Part 3: Creating A Song
CREATING A SONG PART 3: CREATING A SONG 3A CREATING A SONG: OVERVIEW 3B SELECTING A SONG 3C CHAINING SEGMENTS TOGETHER 3D ENDING A SONG 3E EDITING SONGS (STEPPING, INSERTING, DELETING) USING REPEATS 3G CHANGING THE SONG DRUM SOUND MIX 3H SETTING SONG TEMPO PROGRAMMING TEMPO CHANGES WITHIN A SONG JUMPING TO A SUB-SONG... -
Page 40: Creating A Song: Overview
There are two ways to create songs using segments. One way is to simply run the SP-12 and key in each segment just before you want it to appear. However, a far easier way is to go into song mode (by pressing the SONG/SEGMENT button), and programming a sequence of segments to create a song. -
Page 41: Selecting A Song
CREATING A SONG Note: When going to song mode from segment mode, segment level and tempo settings are not transferred over to the song. Instead, each song has its own programmed tempo (see Section 3H) and can acquire (at any time during the song) any of the eight previously defined drum sound mixes (see Section 1K). -
Page 42: Chaining Segments Together
CREATING A SONG 3C CHAINING SEGMENTS TOGETHER As mentioned in the overview, it’s best to write out the order of segments you want to program into a song. Let’s try a simple example: Segment # Step Step Step Step Step Step Step Step... -
Page 43: Ending A Song
The display’s lower line will confirm your choice by saying “Link (song number)”. 3. To stop the SP-12 completely after the song, press END (a flashing cursor will appear after End). Press END a second time; the flashing cursor will disappear, and the display’s lower line will show End to confirm that the song... -
Page 44: Editing Songs (Stepping, Inserting, Deleting)
CREATING A SONG 3E EDITING SONGS (STEPPING, INSERTING, DELETING) 1. Stepping: To change a song step, locate the step with the Right Arrow and Left Arrow buttons. Pressing Right Arrow increases the step number, Left Arrow decreases the step number. Tap either key once to move one step at a time, or hold either key down for a “fast forward”... -
Page 45: Using Repeats
CREATING A SONG 3F USING REPEATS You may enclose a segment, or group of segments, inside repeat instructions to repeat the segment(s) a selected number of times. This not only simplifies song programming, but also saves memory compared to entering multiple segments. As you write out the order of steps for a song, take these repeat instruction steps into account;... - Page 46 Here’s how you would use repeat instructions to advantage in this example: 1. At step 1, press REPEAT. The right-hand display shows sign. Press ENTER to enter this step into the SP-12’s memory. Note that the SP-12, being such an intelligent fellow, will automatically insert the right kind of repeat mark -- if there is no begin repeat instruction in the song, it will insert a begin repeat command when you press REPEAT;...
-
Page 47: Changing The Song Drum Sound Mix
Finally, press ENTER to enter this step into the SP-12’s memory. 9. At step 14, press END twice to unconditionally end the song. 10. Now start the SP-12. It will play back the song, with the lower display line showing each segment as it occurs. -
Page 48: Setting Song Tempo
Each song can have its own programmed tempo from 40 to 240 Beats Per Minute. 1. To change tempo (the SP-12 may be stopped or running and in or out of’ EDIT mode), press TEMPO. (Note: If’ you change tempo while the SP-12 is running, the tempo setting is not stored and does not loop around if a song should repeat. -
Page 49: Programming Tempo Changes Within A Song
00. 6. Press ENTER, Right Arrow, or Left Arrow to enter the tempo change command into the SP-12’s memory. Note: As the song plays back, the tempo display will change accordingly to indicate tempo changes. -
Page 50: Jumping To A Sub-Song
B. Song B will then play all the way through without returning to song A. 3K PROGRAMMING TRIGGER OUTPUTS You may program the SP-12 to output trigger pulses during the course of a song. This technique allows the SP-12 to generate pulses every quarter note, quarter note triplet, eighth note, eighth note triplet, sixteenth note, sixteenth note triplet, thirty- second note, or thirty-second note triplet. -
Page 51: Starting At A Specified Point In The Song
3L STARTING AT A SPECIFIED POINT IN THE SONG The SP-12 should be stopped. Activate the SET-UP module and key in 21. Enter the song step where you want the SP-12 to begin; the display’s lower line confirms your choice. -
Page 52: Efficient Use Of Memory
CREATING A SONG 3M EFFICIENT USE OF MEMORY The more efficiently you use memory, the more space you’ll have available for storing all those wonderful drum patterns. Consider a song where you have an 8 measure chorus, consisting of 7 identical measures followed by 1 different measure that serves as a “fill”. -
Page 53: Part 4: Sampling Your Own Sounds
SAMPLING YOUR OWN SOUNDS PART 4: SAMPLING YOUR OWN SOUNDS 4A SAMPLING: AN OVERVIEW 4B SETTING LEVELS PRIOR TO SAMPLING 4C ASSIGNING THE SAMPLE TO A PARTICULAR USER NUMBER AND OUTPUT CHANNEL 4D SETTING THE SAMPLING THRESHOLD 4E SETTING THE SAMPLE LENGTH INITIATING AND STOPPING SAMPLING 4G DELETING (ERASING) A USER SOUND 4H MODIFYING A SAMPLE VIA TRUNCATION AND LOOPING... -
Page 54: Sampling: An Overview
Erase the User sounds and record eight new User sounds, which remain in User 1 through User 8. There is a catch; with the Turbo SP-12 (five seconds of sampling time), the average length of each sound can only be about 150 milliseconds long (5 seconds divided by 32 sounds). -
Page 55: Setting Levels Prior To Sampling
GAIN control. If you cannot achieve sufficient gain to get a good signal level, proceed to the next step. If the meter bar hits the extreme right hand side, the SP-12 is being overloaded. Turn down the GAIN control so that the peaks are below this overload point. -
Page 56: Assigning The Sample
Note: Once sampling has begun, the SP-12 will continue sampling even if the signal falls below the threshold level. © E-mu Systems, Inc. 1985 Enhanced by The Emulator Archive 2002 www.emulatorarchive.com... -
Page 57: Setting The Sample Length
SAMPLING YOUR OWN SOUNDS 4E SETTING THE SAMPLE LENGTH Once sampling starts, the SP-12 will normally sample until it runs out of memory or is stopped (Section 4F). However, this function let’s you program a fixed sample time up to 2.5 seconds; after this time has elapsed, the SP-12 will stop sampling. -
Page 58: Deleting A User Sound
SAMPLING YOUR OWN SOUNDS 4. If you are not satisfied with the sample, try again by keying in 6 to re-sample the sound. 4G DELETING A USER SOUND Recording over a User Sound will erase the previous User Sound contents. However, you might also want to erase a User Sound without recording over it in order to create more memory space. -
Page 59: Modifying A Sample Via Truncation And Loop
(which is great for simulating noise- gated reverb effects on drums), or isolate a particular section of a sample. As mentioned in the introduction, the SP-12’s standard memory capacity is 1.2 seconds. Since each second requires 27,500 samples, this works out to a total available memory space of 33,000 samples. - Page 60 SAMPLING YOUR OWN SOUNDS 6. Looping can be set at the same time as truncation, or you can loop a previously truncated sample. Looping marks off a section (called a loop) of a User Sound. The display indicates the Loop Length (L=), whose end point is the end of the sample.
- Page 61 SAMPLING YOUR OWN SOUNDS Fig. 4-1 Note: Activating SET-UP and selecting SPECIAL FUNCTION 19 sets a default decay for all sounds (as set by Slider 1). This is useful if you loop a sound and want it to decay, but also want to produce different pitched sounds. ©...
-
Page 62: Part 5: Saving Your Data
SAVING YOUR DATA PART 5: SAVING YOUR DATA 5A BACKGROUND: SAVING DATA 5B GENERAL CARE AND HANDLING OF DISKS AND CASSETTES 5C HOOKING UP THE 15K1 DISK DRIVE OR CASSETTE 5D FORMATTING DISKS 5E DISK AND CASSETTE OPERATIONS © E-mu Systems, Inc. 1985 Enhanced by The Emulator Archive 2002 www.emulatorarchive.com Page 62... -
Page 63: Background: Saving Data
Clearly label each disk or cassette as to whether it contains sounds or sequences. 5B GENERAL CARE & HANDLING OF DISKS & CASSETTES Disks and cassettes represent the sum total of your experience with the SP-12, and should be handled with care. -
Page 64: Labeling
SAVING YOUR DATA The SP-12 requires double-sided, double-density, 48 tracks per inch (TPI) 5.25” floppy disks. Cassettes should be high-quality data cassettes, not standard audio cassettes. Disk drives are somewhat fragile. Before transporting the 1541 (even if it’s only across the room), always insert and latch either the original packing material or a “scrap”... -
Page 65: Saving Your Data
SAVING YOUR DATA To write-protect a cassette, knock out the little tabs on the back of the case as shown in Fig. 5-3. These can be covered over with masking tape later if you want to “un- write-protect” them. Fig. 5-3 ©... -
Page 66: Hooking Up The 1541 Disk Drive Or Cassette
5C HOOKING UP THE 1541 DISK DRIVE OR CASSETTE 1. Power off both the SP-12 and the 1541. 2. Patch the disk cable from the plug above the 1541’s fuse post to the SP-12’s rear panel disk jack (see Fig. 5-4). -
Page 67: Formatting Disks (Cassette/Disk 0)
We recommend using 5.25” double-sided, double-density 48 TPI floppy disks. Avoid bargain disks; stick to name brands such as Maxell and Dysan. Buying in quantity can save you lots of money, so get together with other SP-12 or Emulator II owners and do group disk purchases for substantial discounts. -
Page 68: Disk And Cassette Operations
Saves all User Sounds currently in memory. Note: This takes a very, very, very, very, very, long time if you have a Turbo SP-12 and the User sound memory is full. While waiting for the sounds to be saved, you have an excellent opportunity to learn a new language, become an airline pilot, or take a brief overseas vacation. - Page 69 SAVING YOUR DATA Verify Sequences Disk: Key in 2 then 7 After saving sequences, run this verify function to make sure that the data was saved correctly. The display will let you know if all is well. Verify Sounds Disk: Key in 2 then 8 After saving user sounds, run this verify function to make sure that the data was saved correctly.
-
Page 70: Part 6: Midi, Sync, & Smpte
MIDI, SYNC & SMPTE PART 6: MIDI, SYNC, & SMPTE 6A MIDI CHANNEL AND MODE SELECT (SET-UP 22) 6B BACKGROUND: SYNCHRONIZATION 6C INTERNAL SYNC (SYNC 1) 6D MIDI SYNC (SYNC 2) 6E SMPTE SYNC (SYNC 3) CLICK SYNC (SYNC 4) 6G WRITING SMPTE TIME CODE ON TAPE 6H WRITING A 24 PULSES-PER-QUARTER NOTE CLICK SYNC TRACK ON TAPE... -
Page 71: Midi Channel And Mode Select
2. Specify the Channel Number from 01 to 16 with the Left Arrow and Right Arrow keys or key in the number via the keypad. This specifies the channel over which the SP-12 will look for data when in Poly mode. After selecting the desired Channel Number, press ENTER. - Page 72 G#3 through B4 - will play the different available pitches for that sound. If you don’t want pitch keys, press NO. After selecting the desired option, press ENTER. © E-mu Systems, Inc. 1985 Enhanced by The Emulator Archive 2002 SP-12 Bass 1 Cowbell Bass 2 Snare 1...
-
Page 73: Background: Synchronization
1. To select MIDI sync, activate the SYNC module and key in 2. In this mode, the SP-12 can serve as a system master timing reference, at a rate set by the Tempo function (see Sections 10 and 3H); MIDI timing information is sent out the MIDI OUT jack. -
Page 74: Smpte Sync (Sync 3)
SP-12 via the CASS/SYNC/SMPTE IN jack, the display will show the current SMPTE time code reading. If the SMPTE time code being read from tape is earlier than the SP-12’s SMPTE start point, the SYNC light will blink until the tape catches up. When the SMPTE time code reading matches the start point, the SYNC light will go out and the segment or song will begin playing. -
Page 75: Click Sync (Sync 4)
24 pulses-per-quarter note signal is really 48 pulses, a 96 pulse signal is really 192, and so on. Therefore, if the SP-12 is being driven by a 96 pulses-per-quarter note device, divide this by 08 to obtain a 24 pulses-per- quarter note signal;... -
Page 76: Writing Smpte Time Code On Tape
MIDI, SYNC & SMPTE 6G WRITING SMPTE TIME CODE ON TAPE The SP-12 is a SMPTE time code generator that can write SMPTE time code on tape (typically one track of a multitrack recorder), to which the SP-12 can later synchronize. -
Page 77: Writing A 24 Ppqn Click Sync Track On Tape
MIDI, SYNC & SMPTE 6H WRITING A 24 PPQN CLICK SYNC TRACK ON TAPE The SP-12 can write a Click track to tape (typically one track of a multitrack recorder), to which the SP-12 can later synchronize. 1. Activate the SYNC module and key in 1 for Internal sync. -
Page 78: Part 7: Mixing And Processing
MIXING AND PROCESSING PART 7: MIXING AND PROCESSING 7A MIXING AND PROCESSING: OVERVIEW 7B PSEUDO AUTOMATED MIXDOWN 7C CREATING AMBIENCE 7D USING SPECIAL EFFECTS IN THE STUDIO © E-mu Systems, Inc. 1985 Enhanced by The Emulator Archive 2002 www.emulatorarchive.com Page 78... -
Page 79: Mixing And Processing: Overview
(“ambience”). Also, special effects may be added to various drums to make them punchier, brighter, fatter, and so on. The SP-12 can benefit from these same techniques. While you can simply plug the MIX OUT jack into a tape track or amplifier, a better approach is to plug the different drum sounds into a stereo mixing board (see Section 1M for information on how to assign different drum sounds to different output channels). -
Page 80: Using Special Effects In The Studio
SP-12 sounds is superb, so in practice little equalization is needed. However, a little extra bottom on the bass drum, some extra sheen on the high hats, and an upper midrange boost on the snare drum can do for a SP-12 what a little tasteful make-up can do for a face. -
Page 81: Appendix
APPENDIX C: UNDERSTANDING TIME SIGNATURES APPENDIX D: UNDERSTANDING MIDI/SMPTE APPENDIX E: TIPS ON CREATING REALISTIC DRUM PARTS APPENDIX F: TIPS ON USING CASSETTE INTERFACES APPENDIX G: HOW THE SP-12 WORKS © E-mu Systems, Inc. 1985 Page 81 Enhanced by The Emulator Archive 2002... -
Page 82: Appendix A: The Art Of Sampling
Recording good samples is not always easy; creating a really super set of User sounds requires patience, practice, and skill. Sure, you can get musically useful results within a few days after working with the SP-12, but as you learn your craft the quality of your samples will improve dramatically. - Page 83 Limiting Dynamic Range: Limiting the signal being sampled can put a higher average signal level into the SP-l2, thus improving the already excellent signal-to- noise ratio. Also, the limit point can be set just under the SP-12 overload point, which makes level setting less critical.
- Page 84 APPENDIX Audio “exciters”: To brighten up a sampled signal, use a device such as an Aphex Aural Exciter or EXR Projector. Both of these devices add a high-end “sheen” without adding the stridency encountered with excessive high-frequency equalization. Using noise reduction: A number of single-ended noise reduction units (such as the MicMix Dynafex or Rooktron Hush) are now available;...
- Page 85 Follow common-sense recording practice -- be extremely careful about mic placement, use noise reduction when recording samples on to tape, limit the signal going on to tape rather than limiting the signal coming off the tape into the SP-12, and add aural enhancement if desired.
-
Page 86: Part 2: Manipulating The Sample
APPENDIX PART 2: MANIPULATING THE SAMPLE Proper use of truncation and looping can conserve memory and create novel effects; let’s show how it’s done with an example. Suppose you want to sample a long, sustaining sound such as a gong. Although this will eat up a fair amount of memory, here are some suggestions. - Page 87 APPENDIX © E-mu Systems, Inc. 1985 Page 87 Enhanced by The Emulator Archive 2002 www.emulatorarchive.com...
- Page 88 APPENDIX APPENDIX B: UNDERSTANDING RHYTHMIC NOTATION This extremely brief overview is intended solely as a refresher and memory jogger; for a detailed description of rhythm notation, see any good book on music theory. Measures: A piece of music is divided into measures, and each measure is divided into notes.
-
Page 89: Appendix C: Understanding Time Signatures
APPENDIX APPENDIX C: UNDERSTANDING TIME SIGNATURES A time signature (also called metric signature) describes the meter of a piece of music. It consists of two numbers arranged like a fraction, such as 3/4, 4/4, etc. The top number (numerator) indicates the number of’ beats in each measure, while the bottom number (denominator) indicates the rhythmic value of each beat. -
Page 90: Appendix D: Understanding Midi/Smpte
APPENDIX D: UNDERSTANDING MIDI/SMPTE MIDI is causing a certain amount of confusion among musicians. Fear not -- it’s not all that difficult to understand, and the SP-12 makes it particularly easy to deal with MIDI. For those of you who aren’t that familiar with MIDI, we’ll first answer some common questions. -
Page 91: How Does Midi Differentiate Between Different Instruments
MIDI instrument responds to these channels. In Omni mode, the SP-12 (or any other MIDI device) listens to all channels at once. No matter how many notes from how many sources make it through the MIDI bus into the instrument, when in Omni mode it will attempt to play all of them. -
Page 92: Dealing With "Mldlosyncracies
If the keyboard sends velocity (dynamics) data, the SP-12 will respond to this data. The SP-12 can also “slave” to tempo data being sent over MIDI from a master, or serve as a MIDI master to which other MIDI devices refer for tempo information. -
Page 93: Appendix E: Tips On Creating Realistic Drum Parts
APPENDIX E: TIPS ON CREATING REALISTIC DRUM PARTS If you’re a drummer, you probably don’t need to read this. But for those of you who are primarily melodic players and are using the SP-12 to augment your recordings or live act, read on. -
Page 94: Appendix F: Tips On Using Cassette Interfaces
Recording data on reel-to-reel recorders: It’ you’re working in the studio on a song which uses the SP-12, record the SP-12 data either just before or just after the song. Since reel-to-reel recorders run at higher speeds than cassette recorders, and use good quality tape, drop-outs and similar hassles should not be a problem. - Page 95 SP-12) until hitting the vocal announcement. After the narration is over, plug the cassette player back into the SP-12 and start loading the data. Another option is to record the voice at a low enough level that the interface simply ignores it.
-
Page 96: Appendix G: How The Sp-12 Works
Song and segment information is recorded in RAN (random access memory); although RAM normally loses its data when the power supply is turned off, the SP-12 includes battery backup, which preserves data in RAM for up to five years. -
Page 97: Appendix H: Special Functions (Set-Up #23)
CATALOG FUNCTIONS Use slider #1 to display the options available in the special function mode. CLEAR ALL MEMORY This function is used to clear the SP-12 of all segment and song information, as well as all RAM sounds. In addition, all ROM sounds will be restored to their original location assignments as printed on the front panel. - Page 98 COWBELL even though the display reads RIM. The RIM sound is still in the SP-12’s memory, but it is no longer assigned to a location, and therefore cannot be played or heard. To recover the RIM sound, see Set-up Module function # 20 -“...
- Page 99 APPENDIX SWAP SOUNDS Please refer to section 2L of the SP-12 owners manual. DEFAULT DECAY This function applies only to RAM sounds in the TUNE mode (Set-up function # 18 – Decay/Tune Select) that need to be decayed as well. A decay range of 0 - 31 (short sounds in the tune mode will be affected by this setting.