Sony TA-N9000ES Operating Instructions Manual
Sony 5 channel power amplifier ta-n9000es operating instructions
Hide thumbs
Also See for TA-N9000ES:
- Service manual (28 pages) ,
- Operating instructions manual (16 pages)
Table of Contents
Advertisement
Available languages
Available languages
Quick Links
- 1 Normal Connections Using One Power Amplifier
- 2 Normal Connections Using Two Power Amplifiers
- 3 If You Already Have an Integrated Stereo Amplifier
- 4 Using the Power Amplifier with a Digital Signal Processor
- 5 Btl Connections Using Two Power Amplifiers
- 6 Troubleshooting
- 7 Specifications
- Download this manual
See also:
Service Manual
Advertisement
Chapters
Table of Contents

Related Manuals for Sony TA-N9000ES


Summary of Contents for Sony TA-N9000ES
-
Page 1: Channel Power Amplifier
5 Channel Power Amplifier Operating Instructions Mode d’emploi TA-N9000ES 1998 by Sony Corporation 3-864-981-12(1) - Page 2 The model and serial numbers are located on the rear of the unit. Record the serial number in the space provided below. Refer to them whenever you call upon your Sony dealer regarding this product. Model No. TA-N9000ES Serial No. For the customers in Canada...
-
Page 3: Table Of Contents
About This Manual The instructions in this manual are for model TA-N9000ES. Check your model number by looking at the lower right corner of the front panel. Conventions • The following icon is used in this manual: z Indicates hints and tips for making the task easier. -
Page 4: Hooking Up The Components
Hooking Up Components This chapter describes how to connect a Sony TA-E9000ES control amplifier, your speakers, and your other audio components to the power amplifier. Be sure to read this section before making any connections. Unpacking Check that you received the following items: •... - Page 5 Notes on speaker system hookup • Twist the stripped ends of the speaker cords about 10 speaker cord This is a high output amplifier. Touching the stripped end of the speaker cords may result in injury. When connecting the speakers, be sure the stripped end of the speakers cord does not protrude from the speaker terminal.
-
Page 6: Normal Connections Using One Power Amplifier
REC OUT REC OUT FRONT REAR WOOFER TAPE TV/DBS VIDEO 3 VIDEO 2 VIDEO 1 PRE OUT Center Speaker Active Woofer INPUT AUDIO IN TA-N9000ES See page 5 NORMAL NORMAL SPEAKER IMPEDANCE CD player (etc.) OUTPUT AC OUTLET CTRL S... -
Page 7: Normal Connections Using Two Power Amplifiers
Use one power amplifier for the front and center speakers, and one for the rear speakers. Be sure the OPERATION selector on the rear panel is set to NORMAL. Right (R) Front Speaker Front Speaker TA-N9000ES OPERATION “3ch” OPERATION S-LINK INPUT CTRL A1... -
Page 8: If You Already Have An Integrated Stereo Amplifier
REC OUT REC OUT FRONT REAR WOOFER TV/DBS VIDEO 3 VIDEO 2 VIDEO 1 PRE OUT Left (L) Front Speaker Active Woofer INPUT AUDIO IN TA-N9000ES See page 5 NORMAL NORMAL SPEAKER IMPEDANCE SPEAKERS MAIN – – BI-WIRE AC OUTLET... -
Page 9: Using The Power Amplifier With A Digital Signal Processor
– – REAR SPEAKERS CENTER SPEAKER INPUT OPERATION FRONT EXTRA 2CH CENTER NORMAL Digital Signal Processor (SDP-EP9ES, etc.) BYPASS INPUT FRONT REAR CENTER WOOFER Control amplifier (TA-E2000ESD, etc.) AUDIO CENTER FRONT REAR WOOFER PRE OUT TA-N9000ES NORMAL NORMAL SPEAKER IMPEDANCE... -
Page 10: Btl Connections Using Two Power Amplifiers
BTL 2ch When making BTL connections as shown in AC OUTLET this illustration, the gain level on the TA-N9000ES center speaker output drops about 6 dB compared to the output of the other speakers. When this happens, raise the level... -
Page 11: Control A1 Connections
TA-E9000ES AV Control Amplifier is set to standby mode, this unit will also switch to standby mode. If you are using more than one TA-N9000ES power amplifier, use additional CONTROL A1 cords to connect them in series. Refer to the operating instructions supplied with your TA-E9000ES AV Control Amplifier for details. -
Page 12: Location Of Parts And Basic Operations
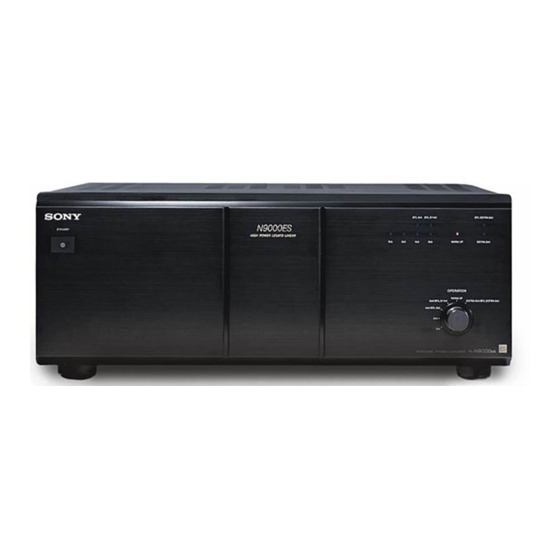
Location of Parts and Basic Operations This chapter explain the names and basic operations of the buttons and controls located on the front panel. Front Panel Parts Description 1 U switch Press to turn the power amplifier on and off. STANDBY indicator Blinks momentarily after U is pressed to turn the unit on, then goes out to indicate that the unit is ready. - Page 13 STANDBY 2 Operation indicators Light to indicate the operation mode selected with the OPERATION control. Blink if you select a mode that cannot be used. 3 OPERATION control Turn to select the channels you want to use. When the OPERATION selector on the rear panel is set to NORMAL Position Output Channels...
-
Page 14: Additional Information
Additional Information Precautions On safety Should any solid object or liquid fall into the cabinet, unplug the power amplifier and have it checked by qualified personnel before operating it any further. On power sources • Before operating the power amplifier, check that the operating voltage is identical with your local power supply. -
Page 15: Troubleshooting
If you have any question or problem concerning your power amplifier, please consult your nearest Sony dealer. Troubleshooting If you experience any of the following difficulties while using the power amplifier, use this troubleshooting guide to help you remedy the problem. -
Page 16: Specifications
Specifications AUDIO POWER SPECIFICATIONS POWER OUTPUT AND TOTAL HARMONIC DISTORTION: With 8 ohm loads, both channels driven, from 20 - 20,000 Hz; rated 120 watts per channel minimum RMS power, with no more than 0.03% total harmonic distortion from 250 milliwatts to rated output (USA model only). - Page 18 AVERTISSEMENT Afin d’éviter tout risque d’incendie ou d’électrocution, ne pas exposer cet appareil à la pluie ou à l’humidité. Afin d’éviter tout risque de choc électrique, ne pas ouvrir le coffret. Confier toute réparation à un technicien qualifié uniquement. N’installez pas l’appareil dans un espace confiné...
- Page 19 Au sujet de ce mode d’emploi Les instructions de ce mode d’emploi couvrent le modèle TA-N9000ES. Vérifiez le numéro de votre modèle dans le coin inférieur droit du panneau avant. Conventions • L’icône suivante est utilisée dans ce mode d’emploi: z Indique des conseils et suggestions pouvant faciliter certaines opérations.
-
Page 20: Raccordement Des Appareils
Raccordement des appareils Ce chapitre explique comment raccorder un amplificateur de contrôle TA-E9000ES Sony, des enceintes et d’autres appareils audio à l’amplificateur de puissance. Veuillez lire attentivement ce paragraphe avant de faire les liaisons. Déballage Vérifiez si l’accessoire suivant se trouve dans l’emballage: •... - Page 21 Remarques sur le raccordement du système acoustique • Torsadez chaque extrémité dénudée des cordons d’enceinte sur 10 mm environ. Cordon d’enceinte Cet amplificateur a une puissance de sortie élevée. Vous risquez d’être blessé si vous touchez l’extrémité dénudée des cordons d’enceintes. Lorsque vous raccordez les enceintes, assurez-vous que les extrémités dénudeés des cordons d’enceinte ne ressortent pas des bornes d’enceinte.
-
Page 22: Raccordement Ordinaire À Un Seul Amplificateur
REC OUT FRONT REAR WOOFER TAPE TV/DBS VIDEO 3 VIDEO 2 VIDEO 1 PRE OUT Enceinte Caisson de grave centrale amplifié INPUT AUDIO IN TA-N9000ES Voir page 5 NORMAL NORMAL SPEAKER IMPEDANCE Lecteur CD (etc.) OUTPUT AC OUTLET CTRL S... -
Page 23: Raccordement Ordinaire À Deux Amplificateurs
Veillez à régler le sélecteur OPERATION sur le panneau arrière de l’amplificateur sur NORMAL. Enceinte avant Enceinte avant droite (R) gauche (L) TA-N9000ES Réglez OPERATION sur “3ch” OPERATION S-LINK INPUT... -
Page 24: Si Vous Avez Déjà Un Amplificateur Stéréo Intégré
REC OUT FRONT REAR WOOFER TV/DBS VIDEO 3 VIDEO 2 VIDEO 1 PRE OUT Enceinte avant Caisson de grave gauche (L) amplifié INPUT AUDIO IN TA-N9000ES Voir page 5 NORMAL NORMAL SPEAKER IMPEDANCE SPEAKERS MAIN – – BI-WIRE AC OUTLET... -
Page 25: Utilisation De L'amplificateur De Puissance Avec Un Processeur De Signal Numérique
REAR SPEAKERS CENTER SPEAKER INPUT OPERATION CENTER FRONT EXTRA 2CH NORMAL Processeur de signal numérique (SDP-EP9ES, etc.) BYPASS INPUT FRONT REAR CENTER WOOFER Amplificateur de contrôle AUDIO CENTER FRONT REAR WOOFER PRE OUT TA-N9000ES NORMAL NORMAL SPEAKER IMPEDANCE (TA-E2000ESD, etc.) -
Page 26: Raccordement Btl À Deux Amplificateurs De Puissance
BTL AC OUTLET indiquées sur l’illustration, le niveau de gain sur la sortie d’enceinte centrale du TA-N9000ES descend de 6 dB environ par rapport à la sortie des autres enceintes. Dans ce cas, élevez le niveau de l’enceinte... -
Page 27: Raccordement Control A1
CTRL A1 de l’amplificateur de contrôle AV TA-E9000ES. Lorsque l’amplificateur de contrôle AV TA-E9000ES sera mis en veille, cet appareil le sera aussi. Si vous utilisez plus d’un amplificateur de puissance TA-N9000ES, reliez- les en série avec d’autres cordons CONTROL A1. Reportez-vous au mode d’emploi fourni avec l’amplificateur de contrôle AV TA-E9000ES pour les... -
Page 28: Emplacement Des Éléments Et Opérations De Base
Emplacement des éléments et opérations de base Ce chapitre vous indique l’emplacement et la fonction de chaque touche et commande du panneau avant. Description des éléments du panneau avant 1 Commutateur U Sert à mettre l’amplificateur sous et hors tension. Témoin STANDBY (veille) Clignote momentanément lorsque vous appuyez sur U pour mettre l’amplificateur sous tension et s’éteint... - Page 29 STANDBY 2 Témoins de fonctionnement S’allument pour indiquer le mode de fonctionnement sélectionné avec la commande OPERATION. Clignotent si vous sélectionnez un mode qui ne peut pas être utilisé. 3 Sélecteur OPERATION Sert à sélectionner les canaux que vous voulez utiliser. Lorsque le sélecteur OPERATION sur le panneau arrière est réglé...
-
Page 30: Informations Complémentaires
Informations complémentaires Précautions Sécurité Si un solide ou un liquide pénètre dans le coffret, débranchez l’amplificateur de puissance et faites-le vérifier par un professionnel avant de le remettre en service. Sources d’alimentation • Avant de mettre l’amplificateur de puissance en service, vérifiez que sa tension de fonctionnement correspond à... -
Page 31: Guide De Dépannage
à ce guide de dépannage pour essayer de le résoudre. Si vous n’y parvenez pas, consultez votre revendeur Sony. Pas de son ou son extrêmement faible. / Vérifiez si les enceintes et les appareils sont raccordés correctement. -
Page 32: Spécifications (Dos)
Prise d’entrée Sensibilité Impédance REAR 45 kilohms CENTER 45 kilohms FRONT 45 kilohms EXTRA 2ch 45 kilohms Sony Corporation Printed in Japan Généralités Système SEPP Linéaire legato haute puissance purement complémentaire Alimentation 120 V CA, 60 Hz Consommation 4,5 A Dimensions...