
Related Manuals for Sony Bravia VPL-VW40


Summary of Contents for Sony Bravia VPL-VW40
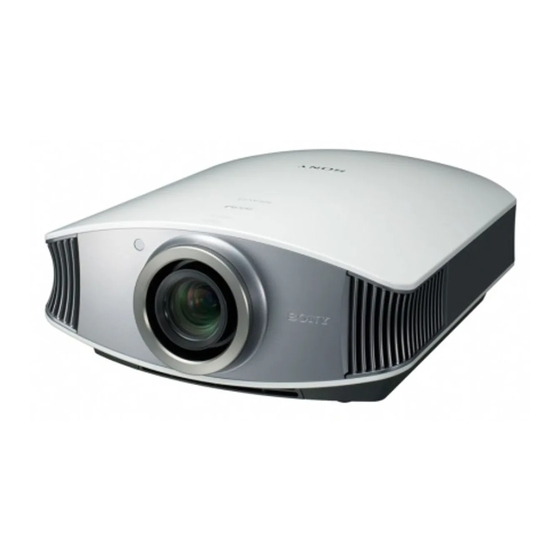
- Page 1 3-280-691-11 (1) Video Projector Operating Instructions VPL-VW40 © 2007 Sony Corporation...
- Page 2 For customers in the USA If you have any questions about this product, you may call: Sony Customer Information Service Center 1-800-222-7669 or http://www.sony.com/ The number below is for FCC related matters only. Declaration of Conformity Trade Name: SONY Model No.: VPL-VW40...
- Page 3 Electronic Industries Alliance (www.eiae.org). For customers in Europe The manufacturer of this product is Sony Corporation, 1-7-1 Konan Minato-ku Tokyo, 108-0075 Japan. The Authorized Representative for EMC and product safety is Sony Deutschland GmbH, Hedelfinger Strasse 61, 70327 Stuttgart, Germany.
- Page 4 For customers in Canada This Class B digital apparatus complies with Canadian ICES-003. For customers in Europe Disposal of waste batteries (applicable in the European Union and other European countries with separate collection systems) This symbol on the battery or on the packaging indicates that the battery provided with this product shall not be treated as household waste.
-
Page 5: Table Of Contents
Table of Contents Precautions ... 7 Location of Controls Front/Right Side ...8 Rear/Bottom ...9 Remote Control ...10 Connections and Preparations Unpacking ...11 Step 1: Installing the Projector ...12 Before Setting Up the Projector ...12 Positioning the Projector and a screen ...14 Step 2: Connecting the Projector ...17 Connecting to a VCR ...17 Connecting to a Computer ...20... - Page 6 Others Troubleshooting ... 52 Warning Indicators ... 55 Message Lists ... 56 Replacing the Lamp and the Air Filter and cleaning the Ventilation holes (intake) ... 57 Cleaning the Air Filter ... 60 Cleaning and the Screen of the Projector ... 60 Specifications ...
-
Page 7: Precautions
Precautions On safety • Check that the operating voltage of your unit is identical with the voltage of your local power supply. • Should any liquid or solid object fall into the cabinet, unplug the unit and have it checked by qualified personnel before operating it further. -
Page 8: Location Of Controls
Location of Controls Front/Right Side You can use the buttons on the control panel with the same names as those on the remote control to operate the projector. LENS button (1 page 22) M/m/</, (arrow)/ (enter) button (1 page 36) MENU button (1 page 36) INPUT button (1 page 27) (ON/STANDBY) switch (1 page 22) -
Page 9: Rear/Bottom
Rear/Bottom Ventilation holes (intake) (1 page 13) Remote control detector (1 page 21) Ventilation holes (intake) (1 page 13) Ventilation holes (intake) (1 page 13) Ventilation holes (intake) (1 page 13) Ventilation holes (intake) (1 page 13) Lamp cover (1 page 57) Adjusters (1 page 24) Filter holder (1 page 58) Ventilation holes (intake) -
Page 10: Remote Control
Remote Control Infrared transmitter LIGHT button Illuminates the buttons on the remote control. INPUT button (1 page 27) COLOR SPACE button (1 page 32) GAMMA CORRECTION button (1 page 32) M/m/</, (arrow)/ buttons (1 page 36) MENU button (1 page 36) WIDE MODE button (1 page 29) PICTURE MODE... -
Page 11: Connections And Preparations
Connections and Preparations This section describes how to install the projector and screen, how to connect the equipment from which you want to project the picture, etc. Unpacking Check the carton to make sure it contains the following items: • Remote control (1) and Size AA (R6) batteries (2) •... -
Page 12: Step 1: Installing The Projector
Step 1: Installing the Projector The projector displays pictures output from a VCR or other device. The lens shift allows you to have broader options for placing the projector and viewing pictures easily. Before Setting Up the Projector Unsuitable installation Do not place the projector in the following situations, which may cause malfunction or damage to the projector. - Page 13 Improper use Do not do any of the following while using the projector. Blocking the ventilation holes. Ventilation holes (intake) Ventilation holes (exhaust) For details on the location of the ventilation holes (intake or exhaust), see “Location of Controls” on pages 8 to 9. Tilting front/rear and left/right 15°...
-
Page 14: Positioning The Projector And A Screen
Positioning the Projector and a screen The installation distance between the projector and a screen varies depending on the size of the screen. Determine the installation position of the projector and screen. You can obtain a good quality picture if you position the projector with the center of the lens within the areas indicated in the gray areas in the illustration. - Page 15 When using the 16:9 aspect ratio screen Screen size (inches) (mm) 1016 1524 2032 1212 1842 2472 (minimum) 2105 3181 4257 (maximum) (125 (167 To calculate the installation measurements (SS: Screen Size) a (minimum) = 31.5 (1 ) × SS – 48.2 (1 b (maximum) = 53.8 (2 ) ×...
- Page 16 Position the projector so that the lens is parallel to the screen. Top view Screen Project an image on the screen and adjust the picture so that it fits the screen. (1 page 21) To project an image, connect video equipment to the projector. (1 page 17) Note When using a screen with an uneven surface, stripes pattern may rarely appear on the screen depending on the distance between the screen and the projector or the zooming magnifications.
-
Page 17: Step 2: Connecting The Projector
Step 2: Connecting the Projector When making connections, be sure to do the following: • Turn off all equipment before making any connections. • Use the proper cables for each connection. • Insert the cable plugs properly; poor connection at the plugs may cause a malfunction or poor picture quality. - Page 18 To connect to a DVD player/recorder or Blu-ray Disc player equipped with HDMI output You can enjoy better picture quality by connecting a DVD player/recorder or Blu-ray Disc player equipped with HDMI output to the HDMI input of the projector. Right side of the projector : Video signal flow Notes...
- Page 19 To connect to a VCR equipped with the S video connector or video connector You can connect a DVD player/recorder, hard disk video recorder, VCR or laser disk player, which is not equipped with component video connectors. See also the instruction manual of each equipment.
-
Page 20: Connecting To A Computer
Connecting to a Computer Right side of the projector HD-Dsub15 pin cable (not supplied) or HDMI cable (not supplied) : Video signal flow Set “Input-A Signal Sel.” in the Setup not appear properly, set it to “Computer.” (1 page 47, 56) Notes •... -
Page 21: Step 3: Adjusting The Picture Position
Step 3: Adjusting the Picture Position Project an image on the screen and then adjust the picture position. Remote control detector (ON/STANDBY), INPUT, LENS, MENU, and M/m/</,/ side panel of the projector function the same as those on the remote control. Note Depending on the installation location of the projector, you may not control it with the remote control. - Page 22 Flashes in green for a few seconds, and then lights in green. Tips • You can select the desired language for the menu screen. For details, refer to “Step 4: Selecting the Menu Language”. (1 page 25) • When “Auto Input Search” is set to “On” in the Function effective signals is automatically displayed by pressing INPUT.
- Page 23 When “Lens Control” is set to “Off” on the Installation picture position. (1 page 49) When “Test Pattern” is set to “Off” on the Function (1 page 48) The picture moves up by a maximum of 65% of the screen size from the center of the lens. 120”...
- Page 24 When “Lens Control” is set to “Off” on the Installation and the focus. (1 page 49) When “Test Pattern” is set to “Off” on the Function (1 page 48) To adjust the tilt of the installation surface If the projector is installed on an uneven surface, use the adjusters to keep the projector level.
-
Page 25: Step 4: Selecting The Menu Language
Step 4: Selecting the Menu Language You can select one of 16 languages for displaying the menu and other on-screen displays. The factory default setting is English. To change the current menu language, set the desired language with the menu screen. 2,3,4 Press MENU. - Page 26 Press M/m to select the Setup menu, and press , or The setting items of the selected menu appears. Press M/m to select “Language,” and press , or Press M/m/</, to select a language, and press The menu changes to the selected language.
-
Page 27: Projecting
Projecting This section describes how to operate the projector to view the picture from the equipment connected to the projector. It also describes how to adjust the quality of the picture to suit your taste. Projecting the Picture on the Screen Example: To view the picture from the video equipment connected... -
Page 28: Turning Off The Power
When “Auto Input Search” is set to “On” in the Function signals is automatically displayed by pressing INPUT. Turning Off the Power Press the (ON/STANDBY) switch. A message “POWER OFF?” appears on the screen. Press the (ON/STANDBY) switch again before the message disappears. -
Page 29: Selecting The Wide Screen Mode
Selecting the Wide Screen Mode You can enjoy various wide screen modes according to the video signal received. WIDE MODE button Original image When the Wide Mode is operated Squeezed Press WIDE MODE. Each time you press the button, you can select the “Wide Mode”... - Page 30 Letterbox picture with side panels Letterbox picture Note You can adjust the vertical position of the picture with “V Center” and “Vertical Size” in the Screen menu only when “Zoom” is selected. (1 page 45) Notes on selecting the wide screen mode The projector is featured with the WIDE MODE.
-
Page 31: Selecting The Picture Viewing Mode
Selecting the Picture Viewing Mode You can select the picture viewing mode that best suits the type of program or room conditions. PICTURE MODE buttons DYNAMIC STANDARD CINEMA USER 1, USER 2 and USER 3 Press one of the PICTURE MODE buttons (DYNAMIC, STANDARD, CINEMA and USER 1, USER 2 and USER 3). -
Page 32: Adjusting The Picture Quality
Adjusting the Picture Quality You can easily adjust the picture quality that suits your taste by selecting the adjustment items with the remote control. The adjusted data can be stored in each picture mode. Selecting to directly adjust the desired menu item COLOR SPACE button COLOR TEMP... -
Page 33: Selecting Desired Adjust Menu Items In The Order
Selecting desired adjust menu items in the order Example: To adjust the contrast Press ADJ PIC. Each time you press the button, the following adjustment windows are displayed in sequence. For details on each adjustment, see the Picture Note Some adjustment windows cannot be displayed, depending on the type of input signal. -
Page 34: Adjusting The Picture Using Real Color Processing
Adjusting the Picture Using Real Color Processing The Real Color Processing (RCP) feature allows you to adjust the color and hue of each target of the projected picture you specify independently. You can thus obtain a picture more suitable to your taste. Freeze the scene of the video source when you are adjusting the picture using Real Color Processing. -
Page 35: Using The Supplied Software To Adjust The Picture Quality (Imagedirector3)
Using the Supplied Software to Adjust the Picture Quality (ImageDirector3) By using the “ImageDirector3” (supplied as a CD-ROM), you can make the desired gamma correction from a computer connected to the projector. Connect the REMOTE connector of the projector with a computer and start-up “ImageDirector3” on the computer. -
Page 36: Using The Menus
Using the Menus This section describes how to make various adjustments and settings using the menus. Operation through the Menus The projector is equipped with an on-screen menu for making various adjustments and settings. Some of the adjustable/setting items are displayed in a pop-up menu, in a setting menu or adjustment menu with no main menu, or in the next menu window. - Page 37 Press MENU. The menu window appears. Press M/m to select a menu item, and press , or The items that can be set or adjusted with the selected menu appear. The item presently selected is shown in yellow.
- Page 38 Pop-up menu Setting items Setting menu Adjustment menu Next menu window Setting items Press M/m to select an item you want to set or adjust and press , or The setting items are displayed in a pop-up menu, in a setting menu, in an adjustment menu or in the next menu window.
- Page 39 Make the setting or adjustment of an item. When changing the adjustment level To increase the value, press M/,. To decrease the value, press m/<. Press to restore the original screen. When changing the setting Press M/m to change the setting. Press to restore the original screen.
-
Page 40: Picture Menu
Picture Menu The Picture menu is used for adjusting the picture. Picture Mode You can select the picture viewing mode that best suits the type of picture or the environment. Dynamic: Select this for enhanced picture contrast and sharpness to reproduce color tones. - Page 41 Cinema Black Pro Advanced Iris Switches the iris function during projection. Auto1: Automatically switches to an optimum iris according to a projected scene. The contrast of the scene is emphasized most. Auto2: An optimum iris becomes smaller than when set to “Auto1”. The contrast of the scene becomes reduced.
- Page 42 Expert Setting NR (Noise Reduction) Reduces the roughness or noise of the picture. Usually, select “Off”. If the picture is rough or noisy, select a setting from among “Low”, “Middle” or “High” according to the input signal source. DDE (Dynamic Detail Enhancer) According to the film source you have selected, make a setting for playback.
-
Page 43: Advanced Picture Menu
Advanced Picture Menu The Advanced Picture is used for adjusting the picture more. RCP (Real Color You can adjust the color and hue of each selected portion of the Processing) picture independently. User1, User2, User3: You can adjust the picture using Real Color Processing and store the settings. -
Page 44: Screen Menu
Screen Menu The Screen menu is used to adjust the input signal. You can adjust the size of the picture, and select wide screen mode, etc. Wide Mode You can set the aspect ratio of the picture to be displayed for the (Video signal) current input signal. - Page 45 V Center Adjust the whole picture by moving up and down on the screen. As the selected number increases, the screen moves up, and as the selected number decreases, the screen moves down. Note This item is adjustable only when “Zoom” is selected. Vertical Size Reduces or enlarges the picture vertically.
-
Page 46: Setup Menu
Setup Menu The Setup menu is used to change the factory preset settings, etc. Status Sets whether or not the on-screen display is displayed. Set to “Off” to turn off the on-screen displays except for the menus, message when turning off the power, and warning messages. Language Selects the language used in the menu and on-screen displays. - Page 47 Input-A Signal Sel. Selects the type of signal input from the equipment connected to the INPUT A connector. Selects the type of signal input from the equipment by selecting “Input-A” with the INPUT button. Auto: Selects the input signal type automatically. Computer: Inputs the signal from a computer.
-
Page 48: Function Menu
Function Menu The Function menu is used for changing the settings of the various functions of the projector. Auto Input Search Detects the input signal and displays the detected input signal automatically when the INPUT button is pressed. When set to “On”, the projector detects whether a Component, HDMI 1, HDMI 2, Video, S-video or Input-A signal is input when the input terminal with effective signals is automatically selected by pressing INPUT. -
Page 49: Installation Menu
Installation Menu The Installation menu is used for changing the installation settings. V Keystone Corrects the vertical trapezoidal distortion of the picture. When the bottom of the trapezoid is longer than the top ( When the top of the trapezoid is longer than the bottom ( Note Depending on the picture position adjusted with the lens shift feature, the aspect ratio of the picture may change from the original... - Page 50 Blanking This feature allows you to adjust the displayable region within the four directions of the screen. Select each screen edge “Left / Right / Top / Bottom” on the Blanking adjustment screen with M / m buttons. Adjust the desired Blanking value with <...
-
Page 51: Information Menu
Information Menu The Information menu displays the model name, serial number, the horizontal and vertical frequencies of the input signal and the cumulated hours of usage of the lamp. Model Name Displays the model name (VPL-VW40). Serial No. Displays the serial number. fH (horizontal frequency) Displays the horizontal frequency of the input signal. -
Page 52: Troubleshooting
This section describes about the other functions, how to solve the problems, how to replace the lamp and air filter, etc. Troubleshooting If the projector appears to be operating erratically, try to diagnose and correct the problem using the following instructions. If the problem persists, consult with qualified Sony personnel. Power Symptom Cause and Remedy c After about one minute, turn the power on. - Page 53 (1 page 45) menu to “On.” (1 page 46) (ON/STANDBY) indicator should light in green. purchase. Consult with your local dealer or qualified Sony personnel. (1 page 11) menu, set the setting of “IR Receiver” to “Front & Rear”. (1 page 49) projector may work improperly or inadvertently.
- Page 54 Others Symptom Cause and Remedy c Check the setting of “Cooling Setting” in the Setup The fan is noisy. c Make sure that the room temperature is not too high. Image is left on the screen. c When High contrast non-moving images are displayed for a (image retention) (1 page 46) Check the installation conditions.
-
Page 55: Warning Indicators
The lamp has reached the end of its useful lifespan. Replace the red. (A repetition rate of 3 flashes) c The lamp has reached a high temperature. Wait until the lamp c The fan is broken. Consult with qualified Sony personnel. ON/STANDBY flashes in red. (A repetition rate of 4 flashes) ON/STANDBY flashes in c The internal temperature is unusually high. -
Page 56: Message Lists
Message Lists Warning messages Message Cause and Remedy c Turn off the power. High temp.! Lamp off in 1 c Check to ensure that nothing is blocking the ventilation holes. min. Frequency is out of range! c Frequency is out of range. Input a signal that is within the c Set “Input-A Signal Sel.”... -
Page 57: Replacing The Lamp And The Air Filter And Cleaning The Ventilation Holes (Intake)
Replacing the Lamp and the Air Filter and cleaning the Ventilation holes (intake) Tools you need to get started: Standard Phillips screwdriver Cloth (for scratch protection) The lamp used for the light source has a certain lifespan. When the lamp dims, the color balance of the picture becomes strange, or “Please replace the Lamp/Filter.”... - Page 58 Loosen the three screws on the lamp with the Phillips screwdriver. Hold up the cover release lever, then pull the lamp straight out. Ensure you push the new lamp all the way, then securely tighten those three screws on the lamp. Lock the cover release lever and put it back.
- Page 59 Attach the new air filter so that it fits into the each claws (10 positions) on the filter holder. Note Attach the Air Filter aligning it with the shape of the filter holder. Also, do not touch the fan after removing the air filter that is set deep inside the projector.
-
Page 60: Cleaning The Air Filter
Cleaning the Air Filter When “Please clean the filter.” appears on the screen, you should clean the air filter. The air filter should be cleaned every 1,500 hours. This value varies depending on the environment or how the projector is used. 1,500 hours are approximate. -
Page 61: Specifications
Specifications System Projection system SXRD panel, 1 lens, projection system LCD panel 0.61-inch (15.4 mm) SXRD panel 6,220,800 pixels (2,073,600 pixels × 3) Lens 1.8 times zoom lens (motorized) f=18.7 mm to 33.7 mm/F2.54 to F3.53 Lamp 200 W Ultra High Pressure Lamp Projection picture size 40 inches to 300 inches (1,016 mm to 7,620 mm) (measured... - Page 62 Supplied accessories Remote control RM-PJVW60 (1) Size AA (R6) batteries (2) AC power cord (1) Lens Cap (1) Operating Instructions (1) CD-ROM (ImageDirector3) (1) Design and specifications are subject to change without notice. Optional accessories Projector Lamp LMP-H200 (for replacement) Projector Suspension Support PSS-H10...
-
Page 63: Preset Signals
Warning on power connection Use a proper power cord for your local power supply. The United States, Canada Plug type YP-3 Female end YC-13 Cord type Rated Voltage & 10A/125V Current Safety approval UL/CSA * Use a rated plug that complies with the regulation of each country/region and the specifications. Preset Signals The following table shows the signals and video formats which you can project using this unit. - Page 64 Memory Preset signal (resolution) 720/60p 720/60p (1280 × 720p) 720/50p 720/50p (1280 × 720p) 1080/60p 1080/60p (1920 × 1080p) 1080/50p 1080/50p (1920 × 1080p) 1080/24p 1080/24p (1920 × 1080p) 640 × 350 VGA-1 (VGA350) 31.469 VESA 85 (VGA350) 640 × 400 NEC PC98 VGA-2 (TEXT)/ VESA70...
- Page 65 Memory Preset signal (resolution) 1280 × 768 1280 × 768/60 1280 × 720 1280 × 720/60 Preset memory numbers for each input signal Analog signal Signal Video signal (VIDEO INPUT and S VIDEO INPUT connectors) Component signal (INPUT A and Y P connectors) Video GBR signal (INPUT A connector) Computer signal (INPUT A connector)
-
Page 66: Input Signals And Adjustable/Setting Items
Input Signals and Adjustable/Setting Items The items in the menus available to adjust differ depending on the input signal. The following tables indicate them. The items that cannot be adjusted are not displayed in the menu. Item Video signal Advanced Iris Lamp Control Contrast Brightness... - Page 67 Screen menu Item Video signal Wide Mode Over Scan – Screen Area * – V Center * Vertical Size * – Phase – Pitch – Shift – z : Adjustable/can be set – : Not adjustable/cannot be set : This item is effective only when “Over Scan” is set to “On” in the Screen : If the input signal is from a computer, the setting cannot be made when the aspect ratio is 16:9 or wider.
-
Page 68: Ceiling Installation
Ceiling Installation Use the PSS-H10 Projector Suspension Support when you install the projector on a ceiling. The projection distances for ceiling installation are shown below. When Using the PSS-H10 Projector Suspension Support a: Distance between the screen and the installation hole at the ceiling side of the ceiling mount unit (front side) x: Distance between the ceiling and the center of the screen such that the picture will not be truncated or blocked... - Page 69 When using the 16:9 aspect ratio screen Screen Size (inches) (mm) 1016 1524 2032 a Minimum 1403 2033 2663 Distance (104 Maximum 2296 3372 4448 Distance (132 (175 x Minimum Distance Maximum Distance To calculate the installation measurements (SS: Screen Size) a (minimum) = 31.5 (1 ) ×...
- Page 70 For details on installation on a ceiling, refer to the Installation manual for Dealers of the PSS-H10. Make sure to consult with a qualified Sony personnel for installation. The installation measurements are shown below when installing the projector on a ceiling using the PSS-H10.
-
Page 71: Front View
Front view 150 (6) 75 (3) 197.5 (7 395 (15 Side view Center of the lens Front of the cabinet Ceiling 175 (7) Center of the supporting pole 93.5 (3 Center of the lens 197.5 (7 191.3 (7 130 (5 236.3 (9 235.1 (9 471.4 (18... -
Page 72: Making Fine Adjustments To The Horizontal Picture Position
Making Fine Adjustments to the Horizontal Picture Position Tools you need to get started Phillips screwdriver: 110 mm (4 Flat-head screwdriver: 110 mm (4 Note For details on how to make fine adjustments of the horizontal picture position, consult with qualified personnel. - Page 73 Insert a flat-blade screwdriver into the lens adjustment groove located at the left bottom (when the projector projects the image when placed on the floor, on a desk, etc.), and turn it in the direction in which you want to move the lens. If you turn it to the left, the lens moves to the left, and if you turn it to the right, the lens moves to the right.
- Page 74 After you have decided the lens position, insert the Philips screwdriver at the locations of the four screws around the border of the lens in turn and tighten them to fix the lens in place. Attach the ring (washer) by turning it clockwise. Note When you use the horizontal and vertical lens shift features at the same time and adjust the horizontal lens shift to the maximum, the picture moves up to a maximum of 53% of its original position.
-
Page 75: Index
Index Adjust Signal Phase ...45 Pitch ...45 Shift ...45 Adjuster ...24 Adjusting picture position ...21 picture quality ...32 Advanced Iris ...32, 41 Auto Input Search ...48 Background ...48 Black Level Adj..32, 42 Blanking ...50 Brightness ...41 Ceiling Installation ...68 Cinema Black Pro ...41 Color Space ...32, 43 Color System ...47... - Page 76 RCP ... 43 Remote control inserting the batteries ... 11 location of controls ... 10 Reset resettable items ... 39 resetting the items ... 39 Screen Area ... 44 Selecting the menu language ... 25 Sharpness ... 41 Specifications ... 61 Standby Mode ...
- Page 80 Printed on 70% or more recycled paper. Sony Corporation Printed in Japan...