
Related Manuals for Magellan LeadCare II

Summary of Contents for Magellan LeadCare II
- Page 1 LeadCare II Blood Lead Analyzer ® User’s Guide Instructions for use with Analyzer Firmware Version 1.09 NOTE: or higher. Please check the label on the bottom of your analyzer to determine firmware version.
- Page 2 Tel: +44 (0) 1372 377 754 Fax: +44 (0) 1372 388 282 Copyright© 2015 Magellan Diagnostics, Inc. All rights reserved. No part of this publication may be reproduced, transmitted, transcribed, stored in a retrieval system, or translated into any language or computer language, in any form, or by any means, electronic, mechanical, magnetic, optical, chemical, manual, or otherwise, without prior written permission of Magellan Diagnostics, Inc.
- Page 3 All laboratories eligible for a CLIA Certificate of Waiver must follow the manufacturer's instructions as specified in the LeadCare II User's Guide (this guide), LeadCare II Quick Reference Guide and in the LeadCare II Package Insert. Other LeadCare II Documents •...
-
Page 4: Table Of Contents
Troubleshooting Chapter 1 Before Testing Definitions and Precaution Symbols Compliance Statements Symbols Unpacking the LeadCare II Blood Lead Analyzer Register Your System Setting Up the Analyzer Installing Batteries About the LeadCare II System About Blood Lead Testing How the LeadCare II System Works... - Page 5 Why Calibration is Important The Calibration Button Calibrating the Analyzer Chapter 3 Quality Control Procedure What is a LeadCare II Lead Control Storage and Handling How Often Should You Test Controls Testing Controls Prepare the Sample Mix with Treatment Reagent...
-
Page 6: Troubleshooting I
Control Test Results Below the Target Range: Possible Causes Control Test Results Above the Target Range: Possible Causes Screen Display Messages Screen Display Chart Maintaining the Analyzer Chapter 6 LeadCare II Blood Lead Testing System Limited Warranty Warranty Appendix A Connecting a Compatible Serial Printer Connections... - Page 7 Turn Analyzer On Chapter 4 Blood Lead Testing Figure 4-1 Message Display Appendix A Connecting a Compatible Serial Printer Figure A-1 Serial Cable Figure A-2 Rear Panel of the LeadCare II Figure A-3 LeadCare II Label Figure A-4 Label Placement...
- Page 8 This page intentionally left blank.
-
Page 9: Chapter 1 Before Testing
LeadCare ® II Blood Lead Analyzer. Please read the following sections before using the analyzer. • Unpacking the LeadCare II Blood Lead Analyzer • Setting up the Analyzer • About the LeadCare II Blood Lead Analyzer • Intended Use •... -
Page 10: Definitions And Precaution Symbols
Definitions and Precaution Symbols WARNING: This symbol identifies conditions or practices that could result in injury or loss of life. CAUTION: This symbol indicates conditions or practices that could cause erroneous results or damage to the analyzer. This symbol indicates that you should read the instructions carefully. -
Page 11: Compliance Statements
The ETL label on the bottom of the instrument indicates that Intertek Electrical Testing Labs (ETL) has certified the LeadCare II to the applicable safety standards. This device complies with Part 15 of the FCC rules. Operation is subject to the following two rules: 1. -
Page 12: Symbols
Symbols The following symbols are used in the labeling of the LeadCare II Analyzer and Blood Lead Test Kit. Symbol Description This product fulfills the requirements of Directive 98/79/EC on In Vitro Diagnostic Medical Devices. Temperature Limitation Use By Manufacturer... -
Page 13: Unpacking The Leadcare Ii Blood Lead Analyzer
LeadCare II Analyzer Kit • Analyzer • AC Adapter & International Power Plug Set • 4 AA Alkaline Batteries • Quick Reference Guide • LeadCare II Flash Drive (contains User’s Guide and Instructional Videos) Figure 1-1 Analyzer Kit Contents LeadCare ®... -
Page 14: Register Your System
Register Your System Please take a moment to complete the registration form online at: www.leadcare2.com/register Registering your analyzer with Magellan Diagnostics will allow you to receive important updates about your LeadCare II Test System. LeadCare ® II User's Guide... -
Page 15: Setting Up The Analyzer
Setting up the Analyzer The Work Area Set up the LeadCare II Blood Lead Analyzer in an area that is free of drafts and temperature extremes. The analyzer needs a stable temperature to operate. You can use the analyzer with an AC power adapter or with batteries. - Page 16 The battery holder is located at the rear of the analyzer. To install the batteries: Turn the analyzer to access the battery area. Remove the DC input connector. Remove the battery cover as shown in Figure 1-4. Figure 1-4 Remove Battery Holder Cover Press on the locking tab with one or both thumbs and slide it away from the analyzer.
-
Page 17: About Blood Lead Testing
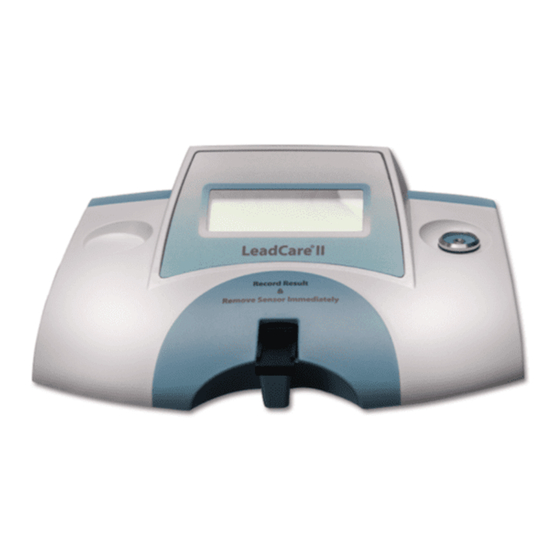
About the LeadCare II Blood Lead Analyzer The LeadCare II Blood Lead Analyzer is a portable device for testing the amount of lead in whole blood. Figure 1-6 LeadCare II Blood Lead Analyzer About Blood Lead Testing Childhood lead poisoning is a major, preventable environmental health problem in the United States. -
Page 18: How The Leadcare Ii System Works
How the LeadCare II System Works The LeadCare II System uses an electrochemical technique called Anodic Stripping Voltammetry (ASV) to determine the amount of lead in a blood sample. The diagram below illustrates the methodology. Blood is mixed with LeadCare Treatment Reagent and the red blood cells (RBC) are lysed, which releases the lead that is bound to the RBC wall. -
Page 19: Intended Use
Intended Use The LeadCare II Blood Lead Analyzer and Test Kit provide a measurement of the amount of lead in a fresh whole blood sample. The LeadCare II Blood Lead Analyzer is intended for in vitro (external) use only. It is for lead testing only. The test kit components are designed for use only with the LeadCare II Blood Lead Analyzer. -
Page 20: Reading The Analyzer Display
Chapter 5, Troubleshooting and Maintenance, includes a list of the messages and what to do if they appear. Important Precautions This section lists important things you need to know about using the LeadCare II Blood Lead Analyzer. Understand these precautions. Precautions When Preparing Samples WARNING: Use universal precautions while collecting and handling blood samples. -
Page 21: Precautions For Testing A Patient Sample
• Use only the heparinized capillary tubes provided with the LeadCare II Test Kit. The capillary tube must be filled to the fill line (50 µl) for accurate results. Check to make sure that the tube is free of gaps and bubbles. After collection, wipe off the sides of the capillary tube with a gauze pad (wipe downward). -
Page 22: Precautions When Performing Quality Control Testing
CAUTION: • Do NOT leave the treatment reagent vial uncapped other than to add the sample or remove the sample/reagent solution. The tube and its contents could become contaminated causing inaccurate test results. • Before placing the sample on the sensor, make sure the display calls for sample addition. -
Page 23: More Information
More Information The following references provide additional information about blood sample collection, blood lead testing, and Magellan Diagnostics LeadCare II products. Blood Sample Collection Information about sample collection is available from the Clinical Laboratory Standards Institute (CLSI) or the Centers for Disease Control (CDC). - Page 24 This page intentionally left blank. LeadCare ® II User's Guide 1-16...
-
Page 25: Chapter 2 Calibrating The Analyzer Page
Chapter 2 Calibrating the Analyzer This chapter describes how to calibrate the analyzer. The analyzer must be calibrated to the lot of sensors to ensure accurate results. This chapter contains the following topics: • Turning the Analyzer On and Off •... -
Page 26: Turning The Analyzer On And Off
Turning the Analyzer On and Off The LeadCare ® II Blood Lead Analyzer power switch is located at the back of the device as shown in Figure 2-1. Power Switch Figure 2-1 Power Switch If the analyzer is not in use for 15 minutes (battery operation) or 60 minutes (AC operation), it will go into “sleep”... -
Page 27: Analyzer Self-Tests
When you first turn on the analyzer, you will hear a beep and see the startup and self-test messages. The analyzer performs a series of self-tests. The LeadCare II self-test is a set of internal electrical and software checks that ensure the proper operation of the system's electronic components. -
Page 28: About Calibration
• Any time the analyzer displays a recalibration message. The Calibration Button Each LeadCare II Test Kit comes with 48 sensors and a calibration button. The button transfers calibration and expiration information to the analyzer. When you touch the calibration button to the button reader, you will hear an audible beep. - Page 29 Then the screen reads “IF NEW SUCCESSFUL LOT TEST CONTROLS”, followed by the “PREPARE SAMPLE...” message. 6. Make sure the number of the button matches the display. The LeadCare II Blood Lead Analyzer is now ready for testing. ® LeadCare II User's Guide...
- Page 30 This page intentionally left blank. ® LeadCare II User's Guide...
-
Page 31: Chapter 3 Quality Control Procedure
The product is supplied in a two level format. Each is assigned a target lead value with an associated acceptable range. The testing of controls will ensure your LeadCare II Blood Lead Analyzer is reporting accurate results. Storage and Handling The control material is supplied in liquid form and ready to use. -
Page 32: How Often Should You Test Controls
Laboratories: guidelines to ensure compliance. Testing Controls Test the LeadCare II Lead Control material as you would any whole blood sample. You must run both the Level 1 and Level 2 controls to verify the performance of the system. CAUTION: When testing controls, make sure that the value falls within the acceptable range for each control. -
Page 33: Mix With Treatment Reagent
The resulting mixture will be red. C) Test 1. Insert a fresh sensor into the LeadCare II Analyzer. 2. Ensure the lot number on the display matches the sensor lot you are using. It must also match the lot number on the control vial. - Page 34 Use a downward motion to remove excess control from the outside of the tube with a clean wipe or gauze pad. Use caution not to absorb the control from the end of the capillary tube. Inspect the capillary tube for proper filling. Make sure there are no gaps or bubbles, or any excess control on the outside of the capillary tube.
-
Page 35: Interpreting The Control Test Results
LeadCare II Analyzer should be within the acceptable range provided for that control. If the reported value is within the acceptable limits for both the Level 1 and Level 2 controls, your LeadCare II System is operating properly. You may now test patient samples. - Page 36 This page intentionally left blank. ® LeadCare II User's Guide...
-
Page 37: Chapter 4 Blood Lead Testing
• References Overview of the Testing Procedure Testing for lead in blood with the LeadCare II Blood Lead Analyzer is fast and easy. Practice lead testing with the control samples or other samples before you perform a blood lead test. -
Page 38: The Leadcare Ii Message Display
• Alcohol Wipes, Gauze Pads, Lead Free Wipes (optional) • Lancets • Absorbent Liner and Biohazard Waste Container • LeadCare II Analyzer and Power Cord or Batteries • LeadCare II Quick Reference Guide • LeadCare II User’s Guide • LeadCare Test Kit Items:... - Page 39 • Dispose of sensors, capillary tubes, plungers, and droppers in biohazard container. • Use caution when handling the LeadCare II Treatment Reagent. This reagent contains dilute hydrochloric acid. Refer to the LeadCare Treatment Reagent Safety Data Sheet that appears in Appendix E of this manual for safe handling instructions.
-
Page 40: Testing Procedure
• Treatment reagent tube • Sensor container • Dropper for depositing sample on the sensor • LeadCare II Blood Lead Analyzer WARNING: Use universal precautions while collecting and handling blood samples. Blood can transmit infectious diseases. Follow the procedures set up by your institution to meet local, state and federal regulations. -
Page 41: Step 1: Collect Blood
Collect Blood CAUTION: Only use the heparinized capillary tubes provided with the LeadCare II Test Kit. The capillary tube must be filled to the fill line (50 µl) for accurate results. Check to make sure that the tube is free of gaps and bubbles. After collection, wipe the capillary tube with a gauze pad (wipe downward). -
Page 42: Step 2: Prepare Sample
Step 2: Prepare Sample CAUTION: • The system is intended to test fresh whole blood (collected in either EDTA or Heparin). Add the blood to the treatment reagent within 24 hours of collection. Blood older than 24 hours may produce false negative results. •... -
Page 43: Step 3: Analyze The Sample
Step 3: Analyze the Sample 1. Remove one sensor from the sensor container. Close the container immediately. Grasp the sensor at the end without the black bars. CAUTION: Keep the sensors in their container until you are ready to use them. Minimize handling to prevent contamination which could cause an inaccurate test result. - Page 44 7. The analyzer will beep when it has enough sample. It will display TESTING the message to the right. After 3 XXX SECONDS TO GO minutes (180 seconds) the analyzer will beep again to SENSOR LOT 0018A indicate that the test is done. RECORD TEST RESULT 7.5 µg/dL Pb 8.
-
Page 45: Interpreting Patient Test Results
“High” in the display windows indicates a blood lead test result greater than 65 µg/dL. When this occurs, report the blood lead result as greater than (>) 65 µg/dL. “High” results on LeadCare II should be followed up immediately as an emergency laboratory test. -
Page 46: Printing Test Results
Consult your local public health department, or the CDC, for current information on actions to be taken for blood lead results that are greater than the current reference level. Report all blood lead test results to the appropriate local, state or federal agency. -
Page 47: Chapter 5 Troubleshooting And Maintenance Page
Product Support at 1-800-275-0102 or email LeadCareSupport@magellandx.com Please collect this information and have it ready before you call: • Serial No. of LeadCare II (on bottom of analyzer) • Test kit lot number (on end of box) • Calibration code on calibration button * •... -
Page 48: Troubleshooting Results Below The Target Or Expected Value
Operate the analyzer only within the specified humidity range: (12 to 80% Relative Humidity). • Avoid operating the LeadCare II System in drafts or in locations with low humidity. Make sure that the analyzer and the test kit are maintained at a constant •... -
Page 49: Troubleshooting Results Above The Target Or Expected Value
Troubleshooting Results Above the Target or Expected Value Possible causes include: • Contamination of blood sample. • Excess blood on the capillary tube. • Sample not mixed properly. • The analyzer is not calibrated properly. See detailed precautions below: Blood Sampling •... -
Page 50: Control Test Results Below The Target Range: Possible Causes
User Technique Do NOT touch the black bars on the sensor. This could damage the sensor. • Do NOT touch the ends of the capillary tubes or the plungers. This could cause • contamination. Make sure to thoroughly mix patient blood with the treatment reagent. The mixture •... -
Page 51: Control Test Results Above The Target Range: Possible Causes
Testing Conditions Do NOT operate the LeadCare II System in drafty locations. • Make sure that the analyzer and the test kit are maintained at a constant • temperature. If you move any part of the system from one place to another, (for example, from outside into a laboratory) wait for the analyzer and components to reach a stable temperature. -
Page 52: Screen Display Messages
When processing the sample, check to make sure the code on the analyzer screen matches the code of the calibration button for the test kit. Testing Conditions Do NOT operate the LeadCare II System in drafty locations. • •... - Page 53 Screen Display Messages Message Definition What to Do The analyzer must be calibrated the first Calibrate the analyzer. Refer to the PLEASE CALIBRATE ANALYZER time you use it and for each new sensor WITH BUTTON calibration instructions in Chapter 2. lot.
-
Page 54: Maintaining The Analyzer
Maintaining the Analyzer Cleaning the Analyzer • Remove used sensors from the analyzer as soon as a result is recorded. • Clean the analyzer with a damp cloth and warm, soapy water. Do NOT immerse in water. • Disinfect with dilute (10%) bleach solution. •... -
Page 55: Chapter 6 Leadcare Ii Blood Lead Testing System Limited Warranty
It shall not apply to any error or failure due to machine error or to the misuse by or negligence of any person or entity other than Magellan or to any software which is modified by any person or entity other than Magellan. - Page 56 This page intentionally left blank. ® LeadCare II User's Guide...
-
Page 57: Appendix A Connecting A Compatible Serial Printer
Battery power is insufficient to generate a label. The LeadCare II Analyzer has printing capabilities. After a result is generated the information is transmitted via a serial connection to a label printer. The USB connection cannot be utilized for printing purposes. -
Page 58: Power On Cycle
3. Plug the printer’s AC adapter into a power outlet. Label the adapter so it only gets plugged into the SLP printer. 4. Ensure the LeadCare II is plugged into a power outlet with its appropriate adapter. Note: Battery operation is insufficient to generate a label. -
Page 59: Power Off Cycle
2. Lift the left side of the roll cover to open. Remove the spindle and place a roll of labels on the spindle. (The LeadCare II utilizes shipping labels: 2 1/8” W X 4” L label stock.) Adjust the guides to fit the labels (see below). - Page 60 This page intentionally left blank. ® LeadCare II User's Guide...
-
Page 61: Appendix B Specifications, Operating Requirements, And Performance Characteristics
Appendix B Specifications, Operating Requirements, and Performance Characteristics Specifications Table B-1 Physical Dimensions Height 9 cm (3.5 in.) Dimensions (Approximate, Analyzer Only) Width 17 cm (6.5 in. ) Depth 23 cm (9 in.) Weight (Approximate, Analyzer with 1.13 kg (2.5 lb) Batteries) Table B-2 Electrical Specifications... -
Page 62: Operating Requirements
Operating Requirements Table B-4 Storage and System Operating Ranges Storage Ranges 15°C to 30°C (59°F to 86°F) Analyzer Up to 80% Relative humidity Test Kit 15°C to 27°C (59°F to 80°F) Store at room temperature (RT) prior to mixing with Whole Blood Sample (human) Treatment Reagent. -
Page 63: Interference Substances
Interference Substances Tests were conducted by adding the potential interferences at the concentrations listed below to bovine blood with elevated lead levels. Lead results for samples with each potential interference did not differ statistically from lead results obtained on unadultered samples. The following substances at the following concentrations do NOT affect the results of the LeadCare ®... - Page 64 This page intentionally left blank. ® LeadCare II User's Guide...
- Page 65 Appendix C ® LeadCare II User's Guide...
- Page 66 This page intentionally left blank. ® LeadCare II User's Guide...
-
Page 67: Appendix D Steps For Collecting Fingerstick Blood Samples In Micro-Vials For Lead Testing
Fingerstick Blood Samples in Micro-Vials for Lead Testing The following references provide additional information about blood sample collection, blood lead testing, and Magellan Diagnostics LeadCare II products. Blood Sample Collection Information about sample collection is available from the Clinical Laboratory Standards Institute (CLSI) or the Centers for Disease Control (CDC). - Page 68 This page intentionally left blank. ® LeadCare II User's Guide...
-
Page 69: Appendix E Safety Data Sheets
Appendix E Safety Data Sheets (MSDS) This chapter contains the following LeadCare ® II Safety Data Sheets: • LeadCare II Controls • LeadCare Treatment Reagent ® LeadCare II User's Guide... - Page 70 This page intentionally left blank. ® LeadCare II User's Guide...