Table of Contents
Advertisement
Quick Links
Advertisement
Table of Contents

Related Manuals for Sony BKMW-E3000


Summary of Contents for Sony BKMW-E3000
- Page 1 NETWORK INTERFACE BOARD BKMW-E3000 OPERATION MANUAL [English] 1st Edition...
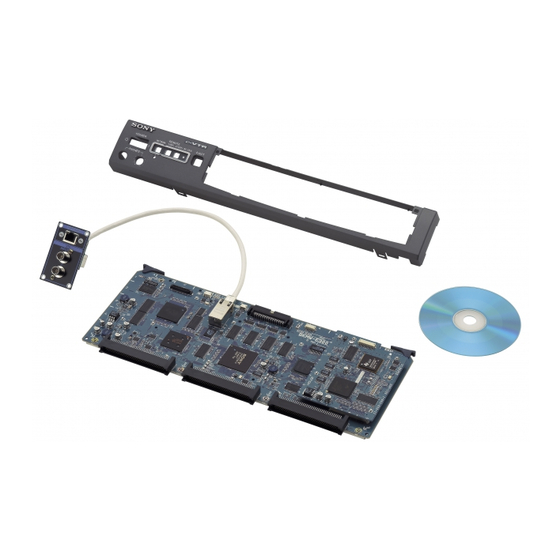
- Page 2 Refer to the installation manual supplied with the BKMW- E3000 for installation instructions. NOTICE TO USERS © 2004 Sony Corporation. All rights reserved. This manual or the software described herein, in whole or in part, may not be reproduced, translated or reduced to any machine readable form without prior written approval from Sony Corporation.
-
Page 3: Table Of Contents
Table of Contents Overview ... 5 e-VTR Functions ...5 e-VTR Manager Application Software Functions ...6 System Configuration ...7 Preparations ... 9 For Using a Computer ...9 Basic Network Settings...9 Setting the Tape Top and the Beginning of the File...11 Viewing the Network Settings...11 Enabling File Reception when Using a Cassette without a Memory Label ...12 Enabling the REC Command via a Network for a Cassette with a... - Page 4 Table of Contents Backing Up the Menu Settings ...30 Saving the Files with a Different Name ...30 Monitoring File Contents ... 31 Displaying File Top Pictures ...31 Monitoring the Video and Audio of Files (e-monitor) ...31 Storing JPEG Data...31 Storing/Playing Files Using a PC ... 32 Storing an MXF Proxy AV File on the PC Local Disk ...32 Playing Back a MXF Proxy AV File on the PC Local Disk ...32 Transferring Files ...
-
Page 5: Overview
Overview The BKMW-E3000 is a network interface board for installation in an MSW-2000 series digital videocassette recorder. With this board installed, the VTR can be added to a 10/100/1000Base-T network to transfer video, audio, and metadata as MXF files. You can use MXF data received over the network to record video, audio, and metadata to cassettes. -
Page 6: E-Vtr Manager Application Software Functions
memory label (rec start marks, shot marks, cue points, IN/ OUT points). User registration Up to 5 users can be registered for one e-VTR. One of the registered users is “superuser,” and the other users are “general users,” registered by the superuser. The privileges of the users are as follows: Superuser •... -
Page 7: System Configuration
System Configuration The following figures show examples of network systems using e-VTRs. Connecting two e-VTRs e-VTR 1 Connecting multiple e-VTRs and a server e-VTRs Computer e-VTR 2 Computer Server Overview... - Page 8 Connecting multiple e-VTRs and a mass storage server e-VTRs Overview Computer Rooter Mass storage server...
-
Page 9: Preparations
Preparations For Using a Computer Install e-VTR Manager on a computer meeting the following requirements. e-VTR Manager may not perform normally if installed on a computer that does not meet these requirements. CPU: 1 GHz or higher Memory: 256 MB or greater OS: Windows XP/2000 DirectX 8.1lb or higher Language: English... - Page 10 To bring the cursor to the value you want to change Rotate the MULTI CONTROL knob. To change a value Rotate the MULTI CONTROL knob while holding the HOME button down. For automatic assignment of network settings (such as IP address) Set the IP address to “000.000.000.000”...
-
Page 11: Setting The Tape Top And The Beginning Of The File
Setting the Tape Top and the Beginning of the File You can specify the length of the leader section at tape top, the timecode at the start of the recordable portion, and the type of video signal recorded on the leader section. Starting timecode Tape top Leader... -
Page 12: Enabling File Reception When Using A Cassette Without A Memory Label
M5 : NETWORK M56 : IP CONFIG DHCP:disable IP ADDRESS: 192.168.000.001 SUBNET MASK: 255.255.255.000 DEFAULT GATEWAY: 192.168.000.254 DNS SERVER ADDRESS: 192.168.000.254 Enabling File Reception when Using a Cassette without a Memory Label It is normally necessary to attach a memory label to a cassette to enable FTP file reception. -
Page 13: Enabling The Rec Command Via A Network For A Cassette With A Memory Label
Enabling the REC Command via a Network for a Cassette with a Memory Label Execution of the REC command via a network when using a cassette with a memory label attached is normally disabled to prevent overwriting of a file that has been already received. -
Page 14: Applying Changes To Basic Network Settings
OTHERS CONFIG M570: REC WITHOUT TELE-F M571: REC WITH TELE-F M572: TEMP FILE CREATE The M572: TEMP FILE CREATE setting page appears. Rotate the MULTI CONTROL knob to change the setting. OTHERS CONFIG M572: TEMP FILE CREATE enable Push SET button enable: You can create files even after the capacity of the memory label is exceeded. -
Page 15: Resetting User Names And Passwords
Resetting User Names and Passwords Use the VTR maintenance menu to reset registered user names and passwords to the default. Note This procedure resets the names and passwords of all registered users. Do steps 1 to 3 in the procedure of “Basic Network Settings”... -
Page 16: Setting The Transfer Processing For Nonrecorded Sections
Setting the Transfer Processing for Nonrecorded Sections When the material transfer range is from the tape top to the tape end (transfer of the virtual file &whole.mxf), or from the current position to the tape end (transfer of the virtual file ¤t.mxf), you can stop the transfer automatically when a nonrecorded section is played back continuously for a specific length of time. -
Page 17: Enabling File Transfer Through Control Panel Operation
ITEM-253 E-MONITOR AUDIO SELECT track 1/2 track 1/2 (default setting): Audio track channels 1 and 2 are output. track 3/4: Audio track channels 3 and 4 are output. track 5/6: Audio track channels 5 and 6 are output. track 7/8: Audio track channels 7 and 8 are output. Enabling File Transfer Through Control Panel Operation To enable FTP or HTTP file transfer using the control... - Page 18 To send a file while playing back the tape, cue to the position from where you wish the transfer to start then press the PLAY button while holding the ENTRY button pressed. To send a file while recording the input signal on the tape, simultaneously press the REC and PLAY buttons while holding the ENTRY button pressed.
-
Page 19: Starting E-Vtr Manager
Starting e-VTR Manager Start e-VTR Manager by double clicking on Manager icon). Menu bar Tool bar Network Device Register window Status bar The Network Device Register window also appears when e-VTR Manager is started. Use the Network Device Register to manage the devices controlled by e-VTR Manager (see page 21). -
Page 20: E-Vtr Manager Window Menus
e-VTR Manager Window Menus The menu bar in the e-VTR Manager window contains the following menus. File menu Setup command: Allows settings to be made for file list import and export and file transfer cancellation. Exit commnd: Select to exit from e-VTR Manager. View menu Provides the following four commands. -
Page 21: Registering E-Vtrs
Registering e-VTRs In the Network Device Register window, register e-VTRs to operate on by entering their names and host names or IP addresses. The system saves registered names and host names or IP addresses and displays them again in the Network Device Register window the next time you start e-VTR Manager. -
Page 22: Registering The Device Information At A Time By Reading A File
Registering the Device Information at a Time by Reading a File By reading a file from the PC local disk, you can make registration of device information at a time. Right-click in an empty area of the Network Device Register window, and select Import from the popup menu. - Page 23 e-VTR Manager window VTR window If you checked Simple Monitoring, the Simple Monitor window appears. In the Simple Monitor window, you can monitor the video output from the e-VTR’s Video Output connector. You cannot control the VTR or do any file operations. Simple Monitor window Registering e-VTRs...
-
Page 24: Vtr Window Configuration
VTR Window Configuration The VTR window displays system information for the e- VTR currently being controlled, and the data contents of the cassette loaded in the e-VTR. Notes • The cassette data contents displayed in this window is for data defined as files. Refresh button File display mode list Metadata Directory indication... - Page 25 File display mode list Select the type of files shown in the file list. Normal (default): Display MXF file for which the user has access privileges and which can be transferred between e-VTRs. (Files whose names do not begin with &. Among virtual files, &whole and ¤t.) Total: Displays all files for which the user has access privileges.
-
Page 26: Entering The Title And Id Of A Cassette (Under Superuser Privilege)
File name Definition &monitorS01.mxf MXF Proxy AV file containing signal output from e-VTR’s VIDEO/AUDIO OUTUT connector in an MXF file after converting to low resolution Entering the Title and ID of a Cassette (under Superuser Privilege) When the cassette in the e-VTR has a memory label, a title and an ID can be assigned to the cassette and registered. -
Page 27: Manipulating The File System Data On An External Server (Under Superuser Privilege)
the server, enter the appropriate user name and password. Click on the OK button. On this tab, enter the path for the directory under which the metadata have been stored. To connect matadata files with a video/audio file, use Change Attribute (see page 34). Manipulating the File System Data on an External Server (under Superuser Privilege) -
Page 28: Creating Files (Under Superuser Privilege)
Creating Files (under Superuser Privilege) This procedure allows the superuser to create a file by specifying a segment on an already recorded tape. Use the following procedure to create a file. Right-click in an empty section of the file list and select Create File &... -
Page 29: Importing/Exporting File List
Deleting record entries In the recording entries list, activate the record entry that you want to delete by clicking its number. Click on the Delete button. Changing record entry positions in the list In the recording entries list, activate the record entry whose position you want to change by clicking its number. -
Page 30: Automatically Creating Files From Tape Or Memory Label Information
Automatically Creating Files from Tape or Memory Label Information MXF files can be automatically created from information recorded in the timecode (LTC) (rec start mark, a shot mark, a post mark) or information recorded on memory labels (rec start mark, shot mark, cue point, IN/OUT points). -
Page 31: Monitoring File Contents
Monitoring File Contents You can check file contents in the top-of-file picture display of the VTR window. Displaying File Top Pictures Select the file that you want to monitor from the file list of the VTR window. Right-click on the file and select Get TOP Thumbnail Picture from the popup menu that appears, or click on the top-of-file picture display. -
Page 32: Storing/Playing Files Using A Pc
Storing/Playing Files Using a PC MXF Proxy AV files can be stored on a PC local disk and those on a PC local disk can be played back on a terminal. Storing an MXF Proxy AV File on the PC Local Disk Select Proxy from the File display mode list in the VTR window to list the MXF Proxy AV files. -
Page 33: Transferring Files
Transferring Files You can transfer files between two selected e-VTRs. In the Network Device Register window, select two e- VTRs and display the VTR window for each e-VTR. Select the file to transfer from the sending side VTR window, and drag and drop it to the file list in the receiving side VTR window. -
Page 34: If The Receiving Side Has A File Of The Same Name With The File Being Transferred
If the Receiving Side Has a File of the Same Name With the File Being Transferred The File Transfer Select window appears. Select one of Overwrite, Change Filename, Append, and Complete Partial File in the window. Overwrite: Overwrites the file on the receiving side with the file being transferred. -
Page 35: Web Application Operations
Web Application Operations By accessing the Web server built into e-VTRs from Internet Explorer and Netscape Navigator, you can make e-VTR settings and perform file operations through the Web application. The following operations can be performed from the Web application. •... -
Page 36: Information In The Top Page
Page selection buttons LOG OFF button The left side of the Web application screen shows the page selection buttons and the LOG OFF button. The right side shows the top page, file page, or maintenance page,s as selected by the page selection buttons. To select a Web application page TOP button: Click on this button to display the top page. -
Page 37: File Page Operations
File Page Operations Click on the FILE page selection button to display the file page of the Web application on the right side of the screen. Display area for aquired image Reset button Execute button The file page allows you to modify existing files on e- VTRs in the network, and to create new files. -
Page 38: Displaying And Modifying Attributes Of Existing Files
Displaying and Modifying Attributes of Existing Files Select a file to display from the file/record entry list on the page. The attributes of the selected file appear in the File Attribute area on the page. File Name: File name File Type: File type (real file or temporary file) Property: File access privileges (held by file owner and other users) Owner: Name of file owner... -
Page 39: Maintenance Page Operations
Maintenance Page Operations Click on the MAINTENANCE page selection button to display the maintenance page of the Web application on the right side of the screen. Device Information Model Name: e-VTR model name Destination: e-VTR product destination Serial Number: e-VTR serial number Software Version: e-VTR firmware version Option: Option boards installed in e-VTR Maintenance Mode (pages accessible from... -
Page 40: Hours Meter Page
Hours Meter Page The Hours Meter page displays the hours meter information for the e-VTR. H01: OPERATION HOURS (accumulated operation time) Displays the total number of hours the unit has been turned on in units of 1 hour. H02: DRUM HOURS (accumulated head drum rotation time) Displays the total number of hours the head drum has operated with tape threaded in units of 1 hour. -
Page 41: Error Logger Page
Error Logger Page The Error Logger page displays the messages stored in the error logger of the e-VTR. Three types of the messages can be selected for display: “Error,” “Warning,” and “Channel Condition.” Check the message type to be displayed and click on the Execute button. -
Page 42: User Registration Page
User Registration Page The content of the user registration page is different for the superuser and general users. Superuser can register a general users’ user names and passwords in the User Registration page. A general user can change his/her own password. User Registration page for the superuser The superuser can register up to five pairs of user names and passwords for each e-VTR. - Page 43 User Registration page for general users General users can change their own passwords. To change your own password Enter a password in the Password field, and then enter the same password in the Verify Password field. Finally, click on the Execute button. Maintenance Page Operations...
-
Page 44: Snmp Variable Settings Page
SNMP Variable Settings Page The e-VTR provides the SNMP (Simple Network Management Protocol) function that allows management information on devices on the network, such as the e-VTR, to be monitored by external monitoring applications. Maintenance Page Operations SNMP settings can be made in the SNMP Variable Settings page. -
Page 45: Network Information Page
Network Information Page The Network Information page shows the status of the network to which the e-VTR is currently connected. Dynamic Host Configuration Indicates whether the mode enabling automatic IP address acquisition is being used or not. IP Address Displays the IP address. Subnet Mask Displays the subnet mask. -
Page 46: Mxf D10 Transfer Destination Page
MXF D10 Transfer Destination Page Settings for MXF D10 file transfer through the operation on the control panel of the e-VTR can be done on this page. Protocol Select the transfer protocol. Hostname/IPAdrs Enter the hostname or IP address of the transfer destination server. -
Page 47: Mxf Proxy Av Transfer Destination Page
MXF Proxy AV Transfer Destination Page Settings for the MXF Proxy AV file transfer through the operation on the control panel of the e-VTR can be done Protocol Select the transfer protocol. Hostname/IPAdrs Enter the hostname or IP address of the transfer destination server. -
Page 48: Dns Server & Http Proxy Server Page
DNS Server & HTTP Proxy Server Page Settings of the DNS (Domain Name System) server and internet proxy can be done on this page. Setting the DNS server To automatically acquire the DNS server from the DHCP server, select the Dynamic Configuration option. To specify a certain IP address, select the Designate Address as follows option, and enter the IP address in the Address field. - Page 49 The material contained in this manual consists of information that is the property of Sony Corporation and is intended solely for use by the purchasers of the equipment described in this manual. Sony Corporation expressly prohibits the duplication of any...
- Page 50 Sony Corporation B & P Company BKMW-E3000 (SYM) 3-857-242-01 (1) © 2004...