Sony Walkman NWZ-X1051 Operation Manual
Sony mp3 player operation guide
Hide thumbs
Also See for Walkman NWZ-X1051:
- Operation manual (182 pages) ,
- Quick start manual (42 pages) ,
- Service manual (34 pages)

Related Manuals for Sony Walkman NWZ-X1051


Summary of Contents for Sony Walkman NWZ-X1051
- Page 1 Operation Guide NWZ-X1050 / X1051 / X1060 / X1061 ©2009 Sony Corporation 4-141-609-12 (1)
-
Page 2: Browsing The Operation Guide
Browsing the Operation Guide To use the buttons in the Operation Guide Click the buttons located at the upper right of the pages of this manual to jump to “Table of Contents” or “Index. ” Jumps to the table of contents Find what you are looking for from a list of topics in the manual. -
Page 3: Table Of Contents
Table of Contents Basic Operations and Screens Parts and Controls ... 6 Connecting the headphones ...8 Turning the Player On and Off ... 9 Disabling the operation buttons and the touch panel ...10 How to Use the Touch Panel ... 11 About the Home Menu... - Page 4 Listening to FM Radio Listening to FM Radio ... 71 To listen to FM radio ...72 Presetting broadcast stations automatically ...73 (Auto Preset) Presetting broadcast stations manually ...74 Deleting preset broadcast stations ...74 Changing the FM Radio Settings ... 75 Scan Sensitivity ...75 Mono/Auto ...75 Using the FM Radio Option Menu ...
- Page 5 Common Settings Changing the Common Settings ... 118 Unit Information ... 118 AVLS (Volume Limit) ... 119 Beep Settings ... 119 Screen Off Timer... 120 Brightness... 121 Wallpaper Settings ... 121 Set Date-Time ... 122 Date Display Format ... 123 Time Display Format ...
-
Page 6: Basic Operations And Screens
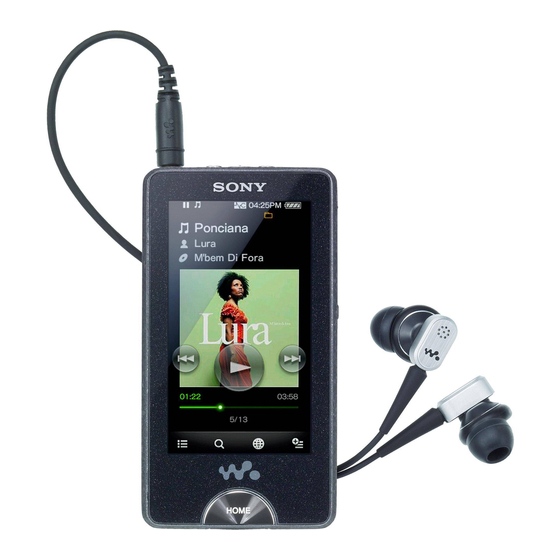
Basic Operations and Screens Parts and Controls Front Screen (touch panel) Touch (tap) an icon, item, control button, etc., on the screen to operate the player ( page 11). HOME button Press to display the Home menu ( page 13). - Page 7 Basic Operations and Screens Rear / buttons Press to find the beginning of a song or video, or to fast-forward/rewind. Headphone jack Connects the headphones ( page * button Press the button to start playback of a song or video.
-
Page 8: Connecting The Headphones
Basic Operations and Screens Connecting the headphones Plug the headphones into the headphone jack of the player until they click into place. If the headphones are not connected correctly, the sound does not play. Headphones Note The supplied headphones are exclusive to this player only. If you connect the supplied headphones to another device, the sound may not play. -
Page 9: Turning The Player On And Off
Basic Operations and Screens Turning the Player On and Off To turn on the player Press any button to turn the player on. Hint If appears on the top of the screen, slide the HOLD switch on the back of the player in the opposite direction of the arrow ... -
Page 10: Disabling The Operation Buttons And The Touch Panel
Basic Operations and Screens Disabling the operation buttons and the touch panel You can protect the player against accidental operation by using the HOLD switch when carrying it. To lock the player Slide the HOLD switch in the direction of the arrow . The operation buttons and touch panel are disabled and the information area ( ... -
Page 11: How To Use The Touch Panel
Basic Operations and Screens How to Use the Touch Panel You can use the touch panel screen to operate the player. Tap an icon, item, control button, etc., on the screen to operate the player. Also, drag up or down to scroll through a list, and flick to scroll quickly through a list or thumbnails (reduced-size images that appear in a list). - Page 12 Basic Operations and Screens Flicking to scroll quickly Flick the screen up or down with your finger to scroll quickly through a list. Also, flick up, down or sideways to see the next/previous album on the album scroll screen, or to see the next/previous image on the scene scroll screen. Notice for touch panel operations The touch panel of the player does not work properly when operated with: ...
-
Page 13: About The Home Menu
Basic Operations and Screens About the Home Menu The following table shows the item list of the player. For details about each menu item, refer to the specified reference page. Internet Browser Internet Browser FM Radio YouTube Photos Music Videos Settings Podcasts NC Modes... -
Page 14: How To Use The Home Menu
Basic Operations and Screens How to Use the Home Menu The Home menu is the starting point of each application, such as searching for songs, changing settings, etc. You can display the Home menu by pressing the HOME button of the player. HOME button From the Home menu, you can select the desired item on the screen by touch panel operations ( ... - Page 15 Basic Operations and Screens In this manual, operating instructions from the Home menu are described as below. Example: From the Home menu, select “Album” The actual operations for the example above are shown below. Press the HOME button. The Home menu appears. ...
- Page 16 Basic Operations and Screens Tap “Album.” The album list screen appears. You can scroll the list by dragging your finger up or down. Tap the desired album. The song list screen of the selected album appears. Tap the desired song.
- Page 17 Basic Operations and Screens To return to the Home menu during operation Press the HOME button. To return to the previous screen during operation (To List)/ (Up).
-
Page 18: How To Use The Option Menu
Basic Operations and Screens How to Use the Option Menu The option menu items vary function-to-function, allowing you to change the settings of each application. You can tap (Option Menu) on the playback screen or the list screen to display the option menu. To close the option menu, tap more. - Page 19 Basic Operations and Screens Tap “Play Mode.” Tap “Shuffle.” Tap “OK.” The play mode changes to “Shuffle. ” The items of the option menu differ, depending on the screen on which you tap (Option Menu). For details, see the following pages. ...
-
Page 20: Text Input
Basic Operations and Screens Text Input You can use the onscreen keyboard to enter text. Select a text field you intend to enter text into, such as a web page address entry, to bring up the onscreen keyboard. Example: Alphanumeric keyboard for English Input field Predictive texts field (English and Chinese only) - Page 21 Basic Operations and Screens Entering text The following example shows how to enter “Blue” in the alphanumeric input mode. Tap the “ABC2” key five times. “B” appears in the input field. Each time you press the key, the character changes. ...
-
Page 22: About The Bundled Software
Basic Operations and Screens About the Bundled Software Windows Media Player 11 Windows Media Player can import audio data from CDs and transfer data to the player. When you use copyright protected WMA audio files and copyright protected WMV video files, use this software. Transferable files: Music (MP3, WMA), Video (WMV), Photo (JPEG) For details on operation, refer to the Help of the software or visit the following website. -
Page 23: Content Transfer
Basic Operations and Screens Content Transfer Content Transfer can transfer music, videos or photos from a computer to the player by a simple drag-and-drop operation. You can use Windows Explorer or iTunes® to drag and drop data to Content Transfer. Furthermore, if you transfer a podcast from iTunes®... -
Page 24: Preparing The Player
Preparing the Player Charging the Player The player’s battery is recharged while the player is connected to a running computer. When you connect the player to your computer, use the supplied USB cable. When the remaining battery power indication on the upper right-hand corner of the display shows: , charging is completed (charging time is approx. - Page 25 Preparing the Player Some USB devices connected to the computer may interfere with the proper operation of the player. We do not guarantee the recharge of the battery using personally assembled computers or modified computers. If the computer enters a power saving mode, such as the sleep or hibernation mode, while the player is connected via the USB cable, the player’s battery is not charged.
-
Page 26: Setting The Date And Time
Preparing the Player Setting the Date and Time Some applications of the player do not work correctly until the date and time are set. Set the current date and time before using the player. HOME button From the Home menu, select “Clock Settings”... -
Page 27: Getting Music/Videos/Photos/Podcasts
Preparing the Player Getting Music/Videos/Photos/Podcasts To enjoy music, videos, photos and podcasts on the player, you need to prepare the data on your computer. You can import music from audio CDs or from the Internet, etc. You can import videos from recorded videos or from the Internet, etc. You can import photos from a digital camera, etc. -
Page 28: Transferring Music/Videos/Photos/Podcasts
Preparing the Player Transferring Music/Videos/Photos/Podcasts You can directly transfer data by drag-and-drop using Windows Explorer on your computer. Playable data hierarchy has rules. To transfer data properly, see the following instructions. For details about the bundled software that can transfer data, see page 22. ... - Page 29 Preparing the Player For songs (On Windows Explorer) Drag and drop files or folders into the “MUSIC” folder. However, folders and files beyond the 8th level will not be recognized. Note Do not change the folder name or delete the “MUSIC” folder. (On the player) Folders are displayed in the folder name order first, then files are displayed in the file name order.
- Page 30 Preparing the Player For videos (On Windows Explorer) Drag and drop files or folders into the “VIDEO” folder. Files on the 1st to 8th level will be recognized. However, files beyond the 8th level will not be recognized. Note Do not change the name of the “VIDEO” folder. If renamed, the folder will not be displayed on the player.
- Page 31 Preparing the Player For photos (On Windows Explorer) Drag and drop files or folders into the “PICTURE, ” “PICTURES” or “DCIM” folder. Files on the 1st to 8th level will be recognized. However, files beyond the 8th level will not be recognized. Note ...
- Page 32 Preparing the Player For podcasts (On Windows Explorer) Drag and drop podcast folders into the “PODCASTS” folder and episode files into the podcast folders. On the 1st level, the “PODCASTS” folder will recognize only folders. Episode files on the 1st level will not be recognized. On the 2nd level, only files will be recognized and any folders will not be recognized.
-
Page 33: Wireless Lan Connection
Preparing the Player Wireless LAN Connection Wireless networks which may be used with the player The player can connect to the following wireless LANs. Your Home wireless LAN Your office or school wireless LAN Public wireless LANs, such as at coffee shops, hotels, or libraries. Standard Security Communication range... -
Page 34: Connecting To A Wireless Lan
Preparing the Player Connecting to a wireless LAN To connect to a wireless LAN, select the desired access point from a list, then enter the encryption key if necessary. Usually, when the connection is required by the Internet browser, YouTube or Podcast, the connection confirmation screen appears automatically to connect to a wireless LAN. - Page 35 Preparing the Player Select the access point you want to connect to from the list. If an encryption key is required, the entry screen appears. When no encryption key is required, the connecting dialog box appears. After establishing the connection, the Internet browser appears.
-
Page 36: Disconnecting From A Wireless Lan
Preparing the Player Notes If the “WLAN Function On/Off ” option is set to “Off, ” the player cannot connect to the wireless LAN. While connected to a wireless LAN, if the player enters standby mode, is turned off, or is connected to a computer via the USB cable, it is disconnected from the wireless LAN. -
Page 37: Playing Music
Playing Music Playing Music To play music, select playback screen. You can search for desired songs by selecting playback screen. The song information, control buttons, etc., are displayed on the music playback screen. HOME button From the Home menu, select The music playback screen appears. -
Page 38: Music Playback Screen
Playing Music Music playback screen You can bring up or dismiss the control buttons by tapping the screen. If there is no operation for a while, they disappear. Play Mode ( page 47), Playback Range ( page 48), Equalizer ( ... -
Page 39: List Screen
Playing Music Icons on the playback screen Icon (To List) (Search) (Related Links) (Option Menu) List screen The following are examples of list screens. Song list screen Hint You can change the display format of the album list to display the cover art thumbnails only ( ... - Page 40 Playing Music Operations on the list screen Select an item Scroll a list up or down Icons on the list screen Icon (Up) (Search) (To Play Screen) (Option Menu) Do this Tap an item. Drag or flick up or down. Description Shows the list screen of the next upper level (for example, the icon of a song list screen may show an album list screen).
-
Page 41: Browsing Cover Arts To Select An Album (Album Scroll)
Playing Music Browsing cover arts to select an album On the music playback screen, you can drag or flick the cover art up or down to select the album. From the Home menu, select Drag or flick the cover art up or down. The album scroll screen appears. -
Page 42: Searching For Songs
Playing Music Searching for Songs When you tap (Search) on the music playback screen or the list screen, the search menu appears. You can select the desired search method to search the list for desired songs. HOME button Hint ... -
Page 43: Searching For Reference Information On A Song (Related Links)
Playing Music Searching for Reference Information on a Song (Related Links) You can search the Internet by keyword for information on the current playing song, album, artist, etc. You can search YouTube site for videos, or search a website for information. Select (Related Links) on the music playback screen to search the Internet for information on the playing song. -
Page 44: Deleting Songs
Playing Music Deleting Songs When you delete songs from the player, use the software you used to transfer the songs, or Windows Explorer. For details about using the software, see the Help of the software. Note The player itself cannot delete songs without connecting to a computer. -
Page 45: Using The Music Option Menu
Playing Music Using the Music Option Menu You can bring up the music option menu by selecting music list screen or on the music playback screen. For how to use the option menu, see page 18. The option items shown on the option menu vary, depending on the screen from which you bring up the option menu. -
Page 46: Displaying The Detailed Information Screen
Playing Music Displaying the Detailed Information screen From the music playback screen, select “Detailed Information.” Detailed Information screen Song name Artist name Album title Genre Release year Length of Song Codec Copyright protected content Bit rate While playing back variable bit rate songs, “VBR” is shown. During VBR playback, the elapsed time indication and the Seek Slider indicator may be unstable and inaccurate. -
Page 47: Changing The Music Settings
Playing Music Changing the Music Settings To change the music settings, select select “Music Settings. ” HOME button Play Mode The player offers a variety of play modes, including random play and selected repeat play. From the Home menu, select ... -
Page 48: Playback Range
Playing Music Playback Range You can set the playback range of songs. From the Home menu, select “Playback Range” Type All Range Selected Range Equalizer You can set the sound quality according to the music genre, etc. From the Home menu, select ... - Page 49 Playing Music Customizing sound quality You can preset the value of CLEAR BASS (bass) and 5 bands Equalizer as “Custom 1” or “Custom 2. ” From the Home menu, select “Equalizer” Drag the slider for the CLEAR BASS or the frequency range setting to adjust the setting level, and then select “OK.”...
-
Page 50: Vpt (Surround)
Matrix ( Karaoke ( VPT, which stands for Virtual Phone Technology, is a proprietary sound processing technology developed by Sony. Note The “VPT (Surround)” setting is not applied while playing a video, YouTube video, podcast video, external input audio, or FM radio. -
Page 51: Dsee (Sound Enhance)
Disables the “DSEE (Sound Enhance)” function and plays back normal sound. (Default setting) DSEE, which stands for Digital Sound Enhancement Engine, is a technology developed by Sony, to enhance the sound quality of compressed audio files by restoring high-range sound removed by the compression process. Notes ... -
Page 52: Clear Stereo
Playing Music Clear Stereo “Clear Stereo” enables individual left and right digital processing of the sound. From the Home menu, select “Clear Stereo” Type Notes The “Clear Stereo” setting is not applied while playing a video, YouTube video, podcast video, external input audio, or FM radio. -
Page 53: Album Display Format
Playing Music Album Display Format You can select the album display format. From the Home menu, select “Album Display Format” “OK.” Title & Cover Art (Default setting) Type Screen Hint The cover art only appears if the cover art information is included. You can set cover art using the bundled Windows Media Player 11. -
Page 54: Watching Videos
Watching Videos Playing a Video To play a video, select You can select the desired video by selecting screen. The video’s information, control buttons, etc., are displayed on the video playback screen. HOME button From the Home menu, select The video playback screen appears. -
Page 55: Video Playback Screen
Watching Videos Video playback screen You can bring up or dismiss the control buttons, icons, etc., by tapping the screen. If there is no operation for a while, they disappear. Operations on the video playback screen You can tap the objects such as control buttons on the screen to operate the player. - Page 56 Watching Videos Icons on the playback screen Icon (To List) (Search) (Scene Scroll) (Option Menu) Thumbnail refers to a reduced size image of one scene of a video. Description Shows a list screen. Shows the search menu. You can select desired search method to display the list screen and search for videos.
-
Page 57: Browsing Scenes (Scene Scroll)
Watching Videos Browsing scenes You can display thumbnails* Thumbnail refers to a reduced size image of one scene of a video. Hint On the scene search screen, you can set the interval of scenes displayed as thumbnails. You can set the interval to “15 Sec, ” “30 Sec, ” “1 Min, ” “2 Min” or “5 Min. ” Tap the Scene interval setting on the top of the screen to select the desired interval. -
Page 58: Searching For Videos
Watching Videos Searching for Videos When you tap (Search) on the video playback screen or the list screen, the search menu appears. You can select desired search method to search the list for desired video. HOME button From the Home menu, select desired search method Search method Method... -
Page 59: Deleting Videos
Watching Videos Deleting Videos You can delete videos from the player. Deleting currently playing video From the playback screen of the video, tap “Delete Video” Deleting videos by selecting from a list From the video list screen, select ... -
Page 60: Using The Video Option Menu
Watching Videos Using the Video Option Menu You can bring up the video option menu by selecting video list screen or on the video playback screen. For how to use the option menu, see page 18. The option items shown on the option menu vary, depending on the screen from which you bring up the option menu. -
Page 61: Changing The Video Settings
Watching Videos Changing the Video Settings To change the video settings, select select “Video Settings. ” HOME button Zoom Settings You can zoom in the currently playing video. From the Home menu, select “Zoom Settings” Type Description Auto The video image is enlarged/reduced by fully fitting it to the available display area, keeping the aspect ratio. - Page 62 Watching Videos Type Description Full The video image is enlarged/reduced by fully fitting it to the available display area, keeping the aspect ratio. When a 16:9 video image is displayed, it is enlarged/reduced by fully fitting it to the available display area, keeping the aspect ratio. ...
-
Page 63: Playing Only Video Sound
Watching Videos Playing only video sound You can set to turn off the video screen during the player is on hold, allowing you to enjoy the sound of videos only. Setting this option to “No” saves battery power and battery life will last longer. ... -
Page 64: Viewing Photos
Viewing Photos Viewing Photos To view photos, select display screen. You can select desired photos from a list by selecting display screen. The photo information, control buttons, etc., are displayed on the photo display screen. HOME button From the Home menu, select The photo display screen appears. - Page 65 Viewing Photos Hints Playback of songs continues even while you are searching for photos in the photo folder lists or photo lists, or when the photo display screen is displayed. You can arrange photos transferred to the player by folder. Select the player (as [WALKMAN]) using Windows Explorer, drag and drop a new folder just under the “DCIM, ”...
-
Page 66: Photo Display Screen
Viewing Photos Photo display screen You can bring up or dismiss the control buttons, icons, etc., by tapping the screen. If there is no operation for a while, they disappear. Operations on the photo display screen You can tap the objects such as control buttons on the screen to operate the player. -
Page 67: Searching For Photos
Viewing Photos Searching for Photos When you tap (Search) on the photo display screen or the list screen, the search menu appears. You can select desired search method to search the list for desired photos. HOME button From the Home menu, select desired search method ... -
Page 68: Deleting Photos
Viewing Photos Deleting Photos Use Media Manager for WALKMAN or Windows Explorer to delete photos from the player. Use Media Manager for WALKMAN to delete photos transferred by Media Manager for WALKMAN. For details about using Media Manager for WALKMAN, see the Help of the software. -
Page 69: Using The Photo Option Menu
Viewing Photos Using the Photo Option Menu You can bring up the photo option menu by selecting photo list screen or on the photo display screen. For how to use the option menu, see page 18. The option items shown on the option menu vary, depending on the screen from which you bring up the option menu. -
Page 70: Changing The Photo Settings
Viewing Photos Changing the Photo Settings To change the photo settings, select select “Photo Settings. ” HOME button Setting the Photo List Display Format The player offers 2 display formats. You can set the display format of the photo list as “Thumbnail + Title* ... -
Page 71: Listening To Fm Radio
Listening to FM Radio Listening to FM Radio To Listen to FM Radio, select (FM Radio) from the Home menu to display the FM Radio screen. The FM radio information, control buttons, etc., are displayed on the FM Radio screen. FM Radio HOME button Note... -
Page 72: To Listen To Fm Radio
Listening to FM Radio To listen to FM radio From the Home menu, select Radio) the desired frequency or Preset number. You can tap the control buttons, icons etc., on the FM Radio screen to operate the player. -
Page 73: Presetting Broadcast Stations Automatically (Auto Preset)
Listening to FM Radio Presetting broadcast stations automatically You can preset receivable broadcast stations (up to 30 stations) in your area automatically by selecting “Auto Preset. ” When you use the FM radio for the first time, or when you move to a new area, we recommend you preset receivable broadcast stations by selecting “Auto Preset. -
Page 74: Presetting Broadcast Stations Manually
Listening to FM Radio Presetting broadcast stations manually You can preset broadcast stations which “Auto Preset” cannot detect ( page 73). On the FM Radio screen, select the desired frequency. Select (Option Menu) The frequency you select in step number appears below the frequency. -
Page 75: Changing The Fm Radio Settings
Listening to FM Radio Changing the FM Radio Settings To change the FM radio settings, select then select “FM Radio Settings. ” HOME button Scan Sensitivity When you select stations using the “Auto Preset” function ( page 73) or tapping , the FM receiver may receive many unwanted broadcast stations because sensitivity is too high. -
Page 76: Using The Fm Radio Option Menu
Listening to FM Radio Using the FM Radio Option Menu You can bring up the FM radio option menu by selecting the FM Radio screen. For how to use the option menu, see page 18. Option Items Scan Sensitivity Mono/Auto Save to Preset Delete from Preset... -
Page 77: Watching Youtube
Watching YouTube Watching YouTube To watch YouTube, select YouTube list screen. You can play a YouTube video by selecting the desired video from the list. The video information, control buttons, etc., are displayed on the YouTube playback screen. HOME button Notes ... - Page 78 Watching YouTube Select the desired video. The playback of the YouTube video begins. You can tap the control buttons, icons etc., on the YouTube playback screen to operate the player. For details on how to control the video playback, see “YouTube playback screen”...
-
Page 79: Youtube Playback Screen
Watching YouTube YouTube playback screen You can bring up or dismiss the control buttons, icons, etc., by tapping the screen. If there is no operation for a while, they disappear. Operations on the YouTube playback screen You can tap the objects such as control buttons on the screen to operate the player. -
Page 80: Searching For Youtube Videos
Watching YouTube Searching for YouTube Videos When you tap (Search) on the YouTube playback screen or the list screen, the search menu appears. You can select desired search method to search the list for desired video. HOME button From the Home menu, select desired search method Method Featured*... -
Page 81: Choosing Country/Region
Watching YouTube Choosing country/region You can narrow down the “Featured” list and the “Most Viewed” list by choosing country/region. From the Home menu, select “Featured” or “Most Viewed” Region” the desired country/region Hint You can also select Home menu to choose country/region. -
Page 82: Using The Youtube Option Menu
Watching YouTube Using the YouTube Option Menu You can bring up the YouTube option menu by selecting the YouTube playback screen or on the YouTube list screen. For how to use the option menu, see page 18. The option items shown on the option menu vary, depending on the screen from which you bring up the option menu. -
Page 83: Enjoying Podcast
Enjoying Podcast Before Enjoying Podcast You can use the podcast function of the player in three ways. For details, see each of the descriptions. Register a podcast by using the player ( page 84), download episodes by using the wireless LAN function of the player ( page 86), then play them back ( ... -
Page 84: Registering A Podcast
Enjoying Podcast Registering a Podcast To play back podcast episodes, you need to register the podcast to the player and download episodes. You can register a podcast by selecting an RSS icon displayed on the Internet browser of the player. For how to use the Internet browser of the player, see “Viewing Websites (Internet Browser)”... - Page 85 Enjoying Podcast Open the web page of the desired podcast, then select the RSS icon. The podcast is registered to the player by selecting the RSS icon. RSS icons differ between websites. Refer to descriptions on the website to select an RSS icon.
-
Page 86: Downloading Episodes
Enjoying Podcast Downloading episodes You can download the latest episodes of the desired podcast. Also, you can download the latest episodes from all of the podcasts you have selected to refresh. HOME button Note To download episodes from podcasts registered to the player, the player need to connect to a wireless LAN. -
Page 87: Downloading From All Of The Podcast Selected To Refresh
Enjoying Podcast Downloading from all of the podcast selected to refresh You can download the latest episodes from all of the podcasts you have selected to refresh. For how to select/deselect podcasts to refresh, see “Selecting/ deselecting podcasts to refresh” ( page 88). ... -
Page 88: Selecting/Deselecting Podcasts To Refresh
Enjoying Podcast Selecting/deselecting podcasts to refresh You can select/deselect podcasts to refresh. By selecting podcasts to refresh, you can download the latest episodes of the podcasts by using “Refresh Podcasts” ( page 87). From the Home menu, select The Podcast List screen appears. -
Page 89: Setting The Number Of Episodes To Be Downloaded
Enjoying Podcast Setting the number of episodes to be downloaded You can set the number of the latest episodes to be downloaded when refreshing podcasts. From the Home menu, select (Option Menu) number type Type Latest Episode Latest 3 Episodes Latest 5 Episodes Latest 10 Episodes Latest 100 Episodes... -
Page 90: Playing Podcast
Enjoying Podcast Playing Podcast To play a podcast, select You can select the desired episode by selecting playback screen. The episode’s information, control buttons, etc., are displayed on the podcast playback screen. HOME button To play podcast From the Home menu, select The podcast playback screen appears. -
Page 91: Podcast Playback Screen
Enjoying Podcast Podcast playback screen You can bring up or dismiss the control buttons by tapping the screen. If there is no operation for a while, they disappear. You can tap the objects such as control buttons on the screen to operate the player. - Page 92 Enjoying Podcast Video playback screen Operations on the video playback screen To (screen indication) Play ( )/pause ( )* Fast forward ( )/ fast rewind ( )* Fast forward ( )/ fast rewind ( ) during pause* Move to the previous scene ( ...
- Page 93 Enjoying Podcast Icons on the playback screen Icon (To List) (Option Menu) (Scene Scroll)* Scene Scroll icon appears on the video playback screen only. Description Shows an episode list screen. When you select episode list screen, the Podcast List screen appears. For details, see “Searching for Podcasts”...
-
Page 94: Searching For Podcasts
Enjoying Podcast Searching for Podcasts When you tap (To List) on the podcast playback screen, the episode list appears, and you can select a desired episode to play back. When you tap (Back) on the episode list screen, the podcast list appears, and you can select a desired podcast to display its episode list. -
Page 95: Episode List Screen
Enjoying Podcast Episode list screen Podcast name Playback icon Video icon Audio icon New icon Icons of episodes The following icons are displayed in the episode field. Icon (Audio icon) (Video icon) (New icon) (Playback icon) Operations on the episode list screen Select an episode Scroll the list up or down Icons on the episode list screen... -
Page 96: Podcast List Screen
Enjoying Podcast Podcast List screen New icon Selected to refresh icon Refresh error icon RSS icon Icons of podcasts The following icons are displayed in the podcast name* Icon (RSS icon) (Selected to refresh icon) Shows that the podcast is selected to refresh by using “Refresh (New icon)* (Refresh error icon)* The folder name is displayed for the podcast that is transferred from a computer to the... - Page 97 Enjoying Podcast Operations on the Podcast List screen Select a podcast Scroll the list up or down Icons on the Podcast List screen Icon (To Play Screen) (Option Menu) Do this Tap a podcast. Drag or flick up or down. Description Returns to the podcast playback screen.
-
Page 98: Deleting Podcasts
Enjoying Podcast Deleting Podcasts You can delete an episode, all episodes of a podcast, a podcast, and all registered podcasts. Deleting the currently playing episode From the playback screen of the episode you intend to delete, select (Option Menu) Deleting an episode in the episode list ... -
Page 99: Deleting All Podcasts
Enjoying Podcast Deleting all podcasts This operation deletes all episodes of all podcasts and deletes all podcast registrations. From the Podcast List screen, select Podcasts” “Yes.” Note Use the player’s functions to delete podcast episodes. If you attempt to delete episode files using computer software, the files may not be deleted. -
Page 100: Using The Podcast Option Menu
Enjoying Podcast Using the Podcast Option Menu You can bring up the podcast option menu by selecting the podcast playback screen or on the list screen. For how to use the option menu, see page 18. The option items shown on the option menu vary, depending on the screen from which you bring up the option menu. - Page 101 Enjoying Podcast Option item appearing on the Podcast List screen Option Item Number of Downloads Select Podcast to Refresh Refresh Podcasts Delete Podcast Delete All Podcasts To Podcast Links Description/reference page Sets the number of episodes to be downloaded ( page 89). Selects/deselects podcasts to refresh by using “Refresh Podcasts”...
-
Page 102: Viewing Websites
Viewing Websites Viewing Websites To view websites, select the Internet browser. You can perform operations such as web page address input, favorites, advanced settings, etc., by selecting Internet browser. HOME button Note To use the Internet browser, you need to connect to a wireless LAN. For information on wireless LAN connection settings, see “Wireless LAN Connection”... - Page 103 Viewing Websites Enter the address of the desired website, and then select “OK.” Tap the address input field to display the onscreen keyboard. Enter the address and select “OK” on the onscreen keyboard to return to the Enter Address screen. After selecting “OK” on the Enter Address screen, the loading of the web page begins.
-
Page 104: Internet Browser Screen
Viewing Websites Internet browser screen You can operate the Internet browser by tapping and dragging the screen. Furthermore, you can perform operations such as web page address input, favorites, advanced settings, etc., by selecting the Internet browser. Web page Operations on the Internet browser screen Scroll the web page Open a linked web page Tap a link. -
Page 105: Operations Of The Control Buttons
Viewing Websites Operations of the Control Buttons To display the control buttons, select Internet browser. To dismiss the control buttons, tap the area outside of the buttons. Control buttons of the Internet browser Web page Control buttons Icon (Back) (Forward) (Refresh) / (Stop) (Address Input) -
Page 106: Using Favorites
Viewing Websites Using favorites By adding a web page to the favorites list, you can open the web page by selecting it from the favorites list. From the Internet browser, select (Favorites List). Add the web page you are viewing to the favorites list Open a web page in the favorites list... -
Page 107: Changing The Internet Browser Settings
Viewing Websites Changing the Internet Browser Settings To change the Internet browser settings, select browser screen, then select View Mode You can change the appearance of the web page. From the Internet browser, select “View” tab Type Normal Just-Fit Smart-Fit Page Information... -
Page 108: Startup Page
Viewing Websites Startup Page You can set the startup page to be displayed when the Internet browser starts From the Internet browser, select “View” tab Type Blank Page Page Last Displayed Detailed Settings You can enable or disable JavaScript, authentication information saving, and cache. -
Page 109: Privacy Settings
Viewing Websites Privacy Settings You can delete the cache, cookies, history list, and authentication information. From the Internet browser, select “Settings” tab “OK.” Item Delete Cache Delete Cookie Delete History Delete Authentif. Info Cookie Settings You can set to receive or not to receive cookies from web servers. ... -
Page 110: Using Noise Canceling Function
Using Noise Canceling Function About Noise Canceling The internal microphone embedded in the headphones picks up the ambient noise. The player generates an antiphase sound wave against the ambient noise to reduce it. The Noise Canceling function can reduce the unwanted ambient noise especially in a vehicle such as an airplane, train, bus, etc., allowing you to enjoy music at a low volume. - Page 111 Using Noise Canceling Function You may feel the Noise Canceling function does not work or noise is louder in a quiet environment or depending on the noise. In this case, release the Noise Canceling function. Mobile phones may affect noise. In that case, keep the player away from mobile phones. ...
-
Page 112: Playing Back With Using The Noise Canceling Function
Using Noise Canceling Function Playing Back with Using the Noise Canceling Function You can reduce the unwanted ambient noise by using the Noise Canceling function of the player. The internal microphone of the headphones can catch the ambient noise to reduce noise by outputting an antiphase sound wave against the noise. -
Page 113: Listening To External Audio Sources (External Input Mode)
Using Noise Canceling Function Listening to External Audio Sources (External Input Mode) You can enable the Noise Canceling function when you listen to audio from external audio sources, such as audio devices in airplanes. Using with external audio devices To headphone jack Using with in-flight entertainment systems The supplied plug adaptor To in-flight entertainment systems... - Page 114 Using Noise Canceling Function Hints You can change between “External Input Mode” and “Quiet Mode” ( page 115) by selecting “External Input Mode” or “Quiet Mode” on the screen. If you disconnect the supplied audio input cable, the Noise Canceling function enters “Quiet Mode”...
-
Page 115: Reducing The Ambient Noise Without Playing Back Music (Quiet Mode)
Using Noise Canceling Function Reducing the Ambient Noise without Playing Back Music (Quiet Mode) You can use the Noise Canceling effect to get peace and quiet. HOME button Connect the supplied headphone to the player and slide the NOISE CANCELING switch in the direction of the arrow . ... -
Page 116: Changing The Noise Canceling Settings
Using Noise Canceling Function Changing the Noise Canceling Settings To change the Noise Canceling settings, select menu, then select “NC Settings. ” HOME button Select NC Environment You can select the digital filter that is most suitable for reducing the ambient noise at the location. -
Page 117: Set Noise Cancel Level
Using Noise Canceling Function Set Noise Cancel Level The player is designed to obtain the maximum effect of the Noise Canceling function ( page 110). However, you may be able to enhance the effect depending on your ear shape or usage environment by increasing (or decreasing) the sensitivity of the microphone installed in the headphones. -
Page 118: Common Settings
Common Settings Changing the Common Settings To change the common settings of the player, select Home menu, then select “Common Settings. ” HOME button Unit Information Information such as model name, firmware version, etc., is displayed. From the Home menu, select “Unit Information.”... -
Page 119: Avls (Volume Limit)
Common Settings AVLS (Volume Limit) You can set “AVLS (Volume Limit)” (Automatic Volume Limiter System) to limit the maximum volume to prevent auditory disturbance or distraction. With “AVLS (Volume Limit), ” you can listen to music at a comfortable volume level. -
Page 120: Screen Off Timer
Common Settings Screen Off Timer When there is no operation for a while, the player turns off the screen. You can set the waiting time for turning off the screen. From the Home menu, select “Screen Off Timer” Type After 15 Sec After 30 Sec After 1 Min... -
Page 121: Brightness
Common Settings Brightness You can set the display brightness to one of 5 levels. From the Home menu, select “Brightness.” Drag the indicator (setting value) to select the desired level. You can set to one of 5 levels. The larger the number, the brighter the screen. -
Page 122: Set Date-Time
Common Settings Set Date-Time You can set the date and time. From the Home menu, select “Clock Settings” Drag or flick the year, month, date, hour and minute up or down to adjust the date and time. Select “OK.”... -
Page 123: Date Display Format
Common Settings Date Display Format You can set the date format displayed for the current time ( page 122) as “YYYY/MM/DD, ” “MM/DD/YYYY, ” or “DD/MM/YYYY. ” From the Home menu, select “Clock Settings” “OK.” Type YYYY/MM/DD MM/DD/YYYY DD/MM/YYYY Time Display Format You can select the time format displayed for the current time ( ... -
Page 124: Reset All Settings
Common Settings Reset All Settings You can reset the player to the default settings. Resetting the player also deletes the wireless LAN encryption key, but does not delete data such as music, video, and photo data. Note This function is only available in the pause mode. ... -
Page 125: Format
Common Settings Format You can format the built-in flash memory of the player. Notes If the memory is formatted, all data (songs, videos, photos, etc., including sample data installed at the factory) will be erased. Be sure to verify the data stored in memory prior to formatting and export any important data to the hard disk of your computer. -
Page 126: Language Settings
Common Settings Language Settings You can select from a variety of languages for the display of menus and messages on the player. From the Home menu, select the desired language setting. Language Deutsch English Español Français Italiano Português Русский Japanese display may not be available, depending on the release region of the player. -
Page 127: Changing The Wireless Lan Settings
Common Settings Changing the Wireless LAN Settings To change or check the wireless LAN settings, select Home menu, then select “Wireless LAN Settings. ” HOME button WLAN Function On/Off You can enable or disable the wireless LAN fuction. From the Home menu, select ... -
Page 128: New Registration
Common Settings New Registration You can register the access point to the player using the setting wizard. From the Home menu, select Settings” “New Registration” There are 5 ways to register the access point. Refer to the description to select the adequate setting method. - Page 129 Common Settings Notes For the information on the WPS settings of your access point, refer to the operation guide of the access point. After WPS setting for wireless LAN connection between the player and access point, the access point may become unconnectable to devices that were previously connected. For details, refer to the operation guide of the access point.
- Page 130 Common Settings Enter SSID screen/Security Settings screen When selecting “Manual Registration” from the New Registration screen, the Enter SSID screen appears. Select the SSID input field to bring up the onscreen keyboard, then enter the SSID and select “Next.” The Security Settings screen appears.
- Page 131 Common Settings Enter Encryption Key screen When the access point is set to use an encryption method, the Enter Encryption Key screen appears. Select the “WEP Key:” field or “WPA Key:” field to bring up the onscreen keyboard, enter the encryption key, then select “Next.” Enter the encryption key for using to connect to the access point.
- Page 132 Common Settings Confirmation screen After completing all settings, the Confirmation screen appears. Confirm the displayed settings and enter the connection name. Confirm the registration settings. Select the Connection Name input field to bring up the onscreen keyboard, enter a connection name, then select “Complete.” Enter an easy-to-understand name as a connection name (such as Home, Office, etc.).
-
Page 133: Access Points Screen
Common Settings Access Points screen You can display the list of the access points registered to the player. When you select an access point, setting items appears allowing you to connect to, edit the settings of, or delete the registration of the access point. ... - Page 134 Common Settings Item Connection Name: SSID: Security Settings IP Address Settings Proxy Server Settings User ID:* Password:* * Appears only when a public wireless LAN service is selected. Hint For how to input text, see “Text Input” ( page 20). Notes ...
- Page 135 Common Settings To edit the proxy server settings You can edit the proxy server settings according to the wireless LAN you intend to connect to. Item Address: Port: Select the proxy server setting item to edit. To enter the address or port number, select the input field to bring up the onscreen keyboard.
-
Page 136: Current Connection Details
Common Settings Current Connection Details You can display the current connection status. From the Home menu, select Settings” “Current Connection Details.” Item Wireless LAN Function: Connection Name: SSID: Security Method: Channel: Signal Strength: IP Address Settings: IP Address: Subnet Mask: Default Gateway: Primary DNS:... -
Page 137: Detailed Information
Common Settings Detailed Information You can display the MAC address of the player. From the Home menu, select Settings” “Detailed Information.” Item MAC Address: Notes You cannot change the MAC address. Repair of the player may change the MAC address, depending on the nature of the repair. -
Page 138: Useful Facts
Useful Facts Maximizing Battery Life By adjusting the settings or managing the power supply properly, it is possible to save the battery power and use the player for a longer time. Turn off the player manually If you press and hold the HOME button, the player enters standby mode and the screen turns off to save battery power. -
Page 139: What Are Format And Bit Rate
Useful Facts What are Format and Bit Rate? What is audio format? Audio format refers to the method used when importing audio data from the Internet or audio CDs to a computer and saving it as an audio file. Common formats include MP3 and WMA, etc. MP3: MP3 (MPEG-1 Audio Layer3) is a common audio compression technology developed by the MPEG working group of the ISO (International Organization for Standardization). -
Page 140: What Is Video Format
Useful Facts What is the relationship between bit rate, sound quality, and storage size? Generally, higher bit rates provide better sound quality, but require more storage space for the same length of audio, so you can store fewer songs on the player. -
Page 141: Storing Data
Useful Facts Storing Data You can store computer data into the built-in flash memory of the player by transferring the data from your computer using Windows Explorer, or another transfer capable software. If the player is connected to the computer, the built- in flash memory appears in Windows Explorer as [WALKMAN]. -
Page 142: Upgrading The Player's Firmware
For details about the latest firmware information and how to install it, visit the following web site: For customers in the USA: http://www.sony.com/walkmansupport For customers in Canada: http://www.sony.ca/ElectronicsSupport/ For customers in Europe: http://support.sony-europe.com/DNA For customers in Latin America: http://www.sony-latin.com/index.crp... -
Page 143: Troubleshooting
Check the information about the issue in the Help of each software. Look for information about the issue on one of the support websites. For customers in the USA, visit: http://www.sony.com/walkmansupport For customers in Canada, visit: http://www.sony.ca/ElectronicsSupport/ For customers in Europe, visit: http://support.sony-europe.com/DNA For customers in Latin America, visit: http://www.sony-latin.com/index.crp... - Page 144 Troubleshooting Operation Symptom There is no sound. No data is played. Data cannot be deleted on the player. Cause/Remedy The volume level is set to zero. Turn the volume up ( page 6). The headphone plug is not connected properly. ...
- Page 145 Troubleshooting Operation (continued) Symptom Transferred data is not displayed in its list. When “All Songs” or “Album” is selected, all the songs will appear, but some songs will not appear when “Folder” is selected. Songs are played back within a limited playback range only, such as within one album.
- Page 146 Troubleshooting Operation (continued) Symptom Noise is generated. Noise Canceling function is not effective. “VPT(Surround)” setting or “Clear Stereo” function is not effective. Cause/Remedy Noise Canceling is set in a quiet place. Noise tends to be more noticeable in a quiet place or depending on the noise type.
- Page 147 Troubleshooting Operation (continued) Symptom Cannot see the video, but can hear it. The touch panel or the Buttons do not work. The buttons work properly, but the touch panel does not work. Playback does not stop. The player does not work. The remaining battery power is insufficient. Transferred data cannot be found.
- Page 148 Troubleshooting Operation (continued) Symptom The volume is not loud enough. There is no sound from the right channel of the headphones. Or the right channel sound is heard from both sides of the headphones. Playback has stopped suddenly. Thumbnails are not displayed.
- Page 149 Troubleshooting Display Symptom “ ” appears for a title. “Unknown” is displayed for an album or artist name, etc. Garbled characters are displayed. The screen darkens while displaying a photo. The screen turns off. A message appears. Cause/Remedy Characters that cannot appear on the player are included in the title.
- Page 150 When usable battery life becomes half the usual time, even after charging the battery fully, the battery should be replaced. Consult your nearest Sony dealer. Copyright-protected contents are played. When copyright-protected contents are played, battery life may be shorter.
- Page 151 Troubleshooting Connection with a computer Symptom Cannot install the software. The progress bar on the install screen does not proceed. Or, the access lamp of the hard drive does not light for several minutes. The installer does not start up automatically. Media Manager for WALKMAN does not start Cause/Remedy...
- Page 152 Troubleshooting Connection with a computer (continued) Symptom “Connecting” or “Connected USB (MTP)” does not appear when connected to the computer with the supplied USB cable. The player is not recognized by the computer when it is connected to the computer. Cause/Remedy ...
- Page 153 Troubleshooting Connection with a computer (continued) Symptom Data cannot be transferred to the player from your computer. Cause/Remedy Transferring may be stopped due to noise such as static electricity, etc. This happens to protect data information. Disconnect the player, then reconnect it. ...
- Page 154 Troubleshooting Connection with a computer (continued) Symptom Data cannot be transferred to the player from your computer. (continued) The transfer takes too long time. Only a small amount of data can be transferred to the player. The player becomes unstable while it is connected to the computer.
- Page 155 Troubleshooting Wireless LAN Symptom The player will not connect to a wireless network. Cause/Remedy “WLAN Function On/Off ” option is set to “Off. ” Set the option to “On” ( page 127). Reconnect to a wireless network manually ( page 133). ...
- Page 156 Troubleshooting Wireless LAN (continued) Symptom You are positioned within a wireless LAN and it is available, but the icon of the Select Access Point screen indicates no signal strength. Some applications cannot use the wireless LAN function. The access point you intend to connect to does not appear in the Select Access Point screen.
- Page 157 Troubleshooting FM Radio Symptom You cannot hear an FM broadcast well. Reception is weak and sound quality is poor. The FM broadcast is affected by interference. YouTube Symptom Sound or video is interrupted intermittently. Some videos do not appear in the list. Cannot connect to YouTube.
- Page 158 Troubleshooting Podcast Symptom Cannot refresh a podcast. Cannot download episodes by using “Refresh Podcasts. ” Cannot play back an episode. Too few episodes are downloaded. Internet browser Symptom A particular Web page is not displayed correctly. Cannot scroll lists on the Internet browser.
- Page 159 If the sheet lies off the edge of the screen, or burrows its way into the gap, reapply it. If you are using a sheet other than Sony’s optional protection sheet, it may interfere with the touch panel. The HOLD switch is set to the HOLD position.
-
Page 160: Messages
Troubleshooting Messages Follow the instructions below if a message appears in the display. Message Cannot play; file format is not supported. Delete failed. Do not disconnect. Firmware update failed. LOW BATTERY. Please Charge. Noise Canceling unavailable. Unable to execute. Not enough free space in memory. Delete files to ensure free space. -
Page 161: Additional Information
Additional Information Precautions The following FCC statement applies only to the version of this model manufactured for sale in the USA. Other versions may not comply with FCC technical regulations. NOTE: This equipment has been tested and found to comply with the limits for a Class B digital device, pursuant to Part 15 of the FCC Rules. - Page 162 Additional Information If you have any questions about this product: Visit: www.sony.com/walkmansupport Contact: Sony Customer Information Service Center at 1-(866)-456-7669 Write: Sony Customer Information Service Center 12451 Gateway Blvd., Fort Myers, FL 33913 Declaration of Conformity Trade Name: Model No.: Responsible Party: Address:.
- Page 163 Notice for customers: the following information is only applicable to equipment sold in countries applying EU directives The manufacturer of this product is Sony Corporation, 1-7-1 Konan, Minato- ku, Tokyo, Japan. The Authorized Representative for EMC and product safety is Sony Deutschland GmbH, Hedelfinger Strasse 61, 70327 Stuttgart, Germany.
- Page 164 Do not touch the rechargeable battery with bare hands if it is leaking. Since battery liquid may remain in the player, consult your nearest Sony dealer if the battery has leaked. If the liquid gets into your eyes, do not rub your eyes as it may lead to blindness.
- Page 165 Additional Information Do not take apart or remodel the player. Doing so can result in electric shock. Consult your nearest Sony dealer or Sony Service Center for exchange of rechargeable batteries, internal checks or repair. On installation Do not put any heavy object on top of the player or apply a strong shock to the player.
- Page 166 Additional Information Note on static electricity In particularly dry air conditions, mild tingling may be felt on your ears. This is a result of static electricity accumulated in the body, and not a malfunction of the player. The effect can be minimized by wearing clothes made from natural materials. On heat build-up Heat may build up in the player while charging if it is used for an extended period of time.
-
Page 167: Precautions About The Display
Additional Information On the use When using a strap (sold separately), be careful to avoid hooking it on objects you pass by. Furthermore be careful not to swing the player by the strap to avoid bumping people. Refrain from using the player according to the in-flight announcements during take off or landing in an aircraft. -
Page 168: On Cleaning
In no event will SONY be liable for any financial damage, or loss of profits, including claims made by third parties, arising out of the use of the software supplied with this player. - Page 169 The recorded song is limited to private use only. Use of the song beyond this limit requires permission of the copyright holders. Sony is not responsible for incomplete recording/downloading or damaged data due to problems of the player or computer.
- Page 170 The recorded song is limited to private use only. Use of the song beyond this limit requires permission of the copyright holders. Sony is not responsible for incomplete recording/downloading or damaged data due to problems of the player or computer.
-
Page 171: License And Trademark Notice
OpenMG, ATRAC, ATRAC3, ATRAC3plus, ATRAC Advanced Lossless and their logos are trademarks of Sony Corporation. “WALKMAN” and “WALKMAN” logo are registered trademarks of Sony Corporation. Microsoft, Windows, Windows Vista and Windows Media are trademarks or registered trademarks of Microsoft Corporation in the United States and/or other countries. - Page 172 Secure Content from the Internet or from a PC. Microsoft may, in conjunction with such license, also download revocation lists onto your device on behalf of Secure Content Owners. Program ©2009 Sony Corporation Documentation ©2009 Sony Corporation and ® marks are not specified.
-
Page 173: Specifications
Additional Information Specifications Supported file format Music (Includes podcasts) Audio Formats (Codec) AAC-LC* Linear PCM Video (Includes podcasts) Video Formats (Codec) (H.264/AVC) MPEG-4 Windows Media Video 9 Audio Formats AAC-LC (Codec) (for AVC, MPEG-4) (for Windows Media Video 9) File size Max. - Page 174 Additional Information Photo* Photo Format JPEG (Codec) The number of files Max. 20,000 Podcast* The number of files Max. 20,000 Sampling frequency may not correspond to all encoders. Copyright protected files cannot be played back. Non-standard bit rates or non-guaranteed bit rates are included depending on the sampling frequency. Some photo files cannot be played back, depending on their file formats.
- Page 175 20 to 20,000 Hz (when playing 44.1 kHz sampling data file, single signal measurement) Total Noise Suppression Ratio* Approx. 17 dB* Under the Sony measurement standard. Equivalent to approx. 98.0% reduction of energy of sound compared with not wearing headphones. (NC Environment: Airplane)
- Page 176 Additional Information Interface Headphone: Stereo mini-jack WM-PORT (multiple connecting terminal): 22 pins Hi-Speed USB (USB 2.0 compliant) Operating temperature 5 °C to 35 °C (41 °F to 95 °F) Power source Built-in rechargeable lithium-ion battery USB power (from a computer via the supplied USB cable) Charging time USB-based charging Approx.
- Page 177 Additional Information Display 3-inch, OLED (Organic Light Emitting Diode) color display, WQVGA (432 × 240 pixels), 262,144 colors Dimensions (w/h/d, projecting parts not included) 52 × 96.5 × 9.8 mm ( 2 1/8 × 3 7/8 × 13/32 inches) Dimension (w/h/d) 52.5 ×...
- Page 178 Additional Information System Requirements Computer IBM PC/AT or compatible computer preinstalled with the following Windows operating systems: Windows XP Home Edition (Service Pack 2 or later) / Windows XP Professional (Service Pack 2 or later) / Windows Vista Home Basic (Service Pack 1 or later) / Windows Vista Home Premium (Service Pack 1 or later) / Windows Vista Business (Service Pack 1 or later) / Windows Vista Ultimate (Service Pack 1 or later) * Excluding OS Versions not supported by Microsoft...
-
Page 179: Index
Additional Information Index Symbols (Repeat) ... 47 (Shuffle) ... 47 (Shuffle&Repeat) ... 47 (Repeat 1 song)... 47 (Heavy)... 48 (Pop) ... 48 (Jazz) ... 48 (Unique) ... 48 (Custom 1) ... 48 (Custom 2) ... 48 (Studio) ... 50 (Live) ... 50 (Club) ... - Page 180 Additional Information Data ... 141 Date Display Format ... 123 Date-Time ... 122 Delete (access point) ... 133 Delete All Episodes... 98 Delete All Podcasts ... 99 Delete Episode ... 98 Delete photos ... 68 Delete songs ... 44 Delete This Episode ... 98 Delete This Podcast ...
- Page 181 Additional Information MAC Address ... 137 Matrix ... 50 Media Manager for WALKMAN ... 22 Menu (Internet browser) ... 104 Messages ... 160 Model ... 118 Mono/Auto ... 75 Most Viewed ... 80 MP3 ... 139 MPEG-4 ... 140 Music ... 37 New Registration ...
- Page 182 Additional Information Tap ... 11 Text Input ... 20 Thumbnails (photo) ... 70 Thumbnails (cover art) ... 53 Thumbnails (video) ... 57 Time Display Format ... 123 Time Zone ... 108 Timeframe ... 81 To Play Screen ...40, 95, 97 To Podcast Links ...