Table of Contents
Advertisement
Advertisement
Table of Contents

Related Manuals for Datavideo NVS-33


Summary of Contents for Datavideo NVS-33
- Page 1 NVS-33...
-
Page 2: Table Of Contents
Table of Contents TABLE OF CONTENTS ....................2 FCC COMPLIANCE STATEMENT ................4 WARNINGS AND PRECAUTIONS ................4 WARRANTY ......................5 ..................... 5 TANDARD ARRANTY ................... 6 HREE ARRANTY DISPOSAL ........................ 6 CHAPTER 1 INTRODUCTION ................7 1.1 B ....................7 EATURES 1.2 F ...................... - Page 3 SERVICE AND SUPPORT ..................72 Disclaimer of Product & Services The information offered in this instruction manual is intended as a guide only. At all times, Datavideo Technologies will try to give correct, complete and suitable information. However, Datavideo Technologies cannot exclude that some information in this manual, from time to time, may not be correct or may be incomplete.
-
Page 4: Fcc Compliance Statement
AC adapter. If you are not sure of the type of power available, consult your Datavideo dealer or your local power company. 8. Do not allow anything to rest on the power cord. Do not locate this unit where the power cord will be walked on, rolled over, or otherwise stressed. -
Page 5: Warranty
Warranty Standard Warranty Datavideo equipment are guaranteed against any manufacturing defects for one year from the date of purchase. The original purchase invoice or other documentary evidence should be supplied at the time of any request for repair under warranty. -
Page 6: Three Year Warranty
Camera module, PCIe Card are covered for 1 year. The three-year warranty must be registered on Datavideo's official website or with your local Datavideo office or one of its authorized distributors within 30 days of purchase. Disposal For EU Customers only - WEEE Marking... -
Page 7: Chapter 1 Introduction
Chapter 1 Introduction The Datavideo NVS-33 is a video streaming server which is designed for different applications and network environments by differernt bitrate settings. The NVS-33 combines recording and streaming functions into one single unit. Moreover, it supports various features including SDI x 1 and HDMI x 1 video input interfaces, external connected RCA Unbalanced Audio signals. - Page 8 Microsoft Internet Explorer Google Chrome Streaming RTSP、RTMP、RTMPS, TS、HLS and SRT Streaming Protocols can be Applied in : Adobe Media Server and Wowza Media Server. Video Playing Softwares such as QuickTime and VLC. Content Delivery Networks such as Youtube Live and Ustream. Recording ...
-
Page 9: Chapter 2 Connections And Control
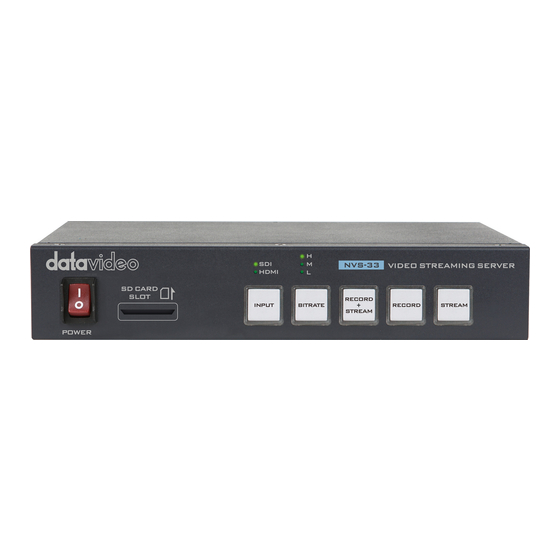
Chapter 2 Connections and Control 2.1 Front Panel Power Switch Used to turn on or turn off the NVS-33. SD Card Slot This SD Card Slot allows users to insert SD Card to be the storage media of the recorded contents. - Page 10 BITRATE This BITRATE button allows users to switch between different bitrate modes including H, M and L. About the BITRATE button and its LED indictor behaviors, please refer to the related paragraphs of “Front Panel’s Buttons and LED Indicators Behaviors”. RECORD+STREAM This RECORD+STREAM button allows users to activate RECORD+STREAM...
-
Page 11: Rear Panel
Others This LAN port allows users to use an RJ-45 Ethernet cable to connect the NVS-33 to the Ethernet. DC IN 12V Power Interface Please connect a 12V power adapter to this DC power port. The cable of the DC power adapter can be secured by screwing the outer fastening ring of the DC IN plug to the socket. -
Page 12: Chapter 3 System Diagram
Chapter 3 System Diagram... -
Page 13: Chapter 4 Front Panel's Buttons And Led Indicators Behaviors
Chapter 4 Front Panel’s Buttons and LED Indicators Behaviors The front panel of the NVS-33 H.264 Video Streaming Server provides five buttons including “INPUT”, ”BITRATE”, ”RECORD+STREAM”, ”RECORD”and”STREAM” for users to control recording and streaming related functions. About the LED indictors behaviors for those buttons, please refer to following paragraphs. -
Page 14: Record+Stream
BITRATE button will be flickering once the RECORD+STREAM, RECORD or STREAM button is activated). The H/M/L buttons must show the saved setting of the last time. Each time when the BITRATE button is short-pressed, the system will be retimed for 2 seconds. 4.3 RECORD+STREAM The RECORD+STREAM button allows users to activate the RECORD+STREAM mode and RECORD+STREAM encoding. -
Page 15: Record Only
At this time, the encoding for the RECORD+STREAM mode will be stopped. 4.4 RECORD Only The RECORD button allows users to activate the RECORD Only mode and RECORD Only encoding. Please follow following steps for using the RECORD button. 4.4.1 How to Activate the RECORD Only Mode and Encoding ... - Page 16 4.5.1 How to Activate the STREAM Only Mode and Encoding If the RECORD+STREAM, RECORD and STREAM buttons are shown in solid white. At first, please make sure that the three buttons including RECORD+STREAM, RECORD and STREAM are shown in solid white. ...
-
Page 17: Chapter 5 Video Streaming
SD card. Streaming Network Connection and Device Search This section details how to connect the NVS-33 to a network with or without a DHCP server, and describes how to acquire the NVS-33’s IP address. Connecting to a DHCP Network (DHCP Mode) Follow the following procedure to scan your DHCP network for connected NVS-33 devices. -
Page 18: Connecting To A Non-Dhcp Network (Static Ip)
Connecting to a NON-DHCP Network (Static IP) Upon connection to a non-DHCP network, the NVS-33 will not be assigned of any IP addresses. As such it is recommended that you manually assign a fixed IP address to the device or use the default IP address (192.168.1.60). -
Page 19: Troubleshooting The Network Connection
The IP address should be the default IP which is 192.168.1.60. Troubleshooting the Network Connection Connect the NVS-33 to the network and open the IP Finder utility program. Scan for the device. If not found, it is possible that your network is not assigning IP addresses. - Page 20 Make sure no other devices are connected to the LAN (wired or wireless) because this may result in IP conflicts. After trying all methods and if the problem is still not solved, the NVS-33 video streaming server offers the fixed IP feature that allows you to establish direct connection to the NVS-33.
- Page 21 The NVS-33 should now be connected with an IP address of 192.168.1.60. If the NVS-33 still cannot connect, simply restore the NVS-33 to the factory defaults. Turn off the NVS-33.
- Page 22 NVS-33 to 10.10.1.X, which can range from 10.10.1.2 to 10.10.1.255. Pick an unused IP address. DHCP:Disable Static IP:X.X.X.Y;the first three decimal numbers must be the same as your router or switch. The number Y must be a number not used by any devices connected to the network.
- Page 23 MAC address starts with 00:07:36:03:xx:xx. On the command prompt (terminal on MAC OS), enter "arp -a" then press enter key to display an ARP list. See if the NVS-33 is successfully connected to the network. Execute services.msc,and on the right column of the “Services” window, locate “DHCP Client”...
-
Page 24: Web User Interface
Web User Interface By now, we have obtained the IP addresses of the PC and the NVS-33. Enter the NVS- 33’s IP address into the address bar of a browser then hit the ENTER button. Login by entering the user name as well as the password into a pop-up dialogue box as shown below. - Page 25 Note: The NVS-33 web UI is not updated in real time so it is not synchronized with the device status. While monitoring streaming and recording, please update the page periodically even if you choose to physically operate the device or a mixed physical and web UI operations.
-
Page 26: Operation Mode
Operation Mode Click the Operation Mode tab on the tool bar to open the operation mode configuration page. The NVS-33 offers the following operation modes: Record and Stream: Streaming and recording functions are enabled at the same time. ... - Page 27 Audio Source, Bitrate Mode, Auto Stream, Resolution, Framerate, Profile, Video Bitrate (bps), Audio Bitrates (bps) , GOP and Stream Type. Five stream types are available on the NVS-33 and they are RTSP, RTMP, TS, HLS and SRT. See Section 5.3 for details.
- Page 28 As for recording, the settings are Video Source, Audio Source, Bitrate Mode, Resolution, Framerate, Profile, Video Bitrate(bps), Audio Bitrate(bps), GOP, File Name and File Size. Click the “Apply” button to apply the new record settings. Click the “Start” button to start recording and the “Stop”...
- Page 29 Stream and Record Settings In the section, you will be introduced various setting options of stream and record functions. Common Setting Items for Streaming and Recording Video Source This drop-down menu allows users to select SDI or HDMI as the video input source. Audio Source This drop-down menu allows users to select the audio source of the streaming video.
- Page 30 Resolution The first step of encoder setup is to adjust the image size. It is best to either match your original video source or scale it down. For example, capture at HD 720 and stream at HD 720. Or capture at HD 720 and stream at 540 (high).
- Page 31 Auto Stream If the Auto Stream is enabled, in the event of power outage, the stream will be automatically restored after the switcher is powered ON again. Profile Profile sets the H.264 encoding profile for your stream. The available options are Baseline, Main, and High.
- Page 32 12Mbps. Audio Bitrate (bps) The NVS-33 offers the user the following audio bitrates at which you may want to stream the audio. It is recommended to select 128Kbps or higher.
- Page 33 Shorter GOP lengths usually work better with video that has quick movements, but they do not compress the data rate as much. Depending on your applications, the NVS-33 offers the user 16 GOP sizes ranging from 1 to 180. Stream Settings Stream Type The NVS-33 offers the user five stream types.
- Page 34 accordingly. A good rule of thumb is for the bitrate of your stream to use no more than 50% of your available upload bandwidth capacity on a dedicated line. For example, if the result you get from a speed test shows that you have 2Mbps of upload speed available, your combined audio and video bitrate should not exceed 1Mbps.
- Page 35 RTSP Username/Password The account and password are root by default. Stream Type – RTMP RTMP URL Enter the RTMP/RTMPS URL obtained from any live streaming platform such as Ustream. Stream Name Enter the stream name or key from any live streaming platform. Account Enter your RTMP/RTMPS account name.
- Page 36 Audio Only In this option, the user is allowed to choose to stream Audio Only or Video Only. If disabled, video and audio streams will be delivered simultaneously. Stream Type – TS TS Port The TS port number is 12345 by default.
- Page 37 SRT Port The SRT port is 9001 by default. Play URL A stream URL will be generated after the Start Stream button is clicked. Record Encoder Settings Resolution Recording resolution is the number of pixels (dots) used to create an image. Higher resolutions use more pixels to create an image.
- Page 38 Frame Rate Frame rate greatly impacts the style and viewing experience of a video. Different frame rates yield different viewing experiences, and choosing a frame rate often means choosing between things such as how realistic you want your video to look, or whether or not you plan to use techniques such as slow motion or motion blur effects.
- Page 39 720P or lower – 8 – 10 mbps 1080P or higher – 15 mbps or higher Audio Bitrate (bps) The NVS-33 offers the user the following audio bitrates at which you may want to record the audio. It is recommended to record at 128Kbps or higher.
- Page 40 Shorter GOP lengths usually work better with video that has quick movements, but they do not compress the data rate as much. Depending on your applications, the NVS-33 offers the user 16 GOP sizes ranging from 1 to 180. Record Settings File Name Enter the name of the recording file.
-
Page 41: Storage
The activation time is approximately 2 to 3 seconds. Storage The menu bar of the NVS-33 web based control interface provides storage option for users to check the status of the SD card. The main interface of the storage option is shown as following diagram. -
Page 42: Compatible Sd Card For The Nvs-33
Note: Please use the SD card which the grade is over class 10 to be the storage media. Compatible SD Card for the NVS-33 Please see following picture for the compatible SD card for the NVS-33 for your reference when recording. - Page 43 Storage Device Information Vendor Display of the manufacturer’s information. Product Display of the name of the SD card. Capacity Display of the SD card’s total capacity and the remaining capacity. Storage Format There are three formats including FAT32, EXFAT and NTFS in the Storage Format menu for user to select their desired SD Card Format.
- Page 44 The NVS-33 Video streaming server’s web UI provides CG option for users to add their desired text to the screen. The main interface of the CG option is shown as following diagram. CG Settings CG ON/OFF This drop-down menu allows users to determine...
- Page 45 Location-X Enter the x-coordinate of the CG overlay text. Location-Y Enter the Y-coordinate of the CG overlay text. Background Users can either select a black background or none. Text Size Select the font size of your CG overlay text.
-
Page 46: System
System The NVS-33 video streaming server’s web based user interface provides system option for users to set various network and system related parameters. Users can set network related parameters including DHCP, Static IP, Subnet Mask, Default Gateway, Primary DNS and Secondary DNS. Moreover, the System option also provides HLS Preview setting, Time Setting, Firmware Upgrade, Device Name Setting and Account Setup of the web control interface. - Page 47 Network Settings DHCP IP Assignment Select an option from this drop-down menu: Enable (DNS AUTO) Enable Disable Static IP Address The static IP field will be activated for the user to manually enter an IP address once the DHCP is disabled.
- Page 48 soon as the button LEDs are turned ON. Fixed IP address is 192.168.1.60 by default. Subnet Mask Static IP address mode requires subnet mask, which is 255.255.255.0 by default. Default Gateway Static IP address mode requires default gateway, which is 192.168.1.254 by default.
- Page 49 MAC Address Display of NVS-33’s MAC address. Submit Button After the network related parameters in the System option are set, users can press the Submit Button to save settings of the network related parameters. HLS Preview Here you will be able to enable/disable HLS preview.
- Page 50 Time Zone Click the drop-down menu to select a time zone for your device. Date/Time Date and Time fields show the device’s system date and time values. Click the Submit button to save the new settings.
- Page 51 Device Name Setting Enter a name for this device and click the Submit button to write this name into the device. Account Setup Account Setup Enter the NVS-33’s account name and password. Click the Apply button to save the new settings.
-
Page 52: File Repair
NVS-33. File Repair The web UI of the NVS-33 provides the File Repair function for users for fixing damaged MP4 file. Please follow following steps for using the File Repair function. Note: The File Repair function is supported only by the FW20190522 or newer firmware. - Page 53 3. After the File repair finish!! Window is shown, please press the OK button and then it is recommended to reboot the NVS-33. 4. In the File List drop-down menu, there is a new file that will be generated with the word “new”after the original file name.
-
Page 54: Operations
Video Streaming The NVS-33 provides the user with different options for video streaming such as RTSP, TS, RTMP, RTMPS, HLS and SRT. This section discusses settings of these options and how to stream your video using these methods. - Page 55 5. Before streaming the video via RTSP, enter the RTSP URL into the client device. 6. Open VLC then click Open Network Stream (shown in the diagram below). 7. As shown in the diagram below, enter the stream URL then click Play to start streaming.
- Page 56 Please follow the steps below to obtain the TS URL: 1. Open the stream settings page 2. Select TS. 3. Enter the TS port number which is 12345 by default. 4. In the TS IP field, enter your PC’s IP address such as 192.168.100.100. 5.
- Page 57 8. As shown in the diagram below, enter the stream URL then click Play to start streaming. Please follow the steps below to obtain the HLS URL: 1. Open the stream settings page 2. Select HLS 3. Click the Start button to generate the HLS URL. 4.
- Page 58 6. Open VLC then click Open Network Stream (shown in the diagram below). 7. As shown in the diagram below, enter the stream URL then click Play to start streaming.
- Page 59 8. You can also play .m3u8 stream URL using the devices listed as follows: iPhone, iPad and MacBook: Use Safari to open the .m3u8 stream URL. Windows 10: Use Microsoft Edge to open the .m3u8 stream URL. Please follow the steps below to obtain the SRT URL: 1.
- Page 60 6. As shown in the diagram below, enter the stream URL then click Play to start streaming. RTMP In RTMP mode, the NVS-33 can only send one data stream to one CDN or media server that supports the Real-Time Messaging Protocol (RTMP). Examples of the RTMP media server are USTREAM and Youtube.
- Page 61 4. On the right, scroll down to the bottom where you will be able to find Server URL and Stream name/key. 5. On the NVS-33, open the Stream Only operation mode page. 6. Select RTMP from the Stream Type drop-down menu.
- Page 62 8. Enter the Stream name/key obtained from the Youtube Live Streaming page into the StreamName field. 9. As required by the live streaming channel, enter your Youtube account name and password into the Account and Password fields. 10. Click the Start Stream button to start streaming the live video on the Youtube Live Streaming page.
- Page 63 “Server URL” and “Stream Key”. 3. Please press the “Operation Mode” option from NVS-33’s web control UI and then please set the stream type as RTMP. After that, please paste the “Server URL” and “Stream Key”...
-
Page 64: Text Overlay Video
Facebook page. Text Overlay Video The NVS-33 video streaming server not only allows you to stream and record your program, it also features a CG tool that is capable of overlaying text on the video currently being broadcast. - Page 65 Follow the steps below to overlay text on the video: 1. Open the CG settings page. 2. Enable the CG function. 3. In the Text field, enter the overlay text. 4. Enter the X and Y coordinates to set the text position. 5.
-
Page 66: Chapter 6 Firmware Upgrade
Chapter 6 Firmware Upgrade The NVS-33 video streaming server provides users to update the firmware to the latest version by the web control interface. Please follow following steps for firmware upgrading. 1. On the browser that opens, enter the login information (User Name: admin / Password: 000000) and then click OK. - Page 67 5. After the firmware update is done successfully, the NVS-33 will reboot automatically. 6. After the reboot is done successfully, the web user interface will be reopened.
-
Page 68: Chapter 7 Dimensions
Chapter 7 Dimensions All measurements in millimeters (mm) -
Page 69: Specifications
Chapter 8 Specifications Interface HDMI x 1 Video Input SDI x 1 SDI Embedded Audio x 1 HDMI Embedded Audio x 1 1 pair RCA Unbalanced audio (Audio Single Audio Input Level: +10/+12dB ~ -6dB) ... - Page 70 Dimensions 220(W) x 115(D) x 45.5(H) mm...
- Page 71 Note...
-
Page 72: Service And Support
Jul..-04.2019 Ver:E2...