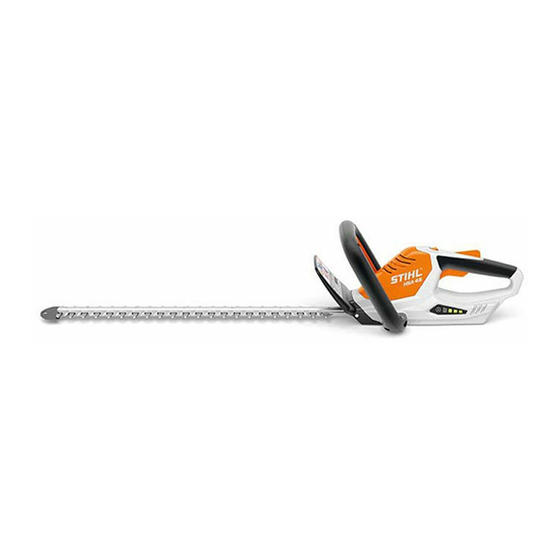
Stihl HSA 45 Instruction Manual
Hide thumbs
Also See for HSA 45:
- Instruction manual (360 pages) ,
- Instruction manual (68 pages) ,
- Instruction manual (68 pages)
Table of Contents
Advertisement
Quick Links
Advertisement
Table of Contents

Related Manuals for Stihl HSA 45


Summary of Contents for Stihl HSA 45
- Page 1 STIHL HSA 45 Instruction Manual...
-
Page 3: Table Of Contents
Inserting and Removing Activation Key ... . . 13 18.3 STIHL LK 45 Charging Cable ..... . 19 7.1 Inserting the Activation Key . -
Page 4: Introduction
Thank you for choosing STIHL. We develop and 21.2 STIHL LK 45 Charging Cable ..... . 20 manufacture our quality products to meet our customers’... -
Page 5: Symbols Used With Warnings In The Text
English 3 Overview Symbols used with warnings in the text WARNING This symbol indicates dangers that can cause serious injuries or death. ► The measures indicated can avoid serious injuries or death. NOTICE This symbol indicates dangers that can cause damage to property. -
Page 6: Symbols
English 4 Safety Precautions Symbols 5 Button Activates the LEDs on the hedge trimmer. Meanings of symbols that may be on the hedge trimmer and charging cable: 6 LEDs Indicate hedge trimmer’s state of charge and This symbol indicates in what direction the malfunctions. -
Page 7: Intended Use
► If you pass the hedge trimmer and charging cable on to Intended Use another user: Always give them the instruction manual. The STIHL HSA 45 hedge trimmer is designed for cutting ► Make sure the user meets the following requirements: hedges, shrubs, bushes and scrub. -
Page 8: Clothing And Equipment
► Wear footwear made of durable material. medication or drugs. ► Wear long trousers made of durable material. ► If you have any queries: Contact your STIHL servicing ■ The user can come into contact with the cutting blades dealer. -
Page 9: Safe Condition
– Cutting blades are properly mounted. ■ The hedge trimmer’s electric motor may produce sparks. – Only original STIHL accessories designed for this hedge Sparks may cause a fire or an explosion in an easily trimmer are fitted. combustible or explosive environment. This can result in serious or fatal injuries and damage to property. -
Page 10: Built-In Battery
► Make sure the cutting blades are properly sharpened ► Use and store your hedge trimmer at and deburred. temperatures between 0°C and +50°C. ► If you have any queries: Contact your STIHL servicing dealer. 4.6.3 Charging Cable ► Keep hedge trimmer away from metallic objects. -
Page 11: Operation
This can result in serious injuries and damage to property. Operation ► Stop work, remove the activation key and contact your STIHL servicing dealer. WARNING ■ Hedge trimmer vibrations may occur during operation. ■ The user cannot concentrate on the work in certain ►... -
Page 12: Transporting
English 4 Safety Precautions ■ Contact with live components can result in an electric ► Remove the activation key. shock. This may result in serious or fatal injuries. ► Check that the connecting cable and plug are not damaged. ► Insert the plug in a properly installed wall outlet. ►... -
Page 13: Cleaning, Maintenance And Repairs
► Keep the charging cable out of the reach of children. ► If the hedge trimmer or the charging cable require ■ The charging cable is not protected against all ambient servicing or repairs: Contact your STIHL servicing conditions. The charging cable may be damaged if it is dealer. -
Page 14: Charging The Hedge Trimmer, Leds
► If 3 LEDs flash red while you are checking the controls: ► Insert the charger plug (3) in the charge socket (2). Remove the activation key and contact your STIHL The LEDs (1) glow green and show the state of charge. -
Page 15: Inserting And Removing Activation Key
1 second. 8 Switching the Hedge Trimmer On/Off ► If the cutting blades continue to run after about 1 second: Remove the activation key and contact your STIHL servicing dealer. Switching On Your hedge trimmer has a malfunction. -
Page 16: Checking The Built-In Battery
► Depress the trigger lockout lever and hold it in that ► If the cutting blades continue to run after 1 second: position. Remove the activation key and contact your STIHL servicing dealer. ► Pull the trigger. Your hedge trimmer has a malfunction. -
Page 17: Cutting
11 After Finishing Work 13.1 Storing the Hedge Trimmer 11.1 After Finishing Work STIHL recommends that you store the hedge trimmer with a charge between 40% and 60% (2 LEDs glow green). ► Switch off the hedge trimmer and remove the activation key. -
Page 18: Storing The Charging Cable
The file only sharpens on the key. forward stroke. Maintain the prescribed sharpening angle, ► Clean the hedge trimmer with a damp cloth or STIHL resin @ 18.2. solvent. ► Turn the hedge trimmer over. -
Page 19: Repairing
16 Repairing ► Run the hedge trimmer for 5 seconds, . The cutting blades run. STIHL resin solvent is distributed evenly. ► If you have any queries: Contact your STIHL servicing dealer. 16 Repairing 16.1 Repairing Hedge Trimmer and Charging Cable The hedge trimmer, cutting blades or charging cable cannot be repaired by the user. -
Page 20: Troubleshooting
► Do not use your hedge trimmer and contact your STIHL servicing dealer. Cutting blades do not move ► Spray both sides of blades with STIHL resin freely. solvent. ► If 3 LEDs continue to flash red: Do not use your hedge trimmer and contact your STIHL servicing dealer. -
Page 21: Specifications
3 dB(A). – Sound power level L measured according to EN 60745- 18.1 STIHL HSA 45 Hedge Trimmer 2-15: 77 dB(A) K-value for sound power level is 3 dB(A). – Weight with cutting blades: 2.4 kg – Vibration level a measured according to EN 60745-2-15 –... -
Page 22: Spare Parts And Accessories
Co. KG Produktzulassung (Product Licensing). which must be disposed of separately. The year of manufacture and serial number are applied to ► Have hedge trimmer disposed of by a STIHL servicing the hedge trimmer. dealer. The STIHL dealer removes the built-in battery from the Done at Waiblingen, 01.07.2016... -
Page 23: General Power Tool Safety Warnings
22 General Power Tool Safety Warnings 22.3 Electrical safety The complete EC Declaration of Conformity is available from ANDREAS STIHL AG & Co. KG, Badstrasse 115, a) Power tool plugs must match the outlet. Never modify the 71336 Waiblingen, Germany. -
Page 24: Power Tool Use And Care
English 22 General Power Tool Safety Warnings Carrying power tools with your finger on the switch or e) Maintain power tools and accessories. Check for energising power tools that have the switch on invites misalignment or binding of moving parts, breakage of accidents. -
Page 25: Service
English 22 General Power Tool Safety Warnings e) Do not use a battery pack or tool that is damaged or modified. Damaged or modified batteries may exhibit unpredictable behaviour resulting in fire, explosion or risk of injury. f) Do not expose a battery pack or tool to fire or excessive temperature. - Page 26 English 22 General Power Tool Safety Warnings 0458-717-0121-A...
- Page 28 0458-717-0121-A englisch www.stihl.com *04587170121A* 0458-717-0121-A...