Siemens SIMATIC S7-1200 Getting Started
Hide thumbs
Also See for SIMATIC S7-1200:
- Function manual (527 pages) ,
- Manual (364 pages) ,
- System manual (338 pages)
Table of Contents
Advertisement
Quick Links
S7-1200 Getting started with S7-1200
SIMATIC
S7-1200
Getting started with S7-1200
Getting Started
11/2009
A5E02486791-01
Preface
______________
Quick review
______________
Installation
______________
Create a simple latch circuit
______________
Complete the user program
Use a watch table for
______________
monitoring
1
2
3
4
5
Advertisement
Table of Contents

Related Manuals for Siemens SIMATIC S7-1200


Summary of Contents for Siemens SIMATIC S7-1200
- Page 1 Preface S7-1200 Getting started with S7-1200 ______________ Quick review ______________ Installation SIMATIC ______________ Create a simple latch circuit S7-1200 ______________ Getting started with S7-1200 Complete the user program Use a watch table for ______________ monitoring Getting Started 11/2009 A5E02486791-01...
- Page 2 Note the following: WARNING Siemens products may only be used for the applications described in the catalog and in the relevant technical documentation. If products and components from other manufacturers are used, these must be recommended or approved by Siemens. Proper transport, storage, installation, assembly, commissioning, operation and maintenance are required to ensure that the products operate safely and without any problems.
-
Page 3: Preface
This quick-start guide provides only a quick introduction to the world of S7-1200. Before performing the exercises in this quick-start guide, review the safety guidelines and other SIMATIC S7-1200 Programmable Controller System Manual information in the Parts list... - Page 4 Contact your Siemens distributor or sales office for assistance in answering any technical questions, for training, or for ordering S7 products. Because your sales representatives are technically trained...
-
Page 5: Table Of Contents
Table of contents Preface ..............................3 Quick review .............................. 7 Basic information about how the CPU works.................8 1.1.1 Tasks performed every scan cycle ....................8 1.1.2 Operating modes of the CPU......................9 1.1.3 Digital data stored in bits, bytes, words and more ...............10 1.1.4 Data types supported by the S7-1200 ..................11 1.1.5... - Page 6 Table of contents Use a watch table for monitoring ......................51 Create a watch table ........................52 Monitor the data values in your CPU ..................53 Monitor the status in the LAD editor.................... 54 Force an input to a specific value ....................54 Going online ..........................
-
Page 7: Quick Review
Quick review With an integrated power supply and a variety of on-board input and output circuits, the S7-1200 CPU is a powerful controller. After you download your program, the CPU monitors the inputs and changes the outputs according to the logic of your user program, which can include Boolean logic, counters, timers, and complex math operations. -
Page 8: Basic Information About How The Cpu Works
Quick review 1.1 Basic information about how the CPU works Basic information about how the CPU works 1.1.1 Tasks performed every scan cycle The scan cycle provides consistent logic through the execution of the user program for a given cycle and prevents the flickering of physical output points that might change state multiple times in the process image output area. -
Page 9: Operating Modes Of The Cpu
Quick review 1.1 Basic information about how the CPU works 1.1.2 Operating modes of the CPU The CPU has three modes of operation: STOP mode, STARTUP mode, and RUN mode. Status LEDs on the front of the CPU indicate the current mode of operation. ●... -
Page 10: Digital Data Stored In Bits, Bytes, Words And More
Quick review 1.1 Basic information about how the CPU works 1.1.3 Digital data stored in bits, bytes, words and more The smallest unit of information in a digital system is known as a "bit" (for "binary digit"). A bit stores one of two possible states, either a "0"... -
Page 11: Data Types Supported By The S7-1200
Quick review 1.1 Basic information about how the CPU works 1.1.4 Data types supported by the S7-1200 The data type specifies not only the size of a data element, but also the structure of the bits within the data. Data type Size Range Constant Entry Examples... -
Page 12: Memory Areas Of The S7-1200
Quick review 1.1 Basic information about how the CPU works 1.1.5 Memory areas of the S7-1200 Note Using symbolic addresses instead of absolute addresses STEP 7 Basic facilitates symbolic programming. You create symbolic names or "tags" for the addresses of the data, whether as PLC tags relating to memory addresses and I/O points or as local variables used within a code block. -
Page 13: From Schematic Diagram To User Program
Quick review 1.2 From schematic diagram to user program From schematic diagram to user program To transform a circuit diagram into a PLC program, simply rotate your circuit diagram 90° to the left. Your power rail then appears on the left, with the grounding rail on the right. The switching elements of your circuit appear in the middle. -
Page 14: Converting The Schematic To Lad Instructions
Quick review 1.2 From schematic diagram to user program 1.2.1 Converting the schematic to LAD instructions Let’s have a closer look at the structure of the PLC program in a ladder diagram (LAD). This type of representation closely resembles a circuit diagram. - Page 15 Quick review 1.2 From schematic diagram to user program Negative logic for the input sensor scan ("normally closed contact"): 0V = low-level = "1" 24V = high-level = "0" Is current flowing? When there is no current flowing through the physical contact, then the result of the scan is "true"...
-
Page 16: Basic Electrical Circuits
Quick review 1.2 From schematic diagram to user program 1.2.2 Basic electrical circuits If you are changing over from contactor technology to PLC technology you will probably encounter switch combinations that cannot be converted directly into ladder diagram representation. (To aid in the comparison, the LAD networks have been arranged vertically.) Bridge circuits: The following figure shows a simple bridge circuit (on the left). - Page 17 Quick review 1.2 From schematic diagram to user program Diode circuits: When diodes have been used in "old" circuit diagrams, converting them into ladder diagram terms is not an altogether simple matter. Since diodes represent connection lines in principle but only conduct current in one direction, a similar solution is adopted here as with the bridge circuit.
-
Page 18: Basic Features Of Step 7 Basic
Quick review 1.3 Basic features of STEP 7 Basic Basic features of STEP 7 Basic STEP 7 Basic provides a user-friendly environment to develop controller logic, configure HMI visualization, and setup network communication. To help increase your productivity, STEP 7 Basic provides two different views of the project: a task-oriented set of portals that are organized on the functionality of the tools (Portal view), or a project-oriented view of the elements within the project (Project view). -
Page 19: Help When You Need It
Quick review 1.3 Basic features of STEP 7 Basic 1.3.1 Help when you need it To help you to find more information or to resolve issues quickly and efficiently, STEP 7 Basic provides intelligent point-of-need assistance. Hovering over an element of the software interface displays the tool tip. -
Page 20: Printing From The Online Help
Quick review 1.3 Basic features of STEP 7 Basic 1.3.2 Printing from the online help To print from the information system, click the "Print" button on the help window. The "Print" dialog allows you to select the topics to print. Make certain that the panel displays a topic. -
Page 21: Inserting Instructions
Quick review 1.3 Basic features of STEP 7 Basic 1.3.3 Inserting instructions Dragging and dropping instructions from the instruction tree STEP 7 Basic provides task cards that contain the instructions for your program. The instructions are grouped according to function. To create your program, you drag instructions from the task card onto a network. -
Page 22: Dragging And Dropping Between Editors
Quick review 1.3 Basic features of STEP 7 Basic 1.3.4 Dragging and dropping between editors To help you perform tasks quickly and easily, STEP 7 Basic allows you to drag and drop elements from one editor to another. For example, you can drag an input from the CPU to the address of an instruction in your user program. -
Page 23: Detecting The Configuration Of A Cpu
Quick review 1.3 Basic features of STEP 7 Basic 1.3.5 Detecting the configuration of a CPU If you have a physical CPU that you can connect to the programming device, it is easy to upload the configuration of the hardware. You must first connect the CPU to your programming device, and you must create a new project. -
Page 24: Changing The Settings For The Work Area
Quick review 1.3 Basic features of STEP 7 Basic 1.3.6 Changing the settings for the work area You can select a variety of settings, such as the appearance of the interface, language, or the directory for saving your work. Select the "Settings" command from the "Options"... -
Page 25: Installation
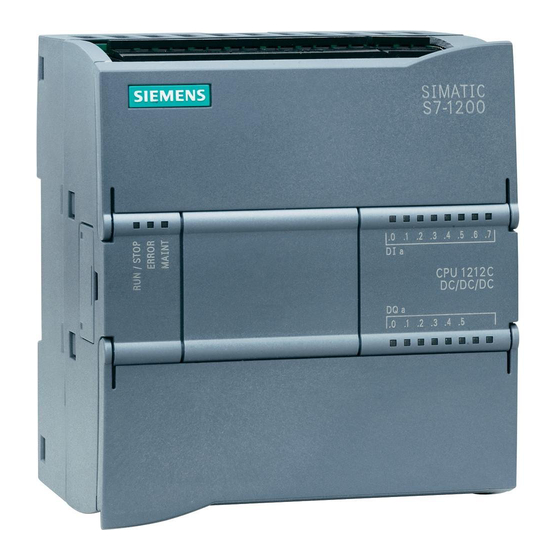
Installation Read this first for safety information Getting Started with S7-1200 This provides a quick introduction to the world of S7-1200, but S7-1200 Programmable Controller System Manual it is not a substitute for the . Before installing your CPU 1212C AC/DC/RLY, please review the safety guidelines and other S7-1200 Programmable Controller System Manual information described in the Note... -
Page 26: Dimensions And Guidelines
Installation 2.2 Dimensions and guidelines Dimensions and guidelines ① Thermal clearance: 25 mm Always consider the following guidelines when planning your installation: Separate the devices from heat, high voltage, and electrical noise. Provide adequate clearance for cooling and wiring. A 25 mm thermal zone must be provided above and below the unit for free air circulation. -
Page 27: Connecting The Hardware
Installation 2.3 Connecting the hardware Connecting the hardware Insert the input simulator The simulator connects to the 24 VDC and the input terminals. Ensure that all of the switches on the simulator are set to the "off" position. ① Insert the simulator. 1. -
Page 28: Installing Step 7 Basic
Installation 2.4 Installing STEP 7 Basic Connect the PROFINET cable The PROFINET cable is a standard CAT5 Ethernet cable with RJ45 connectors that connects the CPU with your computer or programming device. ① Insert one end of the PROFINET cable to the CPU. Insert the other end of the cable into the Ethernet port of your computer or programming device. -
Page 29: Create A Simple Latch Circuit
Create a simple latch circuit You should be familiar with the standard latching function: The output K0 is activated (ON) as soon as the push-button input PB1 closes (ON). Because the latching circuit utilizes the state of K0, K0 remains active (ON) after PB1 releases (OFF). -
Page 30: Create A Project For Your User Program
Create a simple latch circuit 3.1 Create a project for your user program Create a project for your user program Double-click the desktop icon to start STEP 7 Basic. After STEP 7 Basic opens, click "Create new project" in the Start portal. Enter the project name and click "Create". -
Page 31: Create A Simple Network In Your User Program
Create a simple latch circuit 3.2 Create a simple network in your user program Create a simple network in your user program To enable the latching circuit, use a normally open contact. The normally open contact provides power flow (current) when the switch is turned on. Click the normally open contact in the "Favorites"... - Page 32 Create a simple latch circuit 3.2 Create a simple network in your user program To "latch" the coil on after the "On" switch releases, you create a parallel branch. 1. Select the rail of the network. 2. Click the "Open branch" in the "Favorites"...
-
Page 33: Enter The Tags And Addresses For The Instructions
Create a simple latch circuit 3.3 Enter the tags and addresses for the instructions Enter the tags and addresses for the instructions The next step is to associate the contacts and coils to the inputs and outputs of the CPU. You create "PLC tags"... - Page 34 Create a simple latch circuit 3.3 Enter the tags and addresses for the instructions STEP 7 Basic saves the tags in a tag table. You can enter the tag address directly from the tag table to the instruction. 1. Select the contact on the branch. 2.
-
Page 35: Configure The Cpu
Create a simple latch circuit 3.4 Configure the CPU Configure the CPU Uploading the configuration of the CPU You can use the "Detect CPU" feature of the Device Configuration to upload the hardware configuration of the CPU. 1. In the Project tree, expand the "PLC" container. 2. - Page 36 Create a simple latch circuit 3.4 Configure the CPU Configuring the properties for the CPU You use the properties to configure the operating parameters for the CPU. For example, the default setting for startup after a power cycle is to have the CPU go to STOP mode. For this exercise, change the startup property: 1.
-
Page 37: Download The User Program To The Cpu
Create a simple latch circuit 3.5 Download the user program to the CPU Downloading the configuration to the CPU You can now do download the configuration: 1. Select the CPU. 2. Click the "Download" button on the toolbar. After connecting to the CPU, STEP 7 Basic displays the "Load preview" dialog. Click "Load"... -
Page 38: Test The Operation Of Your Sample User Program
Create a simple latch circuit 3.6 Test the operation of your sample user program Test the operation of your sample user program ① Turn the "On" switch (I0.0) on. The status LEDs for "Start" (I0.0) and "Run" (Q0.0) turn ② Turn the "On"... -
Page 39: Reviewing The Tasks For The First Exercise
Create a simple latch circuit 3.7 Reviewing the tasks for the first exercise Reviewing the tasks for the first exercise Congratulations! You have transformed a simple electrical circuit into LAD instructions by performing the following tasks. Using the current path to create a logical flow for the instructions ... - Page 40 Create a simple latch circuit 3.7 Reviewing the tasks for the first exercise Getting started with S7-1200 Getting Started, 11/2009, A5E02486791-01...
-
Page 41: Complete The User Program
Complete the user program In the next exercise, you will complete the user program to include the rest of the circuit by inserting an on-delay timer and an off-delay timer. Note S7-1200 does not limit the number of timers or counters in your user program. The data for each timer is stored in a data block, so you are limited only by the size of your user program in relation to the amount of load memory for your CPU. -
Page 42: Add An On-Delay Timer To Delay The Start Of An Output
Complete the user program 4.1 Add an on-delay timer to delay the start of an output Add an on-delay timer to delay the start of an output In this exercise, you will expand on the latch circuit by inserting an on-delay timer to turn on an output after a preset amount of time. - Page 43 Complete the user program 4.1 Add an on-delay timer to delay the start of an output Insert an on-delay timer The second network of your user program will use a TON instruction that turns on 5 seconds after the "Run" output of the latching circuit turns on. First, enter the contact that will activate the timer.
- Page 44 Complete the user program 4.1 Add an on-delay timer to delay the start of an output Now insert a coil that will turn on after 5 seconds (the preset value for the TON instruction). For this exercise, enter "M0.0" for the address. This stores the value in the bit memory (M) area.
-
Page 45: Turn On An Output For 5 Seconds
Complete the user program 4.2 Turn on an output for 5 seconds Turn on an output for 5 seconds Next, you add an off-delay timer (TOF) to the third network of your user program. You use a TOF instruction to hold an output (Q) on for a preset amount of time after the input (IN) turns off. - Page 46 Complete the user program 4.2 Turn on an output for 5 seconds Use an off-delay timer to turn on an output for 5 seconds The third network of your user program will use a TOF instruction that turns on and stays on for 5 seconds after the TON timer (Page 42) turns on.
- Page 47 Complete the user program 4.2 Turn on an output for 5 seconds Saving your work in the project You can now save your work. Simply click the "Save project" button on the toolbar. Download and test the Timer instructions Now you can download your user program. Open the program editor and simply click the "Download"...
-
Page 48: Editing Your User Program For A Different Structure
Complete the user program 4.3 Editing your user program for a different structure Editing your user program for a different structure The networks that you created match the circuit diagram. This helps other people to understand the logic of the user program, such as for troubleshooting or for future modification. -
Page 49: Getting Started With S7
Complete the user program 4.3 Editing your user program for a different structure Saving your work in the project You can now save your work. Simply click the "Save project" button on the toolbar. After saving your modified user program, click the "Download" button. In the "Load preview"... - Page 50 Complete the user program 4.3 Editing your user program for a different structure Getting started with S7-1200 Getting Started, 11/2009, A5E02486791-01...
-
Page 51: Use A Watch Table For Monitoring
Use a watch table for monitoring When you tested the latching circuit (Page 38), you used the physical switch on the simulator and watched the lights turn on and off on the front of the CPU. For this exercise, you will use the online functionality of STEP 7 Basic to monitor the operation of your user program. -
Page 52: Create A Watch Table
Use a watch table for monitoring 5.1 Create a watch table Create a watch table To create a watch table: 1. Expand the "Watch tables" container. 2. Double-click "Add new watch table" to open a new watch table. Enter the tags by clicking in the "Name" field. Type a character and select the tag from the list. -
Page 53: Monitor The Data Values In Your Cpu
Use a watch table for monitoring 5.2 Monitor the data values in your CPU Monitor the data values in your CPU To monitor the tags, you must have an online connection to the CPU. Simply click the "Go online" button in the toolbar. When you have connected to the CPU, STEP 7 Basic turns the headers of the work areas orange. -
Page 54: Monitor The Status In The Lad Editor
Use a watch table for monitoring 5.3 Monitor the status in the LAD editor Monitor the status in the LAD editor You can also monitor the status of the tags in the LAD editor. Use the editor bar to display the LAD editor. - Page 55 Use a watch table for monitoring 5.4 Force an input to a specific value Now click the "Show/hide force columns" button to display the "Force value" column. Right-click the "Force value" cell to display the context menu. Select the "Force to 1" command to set "On:P"...
-
Page 56: Going Online
. These manuals contain useful information that explains the capabilities of the S7-1200. Don't forget to check out the customer support web site (http://www.siemens.com/automation/support-request) for FAQs and other types of useful documentation. Getting started with S7-1200 Getting Started, 11/2009, A5E02486791-01... -
Page 57: Index
Index AND logic, 14, 31 Data types, 11 Appearance of STEP 7, 24 Deleting networks, 47 Detect CPU, 23, 35 Dimensions, 26 Discover CPU, 23, 35 Displaying the contents and index (online help), 19 Basic electrical circuits Documentation, 19 bridge circuit, 16 Drag and drop change-over switch, 16 between editors, 22... - Page 58 Index MRES, 56 I memory, 12 address peripheral inputs, 54 changing tags, 47 enter addresses, 33 M memory, 7 force, 54 changing tags, 47 monitor, 53 enter addresses, 42 tags, 33 tags, 42 watch table, 53, 54 Memory areas, 7 Information system, 19 address peripheral inputs, 54 Displaying the contents and index, 19...
- Page 59 Index Physical size, 26 S7-1200 force, 54 bit memory (M), 7 monitoring, 53 data types, 11 MRES, 56 force, 54 operator panel, 56 inputs and outputs, 7 physical size, 26 load memory, 7 safety guidelines, 25, 26 M memory, 7 saving, 32, 34, 37, 44, 46, 48 monitoring, 53 Safety guidelines, 25, 26...
- Page 60 Index TIA Portal User interface Portal view, 18 Portal view, 18 Project view, 18 Project view, 18 Timers number of timers and counters supported, 41 TOF (on-delay), 44 TON (on-delay), 41 Watch table Transform a circuit diagram, 13, 14 create, 52 force, 51, 54 monitor, 51, 53 Work memory, 7...