Sony DCR-TRV950 Network Function Operating Instructions Manual
Digital video camera recorder
Hide thumbs
Also See for DCR-TRV950 Network Function:
- Manual (65 pages) ,
- Specifications (2 pages) ,
- Operating instructions manual (387 pages)
Table of Contents
Advertisement
Quick Links
Digital
Video Camera
Recorder
Operating Instructions
Before operating the unit, please read this manual thoroughly,
and retain it for future reference.
Owner's Record
The model and serial numbers are located on the bottom. Record the
serial number in the space provided below. Refer to these numbers
whenever you call upon your Sony dealer regarding this product.
Model No. DCR-TRV
Serial No.
DCR-TRV950
DCR-TRV940/TRV950
©2002 Sony Corporation
3-075-494-13 (1)
Model No. AC-
Serial No.
TM
SERIES
Advertisement
Table of Contents

Related Manuals for Sony DCR-TRV950 Network Function


Summary of Contents for Sony DCR-TRV950 Network Function
-
Page 1: Digital Video Camera
Owner’s Record The model and serial numbers are located on the bottom. Record the serial number in the space provided below. Refer to these numbers whenever you call upon your Sony dealer regarding this product. Model No. DCR-TRV Serial No. -
Page 2: Declaration Of Conformity
Congratulations on your purchase of this Sony Handycam. With your Handycam, you can capture life’s precious moments with superior picture and sound quality. Your Handycam is loaded with advanced features, but at the same time it is very easy to use. You will soon be producing home video that you can enjoy for years to come. - Page 3 “Memory Stick” This device complies with Part 15 of the FCC Rules. Operation is subject to the following two conditions: (1) This device may not cause harmful interference, and (2) this device must accept any interference received, including interference that may cause undesired operation.
-
Page 4: Main Features
Main Features Recording moving pictures or still images, and playing them back •Viewing images recorded on a “Memory Stick” using the USB cable (p. 199, 203) •Viewing moving pictures recorded on tapes using the USB cable (p. 194) •Capturing images on your computer from your camcorder using the USB cable (p. - Page 5 Main Features Accessing the Internet via a Bluetooth compliant device (DCR-TRV950 only) Other uses Functions for adjusting the exposure in the recording mode •BACK LIGHT (p. 34) •SPOT LIGHT (p. 35) •Recording images with the flash (p. 48, 139) •PROGRAM AE (p. 67) •Adjusting the exposure manually (p.
-
Page 6: Table Of Contents
Table of contents Main Features Quick Start Guide – Recording on a tape ... 8 – Recording on a “Memory Stick” ... 10 Getting Started Using this manual ... 12 Checking supplied accessories ... 14 Step 1 Preparing the power supply ... 15 Installing the battery pack ... - Page 7 Table of contents “Memory Stick” Operations Using a “Memory Stick” – Introduction ... 126 Recording still images on a “Memory Stick” – Memory Photo recording ... 135 Recording images from a tape as still images ... 144 Superimposing a still image in the “Memory Stick”...
-
Page 8: Recording On A Tape
Quick Start Guide – Recording on a tape Connecting the power cord Use the battery pack when using your camcorder outdoors (p. 15). AC power adaptor (supplied) Inserting a cassette Slide OPEN/Z EJECT in the direction of the arrow to open the lid. -
Page 9: Recording A Picture
Recording a picture Remove the lens cap. Press OPEN to open the LCD panel. The picture appears on the screen. When you purchase your camcorder, the clock setting is set to off. If you want to record the date and time for a picture, set the clock setting before recording (p. 20). Monitoring the playback picture on the LCD screen (p. -
Page 10: Recording On A "Memory Stick
Quick Start Guide – Recording on a “Memory Stick” Connecting the power cord Use the battery pack when using your camcorder outdoors (p. 15). AC power adaptor (supplied) Inserting a “Memory Stick” Slide MEMORY OPEN in the direction of the arrow to open the “Memory Stick”... - Page 11 Recording a still image on a “Memory Stick” Press OPEN to open the LCD panel. The picture appears on the screen. Viewfinder When the LCD panel is closed, use the viewfinder with your eye against the eyecup. Adjust the viewfinder lens to your eyesight (p. 30). When you purchase your camcorder, the clock setting is set to off.
-
Page 12: Getting Started
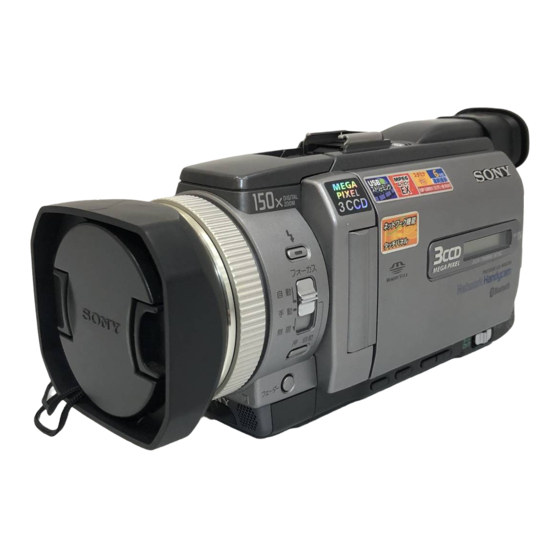
— Getting Started — Using this manual The instructions in this manual are for the two models listed in the table below. Before you start reading this manual and operating your camcorder, check the model number by looking at the bottom of your camcorder. The DCR-TRV950 is the model used for illustration purposes. -
Page 13: Precautions On Camcorder Care
Using this manual Note on TV color systems TV color systems differ depending on the country or region. To view your recordings on a TV, you need an NTSC system-based TV. Copyright precautions Television programs, films, video tapes, and other materials may be copyrighted. Unauthorized recording of such materials may be contrary to the copyright laws. -
Page 14: Checking Supplied Accessories
Checking supplied accessories Make sure that the following accessories are supplied with your camcorder. 1 AC-L10A/L10B/L10C AC power adaptor (1), power cord (1) (p. 16) 2 NP-FM50 battery pack (1) (p. 15, 16) 3 A/V connecting cable (1) (p. 45) 4 Wireless Remote Commander (1) (p. -
Page 15: Step 1 Preparing The Power Supply
Step 1 Preparing the power supply Installing the battery pack (1) Lift up the viewfinder. (2) Slide the battery pack down until it clicks. To remove the battery pack (1) Lift up the viewfinder. (2) Slide the battery pack out in the direction of the arrow while pressing BATT down. -
Page 16: Charging The Battery Pack
Step 1 Preparing the power supply Charging the battery pack Use the battery pack after charging it for your camcorder. Your camcorder operates only with the “InfoLITHIUM” battery pack (M series). See page 231 for details of “InfoLITHIUM” battery pack. (1) Open the DC IN jack cover and connect the AC power adaptor supplied with your camcorder to the DC IN jack with the plug’s v mark facing up. -
Page 17: Charging Time
Step 1 Preparing the power supply Note Prevent metallic objects from coming into contact with the metal parts of the DC plug of the AC power adaptor. This may cause a short-circuit, damaging the AC power adaptor. Remaining battery time indicator The remaining battery time indicator in the display window indicates the approximate recording time with the viewfinder. -
Page 18: Playing Time
This unit is compatible with the “InfoLITHIUM” battery pack (M series). Your camcorder operates only with the “InfoLITHIUM” battery. “InfoLITHIUM” M series battery packs have the “InfoLITHIUM” is a trademark of Sony Corporation. Playing time with LCD closed mark. -
Page 19: Connecting To A Wall Outlet
DC IN jack, even when the power cord is not plugged into a wall outlet. Using a car battery Use Sony Car Battery Adaptor (optional). Refer to the operating instructions of the Car Battery Adaptor for further information. -
Page 20: Step 2 Setting The Date And Time
Step 2 Setting the date and time Set the date and time when you use your camcorder for the first time. “CLOCK SET” will be displayed each time that you set the POWER switch to CAMERA or MEMORY/ NETWORK (DCR-TRV950 only) unless you set the date and time settings. If you do not use your camcorder for about four months, the date and time may be cleared from memory (bars may appear) because the built-in rechargeable battery installed in your camcorder will have been discharged (p. - Page 21 Step 2 Setting the date and time MENU Note Instead of DST, SUMMERTIME is displayed on the screen for some models. If you do not set the date and time “--:--:--” and “--- -- ----” are recorded on the data code of the tape and the “Memory Stick.”...
- Page 22 Step 2 Setting the date and time Simple setting of clock by a time difference You can easily set the clock to the local time by setting a time difference. Select AREA SET, DST SET* in the menu settings. See page 216 for more information. * Instead of DST, SUMMERTIME is displayed on the screen for some models.
-
Page 23: Step 3 Inserting A Cassette
Step 3 Inserting a cassette (1) Prepare the power supply. (2) Slide OPEN/Z EJECT in the direction of the arrow and open the lid. The cassette compartment automatically lifts up and opens. (3) Insert the cassette straight as far as possible into the cassette compartment with the window facing out and the write-protect tab facing upward. -
Page 24: Step 4 Using The Touch Panel
Step 4 Using the touch panel Your camcorder has operation buttons on the LCD screen. Touch the LCD screen directly with your finger or the supplied stylus (DCR-TRV950 only) to operate each function. This section describes how to operate the touch panel during recording or playing back images on a tape. - Page 25 Step 4 Using the touch panel Notes •When using the touch panel, press operation buttons with your thumb supporting the LCD panel from the back side of it or press those buttons lightly with your index finger. •Do not press the LCD screen with sharp-pointed objects other than the supplied stylus.
-
Page 26: Recording - Basics
Recording a picture Your camcorder automatically focuses for you. (1) Remove the lens cap by pressing both knobs on its sides and pull the lens cap string to fix it. (2) Prepare the power supply and insert a cassette. See “Step 1” to “Step 3” for more information (p. - Page 27 Recording a picture Notes •Fasten the grip strap firmly. •The recording data (date/time or various settings when recorded) are not displayed while recording. However, they are recorded automatically on the tape. To display the recording data, press the DATA CODE button during playback you can also use the Remote Commander for this operation (p.
-
Page 28: Adjusting The Lcd Screen
Recording a picture After recording (1) Set the POWER switch to OFF (CHG). (2) Close the LCD panel. (3) Eject the cassette. (4) Remove the battery pack. Adjusting the LCD screen The LCD panel can be opened up to 90 degrees. The LCD panel moves about 90 degrees to the viewfinder side and about 180 degrees to the lens side. -
Page 29: Adjusting The Brightness Of The Lcd Screen
Recording a picture Adjusting the brightness of the LCD screen (1) Press FN and select PAGE2 while the POWER switch is set to CAMERA or MEMORY/NETWORK (DCR-TRV950 only). When you set the POWER switch to VCR, press FN to display PAGE1. (2) Press LCD BRT. -
Page 30: Adjusting The Viewfinder
Recording a picture Adjusting the viewfinder If you record pictures with the LCD panel closed, check the picture with the viewfinder. Adjust the viewfinder lens to your eyesight so that the images in the viewfinder come into sharp focus. Lift up the viewfinder and move the viewfinder lens adjustment lever. Viewfinder backlight You can change the brightness of the backlight. -
Page 31: Digital Zoom (P
Recording a picture Using the zoom feature Move the power zoom lever a little for a slower zoom. Move it further for a faster zoom. Using the zoom sparingly results in better-looking recordings. W : Wide-angle (subject appears farther away) T : Telephoto (subject appears closer) To use zoom greater than 12×... -
Page 32: Shooting With The Mirror Mode
Recording a picture Shooting with the Mirror Mode This feature allows the camera subject to view him-or herself on the LCD screen. The subject uses this feature to check his or her own image on the LCD screen while you look at the subject in the viewfinder. Set the POWER switch to CAMERA or MEMORY/NETWORK (DCR-TRV950 only). - Page 33 Recording a picture Indicators displayed in the recording Indicators are not recorded on tapes. Remaining battery time Cassette memory This appears when using a cassette with cassette memory. 0:00:01 45min JUL 4 2002 12:05:56PM Remaining battery time indicator during recording The remaining battery time indicator roughly indicates the continuous recording time.
-
Page 34: Shooting Backlit Subjects - Back Light
Recording a picture Shooting backlit subjects – BACK LIGHT When you shoot a subject with the light source behind the subject or a subject with a light background, use the backlight function. Press BACK LIGHT while the POWER switch is set to CAMERA or MEMORY/ NETWORK (DCR-TRV950 only). -
Page 35: Shooting Subjects Lit By Strong Light - Spot Light
Recording a picture Shooting subjects lit by strong light – SPOT LIGHT This function prevents people's faces, for example, from appearing excessively white when shooting subjects lit by strong light, such as in the theater. Press SPOT LIGHT while the POWER switch is set to CAMERA or MEMORY/ NETWORK (DCR-TRV950 only). -
Page 36: Self-Timer Recording
Recording a picture Self-timer recording Recording with the self-timer starts in 10 seconds automatically. You can also use the Remote Commander for this operation. (1) In the standby, press FN and select PAGE2. (2) Press SELFTIMER. (3) Press START/STOP. The self-timer starts counting down from 10 with a beep. In the last two seconds of the countdown, the beep gets faster, then recording starts automatically. -
Page 37: Checking Recordings - End Search / Editsearch / Rec Review
Checking recordings – END SEARCH / EDITSEARCH / Rec Review You can use these buttons to check the recorded picture or shoot so that the transition between the last recorded scene and the next scene you record is smooth. END SEARCH You can go to the end of the recorded section after you record. -
Page 38: Rec Review
Checking recordings – END SEARCH / EDITSEARCH / Rec Review Rec Review You can check the last recorded section. Press the – 7 side of EDITSEARCH momentarily in the standby. The section you have stopped most recently will be played back for a few seconds, and then your camcorder will return to the standby. -
Page 39: Playback - Basics
— Playback – Basics — Playing back a tape You can monitor the playback picture on the screen. If you close the LCD panel, you can monitor the playback picture in the viewfinder. You can control playback using the Remote Commander supplied with your camcorder. (1) Prepare the power supply and insert the recorded tape. - Page 40 Playing back a tape When monitoring on the LCD screen You can turn the LCD panel over and move it back to the camcorder body with the LCD screen facing out. If you leave the power on for a long time Your camcorder gets warm.
-
Page 41: To Display The Screen Indicators - Display Function
Playing back a tape To display the screen indicators – Display function Press DISPLAY/TOUCH PANEL on your camcorder or DISPLAY on the Remote Commander supplied with your camcorder. The indicators disappear on the screen. To make the indicators appear, press DISPLAY/TOUCH PANEL or DISPLAY again. DATA CODE About date/time and various settings Your camcorder automatically records not only images on the tape but also the... - Page 42 Playing back a tape To not display various settings Set DATA CODE to DATE in the menu settings (p. 216). The display changes as follows when you press DATA CODE : date/time y no indicator Various settings Various settings are your camcorder’s information when you have recorded. In the recording, the various settings will not be displayed.
-
Page 43: Various Playback Modes
Playing back a tape Various playback modes To operate video control buttons, set the POWER switch to VCR. To play back pause (viewing a still picture) Press X during playback. To resume normal playback, press N or X. To advance the tape Press M in the stop mode. - Page 44 Playing back a tape In the various playback modes •Sound is muted. •The previous picture may remain as a mosaic image during playback. When the playback pause lasts for five minutes Your camcorder automatically enters the stop mode. To resume playback, press N. Slow playback The slow playback can be performed smoothly on your camcorder.
-
Page 45: Viewing The Recording On Tv
Viewing the recording on TV Connect your camcorder to your TV with the A/V connecting cable supplied with your camcorder to watch playback picture on the TV screen. You can operate the video control buttons in the same way as when you monitor playback pictures on the screen. When monitoring playback pictures on the TV screen, we recommend that you power your camcorder from a wall outlet using the AC power adaptor (p. -
Page 46: Advanced Recording Operations
— Advanced Recording Operations — Recording still images on a “Memory Stick” during tape recording You can record still images on a “Memory Stick” in the tape recording or tape recording standby. You can also record still images on a tape (p. 51). Before operation •Insert a “Memory Stick”... - Page 47 Recording still images on a “Memory Stick” during tape recording Image size of still images Image size is automatically set to 640 × 480. When you want to record still images in different size, use the Memory Photo recording (p. 135). When the POWER switch is set to CAMERA You cannot select image quality.
- Page 48 Recording still images on a “Memory Stick” during tape recording Recording images with the flash The flash pops up automatically. The default setting is auto (no indicator). To change the flash mode, press screen. Each press of Auto red-eye reduction: The flash fires before recording to reduce red-eye. Forced flash: No flash: The flash is automatically adjusted to the appropriate brightness.
- Page 49 Recording still images on a “Memory Stick” during tape recording You cannot shoot images with the flash during the following operations: – Tape Recording – Shutter speed (1/30 or smaller) adjustment The flash does not fire even if you select auto (no indicator) and (auto red-eye reduction) during the following operations: –...
- Page 50 Recording still images on a “Memory Stick” during tape recording Self-timer recording You can record still images on a “Memory Stick” with the self-timer. You can also use the Remote Commander for this operation. Before operation •Insert a “Memory Stick” into your camcorder. •Set PHOTO REC in MEMORY.) (1) In the standby, press FN and select PAGE2.
-
Page 51: Recording Still Images On A Tape - Tape Photo Recording
Recording still images on a tape – Tape Photo recording You can record still images such as photographs on tapes. You can record about 510 images in the SP mode and about 765 images in the LP mode on a 60-minute tape. (1) In the standby, set PHOTO REC in (2) Keep pressing PHOTO lightly until a still image appears. - Page 52 Recording still images on a tape – Tape Photo recording Notes •During tape photo recording, you cannot change the mode or setting. •When recording a still image, do not shake your camcorder. If you do so, the image may flutter. •You cannot use PHOTO during the following operations: ( The on the screen.) –...
-
Page 53: Using The Wide Mode
Using the wide mode You can record a 16:9 wide picture to watch on a 16:9 wide-screen TV (16:9WIDE). If you connect a TV compatible with the ID-1/ID-2 system, the screen size is automatically selected. Black bands appear on the screen during recording in 16:9WIDE mode [a]. The picture during playback on a normal TV [b] or on a wide-screen TV [c] is compressed in the longwise direction. - Page 54 Using the wide mode In the wide mode You cannot select the following functions: – Recording still images on a “Memory Stick” in the tape recording or recording standby – BOUNCE – OLD MOVIE During recording You cannot select or cancel the wide mode. When you cancel the wide mode, set your camcorder to the standby and then set 16:9WIDE to OFF in the menu settings.
-
Page 55: Using The Fader
Using the fader You can fade in or out to give your recording a more professional appearance. STBY FADER M. FADER (mosaic) BOUNCE 1) 2) OVERLAP WIPE MONOTONE When fading in, the picture gradually changes from black-and-white to color. When fading out, the picture gradually changes from color to black-and-white. You can use the bounce when D ZOOM is set to OFF in the menu settings. - Page 56 Using the fader (1) When fading in [a] In the standby, press FADER until the desired fader indicator flashes. When fading out [b] In the recording, press FADER until the desired fader indicator flashes. The indicator changes as follows: FADER (no indicator)T The last selected fader is indicated first of all.
- Page 57 Using the fader When you set the POWER switch to MEMORY/NETWORK (DCR-TRV950 only) You cannot use the fader. While using BOUNCE, you cannot use the following functions: – Zoom – Picture effect – Shutter speed adjustment – Exposure – Flexible Spot meter –...
-
Page 58: Using Special Effects - Picture Effect
Using special effects – Picture effect You can digitally process images to obtain special effects like those in films or on TV. NEG. ART [a] : The color and brightness of the picture are reversed. SEPIA : B&W : SOLARIZE [b] : The light intensity becomes clearer, to make the picture look more like SLIM [c] : STRETCH [d] : The picture expands horizontally. -
Page 59: Using Special Effects - Digital Effect
Using special effects – Digital effect You can add special effects to recorded pictures using the various digital functions. Sound is recorded normally. STILL You can record a still image so that it is superimposed on a moving picture. FLASH (FLASH MOTION) You can record still images successively at constant intervals. - Page 60 Using special effects – Digital effect (1) Press FN to display PAGE1 while the POWER switch is set to CAMERA. (2) Press DIG EFFT. The screen to select a desired digital effect appears. (3) Press a desired mode. In the STILL and LUMI. modes, the still image is stored in memory.
- Page 61 Using special effects – Digital effect Notes •The following functions do not work during digital effect: – Recording still images on a “Memory Stick” in the tape recording or recording standby – Tape photo recording – Fader – Shutter speed (1/30 or smaller) adjustment •The following functions do not work in the old movie: –...
-
Page 62: Presetting The Adjustment For Picture Quality - Custom Preset
Presetting the adjustment for picture quality – Custom preset You can preset the camcorder to record the picture with the desired picture quality. When presetting, adjust the picture by shooting a subject and checking the picture displayed on a TV (p. 45). (1) Press CUSTOM PRESET to display the CUSTOM PRESET menu while the POWER switch is set to CAMERA or MEMORY/NETWORK (DCR-TRV950 only). - Page 63 Presetting the adjustment for picture quality – Custom preset Items to be adjusted Item Meaning COLOR LVL Color intensity SHARPNESS Sharpness WB SHIFT White balance AE SHIFT Brightness AGC LIMIT Auto Gain-limit RESET Sets items above to the default settings. To cancel using the custom preset Select OFF in step 4.
-
Page 64: Using The Guide Frame
Using the guide frame You can easily make the picture be on a horizontal line using the guide frame. The guide frame is not recorded in the tape or the “Memory Stick.” (1) Set GUIDE FRAME in switch is set to CAMERA or MEMORY/NETWORK (DCR-TRV950 only). (p210) (2) Press MENU to erase the menu display. -
Page 65: Shooting With The Zebra Pattern
Shooting with the zebra pattern You can set the camcorder to display a zebra pattern (diagonal stripes) in the portion of the picture on the screen with a subject whose brightness exceeds a certain level. You can check the picture level of a subject by displaying the zebra pattern. Use the zebra pattern as a guide for adjusting the exposure so that you can get the desired picture. -
Page 66: Using The Color Bar
Using the color bar If you press COLOR BAR, the color bar is displayed on the screen. Use the color bar in the following cases: – At the beginning of the recording, the recorded images may be unstable. To avoid this, record the color bar first and start recording the desired images when the captured images become clear. -
Page 67: Shooting With Manual Adjustment
Shooting with manual adjustment AUTO LOCK selector Set the selector as shown below to maintain or release the settings of the functions. Manually adjusted functions are retained even if you set the AUTO LOCK selector to AUTO LOCK. However, all functions will automatically return to the default settings five minutes after removing the power supply. - Page 68 Shooting with manual adjustment (1) Set the AUTO LOCK selector to the center (auto lock release) position while the POWER switch is set to CAMERA or MEMORY/NETWORK(DCR-TRV950 only). (p. 67) (2) Press PROGRAM AE. (3) Turn the SEL/PUSH EXEC dial to select the desired mode. The indicator changes as follows: AUTO LOCK...
- Page 69 Shooting with manual adjustment Notes •Because your camcorder is set to focus only on subjects in the middle to far distance, you cannot take close-ups in the following modes: – Sports lesson – Beach & ski •Your camcorder is set to focus only on distant subjects in the following modes: –...
-
Page 70: Adjusting The Shutter Speed
Shooting with manual adjustment Adjusting the shutter speed You can adjust the shutter speed manually to suit your preference and with its shutter speed fixed. (1) Set the AUTO LOCK selector to the center (auto lock release) position while the POWER switch is set to CAMERA or MEMORY/NETWORK(DCR-TRV950 only). - Page 71 Shooting with manual adjustment When the shutter speed is fast When shooting a bright subject, vertical lines may appear on the image, but this is not a malfunction. In such cases, set the shutter speed a little slower. When shooting at slow shutter speed At slow shutter speed, automatic focus may be lost.
-
Page 72: Adjusting The White Balance
Shooting with manual adjustment Adjusting the white balance White balance adjustment makes white subjects look white and allows more natural color balance for camera recording. You can obtain better results by adjusting the white balance manually when lighting conditions change quickly or when recording outdoors: e.g., neon signs, fireworks. - Page 73 Shooting with manual adjustment If you have selected When you set the white balance to one-push white balance mode, the setting is locked and maintained even if lighting conditions change. You can achieve recording with natural colors without the image being affected by ambient light. (1) Shoot a white object such as paper fully with recording standby.
-
Page 74: Adjusting The Exposure
Shooting with manual adjustment Adjusting the exposure You can manually adjust and set the exposure. Adjust the exposure manually in the following cases: – When you need a fine adjustment for the backlit subjects. – When shooting subjects and dark backgrounds. –... -
Page 75: Using The Spot Light-Metering - Flexible Spot Meter
Shooting with manual adjustment Using the spot light-metering – Flexible Spot Meter You can take a picture with the appropriate exposure automatically for just the point you want to focus on and with its exposure fixed. Use the Flexible Spot Meter in the following cases: –... -
Page 76: Focusing Manually
Focusing manually You can gain better results by manually adjusting the focus in the following cases. Normally, focus is automatically adjusted. •The autofocus is not effective when shooting: – Subjects through glass coated with water droplets – Horizontal stripes – Subjects with little contrast with backgrounds such as walls and sky •When you want to change the focus from a subject in the foreground to a subject in the background. - Page 77 Focusing manually To focus precisely It is easier to focus on subjects if you adjust the zoom to shoot at the “W” (wide-angle) after focusing at the “T” (telephoto) position. When you shoot close to the subject Focus at the end of the “W” (wide-angle) position. 9 changes as follows: when recording a distant subject when the subject is too close to focus on...
-
Page 78: Using The Spot Focus - Spot Focus
Using the spot focus – Spot Focus You can take a picture with the appropriate focus automatically for just the point you want to focus on and with its focus fixed. (1) Set FOCUS to MAN while the POWER switch is set to CAMERA or MEMORY/NETWORK (DCR-TRV950 only). -
Page 79: Adjusting Recording Level Manually - Sound Recording Level
Adjusting recording level manually – Sound recording level You can adjust the recording sound level. Use headphones to monitor the sound when you adjust it. (1) Set MIC LEVEL in switch is set to CAMERA or VCR. (p. 214) (2) Press MENU to erase the menu display. (3) Press AUDIO LEVEL to display the recording level adjustment display in standby mode. - Page 80 Adjusting recording level manually – Sound recording level Notes on the manual adjustment •The recording level setting is retained for about five minutes even after removing the power supply. •The recording level indicator appears at the lower-right on the screen. The sound input through the AUDIO/VIDEO jack or the DV Interface You cannot adjust the recording level.
-
Page 81: Interval Recording
Interval recording You can make a time-lapse recording by setting the camcorder to automatically record and standby sequentially. You can achieve an excellent recording for flowering, gradual appearances, etc., with this function. Example [a] REC TIME [b]Waiting time [c] INTERVAL (1) In the standby, set INT. - Page 82 Interval recording POWER MEMORY/ NETWORK STBY INTERVAL MENU (4) Press MENU to erase the menu display. The INTERVAL indicator flashes. (5) Press START/STOP to start interval recording. The INTERVAL indicator lights up. To cancel the interval recording Perform either of the following: –...
-
Page 83: Frame By Frame Recording - Frame Recording
Frame by frame recording – Frame recording You can make a recording with a stop-motion animated effect using frame recording. To create this effect, alternately move the subject a little and make a frame recording. We recommend that you use a tripod, and operate your camcorder using the Remote Commander after step 3. -
Page 84: Advanced Playback Operations
Playing back tapes with picture effect During playback, you can process a scene using the following picture effect: NEG. ART, SEPIA, B&W and SOLARIZE. (1) In the playback or playback pause, press MENU, then select P EFFECT in with the SEL/PUSH EXEC dial, then press the dial (p. 208). (2) Turn the SEL/PUSH EXEC dial to select the desired mode, then press the dial. -
Page 85: Playing Back Tapes With Digital Effect
Playing back tapes with digital effect During playback, you can process a scene using the following digital effect: STILL, FLASH, LUMI. and TRAIL. (1) In the playback or playback pause, press FN and select PAGE2. (2) Press DIG EFFT. The screen to select a desired digital effect appears. (3) Press a desired mode. -
Page 86: Enlarging Images Recorded On Tapes - Tape Pb Zoom
Enlarging images recorded on tapes – Tape PB ZOOM You can enlarge playback images recorded on tapes. Besides the operation described here, your camcorder can enlarge still images recorded on the “Memory Stick” (p. 173). (1) In the playback or playback pause, press FN and select PAGE2. (2) Press PB ZOOM. - Page 87 Enlarging images recorded on tapes – Tape PB ZOOM Notes •You cannot process externally input scenes using the PB ZOOM. •You cannot record images on a tape on your camcorder when you have processed the image using the tape PB ZOOM. However, you can record images on a VCR using your camcorder as a player.
-
Page 88: Quickly Locating A Scene - Zero Set Memory
Quickly locating a scene – ZERO SET MEMORY Your camcorder goes forward or backward to automatically stop at a desired scene having a tape counter value of “0:00:00”. Use the Remote Commander for this operation. (1) In the playback, press DISPLAY when the tape counter does not appear. (2) Press ZERO SET MEMORY at the point you want to locate later. -
Page 89: Searching The Boundaries Of A Recorded Tape By Title - Title Search
Searching the boundaries of a recorded tape by title – TITLE SEARCH If you use a cassette with cassette memory, you can search for the boundaries of a recorded tape by title. Use the Remote Commander for this operation. Before operation Set CM SEARCH in (1) Set the POWER switch to VCR. -
Page 90: Searching A Recording By Date - Date Search
Searching a recording by date – DATE SEARCH You can automatically search for the point where the recording date changes and start playback from that point (date search). Use a cassette with cassette memory for convenience. Use the Remote Commander for this operation. Use this function to check where recording dates change or to edit the tape at each recording date. -
Page 91: Searching For The Date Without Using Cassette Memory
Searching a recording by date – DATE SEARCH Note If one day’s recording is less than two minutes, your camcorder may not accurately find the point where the recording date changes. If a tape has a blank portion between recorded portions DATE SEARCH may not work correctly. -
Page 92: Searching For A Photo - Photo Search/Photo Scan
Searching for a photo – PHOTO SEARCH/PHOTO SCAN You can search for a still image you have recorded on a tape (PHOTO SEARCH). You can also search for still images one after another and display each image for five seconds automatically regardless of cassette memory (PHOTO SCAN). Use the Remote Commander for these operations. - Page 93 Searching for a photo – PHOTO SEARCH/PHOTO SCAN Searching for a photo without using cassette memory (1) Set the POWER switch to VCR. (2) Press MENU, then turn the SEL/PUSH EXEC dial to select CM SEARCH in to OFF, then press the dial (p. 213). (3) Press SEARCH MODE on the Remote Commander repeatedly until the PHOTO SEARCH indicator appears.
- Page 94 Searching for a photo – PHOTO SEARCH/PHOTO SCAN Scanning photos (1) Set the POWER switch to VCR. (2) Press SEARCH MODE on the Remote Commander repeatedly until the PHOTO SCAN indicator appears. The indicator changes as follows: TITLE SEARCH* t DATE SEARCH t PHOTO SEARCH (no indicator) * Displayed only when CM SEARCH is set to ON in the menu settings.
-
Page 95: Editing
— Editing — Dubbing a tape Using the A/V connecting cable You can dub or edit on the VCR connected to your camcorder using your camcorder as a player. Connect your camcorder to the VCR using the A/V connecting cable supplied with your camcorder. - Page 96 Dubbing a tape You can edit on VCRs that support the following systems: 8 mm, Hi8, VHS, S-VHS, VHSC, S-VHSC, Betamax, ED Betamax, mini DV, Digital8, MICRO MV If your VCR is a monaural type Connect the yellow plug of the A/V connecting cable to the video input jack and the white or the red plug to the audio input jack on the VCR or the TV.
- Page 97 Dubbing a tape Using the i.LINK cable Simply connect the i.LINK cable (optional) to the DV Interface on your camcorder and to DV IN on the DV products. With a digital-to-digital connection, video and audio signals are transmitted in digital form for high-quality editing. You cannot dub the titles, display indicators or the contents of cassette memory or letters on the “Memory Stick”...
-
Page 98: Dubbing Only Desired Scenes - Digital Program Editing (On Tapes)
Dubbing only desired scenes – Digital program editing (on tapes) You can duplicate selected scenes (programs) for editing onto a tape without operating the VCR. Scenes can be selected by frame. You can set up to 20 programs. Your camcorder can dub on a “Memory Stick.” See p. 160 for more information. Unwanted scene Before operating the Digital program editing on tapes recorded on other equipment... -
Page 99: Set The Ir Setup Code
Dubbing only desired scenes – Digital program editing (on tapes) Step 2: Setting the VCR to operate with the A/V connecting cable To edit using the VCR, send the control signal by infrared rays to the remote sensor on the VCR. When you connect using the A/V connecting cable, follow the procedure below, steps (1) to (4), to send the control signal correctly. - Page 100 The IR SETUP code is stored in the memory of your camcorder. Be sure to set the correct code to match your VCR. The default setting is code number 3. Brand IR SETUP code Sony 1, 2, 3, 4, 5, 6 Admiral (M. Wards) 89 Aiwa...
- Page 101 Dubbing only desired scenes – Digital program editing (on tapes) (2) Setting the modes to cancel the recording pause on the VCR 1 Turn the SEL/PUSH EXEC dial to select PAUSEMODE, then press the dial. 2 Turn the SEL/PUSH EXEC dial to select the mode to cancel recording pause on the VCR, then press the dial.
- Page 102 Dubbing only desired scenes – Digital program editing (on tapes) (4) Confirming VCR operation 1 Insert a recordable tape into the VCR, then set to recording pause. 2 Turn the SEL/PUSH EXEC dial to select IR TEST, then press the dial. 3 Turn the SEL/PUSH EXEC dial to select EXECUTE, then press the dial.
- Page 103 Dubbing only desired scenes – Digital program editing (on tapes) Step 2: Setting the VCR to operate with the i.LINK cable When you connect using the i.LINK cable (optional), follow the procedure below. (1) Set the POWER switch to VCR on your camcorder. (2) Turn the power of the connected VCR on, then set the input selector to DV input.
- Page 104 Dubbing only desired scenes – Digital program editing (on tapes) Step 3: Adjusting the synchronization of the VCR You can adjust the synchronization of your camcorder and the VCR. Have a pen and paper ready for notes. Before operation, eject a cassette from your camcorder. (1) Insert a blank tape (or a tape you want to record over) into the VCR, then set to recording pause.
- Page 105 Dubbing only desired scenes – Digital program editing (on tapes) VIDEO EDIT EDIT SET CONTROL ADJ TEST ”CUT–IN” ”CUT–OUT” IR SETUP PAUSEMODE IR TEST [ ME Notes •When you complete step 3, the image used to adjust the synchronization is recorded for about 50 seconds.
- Page 106 Dubbing only desired scenes – Digital program editing (on tapes) Operation 1: Making a program (1) Insert the tape for playback into your camcorder, and insert a tape for recording into the VCR. (2) Press MENU, then turn the SEL/PUSH EXEC dial to set VIDEO EDIT in TAPE, then press the dial (p.
- Page 107 Dubbing only desired scenes – Digital program editing (on tapes) Erasing the program you have set Erase OUT first and then IN from of the last program. (1) Turn the SEL/PUSH EXEC dial to select UNDO, then press the dial. (2) Turn the SEL/PUSH EXEC dial to select EXECUTE, then press the dial.
- Page 108 Dubbing only desired scenes – Digital program editing (on tapes) Operation 2: Performing the program (Dubbing a tape) Make sure that your camcorder and the VCR are connected, and that the VCR is set to recording pause. When you use an i.LINK cable, the following procedure is not necessary.
-
Page 109: Recording Video Or Tv Programs
Recording video or TV programs Using the A/V connecting cable You can record a tape from another VCR or a TV program from a TV that has video/ audio outputs. Use your camcorder as a recorder. Before operation Set DISPLAY in to LCD in the menu settings. - Page 110 Sony VCRs to avoid erroneous remote control operation. If you use another Sony VCR in the commander mode VTR 2, we recommend changing the commander mode or covering the sensor of the VCR with...
- Page 111 Recording video or TV programs Using the i.LINK cable Simply connect the i.LINK cable (optional) to the DV Interface on your camcorder and to DV OUT on the DV products. With a digital-to-digital connection, video and audio signals are transmitted in digital form for high-quality editing. (1) Insert a blank tape (or a tape you want to record over) into your camcorder, and insert the recorded tape into the VCR.
- Page 112 Sony VCRs to avoid erroneous remote control operation. If you use another Sony VCR in the commander mode VTR 2, we recommend changing the commander mode or covering the sensor of the VCR with...
-
Page 113: Inserting A Scene From A Vcr - Insert Editing
Inserting a scene from a VCR – Insert Editing You can insert a new scene from a VCR onto your originally recorded tape by specifying the insert start and end points. Use the Remote Commander for this operation. Connections are the same as on page 109 or 111. Insert a cassette containing the desired scene to insert into the VCR. -
Page 114: Inserting A Scene From A Vcr – Insert Editing
Sony VCRs to avoid erroneous remote control operation. If you use another Sony VCR in the commander mode VTR 2, we recommend changing the commander mode or covering the sensor of the VCR with... -
Page 115: Audio Dubbing
Audio dubbing You can record audio to add to the original sound on a tape by connecting audio equipment or a microphone. If you connect audio equipment, you can add sound to your recorded tape already recorded in the 12-bit mode by specifying the start and end points. - Page 116 Audio dubbing Connecting the A/V connecting cable to the AUDIO/VIDEO jack Audio equipment LINE OUT AUDIO R (Red) AUDIO L (White) Do not connect the video (yellow) plug. : Signal flow Dubbing with the built-in microphone No connection is necessary. Notes •When dubbing with the AUDIO/VIDEO jack or the built-in microphone, pictures are not output through the S VIDEO jack or the AUDIO/VIDEO jack.
- Page 117 Audio dubbing Adding audio on a recorded tape Choose a connection described on the previous pages, and connect audio equipment or microphone to your camcorder. Then follow the procedure below. (1) Insert the recorded tape into your camcorder. (2) Set the POWER switch to VCR on your camcorder. (3) Locate the recording start point by pressing N.
-
Page 118: Monitoring The New Recorded Sound
Audio dubbing Monitoring the new recorded sound (1) Play back the tape on which you added audio. (2) Turn the SEL/PUSH EXEC dial to select AUDIO MIX in settings, then press the dial. (3) Turn the SEL/PUSH EXEC dial to adjust the balance between the original sound (ST1) and the new sound (ST2), then press the dial. -
Page 119: Superimposing A Title
Superimposing a title If you use a tape with cassette memory, you can superimpose the title. When you play back the tape, the title is displayed for five seconds from the point where you superimposed it. (1) In the recording , recording standby, playback or playback pause, press MENU, then select TITLE in (2) Turn the SEL/PUSH EXEC dial to select (3) Turn the SEL/PUSH EXEC dial to select the desired title, then press the dial. - Page 120 Superimposing a title If you set the write-protect tab of the tape to lock You cannot superimpose or erase the title. Slide the write-protect tab to release the write protection. To use a custom title If you want to use a custom title, select If the tape has a blank portion You cannot superimpose a title on the portion.
-
Page 121: Erasing A Title
Superimposing a title Erasing a title (1) Set the POWER switch to CAMERA or VCR. (2) Press MENU, then turn the SEL/PUSH EXEC dial to select TITLEERASE in , then press the dial (p. 213). (3) Turn the SEL/PUSH EXEC dial to select the title you want to erase, then press the dial. -
Page 122: Making Your Own Titles
Making your own titles You can make up to two titles and store them in the memory of your camcorder. Each title can have up to 20 characters. (1) Set the POWER switch to CAMERA or VCR. (2) Press MENU, then turn the SEL/PUSH EXEC dial to select TITLE in press the dial (p. -
Page 123: To Change A Title You Have Stored
Making your own titles To change a title you have stored In step 4, select CUSTOM1 SET or CUSTOM2 SET, depending on which title you want to change, then press the SEL/PUSH EXEC dial. Turn the SEL/PUSH EXEC dial to select [C], then press the dial to delete the title. -
Page 124: Labeling A Cassette
Labeling a cassette If you use a cassette with cassette memory, you can label a cassette. Labels can consist of up to 10 characters and is stored in cassette memory. When you insert the labeled cassette and when the POWER switch is set to CAMERA or VCR, the label is displayed for about five seconds. -
Page 125: Erasing All The Data In Cassette Memory
Labeling a cassette To erase the label you have made In step 4 turn the SEL/PUSH EXEC dial to select [C], then press the dial. The last character is erased. To change the label you have made Insert the cassette to change the label, and operate in the same way to make a new label. If you set the write-protect tab of the cassette to lock You cannot label the tape. -
Page 126: Memory Stick" Operations
Using a “Memory Stick” – Introduction You can record and play back images on the “Memory Stick” supplied with your camcorder. You can easily play back, record or delete images. You can exchange image data with other equipment such as your computer etc., using the USB cable for the “Memory Stick”... - Page 127 “Memory Stick.” •“Memory Stick” and •All other product names mentioned here may be the trademarks or registered trademarks of their respective companies. ® “TM” and “ ” are not mentioned in each case in this manual. are trademarks of Sony Corporation.
- Page 128 Using a “Memory Stick” – Introduction Inserting a “Memory Stick” (1) Slide the MEMORY OPEN in the direction of the arrow to open the “Memory Stick” slot. (2) Insert a “Memory Stick” in the “Memory Stick” slot as far as it can go with the B mark facing up as illustrated.
-
Page 129: Using A Touch Panel
Using a “Memory Stick” – Introduction Using a touch panel Most operation buttons for use of a “Memory Stick” are displayed on the LCD screen. Touch the LCD screen directly with your finger or the supplied stylus (DCR-TRV950 only) to operate each function. (1) Set the POWER switch to MEMORY/NETWORK (DCR-TRV950 only). - Page 130 Using a “Memory Stick” – Introduction To return to FN Press EXIT. To execute settings Press To cancel settings Press OFF to return to PAGE1/PAGE2/PAGE3. Notes •When using the touch panel, press operation buttons with your thumb supporting the LCD screen from the back side of it or press those buttons lightly with your index finger.
- Page 131 Using a “Memory Stick” – Introduction Selecting the still image quality You can select the image quality in still image recording. The default setting is SUPER FINE. (1) Set the POWER switch to MEMORY/NETWORK (DCR-TRV950 only) or VCR. Make sure that the LOCK switch is set to the further side (unlock position). (2) Press MENU, then select STILL SET in (p.
-
Page 132: Image Quality Settings
Using a “Memory Stick” – Introduction Image quality settings Setting SUPER FINE (SFN) FINE (FINE) STANDARD (STD) Note In some cases, changing the image quality may not affect the image quality, depending on the type of images you are shooting. Differences in image quality Recorded images are compressed in JPEG format before being stored in memory. -
Page 133: Selecting The Image Size
Using a “Memory Stick” – Introduction Selecting the image size You can select either of two image sizes 1152 × 864 or 640 × 480. (When the POWER switch is set to CAMERA Still images: or VCR, the image size is automatically set to 640 × 480.) The default setting is 1152 ×... - Page 134 Using a “Memory Stick” – Introduction Image size settings Setting 1152 × 864 640 × 480 320 × 240 160 × 112 Approximate number of still images you can record on a “Memory Stick” The number of images you can record varies depending on which image quality and image size you select and the complexity of the subject.
-
Page 135: Recording Still Images On A "Memory Stick"- Memory Photo Recording
Recording still images on a “Memory Stick”– Memory Photo recording You can record still images on a “Memory Stick.” Before operation Insert a “Memory Stick” into your camcorder. (1) Set the POWER switch to MEMORY/NETWORK (DCR-TRV950 only). Make sure that the LOCK switch is set to the further side (unlock position). (2) Press PHOTO lightly. - Page 136 Recording still images on a“Memory Stick” – Memory Photo recording When the POWER switch is set to MEMORY/NETWORK (DCR-TRV950 only) The following functions do not work: – Digital zoom – Wide mode – Fader – Picture effect – Digital effect –...
-
Page 137: Recording Images Continuously
Recording still images on a“Memory Stick” – Memory Photo recording Recording images continuously You can record still images continuously. Before recording, select one of the four modes described below in the menu settings. NORMAL [a] Your camcorder shoots up to four still images in 1152 × 864 size or 13 still images in 640 ×... - Page 138 Recording still images on a “Memory Stick” – Memory Photo recording (1) Set the POWER switch to MEMORY/NETWORK (DCR-TRV950 only). Make sure that the LOCK switch is set to the further side (unlock position). (2) Press MENU, then select BURST while STILL SET is selected in the dial (p.
- Page 139 Recording still images on a “Memory Stick” – Memory Photo recording If there is space remaining on the “Memory Stick” for less than three photos You cannot carry out the exposure bracketing (EXP BRKTG). “ when you press PHOTO. Recording images with the flash The flash automatically pops up to strobe.
- Page 140 Recording still images on a “Memory Stick” – Memory Photo recording Notes •The recommended shooting distance using the built-in flash is 0.8 m to 2.5 m (2 3/5 feet to 8 1/3 feet). •Attaching the lens hood or a conversion lens (optional) may block the light from the flash or cause lens shadow to appear.
- Page 141 Recording still images on a “Memory Stick” – Memory Photo recording Shooting with an auxiliary light – HOLOGRAM AF The HOLOGRAM AF is an auxiliary light source used for focusing on subjects in dark places. Set HOLOGRAM F in When appears on the screen in a dark place, press PHOTO lightly.
- Page 142 Recording still images on a“Memory Stick” – Memory Photo recording Notes •Attaching the lens hood or a conversion lens (optional) may obstruct the HOLOGRAM AF light and make focusing difficult. We recommend removing the lens hood or a conversion lens while shooting with the HOLOGRAM AF. •If enough light does not reach the subject even if the HOLOGRAM AF emitter is emitted (recommended shooting distance is 2.5 m (8 1/3 feet)), the subject will not be focused.
-
Page 143: Self-Timer Memory Photo Recording
Recording still images on a “Memory Stick” – Memory Photo recording Self-timer memory photo recording You can record images on a “Memory Stick” with the self-timer. You can also use the Remote Commander for this operation. (1) Set the POWER switch to MEMORY/NETWORK (DCR-TRV950 only). Make sure that the LOCK switch is set to the further side (unlock position). -
Page 144: Recording Images From A Tape As Still Images
Recording images from a tape as still images Your camcorder can read moving picture data recorded on a tape and record it as a still image on a “Memory Stick.” Your camcorder can also capture moving picture data through the input connector and record it as a still image on a “Memory Stick.” Before operation Insert a “Memory Stick”... - Page 145 Recording images from a tape as still images Image size of still images Image size is automatically set to 640 × 480. When the access lamp is lit or flashing Do not shake or strike the unit. Also, do not turn the power off , eject the “Memory Stick.”...
-
Page 146: Recording A Still Image From External Equipment
Recording images from a tape as still images Recording a still image from external equipment Before operation Set DISPLAY in (1) Set the POWER switch to VCR. (2) Play back the recorded tape, or turn the TV on to see the desired program. The image of the external equipment is displayed on the screen. - Page 147 Recording images from a tape as still images Using the i.LINK cable DV OUT : Signal flow Note In the following instances, recording is interrupted or “ and recording is not possible. Reinsert the “Memory Stick” to record distortion-free images. –...
-
Page 148: Superimposing A Still Image In The "Memory Stick" On An Image - Memory Mix
Superimposing a still image in the “Memory Stick” on an image – MEMORY MIX You can superimpose a still image you have recorded on the “Memory Stick” on the moving picture you are recording. You can record the superimposed images on a tape or a “Memory Stick.”... -
Page 149: Recording Superimposed Images On A Tape
Superimposing a still image in the “Memory Stick” on an image – MEMORY MIX Recording superimposed images on a tape Before operation •Insert a tape for recording into your camcorder. •Insert a “Memory Stick” recorded still images into your camcorder. (1) Set the POWER switch to CAMERA. - Page 150 Superimposing a still image in the “Memory Stick” on an image – MEMORY MIX To change the still image to be superimposed Press –/+ on the right lower corner before step 6. To cancel MEMORY MIX Press OFF to return to PAGE1. Notes •You cannot use the MEMORY MIX for moving pictures recorded on a “Memory Stick.”...
- Page 151 Superimposing a still image in the “Memory Stick” on an image – MEMORY MIX Recording superimposed images on a “Memory Stick” as a still image Before operation Insert a “Memory Stick” recorded still images into your camcorder. (1) Set the POWER switch to MEMORY/NETWORK (DCR-TRV950 only). Make sure that the LOCK switch is set to the further side (unlock position).
- Page 152 Superimposing a still image in the “Memory Stick” on an image – MEMORY MIX To change the still image to be superimposed Press –/+ on the right lower corner before step 6. To cancel MEMORY MIX Press OFF to return to PAGE2. Notes •You cannot use MEMORY MIX for moving pictures recorded on a “Memory Stick.”...
-
Page 153: Recording Moving Pictures On A"Memory Stick" - Mpeg Movie Recording
Recording moving pictures on a“Memory Stick” – MPEG movie recording You can record moving pictures with sound on a “Memory Stick.” You can record picture and sound continuously up to the capacity of a “Memory Stick”(MPEG MOVIE EX). Before operation Insert a “Memory Stick”... - Page 154 Recording moving pictures on a “Memory Stick” – MPEG movie recording Note Sound is recorded in monaural. When the POWER switch is set to MEMORY/NETWORK (DCR-TRV950 only) The following functions do not work: – Digital zoom – Wide mode – Fader –...
-
Page 155: Self-Timer Mpeg Movie Recording
Recording moving pictures on a “Memory Stick” – MPEG movie recording Self-timer MPEG movie recording You can record images on a “Memory Stick” with the self-timer. You can also use the Remote Commander for this operation. (1) Set the POWER switch to MEMORY/NETWORK (DCR-TRV950 only). Make sure that the LOCK switch is set to the further side (unlock position). -
Page 156: Recording Pictures From A Tape As A Moving Picture
Recording pictures from a tape as a moving picture Your camcorder can read moving picture data recorded on a tape and record it as a moving picture on a “Memory Stick.” Your camcorder can also capture moving picture data through the input connector and record it as a moving picture on a “Memory Stick.”... - Page 157 Recording pictures from a tape as a moving picture Notes •Sound recorded in 48 kHz is converted to 32 kHz sound when recording images from a tape to a “Memory Stick.” •Sound recorded in stereo is converted to monaural sound when recording from a tape. When the access lamp is lit or flashing Do not shake or knock the unit.
-
Page 158: Recording A Moving Picture From External Equipment
Recording pictures from a tape as a moving picture Recording a moving picture from external equipment Before operation Set DISPLAY in (1) Set the POWER switch to VCR. (2) Play back the recorded tape, or turn the TV on to see the desired program. The image of the other equipment is displayed on the screen. - Page 159 Recording pictures from a tape as a moving picture Using the i.LINK cable DV OUT : Signal flow Note In the following instances, “ pictures. – When recording on a tape in a poor recording state, for example, on a tape that has been repeatedly used for dubbing.
-
Page 160: Recording Edited Pictures From A Tape As A Moving Picture - Digital Program Editing (On A "Memory Stick")
Recording edited pictures from a tape as a moving picture – Digital program editing (on a “Memory Stick”) You can duplicate selected scenes (programs) for editing onto a “Memory Stick.” Making the program Before operation Insert a “Memory Stick” and a recorded tape into your camcorder. (1) Set the POWER switch to VCR. - Page 161 Recording edited pictures from a tape as a moving picture – Digital program editing (on a “Memory Stick”) Erasing the program you have set Erase OUT first and then IN of the last program. (1) Turn the SEL/PUSH EXEC dial to select UNDO, then press the dial. (2) Turn the SEL/PUSH EXEC dial to select EXECUTE, then press the dial.
- Page 162 Recording edited pictures from a tape as a moving picture – Digital program editing (on a “Memory Stick”) Performing the program (Dubbing on a “Memory Stick”) (1) Turn the SEL/PUSH EXEC dial to select START, then press the dial. (2) Turn the SEL/PUSH EXEC dial to select EXECUTE, then press the dial. Search for the beginning of the first program, then start dubbing.
-
Page 163: Copying Still Images From A Tape - Photo Save
Copying still images from a tape – PHOTO SAVE Using the search function, you can automatically capture only still images from tapes and record them on a “Memory Stick” in sequence. Before operation •Insert a recorded tape into your camcorder and rewind the tape. •Insert a “Memory Stick”... - Page 164 Copying still images from a tape – PHOTO SAVE Image size of still images Image size is automatically set to 640 × 480. When the access lamp is lit or flashing Do not shake or knock your camcorder. As well do not turn the power off, eject the “Memory Stick.”...
-
Page 165: Viewing Still Images - Memory Photo Playback
Viewing still images – Memory photo playback You can play back still images recorded on a “Memory Stick.” You can also play back six images including moving pictures in order at a time by selecting the index screen. You can also use the Remote Commander for this operation. Before operation Insert a “Memory Stick”... - Page 166 Viewing still images – Memory photo playback You may not be able to play back images with your camcorder: – when playing back image data modified on your computer. – when playing back image data shot with other equipment. Notes on the file name •The directory number may not be displayed and only the file name may be displayed if the structure of the directory does not conform to the DCF standard.
- Page 167 Viewing still images – Memory photo playback Playing back six recorded images at a time (index screen) You can play back six recorded images at a time. This function is especially useful when searching for a particular image. Before operation Insert a “Memory Stick”...
-
Page 168: Viewing Moving Pictures - Mpeg Movie Playback
Viewing moving pictures – MPEG movie playback You can play back moving pictures recorded on a “Memory Stick.” You can also play back six images including still images in order at a time by selecting the index screen. Before operation Insert a “Memory Stick”... -
Page 169: Playing Back A Moving Picture From The Desired Part
Viewing moving pictures – MPEG movie playback Playing back a moving picture from the desired part The moving picture recorded on a “Memory Stick” is divided into 23 parts. You can select every each one point and play back pictures. Before operation Insert a “Memory Stick”... - Page 170 Viewing moving pictures – MPEG movie playback Screen indicators during moving picture playback MOV00001 MPEG JUL 4 2002 12 : 05 : 56 – Data directory number/File number Recording date/time To display the recording date/time, press DATA CODE. You can also use the Remote Commander for this operation.
-
Page 171: Copying Images Recorded On A "Memory Stick" To A Tape
Copying images recorded on a “Memory Stick” to a tape You can copy images recorded on a “Memory Stick” and record them to a tape. Before operation Insert a “Memory Stick” and a tape for recording into your camcorder. (1) Set the POWER switch to VCR. (2) Using the video control buttons, search a point where you want to record the desired images. - Page 172 Copying images recorded on a “Memory Stick” to a tape During copying You cannot operate the following functions: – MEMORY PLAY – MEMORY INDEX – MEMORY DELETE – MEMORY +/– Note on the index screen You cannot record the index screen. If you press EDITSEARCH during pause Memory playback stops.
-
Page 173: Enlarging Still Images Recorded On A "Memory Stick" - Memory Pb Zoom
Enlarging still images recorded on a “Memory Stick” – Memory PB ZOOM You can enlarge still images recorded on a “Memory Stick.” You can select and view a desired part from the enlarged still image. Also, you can copy the desired part of the enlarged still image to tapes or a “Memory Stick”. - Page 174 Enlarging still images recorded on a “Memory Stick” – Memory PB ZOOM The PB ZOOM is canceled when executing the following operations: – MENU – MEMORY PLAY* – MEMORY INDEX* – MEMORY +/–* * When these functions are selected by the Remote Commander. Moving pictures recorded on a “Memory Stick”...
-
Page 175: Playing Back Images In A Continuous Loop - Slide Show
Playing back images in a continuous loop – SLIDE SHOW You can automatically play back images in sequence. This function is useful especially when checking recorded images or during a presentation. Before operation Insert a “Memory Stick” into your camcorder. (1) Set the POWER switch to MEMORY/NETWORK (DCR-TRV950 only). -
Page 176: Preventing Accidental Erasure - Image Protection
Preventing accidental erasure – Image protection You can protect selected images to prevent accidental erasure of important images. Before operation Insert a “Memory Stick” into your camcorder. (1) Set the POWER switch to MEMORY/NETWORK (DCR-TRV950 only) or VCR. Make sure that the LOCK switch is set to the further side (unlock position). (2) Press INDEX on your camcorder to display the index. -
Page 177: Deleting Images - Delete
Deleting images – DELETE You can delete images stored in a “Memory Stick.” You can delete all images or only selected images. Deleting selected images Before operation Insert a “Memory Stick” into your camcorder. (1) Set the POWER switch to MEMORY/NETWORK (DCR-TRV950 only) or VCR. Make sure that the LOCK switch is set to the further side (unlock position). -
Page 178: Deleting Selected Images On The Index Screen
Deleting images – DELETE Deleting selected images on the index screen Before operation Insert a “Memory Stick” into your camcorder. (1) Set the POWER switch to MEMORY/NETWORK (DCR-TRV950 only). Make sure that the LOCK switch is set to the further side (unlock position). (2) Press INDEX to display the index screen. -
Page 179: Deleting All Images
Deleting images – DELETE Deleting all images You can delete all unprotected images in the “Memory Stick.” Before operation Insert a “Memory Stick” into your camcorder. (1) Set the POWER switch to MEMORY/NETWORK (DCR-TRV950 only). Make sure that the LOCK switch is set to the further side (unlock position). (2) Press MENU, then turn the SEL/PUSH EXEC dial to select DELETE ALL in , then press the dial (p. -
Page 180: Writing A Print Mark - Print Mark
Writing a print mark – PRINT MARK You can specify a recorded still image to print out by writing a print mark. This function is useful for printing out still images later. Your camcorder conforms to the DPOF (Digital Print Order Format) standard for specifying still images to print out. -
Page 181: Using The Optional Printer
Using the optional printer You can use the optional printer on your camcorder to print images on print paper. For details, refer to the operating instructions of the printer. There are various ways of printing still images. The following describes the setup for printing with the DATE/DAY &... - Page 182 Using the optional printer Selecting 9PIC PRINT You can make 9 stickers on a single sheet when you print images recorded on a “Memory Stick” in 9PIC PRINT. (1) Set the POWER switch to MEMORY/NETWORK (DCR-TRV950 only). Make sure that the LOCK switch is set to the further side (unlock position). (2) Press FN and select PAGE3.
-
Page 183: Viewing Images Using Your Computer
— Viewing Images Using your Computer — Viewing images on your computer – Introduction There are the following ways of connecting the camcorder to a computer in order to view images saved on the “Memory Stick” or recorded on the tape on your computer. To view images on a computer which has a “Memory Stick”... -
Page 184: Viewing Images Recorded On A "Memory Stick
Viewing images on your computer – Introduction When connecting to a computer using the i.LINK (DV interface) Your computer must have a DV connector and editing software installed that can read video signals. DV connector is marked on this side i.LINK cable (optional) Viewing images recorded on a “Memory Stick”... - Page 185 Viewing images on your computer – Introduction Notes on using your computer “Memory Stick” •“Memory Stick” operations on your camcorder cannot be assured if a “Memory Stick” formatted on your computer is used on your camcorder, or if the “Memory Stick” in your camcorder was formatted from your computer when the USB cable was connected.
-
Page 186: Connecting Your Camcorder To Your Computer Using The Usb Cable - For Windows Users
Connecting your camcorder to your computer using the USB cable – For Windows users Complete installation of the USB driver before connecting the camcorder to the computer. If you connect the camcorder to the computer first, you will not be able to install the USB driver correctly. When connecting to a computer using the USB cable You must install a USB driver onto your computer in order to connect the camcorder to the computer’s USB connector. - Page 187 Connecting your camcorder to your computer using the USB cable – For Windows users Recommended computer usage environment when connecting via USB cable and viewing “Memory Stick” images on the computer Microsoft Windows 98, Windows 98SE, Windows Me, Windows 2000 Professional, Windows XP Home Edition or Windows XP Professional Standard installation is required.
-
Page 188: Installing The Usb Driver
Connecting your camcorder to your computer using the USB cable – For Windows users Installing the USB driver Start the following operation without connecting the USB cable to your computer. Connect the USB cable according to “Making the computer recognize the camcorder.”... - Page 189 Connecting your camcorder to your computer using the USB cable – For Windows users Making the computer recognize the camcorder Viewing images recorded on a tape Refer to page 190 for details on viewing “Memory Stick” images on your computer. You need to install “PIXELA ImageMixer ”...
- Page 190 Connecting your camcorder to your computer using the USB cable – For Windows users (11) Follow the on-screen messages so that the Add Hardware Wizard recognizes that the USB drivers have been installed. The Add Hardware Wizard starts three times because three different USB drivers are installed. Be sure to allow the installation to complete without interrupting it.
- Page 191 Connecting your camcorder to your computer using the USB cable – For Windows users If you cannot install the USB driver The USB driver has been registered incorrectly as your computer was connected to your camcorder before installation of the USB driver was completed. Perform the following procedure to correctly install the USB driver.
- Page 192 Connecting your camcorder to your computer using the USB cable – For Windows users 5 Select and delete the underlined devices below. Windows 98SE Windows Me Windows 2000 Professional Windows XP Home Edition/Professional...
- Page 193 Select “My Computer” t “Control Panel” t “System,” and click “Device Manager.” 6 Select “Other devices.” Select the device prefixed with the “?” mark and delete. Ex: (?)Sony Handycam 7 Turn the POWER switch to OFF (CHG) on your camcorder, and then disconnect the USB cable. 8 Restart your computer.
-
Page 194: Viewing Images Recorded On A Tape On Your Computer - For Windows Users
Select USB STREAM in (4) Select “Start” t “Programs” t “PIXELA” t “ImageMixer” t “PIXELA ImageMixer Ver.1.0 for Sony.” The “PIXELA ImageMixer Ver.1.0 for Sony” startup screen appears on your computer. The title screen appears. (5) Click to ON in the menu settings (p. 215). - Page 195 Viewing images recorded on a tape on your computer – For Windows users (6) Select (7) Connect the (USB) jack on your camcorder to the USB connector on your computer using the supplied USB cable. (8) Press N to start playback. The picture from the tape appears on your computer.
- Page 196 Viewing images recorded on a tape on your computer – For Windows users Viewing pictures live from your camcorder (1) Follow the steps 1, 2 on page 194. (2) Set the POWER switch to CAMERA. Select USB STREAM in (3) Follow the steps 4 to 7 on page 194, 195. The picture from your camcorder appears on the preview window on your computer.
- Page 197 Viewing images recorded on a tape on your computer – For Windows users Capturing moving pictures (1) Select (2) Look at the preview window and click on you want to capture. (3) Look at the preview window and click on capture.
- Page 198 (CHG) on your camcorder. Seeing the on-line help (operating instructions) of “PIXELA ImageMixer Ver.1.0 for Sony” A “PIXELA ImageMixer Ver.1.0 for Sony” on-line help site is available where you can find the detailed operating method of “PIXELA ImageMixer Ver.1.0 for Sony.” (1) Click The ImageMixer’s Manual screen appears.
-
Page 199: Viewing Images Recorded On A "Memory Stick" On Your Computer - For Windows Users
Viewing images recorded on a “Memory Stick” on your computer – For Windows users Viewing images Before operation •You need to install the USB driver to view “Memory Stick” images on your computer (p. 188). An application such as Windows Media Player must be installed to play back moving pictures in Windows environment. - Page 200 Viewing images recorded on a “Memory Stick” on your computer – For Windows users Image file storage destinations and image files Image files recorded with your camcorder are grouped in folders by recording mode. The meanings of the file names are as follows. ssss stands for any number within the range from 0001 to 9999.
-
Page 201: Connecting Your Camcorder To Your Computer Using The Usb Cable - For Macintosh Users
Connecting your camcorder to your computer using the USB cable – For Macintosh users When connecting to a computer using the USB jack Before connecting your camcorder to your computer, install the USB driver on the computer. The USB driver is packaged together with application software for viewing images on the CD-ROM supplied with your camcorder. - Page 202 (3) Click the “USB Driver” to open the folder containing the six files related to “Driver.” (4) Select the following two files, and drag and drop them into the System Folder. • Sony Camcorder USB Driver • Sony Camcorder USB Shim (5) When the message appears, click “OK.”...
-
Page 203: Viewing Images Recorded On A "Memory Stick" On Your Computer - For Macintosh Users
Viewing images recorded on a “Memory Stick” on your computer – For Macintosh users Viewing images Before operation You need to install the USB driver to view “Memory Stick” images on your computer (p. 202). QuickTime 3.0 or newer must be installed to play back moving pictures. (1) Turn on your computer and allow Mac OS to load. -
Page 204: Capturing Images From An Analog Video Unit On Your Computer - Signal Convert Function
Capturing images from an analog video unit on your computer – Signal convert function You can capture images and sound from an analog video unit connected to your computer which has the i.LINK jack connected to your camcorder. Before operation Set DISPLAY in (1) Set the POWER switch to VCR. -
Page 205: Using The Network Function
— Using the Network function — Accessing the network – DCR-TRV950 only You can access the Internet via a Bluetooth compliant device from your camcorder. Once the access is made, you can view a Web page, send/receive your e-mail, etc. This section described only how to open the Network Menu. - Page 206 Put it back in the holder. Hold the stylus correctly as shown in the illustration and insert it until it clicks. On trademarks •The BLUETOOTH trademarks are owned by their proprietor and used by Sony Corporation under license. •All other product names mentioned herein may be the trademarks or registered trademarks of their respective companies.
-
Page 207: Customizing Your Camcorder
— Customizing Your Camcorder — Changing the default settings with the menu To change the mode settings in the menu settings, select the menu items with the SEL/ PUSH EXEC dial. The default settings can be partially changed. First, select the icon, then the menu item and then the mode. - Page 208 Changing the default settings with the menu To make the menu display disappear Press MENU. Menu items are displayed as the following icons: MANUAL SET CAMERA SET VCR SET LCD/VF SET MEMORY SET PRINT SET CM SET TAPE SET SETUP MENU OTHERS Selecting the mode setting of each item Menu items differ depending on the position of the POWER switch.
- Page 209 Changing the default settings with the menu Icon/item Mode CAMERA SET D ZOOM z OFF 24× 150× PHOTO REC z MEMORY TAPE 16:9WIDE z OFF STEADYSHOT z ON FRAME REC z OFF INT. REC z OFF HOLOGRAM F z AUTO Notes on the SteadyShot •The SteadyShot will not correct excessive camera-shake.
- Page 210 Changing the default settings with the menu Icon/item Mode VCR SET HiFi SOUND z STEREO AUDIO MIX A/VtDV OUT z OFF LCD/VF SET LCD B. L. z BRT NORMAL LCD COLOR VF B.L. z BRT NORMAL GUIDEFRAME z OFF Notes on LCD B.L. and VF B.L. •...
- Page 211 Changing the default settings with the menu Icon/item Mode MEMORY SET STILL SET BURST z OFF NORMAL EXP BRKTG MULTI SCRN QUALITY z SUPER FINE FINE STANDARD IMAGESIZE z 1152 × 864 640 × 480 MOVIE SET IMAGESIZE z 320 × 240 160 ×...
- Page 212 Changing the default settings with the menu Icon/item Mode MEMORY SET PHOTO SAVE FILE NO. z SERIES DELETE ALL FORMAT z RETURN Notes on formatting • Do not do any of the following while FORMATTING is displayed: – Switch the POWER switch. –...
- Page 213 Changing the default settings with the menu Icon/item Mode PRINT SET DATE/TIME z OFF DATE DAY&TIME CM SET TITLE —— TITLEERASE —— TITLE DSPL z ON CM SEARCH z ON TAPE TITLE —— ERASE ALL —— Note on PRINT SET DATE/TIME is displayed only when an external printer (optional) is connected to the intelligent accessory shoe.
- Page 214 When you play back the tape on other camcorders or VCRs, noise may occur in pictures or sound. •When you record in the LP mode, we recommend using a Sony Excellence/Master cassette so that you can get the most out of your camcorder.
- Page 215 Changing the default settings with the menu Icon/item Mode SETUP MENU CLOCK SET —— USB STREAM z OFF USBCONNECT z NORMAL LTR SIZE z NORMAL 2× LANGUAGE z ENGLISH FRANÇAIS ESPAÑOL PORTUGUÊS DEMO MODE z ON Notes on DEMO MODE •You cannot select DEMO MODE when a cassette or a “Memory Stick”...
- Page 216 Changing the default settings with the menu Icon/item Mode OTHERS DATA CODE z DATE/CAM AREA SET DST SET* z OFF BEEP z MELODY COMMANDER z ON * Instead of DST, SUMMERTIME is displayed on the screen for some models. Meaning To display date, time and various settings during playback when pressing the DATA CODE button (p.
- Page 217 Changing the default settings with the menu Icon/item Mode OTHERS DISPLAY z LCD V-OUT/LCD REC LAMP z ON VIDEO EDIT z RETURN TAPE MEMORY Note If you press DISPLAY/TOUCH PANEL with DISPLAY set to V-OUT/LCD in the menu settings, the picture from a TV or VCR will not appear on the LCD screen even when your camcorder is connected to outputs on the TV or VCR.
-
Page 218: Troubleshooting
If you run into any problem using your camcorder, use the following table to troubleshoot the problem. If the problem persists, remove the power supply and contact your Sony dealer or local authorized Sony service facility. If “C:ss:ss” appears on the screen, the self-diagnosis display function has worked. See page 225. - Page 219 Types of trouble and how to correct trouble Symptom The picture does not appear in the viewfinder. A vertical band appears when you shoot a subject such as lights or a candle flame against a dark background. A vertical band appears when you shoot a very bright subject.
- Page 220 Types of trouble and how to correct trouble In the playback Symptom The tape does not move when a video control button is pressed. The playback button does not work. There are horizontal lines on the picture, or the playback picture is not clear or does not appear.
- Page 221 Types of trouble and how to correct trouble In the recording and playback Symptom The power does not turn on. The end search does not work. The end search does not work correctly. The battery pack is quickly discharged. The battery remaining time indicator does not indicate the correct time.
-
Page 222: Trv950 Only) (P
Types of trouble and how to correct trouble When operating using the “Memory Stick” Symptom The “Memory Stick” does not function. Recording does not function. The image cannot be deleted. You cannot format the “Memory Stick.” Deleting all the images cannot be carried out. - Page 223 VCR again (p. 98) • The camcorder is connected to DV equipment of other than Sony using the i.LINK cable. c Set it to IR (p. 99). • You have attempted to set a program on a blank portion of the tape.
- Page 224 • The battery pack is not properly installed. c Install it properly (p. 15). • Something is wrong with the battery pack. c Please contact your Sony dealer or local authorized Sony service facility. • Disconnect the power cord of the AC power adaptor or remove the battery, then reconnect it in about one minute.
-
Page 225: Self-Diagnosis Display
E:61:ss E:62:ss E:91:ss If you are unable to rectify the problem even if you try corrective actions a few times, contact your Sony dealer or local authorized Sony service facility. LCD screen, Viewfinder or Display window Self-diagnosis display • C:ss:ss You can service your camcorder yourself. -
Page 226: Warning Indicators And Messages
Warning indicators and messages If indicators and messages appear on the screen or in the display window, check the following: See the page in parentheses “( )” for more information. Warning indicators 100–0001 100-0001 Warning indicator pertaining to files Slow flashing: •The file is corrupted. -
Page 227: Warning Messages
Warning indicators and messages Warning messages •CLOCK SET •FOR “InfoLITHIUM” BATTERY ONLY • CLEANING CASSETTE** • FULL • 16BIT • REC MODE • TAPE • “i.LINK” CABLE • FULL • • NO FILE • NO MEMORY STICK • AUDIO ERROR •... -
Page 228: Additional Information
Usable cassettes Selecting cassette types You can use Digital8, ED Betamax, * There are two types of mini DV cassettes: with cassette memory and without cassette memory. Cassettes with cassette memory have the We recommend that you use cassette with cassette memory. IC memory is mounted on this type of cassette. -
Page 229: Audio Mode
Usable cassettes Copyright signal When you play back Using any other video camera recorder, you cannot record on tape that has recorded copyright control signals for copyright protection of software which is played back on your camcorder. When you record You cannot record software on your camcorder that contains copyright control signals for copyright protection of software. - Page 230 Usable cassettes Notes on the cassette When affixing a label on the cassette Be sure to affix a label only at the locations illustrated below [a] to prevent malfunction of your camcorder. After using the cassette Rewind the tape to the beginning, put the cassette in its case, and store it upright. When the cassette memory does not work Reinsert a cassette.
-
Page 231: About The "Infolithium" Battery Pack
About the “InfoLITHIUM” battery pack What is the “InfoLITHIUM” battery pack? The “InfoLITHIUM” battery pack is a lithium-ion battery pack that has functions for communicating information related to operating conditions between the battery pack and an optional AC adaptor/charger. The “InfoLITHIUM” battery pack calculates the power consumption according to the operating conditions of your camcorder, and displays the remaining battery time in minutes. -
Page 232: Battery Life
About the “InfoLITHIUM” battery pack How to store the battery pack •If the battery pack is not used for a long time, do the following procedure once per year to maintain proper function. 1. Fully charge the battery. 2. Discharge on your electronic equipment. 3. -
Page 233: About I.link
About the name “i.LINK” i.LINK is a more familiar term for IEEE 1394 data transport bus proposed by SONY, and is a trademark approved by many corporations. IEEE 1394 is an international standard standardized by the Institute of Electrical and Electronic Engineers. - Page 234 DV Interface, see page 97 and 111. This unit can also be connected to other i.LINK (DV Interface) compatible equipment made by SONY (e.g. VAIO series personal computer) other than video equipment. Before connecting this unit to a personal computer, make sure that application software supported by this unit is already installed on the personal computer.
-
Page 235: Using Your Camcorder Abroad
Using your camcorder abroad Using your camcorder abroad Countries and areas where you can use network functions are restricted. For details, refer to the separate Network Operating Instructions. (DCR-TRV950 only) You can use your camcorder in any country or area with the AC power adaptor supplied with your camcorder within 100 V to 240 V AC, 50/60 Hz. -
Page 236: Maintenance Information And Precautions
Maintenance information and precautions Moisture condensation If your camcorder is brought directly from a cold place to a warm place, moisture may condense inside your camcorder, on the surface of the tape, or on the lens. In this state, the tape may stick to the head drum and be damaged or your camcorder may not operate correctly. - Page 237 If the above problem [a], [b] or [c] occurs, clean the video heads for 10 seconds with the Sony DVM-12CLD cleaning cassette (optional). Check the picture and if the above problem persists, repeat cleaning.
-
Page 238: Adjusting The Lcd Screen (Calibration)
Maintenance information and precautions Adjusting the LCD screen (CALIBRATION) The buttons on the touch panel may not work correctly. If this happens, follow the procedure below. (1) Set the POWER switch to OFF (CHG). (2) Eject the cassette from your camcorder, then disconnect any connecting cable from your camcorder. - Page 239 •If any solid object or liquid gets inside the casing, unplug your camcorder and have it checked by a Sony dealer before operating it any further. •Avoid rough handling or mechanical shock. Be particularly careful of the lens. •Keep the POWER switch set to OFF (CHG) when you are not using your camcorder.
-
Page 240: About Care And Storage Of The Lens
Maintenance information and precautions Camcorder care •Remove the cassette, and periodically turn on the power, operate the CAMERA and VCR sections and play back a tape for about three minutes when your camcorder is not to be used for a long time. •Clean the lens with a soft brush to remove dust. -
Page 241: Battery Pack
•If you touch the liquid, wash it off with water. •If the liquid gets into your eyes, wash your eyes with a lot of water and then consult a doctor. If any problem occurs, unplug your camcorder and contact your nearest Sony dealer. -
Page 242: Specifications
Specifications Video camera recorder System Video recording system 2 rotary heads Helical scanning system Audio recording system Rotary heads, PCM system Quantization: 12 bits (Fs 32 kHz, stereo 1, stereo 2), 16 bits (Fs 48 kHz, stereo) Video signal NTSC color, EIA standards Usable cassette Mini DV cassette with the mark printed... - Page 243 Specifications General Power requirements 7.2 V (battery pack) 8.4 V (AC power adaptor) Average power consumption (when using the battery pack) During camera recording using 6.3 W Viewfinder 4.9 W Operating temperature 0°C to 40°C (32°F to 104°F) Storage temperature –20°C to + 60°C (–4°F to + 140°F) Dimensions (Approx.)
-
Page 244: Quick Reference
— Quick Reference — Identifying parts and controls Camcorder 1 Flash (p. 48, 139) 2 Focus ring (p. 76) 3 Lens 4 Lens hood 5 HOLOGRAM AF emitter (p. 141) 6 MIC jack (PLUG IN POWER) (red) Connect an external microphone (optional). - Page 245 Identifying parts and controls PLAY STOP qj Intelligent accessory shoe (p. 115, 181) qk LCD/Touch panel screen (p. 24, 129) ql OPEN button w; Speaker wa Video control buttons * ws DISPLAY/TOUCH PANEL button (p. 41) wd Viewfinder (p. 30) * The PLAY button of the Video control buttons has a raised tactile dot for easy operation.
- Page 246 Identifying parts and controls ea Access lamp es MEMORY OPEN button (p. 128) ed LOCK switch (p. 26) ef POWER switch eg START/STOP button (p. 26) eh DC IN jack (p. 19) ej DC IN jack cover ek MEMORY EJECT button (p. 128) el “Memory Stick”...
- Page 247 Identifying parts and controls rj Power zoom lever (p. 31, 86, 173) rk PHOTO button (p. 46, 51, 135) OPEN/ Z EJECT lever (p. 23) t; Grip strap ta Holder (DCR-TRV950 only) ts Stylus (p. 206) (DCR-TRV950 only) Fastening the grip strap Fasten the grip strap firmly.
- Page 248 Identifying parts and controls th AUDIO DUB button (p. 117) tj BACK LIGHT button (p. 34) tk SPOT LIGHT button * (p. 35) tl EDITSEARCH button * (p. 37) y; DATA CODE button (p. 41) ya COLOR BAR button (p. 66) ys CUSTOM PRESET button (p.
- Page 249 Identifying parts and controls yl Battery Pack (p. 15) u; Tripod receptacle Make sure that the length of the tripod screw is less than 5.5 mm (7/32 inch). Otherwise, you cannot attach the tripod securely, and the screw may damage your camcorder.
-
Page 250: Remote Commander
Identifying parts and controls Remote Commander The buttons that have the same name on the Remote Commander as on your camcorder function identically to the buttons on your camcorder. 1 PHOTO button (p. 46, 51, 135) 2 DISPLAY button (p. 41) 3 Memory control buttons 4 SEARCH MODE button (p. - Page 251 Sony VCRs to avoid erroneous remote control operation. If you use another Sony VCR in the commander mode VTR 2, we recommend changing the commander mode or covering the sensor of the VCR...
-
Page 252: Back Light (P
Identifying parts and controls Operation indicators LCD screen and Viewfinder 120min – STILL 16 : 9WIDE NEG. ART AUTO 60 AWB F1.8 1 Cassette memory (p. 12, 228) 2 Remaining battery time (p. 33) 3 Zoom (p. 31)/ Exposure (p. 74)/ Data file name (p. - Page 253 Identifying parts and controls Display window wk Remaining battery time indicator (p. 16)/ Tape counter (p. 33)/ Time code indicator (p. 33)/ Image number (p. 166)/ Self-diagnosis indicator (p. 225) wl Remaining battery time (p. 16) e; FULL charge indicator (p. 16)
-
Page 254: Index
Index A, B AC power adaptor ... 16 Adjusting viewfinder ... 30 Audio dubbing ... 115 AUDIO LEVEL ... 79 AUDIO MIX ... 210 Audio mode ... 214 AUTO LOCK selector ... 67 Auto red-eye reduction ... 48, 139 AUTO SHTR ... 208 A/V connecting cable ... - Page 256 Printed on recycled paper. Printed using VOC (Volatile Organic Compound)-free vegetable oil based ink. 3 0 7 5 4 9 4 1 3 Sony Corporation Printed in Japan...