Table of Contents
Advertisement
Instructions for use
GB
CN
,13
English,1
RDPG 96407
!
This symbol reminds you to read this instruc-
tion manual.
Contents
Installation, 2-3
Wash cycles, 9
Troubleshooting, 11
Service, 12
WASHER-DRYER
1
GB
Advertisement
Chapters
Table of Contents

Related Manuals for Ariston RDPG 96407


Summary of Contents for Ariston RDPG 96407
-
Page 1: Table Of Contents
Cleaning the detergent dispenser drawer Caring for the door and drum of your appliance Cleaning the pump Checking the water inlet hose Precautions and tips, 5 RDPG 96407 General safety Disposal Opening the porthole door manually Description of the washer-dryer, 6-7... -
Page 2: Installation
Installation Levelling the machine correctly will provide ! This instruction manual should be kept in a safe it with stability, help to avoid vibrations and place for future reference. If the washer-dryer is sold, transferred or moved, make sure that the excessive noise and prevent it from shifting while it is operating. -
Page 3: The First Wash Cycle
(see figure). Technical data The free end of the hose should not be Model RDPG 96407 underwater. width 59.5 cm height 85 cm Dimensions depth 60.5 cm ! We advise against the use of hose extensions;... -
Page 4: Care And Maintenance
Care and maintenance Cutting off the water and Caring for the door and drum of electricity supplies your appliance • Turn off the water tap after every wash cycle. • Always leave the porthole door ajar in order This will limit wear on the hydraulic system to prevent unpleasant odours from forming. inside the washer-dryer and help to prevent Cleaning the pump leaks. -
Page 5: Precautions And Tips
Precautions and tips • Do not use the appliance to dry clothes that ! This washer-dryer was designed and constructed in have been washed with flammable solvents accordance with international safety regulations. The following information is provided for safety reasons and (e.g. trichlorethylene). must therefore be read carefully. • Do not use the appliance to dry foam rubber or similar elastomers. -
Page 6: Description Of The Washer-Dryer
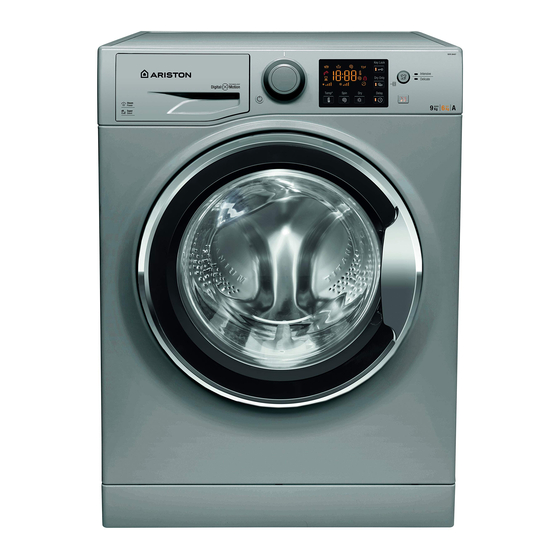
Description of the washer-dryer CLEANING Control panel ACTION button and TEMPERATURE indicator light CHILD button LOCK DRYING ONLY button ON/OFF button button DISPLAY START/PAUSE DELAY button and indicator Programme SPIN TIMER Detergent dispenser drawer light button WASH button CYCLE SELECTOR DRYING KNOB button... - Page 7 Display The display is useful when programming the machine and provides a great deal of information. The duration of the available wash cycles and the remaining time of a running cycle appear in section A (the display will show the maximum duration of the cycle chosen, which may decrease after several minutes, since the effective duration of the programme varies depending on the wash load and the settings chosen);...
-
Page 8: How To Run A Wash Cycle Or A Drying Cycle
How to run a wash cycle or a drying cycle Drying only 1. SWITCH THE MACHINE ON. Press the button; the START/PAUSE indicator light will flash slowly in a Press button to perform the drying-only cycle. After selecting the desired cycle (compatible with green colour. -
Page 9: Wash Cycles
AS/NZ 2442.2 set programme 8 with “A3” dryness level. 2) The programme used for the evaluation of (RDPG 96407 D AUS) under the mandatory Singapore Water Efficiency Labelling Scheme (WELS) and the recommended Washing Programme for soiled clothes is as follows: Program 8, Eco Cotton 60 Deg C... -
Page 10: Detergents And Laundry
Detergents and laundry Detergent dispenser drawer If the drying function is selected, a drying cycle automatically activates at the end of the wash cycle that Successful washing results also depend on the correct resembles open-air drying, with the added advantages dose of detergent: adding too much detergent will not of preserving garments from yellowing due to sunlight necessarily result in a more efficient wash, and may in... -
Page 11: Troubleshooting
Troubleshooting Your washer-dryer could occasionally fail to work. Before contacting the Technical Assistance Service (see “ Service”), make sure that the problem cannot be solved easily using the following list. Problem: Possible causes / Solutions: The washer-dryer does not switch • The appliance is not plugged into the socket fully, or not enough to make contact. -
Page 12: Service
Service Before contacting the Technical Assistance Service: • Check whether you can solve the problem alone (see “Troubleshooting”); • Restart the wash cycle to check whether the problem has been solved; • If this is not the case, contact an authorised Technical Assistance Centre. Always request the assistance of authorised technicians. Have the following information to hand: • the type of problem; • the appliance model (Mod.); • the serial number (S/N). This information can be found on the data plate applied to the rear of the washer-dryer, and can also be found on the front of the appliance by opening the door. - Page 13 洗衣烘干机 该符号提醒你要阅读本说明书。 目录 英语 安装, 14-15 拆包与调平 水电连接 第一个洗涤周期 技术数据 爱护与维护, 16 关断水电 清洁洗衣烘干机 清洁洗涤剂盒 爱护设备门和滚筒 清洁泵 检查进水软管 RDPG 96407 注意事项和技巧, 17 一般安全 处理 手动打开舷窗门 洗衣烘干机描述, 18-19 控制面板 显示屏 如何运行洗涤周期或烘干周期, 20 洗涤周期, 21 程序与洗涤周期表 洗涤剂与脏衣物, 22 洗涤剂盒 准备脏衣物 特殊洗涤周期 负载平衡系统...
- Page 14 安装 ! 本说明书应妥善保管,以备将来使用。如果 正确调平设备将增加稳定性,避免震动和噪音过 洗衣烘干机卖出、转让或移动,请确保将说明书 大,防止其在工作时移动。如果将设备放在地毯 与设备放在一起,以便新主人能够熟悉其操作 上,请调整支脚,以在洗衣烘干机下面留出足够的 和特点。 通风间隙。 ! 请认真阅读说明:说明书含有关于设备安全 安装与操作的重要信息。 水电连接 连接进水软管 拆包与调平 拆包 1. 用 3/4 气体螺纹连 接将进水软管拧到冷 1. 从包装中取出洗衣烘干机。 如图所 水龙头上( 2. 请确保洗衣烘干机在运输中无损坏。如果 示 )。 损坏,请联系零售商,严禁执行任何安装过 在连接前,先进行放 程。 水,直到水变清澈。 3. 取下设备后面 的 4 颗保护螺丝 (运输时使用) 及橡胶垫圈和相...
- Page 15 或者将排水软管放在 见“清洁洗衣烘干 期,运行一次洗涤周期( 脸盆、水槽或浴缸边 机 ”)。 上,并将管子固定到 技术数据 龙头上( 如图所示 )。 型号 软管活动端不得放在 RDPG 96407 水中。 宽 59.5 cm 高 85 cm 尺寸 深 60.5 cm 洗涤程序:1 - 9 kg ! 我们不建议使用延长软管;如果必要,则延长 烘干程序:1 - 6 kg 容量 软管必须与原始软管直径相同,且长度不得超 过 150 cm。...
-
Page 16: 爱护与维护
爱护与维护 关断水电 爱护设备门和滚筒 • 始终保持舷窗门半开,以防止形成难闻气味。 • 在每个洗涤周期后,关闭水龙头。这将减少洗 衣烘干机内部液压系统的磨损,防止泄露。 清洁泵 • 在清洁和所有维护工作中,拔出洗衣烘干机 插头。 洗衣烘干机配备有一个自洁泵,无需任何维护。 有时,小物品(如硬币或钮扣)会掉入设备底部 保护泵的暗室内。 清洁洗衣烘干机 ! 确保洗涤周期结束,拔出设备插头。 • 设备外部和橡胶部件可用浸泡温肥皂水的软布 清洁。严禁使用溶剂或研磨剂。 要打开暗室: • 对内部部件,洗衣烘干机提供自动清洁程 序,该程序必须在滚筒中无负荷时运行。 1. 用螺丝刀取下洗 衣烘干机前面下部 你可能使用洗涤剂 如图所 的盖板( (剂量为微脏衣物指 示 ); 定剂量的 10%)或专 用添加剂来清洁洗衣 烘干机。我们建议每 隔 40 个洗涤周期运 行一次清洁程序。... -
Page 17: 注意事项和技巧
注意事项和技巧 ! 洗衣烘干机根据国际安全规程设计和制造。为确保安 • 严禁用本设备烘干用易燃溶剂(如三氯乙烯) 洗涤的衣物。 全,提供下列信息,请认真阅读。 • 严禁用本设备干燥泡沫橡胶或类似人造橡胶。 一般安全 • 确保在烘干周期中打开水龙 头。 • 本设备仅为家用设计。 除非受到持续监管,否则,不到 3 岁的儿童应远离设 • 如果得到安全使用设备的监管或指导,并了解相关 • 备 。 危险,则本设备可由 8 岁以上儿童及身体、 取出口袋中的所有物体,如打火机和火柴。 • 处理 • 包装材料处理:遵守本地规定,以回收包装材料。 感官或精神功能受损的人或缺乏经验和知识的 • 关于垃圾电气和电子设备的欧洲指令 2012/19/EU 要 求,旧家电不得作为正常未分类城市垃圾处理。旧 设备必须单独回收,以尽可能回收和利用其包含的 人使用。儿童不得玩弄设备。如无监管,严禁儿 材料,降低对人类健康和环境的影响。产品上打叉 童进行清洁和维护。... -
Page 18: 洗衣烘干机描述
洗衣烘干机描述 控制面板 清洁动作 温度 按钮和指示灯 按钮 儿童锁 只烘干 按钮 开/关 按钮 按钮 显示屏 开始/暂停 延时器 程序键 按钮和指示灯 按钮 洗涤剂盒 甩干 洗涤周 烘干 期选择旋钮 按钮 按钮 开始/暂停按钮和指示灯:当绿色指示灯缓慢闪烁时,按下 洗涤剂盒: 见 洗涤剂 用于分配洗涤剂和洗涤添加剂( “ 按钮,以启动洗涤周期。当周期开始后,指示灯将保持明 与脏衣物 ”)。 亮。要暂停洗涤周期,再次按下按钮;指示灯将闪烁琥珀 程序键: 洗涤剂盒内的程序键显示所有可用程序,并给 色。如果 符号未变亮,则可打开门。要从中断处开 出如何使用各分配器隔间的图示。 始洗涤周期,则再次按下按钮。... - Page 19 显示屏 在设定程序时,显示屏很有用,会提供大量信息。 可用洗涤周期的持续时间及运行周期的剩余时间显示在 A 部分(显示屏将显示所选周期的最长持续时间,它会在几分钟后下降, 因为程序的有效持续时间随洗涤负荷及所选设置而不同);如果设置了延时器选项,则在所选洗涤周期启动后,开始倒计时。 此外,按下相应按钮,可查看温度和转速的最大值、与所选程序有关的烘干类型或最近选择的程序(如果与所选程序兼容)。 与所选洗涤周期对应的“洗涤周期阶段”及运行洗涤周期的“洗涤周期阶段”显示在 B 部分: 主洗 漂洗 甩干/泵出 烘干 与“温度”、“甩干”和“烘干”对应的图标(从左开始)显示在 C 部分。“温度”栏 显示可为设定周期选择的最高温 度。“甩干”栏 显示可为设定周期选择的最大甩干程度。 当调整烘干设置时, 符号变亮。 门锁定 指示灯: 符号变亮表示门锁定。为防止损坏,在打开门前,等待符号灯熄灭。要在周期中打开门,按下开始/暂停按钮;如果门锁定 符 号熄灭,则门可打开。...
-
Page 20: 如何运行洗涤周期或烘干周期
如何运行洗涤周期或烘干周期 只烘干 1. 打开设备。按下 按钮; 按下按钮 ,执行只烘干周期。在选择想要 开始/暂停指示灯缓慢闪烁绿色。 的周期后(与衣物类型兼容),按下按钮 , 以取消洗涤阶段,并以所选周期的最大程度开始烘 2. 放入脏衣物。打开舷窗门。放入脏衣物,确保不超 干阶段。按下烘干按钮 ,以设定和修改干燥 过下页程序与洗涤周期表标示的最大负荷值。 程度或时间(与周期 1-2-3-4 和 14)不兼容)。 3. 量出洗涤剂。拉出洗涤剂盒,将洗涤剂倒入相应隔间,如 设置延迟启动。 “ 洗涤剂与脏衣物 ”所示。 要为选择的周期设置延迟启动,重复按下相应按钮,直 到达到所需延时。要清除延迟启动设置,按下按钮,直 4. 关闭门。 到显示屏显示“关”字样。 5. 选择洗涤周期。使用洗涤周期选择旋钮,选择想要的洗 设定想要的洗涤强度。 涤周期。为每个洗涤周期设定温度和转速;这些值可调 选项 允许根据织物脏度及想要的洗涤周期强度 整。周期持续时间将显示在显示屏上。 来优化洗涤。对于很脏的衣物,按下 按钮,直到 6. -
Page 21: 洗涤周期
如何运行洗涤周期或烘干周期 程序与洗涤周期表 洗涤剂 最高 最高 洗涤周期描述 温度 转速 (°C) (rpm) 抗皱 1 日常洗涤和烘干 40° 2 衬衣洗涤和烘干 40° 1000 3 预熨 4 蒸汽翻新 日常清洁 5 防污快速 40° 1200 40° 6 防污... -
Page 22: 洗涤剂与脏衣物
洗涤剂与脏衣物 如果选择烘干功能,则在洗涤周期结束时,烘干周期自动激活,就像 洗涤剂盒 露天干燥一样,且具有防止衣物因阳光暴晒而变黄及防止空气中灰尘 洗涤效果还取决于适量的洗涤剂:加入太多洗涤剂不会 造成衣物白度下降的附加优点。建议选择 提高洗涤效果,它会在你的设备里面堆积,造成环境 “ ”干燥程度。 污染。 防污:该程序适合不褪色的很脏衣物。它可确保高于标准 ! 对白色棉质衣物、预洗和 60°C 以上温度洗涤,使用粉状 级(A 级)的洗涤效果。 洗涤剂。 在运行程序时,严禁混合不同颜色衣物。我们建议使用粉 ! 遵循洗涤剂包装上的说明。 状洗涤剂。如果有顽固污渍,则建议用特殊添加剂预处 ! 严禁使用手洗洗涤剂;会产生太多泡沫。 理。 打开洗涤剂盒,倒入洗涤剂 如果选择烘干功能,则在洗涤周期结束时,烘干周期自动激 和洗涤添加剂,如下所示。 活,就像露天干燥一样,且具有防止衣物因阳光暴晒而变黄及防 止空气中灰尘造成衣物白度下降的附加优点。 建议选择“ 严禁将洗涤剂倒入中间 ”干燥程度。 多色:用于洗涤有色棉质衣物。该程序经过优化,可在反 隔间(*)。 复洗涤后保持颜色鲜艳。 隔间 1: 超柔:使用程序 11,洗涤镶有假钻或闪光装饰片的非常 洗涤周期洗涤剂(粉状或液... -
Page 23: 故障检修
故障检修 见 服务 洗衣烘干机会偶尔故障。在联系技术支持服务前( “ ”),请确保利用下列清单尝试解决问题。 问题: 可能原因 / 解决方案: 洗衣烘干机不能启动。 • 设备插头未完全插入插座,或未充分接触。 • 家中停电。 洗涤周期不能启动。 • 洗衣烘干机门没有正确关闭。 • 未按下开/关按钮。 • 未按下开始/暂停按钮。 • 未打开水龙头。 • 设置了延迟启动。 • 进水软管未连接到水龙头。 洗衣烘干机不能注水 • 软管弯曲。 (显示屏闪烁显示“H2O”字样)。 • 未打开水龙头。 • 家中停水。 • 水压太低。 • 未按下开始/暂停按钮。 洗衣烘干机持续注水和排水。... - Page 24 服务 195142486.04 10/2016 在联系技术支持服务前: • 检查你是否能独自解决问题( 见 故障检修 “ ”); • 重启洗涤周期,检查问题是否解决; • 如果未解决,请联系授权技术支持中心。 始终要求授权技术人员提供支持。 准备好下列信息: • 问题类型; • 设备型号 (Mod.); • 序列号 (S/N)。 这些信息可在洗衣烘干机后面的铭牌上找到,也可在打开门后设备正面找到。...