Sony BDV-L600 Operating Instructions Manual
Blu-ray disc/dvd home theatre system
Hide thumbs
Also See for BDV-L600:
- Operating instructions manual (163 pages) ,
- Quick start manual (20 pages) ,
- Installation manual (2 pages)

Related Manuals for Sony BDV-L600


Summary of Contents for Sony BDV-L600
- Page 1 4-279-067- (2) Blu-ray Disc/DVD Home Theatre System Operating Instructions BDV-L800/BDV-L800M/BDV-L600...
- Page 2 WARNING Do not install the appliance in a confined space, such as a bookcase or built-in cabinet. To reduce the risk of fire, do not cover the ventilation opening of the apparatus with newspapers, tablecloths, curtains, etc. Do not place the naked flame sources such as lighted candles on the apparatus.
-
Page 3: Copy Protection
The manufacturer of this product is Sony Corporation, 1-7-1 Konan Minato-ku Tokyo, 108-0075 Japan. The Authorized Representative for EMC and product safety is Sony Deutschland GmbH, Hedelfinger Strasse 61, 70327 Stuttgart, Germany. For any service or guarantee matters please refer to the addresses given in separate service or guarantee documents. - Page 4 • “Wi-Fi CERTIFIED™” and “Wi- Fi Protected Setup™” are trademarks of the Wi-Fi Alliance. • “PhotoTV HD” and the “PhotoTV HD” logo are trademarks of Sony Corporation. • MPEG Layer-3 audio coding technology and patents licensed from Fraunhofer IIS and Thomson.
-
Page 5: About These Operating Instructions
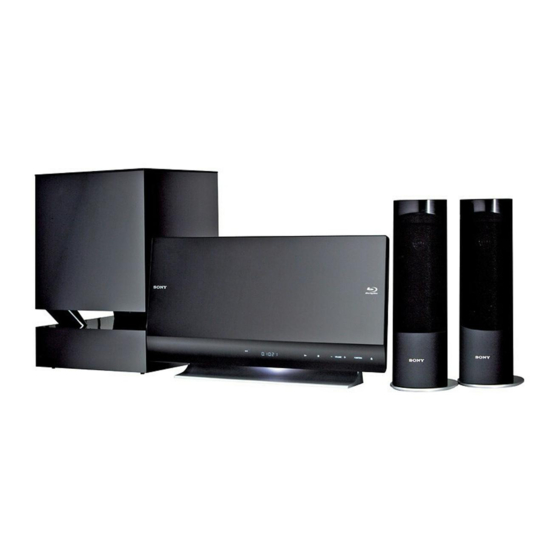
• The instructions in this manual are for BDV-L800, BDV-L800M, and BDV- L600. BDV-L600 is the model used for illustration purposes. Any difference in operation is clearly indicated in the text, for example, “BDV-L600 only.”... -
Page 6: Table Of Contents
Table of Contents About These Operating Instructions ... 5 Unpacking ... 7 Index to Parts and Controls... 10 Getting Started Step 1: Installing the System ...16 Step 2: Connecting the System ...18 Step 3: Performing the Easy Setup ...32 Step 4: Selecting the Source ...33 Step 5: Enjoying Surround Sound ...34 Playback... -
Page 7: Unpacking
Unpacking BDV-L800/BDV-L800M • Main unit (1) • Front speakers (2) • Subwoofer (1) • FM wire antenna (aerial) (1) • Remote commander (remote) (1) • R6 (size AA) batteries (2) • Dock for iPod/iPhone (TDM-iP30) (1) • Video cord for Dock for iPod/iPhone (1) •... - Page 8 BDV-L600 • Main unit (1) • Front speakers (2) • Subwoofer (1) • FM wire antenna (aerial) (1) • Remote commander (remote) (1) • R6 (size AA) batteries (2) • Dock for iPod/iPhone (TDM-iP30) (1) • Video cord for Dock for iPod/iPhone (1) •...
- Page 9 Preparing the remote Insert two R6 (size AA) batteries (supplied) by matching the 3 and # ends on the batteries to the markings inside the compartment.
-
Page 10: Index To Parts And Controls
Index to Parts and Controls For more information, refer to the pages indicated in parentheses. Main unit A Ventilation openings B Disc slot (page 36) C Soft-touch buttons/indicators N (play) Starts or re-starts playback (resume play). Plays a slideshow when a disc containing JPEG image files is inserted. - Page 11 Side view (without the panel cover) (USB) port (left) (page 37) Used for connecting a USB device. B "/1 (on/standby) Turns on the main unit, or sets it to standby mode. C VIDEO OUT jack (page 19) D HDMI OUT jack (page 19) E HDMI IN 1 jack (page 21) F HDMI IN 2 jack (page 21) G LAN(100) terminal (page 23)
-
Page 12: Front Panel Display
Front panel display About the indications in the front panel display A Displays the system’s playing status. B Lights up when repeat play is activated. C Lights up when stereo sound is received. (Radio only) D Lights up when the system is playing via the PARTY STREAMING function. - Page 13 Subwoofer Front panel A LINK/STANDBY indicator You can check the status of wireless transmission between the main unit and subwoofer. Indicator Status Turns green. The system is turned on, wireless transmission is activated and sound signals are being received. Turns orange. The system is turned on, wireless transmission is activated with the Secure Link...
-
Page 14: Top Menu
Remote control The buttons for system operation only are described below. See “Controlling Your TV or Other Components with the Supplied Remote” (page 52) for the buttons for operation of the connected components. SPEAKERS TV AUDIO BRAVIA Sync TOP MENU RETURN MENU FUNCTION... - Page 15 E FUNCTION (pages 33, 47) Selects the playback source. HOME (pages 32, 47, 50, 53, 55, 56, 60) Enters or exits the system’s home menu. SOUND MODE (page 45) Selects the sound mode. F Playback operation buttons See “Playback” (page 36). ./>...
-
Page 16: Getting Started
Getting Started Step 1: Installing the System You can select from one of three positions for installing the main unit: in a vertical position, in a horizontal position, or on a wall. For details, see “Selecting the installation position of the main unit” (page 27). - Page 17 • Place the front speakers forward from the TV. Make sure there are no obstacles in front of the speakers. • Both front speakers should be pointed straight forward. Do not place the speakers at an angle. Note on handling the subwoofer Do not hold the subwoofer by the middle opening when lifting it.
-
Page 18: Step 2: Connecting The System
Step 2: Connecting the System For connecting the system, read the information on the following pages. Do not connect the AC power cords (mains leads) of the main unit and subwoofer to a wall outlet (mains) until all the other connections are made. •... -
Page 19: Connecting The Tv
Connecting the TV Connect the system to your TV to display the image of the system on your TV, and listen to TV sound via the system’s speakers. Depending on the jacks and functions on your TV, select the connection method. •... - Page 20 A HDMI cable connection If your TV has an HDMI jack, connect to the TV with a High Speed HDMI cable. This will provide better image quality compared to other types of connections. When connecting with a High Speed HDMI cable, you need to select the type of output signal when performing the Easy Setup (page 32).
- Page 21 Connecting the other components with an HDMI (OUT) jack You can connect a component that has an HDMI (OUT) jack such as a set-top box/digital satellite ® receiver or PLAYSTATION 3, etc., with a High Speed HDMI cable. A High Speed HDMI cable connection can send both video and audio signals.
- Page 22 Connecting the antenna (aerial) Rear panel of the main unit • Be sure to fully extend the FM wire antenna (aerial). • After connecting the FM wire antenna (aerial), keep it as horizontal as possible. • If you have poor FM reception, use a 75-ohm coaxial cable (not supplied) to connect the main unit to an outdoor FM antenna (aerial).
-
Page 23: Connecting To The Network
(Sony UWA-BR100* only). * As of March 2011. The USB Wireless LAN Adapter may not be available in some regions/countries. • You can also get information for network settings from the following Sony support page: For customers in Europe: http://support.sony-europe.com For customers in other countries/regions: http://www.sony-asia.com/support... - Page 24 USB Wireless LAN Adapter to a different position or place the USB Wireless LAN Adapter and the wireless LAN router closer to each other. • You can also get information for network settings from the following Sony support page: For customers in Europe: http://support.sony-europe.com...
- Page 25 Inserting the wireless transceivers The main unit transmits sound to the subwoofer that is connected to the front speakers. To activate wireless transmission, perform the following Steps. Insert a wireless transceiver into the main unit by matching the markings on the rear panel.
- Page 26 Connecting the AC power cord (mains lead) to the main unit Do not plug the AC power cord (mains lead) for the main unit into a wall outlet (mains) until you have made all other connections. Connect the AC power cord (mains lead) to the AC adapter. AC adapter (supplied) Plug the connector of the AC adapter into the DC IN 14V connector on the rear of the main unit.
- Page 27 Selecting the installation position of the main unit You can select from one of three positions for installing the main unit: in a vertical position, in a horizontal position, or on a wall. To install the main unit in a vertical position See “Attaching the covers”...
- Page 28 Attaching the covers After you have made all the connections, organize the cables and attach the panel cover and the stand cover by following the Steps below. Place the main unit on its face. • Make sure to place the main unit on a soft thick cloth to prevent damaging the main unit. Bring together the cables (except the FM wire antenna (aerial)), guide them through the slot at the right of the main unit, behind the clamp (A), and through the slot at the bottom of the main unit.
- Page 29 Attach the panel cover to the rear of the main unit. Put the left edge of the lower part of the panel cover on (C), align the bottom projection of the panel cover with (D), and then slide it inward until it clicks into place. FM wire antenna (aerial) •...
- Page 30 To open the hatch of the panel cover To arrange the cables to the left side of the main unit, open the hatch of the panel cover before you attach the panel cover. Be sure not to lose the hatch. To open the hatch, remove the panel cover, hold the hatch, and then pull it up and outward.
- Page 31 Turning on the system After you have made all connections in “Step 2: Connecting the System” (page 18), turn the system on. Press "/1 to turn the main unit on. "/1 Connect the AC power cord (mains lead) of the subwoofer into the wall outlet (mains). After the subwoofer turns on, the LINK/STANDBY indicator turns green and the wireless transmission is activated.
-
Page 32: Step 3: Performing The Easy Setup
Step 3: Performing the Easy Setup Follow the Steps below to make the basic adjustments for using the system. Displayed items vary depending on the country model. C/X/x/c, Turn on the TV. Press [/1. Switch the input selector on your TV so that the signal from the system appears on the TV screen. -
Page 33: Step 4: Selecting The Source
Step 4: Selecting the Source You can select the playback source. FUNCTION Press FUNCTION repeatedly until the desired function appears in the front panel display. Each time you press FUNCTION, the function changes as follows. “BD/DVD” t “FM” t “HDMI1” t “HDMI2”... -
Page 34: Step 5: Enjoying Surround Sound
Step 5: Enjoying Surround Sound After performing the previous Steps and starting playback, you can easily enjoy surround sound. You can also select pre-programmed surround settings that are tailored to different kinds of sound sources. They bring the exciting and powerful sound of movie theaters into your home. X/x/c, Selecting surround settings based on your listening preference The setting method differs depending on the function. - Page 35 About speaker output The default setting is [Auto] (“AUTO”). Surround setting Effect [Auto] The system outputs the sound with suitable effect automatically depending on the source. “AUTO” • 2 channel source: Outputs 2 channel sound as it is. • Multi-channel source: Simulates 7.1 or 5.1 surround sound with two front speakers and a subwoofer.
-
Page 36: Playback
Playback Playing a Disc For playable discs, see “Playable Discs” (page 75). Switch the input selector on your TV so that the signal from the system appears on your TV screen. Load a disc. Labeled side facing the front appears on the home menu and playback starts. -
Page 37: Playing From A Usb Device
Insert a Blu-ray 3D Disc. The operation method differs depending on the disc. Refer to the operating instructions supplied with the disc. • Refer also to the operating instructions of your 3D- compatible TV. Displaying the play information You can check the playback information, etc., by pressing DISPLAY. -
Page 38: Enjoying An Ipod/Iphone
Enjoying an iPod/iPhone You can enjoy the music/video/photo and charge the battery of an iPod/iPhone via the system. Compatible iPod/iPhone models The compatible iPod/iPhone models are as follows. Update your iPod/iPhone with the latest software before using with the system. Made for iPod touch 4th generation, iPod touch 3rd generation, iPod touch 2nd generation, iPod touch 1st generation, iPod nano 6th generation,... - Page 39 • You cannot transfer songs onto the iPod/iPhone from this system. • Sony cannot accept responsibility in the event that data recorded to iPod/iPhone is lost or damaged when using an iPod/iPhone connected to this main unit. • This product has been designed specifically to work with iPod/iPhone and has been certified to meet Apple performance standards.
-
Page 40: Playing Via A Network
Playing via a Network Streaming BRAVIA Internet Video BRAVIA Internet Video serves as a gateway delivering selected Internet content and a variety of on-demand entertainment straight to your main unit. • Some Internet content requires registration via a PC before it can be played. Prepare for BRAVIA Internet Video. - Page 41 (PARTY [Video], STREAMING) You can play the same music at the same time across all Sony components which are compatible with the PARTY STREAMING function and connected to your home network. There are two kinds of PARTY STREAMING- compatible components.
-
Page 42: Available Options
• The sale and product lineup of products that are compatible with the PARTY STREAMING function differ depending on the area. Searching for video/music information You can acquire content information using Gracenote technology and search for related information. Connect the system to a network (page 23). - Page 43 [Video] only Items Details [A/V SYNC] Adjusts the gap between picture and sound. For details, see “Adjusting the delay between the picture and sound” (page 44). [3D Output Setting] Sets whether or not to output 3D video automatically. • 3D video from the HDMI IN 1 or HDMI IN 2 jack is output regardless of this setting.
- Page 44 Adjusting the delay between the picture and sound (A/V SYNC) When the sound does not match the pictures on the TV screen, you can adjust the delay between the picture and sound. The setting method differs depending on the function. •...
-
Page 45: Sound Adjustment
Sound Adjustment Selecting the Effect to Suit the Source You can select a suitable sound mode for movies or music. Press SOUND MODE repeatedly during playback until the desired mode appears in the front panel display. • “AUTO”: The system selects “MOVIE” or “MUSIC”... -
Page 46: Enjoying Multiplex Broadcast Sound
• [ Stereo (Audio1)] and [ appear when only one audio stream is recorded on the disc. x CD • [ Stereo]: The standard stereo sound. • [ 1/L]: The sound of the left channel (monaural). • [ 2/R]: The sound of the right channel (monaural). -
Page 47: Tuner
HOME FUNCTION 2 +/– Current station Current band and preset number FM 7 88.00 SONY FM Station name (European models only) Press FUNCTION repeatedly until “FM” appears in the front panel display. Select the radio station. Automatic tuning Press and hold TUNING +/– until the auto scanning starts. -
Page 48: Using The Radio Data System (Rds)
To change the preset number Select the desired preset number by pressing PRESET +/–, then perform the procedure from Step 3. Selecting the preset station Press FUNCTION repeatedly until “FM” appears in the front panel display. The last received station is tuned in. Press PRESET +/–... -
Page 49: Other Operations
HDMI Function for “BRAVIA” Sync This function is available on TVs with the “BRAVIA” Sync function. By connecting Sony components that are compatible with the Control for HDMI function via a High Speed HDMI cable, operation is simplified. • Some functions can only be used if the connected TV is compatible, and require prior setting via the TV. -
Page 50: Setting The Speakers
Routing Control When you perform One-Touch Play on the connected component, the system turns on and sets the system’s function to “HDMI1” or “HDMI2” (depending on the HDMI input jack in use), and your TV’s input is automatically set to the HDMI input to which the system is connected. -
Page 51: Using The Sleep Timer
test tone is emitted from each speaker in sequence. Adjust the sound level as follows. Set [Test Tone] to [On]. Press X/x to select [Level], then press Press X/x to select the desired speaker type, then press Press C/c to select the left or right speaker, then press X/x to adjust the level. -
Page 52: Controlling Your Tv Or Other Components With The Supplied Remote
“Changing the preset code of the remote (Preset mode)” (page 52). • When you replace the batteries of the remote, the remote setting may be reset to the default (SONY) setting. Controlling your components with the supplied remote... -
Page 53: Saving Power In Standby Mode
– [Quick Start Mode] is set to [Off] (page 65). Browsing Websites You can connect to the Internet and enjoy websites like the Sony homepage using the system. Prepare for Internet browsing. Connect the system to a network (page 23). - Page 54 Internet Browser display You can check website information by pressing DISPLAY. The display information differs depending on the website and page status. A Page title B Cursor Move by pressing C/X/x/c. Place the cursor on the link you want to view, then press The linked website is displayed.
-
Page 55: Further Settings For The Wireless System
Further Settings for the Wireless System Activating wireless transmission between specific units [Secure Link] You can specify the wireless connection to link the main unit to the subwoofer using the Secure Link function. This function can help prevent interference if you use multiple wireless products or your neighbors use wireless products. -
Page 56: Setting Up The Network
Press X/x to select [Internet Settings], then press The [Internet Settings] display appears. For BDV-L800/BDV-L800M For BDV-L600 • The [Internet Settings] items are necessary to connect to the Internet. Enter the respective (alphanumeric) values for your broadband router or Wireless LAN router. - Page 57 When connecting to the LAN with a LAN cable Follow the Steps below for connecting to a LAN (Local Area Network). Auto setting Press X/x to select [Wired Setup] on the [Internet Settings] display, then press Press X/x to select [Auto], then press The system performs the network setting automatically, and internet settings appear on the TV screen.
-
Page 58: About Wireless Lan Security
When your wireless router is compatible with the WPS function Press X/x to select [Wireless Setup(built-in)]* or [USB Wireless Setup] on the [Internet Settings] display, then press * BDV-L800/BDV-L800M only. Press X/x to select [Wi-Fi Protected Setup (WPS)], then press Activate the WPS function of your wireless router, press X/x to select [Start], then press... - Page 59 No Security Although you can easily make settings, anyone can intercept wireless communication or intrude into your wireless network, even without any sophisticated tools. Keep in mind that there is a risk of unauthorized access or interception of data. WEP applies security to communications to prevent outsiders from intercepting communications or intruding into your wireless network.
-
Page 60: Settings And Adjustments
Icon [Setup]. Setting Guide] x [Preset Mode] You can change the preset code of the remote for controlling non-Sony components. For details, see “Changing the preset code of the remote (Preset mode)” (page 52). Explanation [Screen Settings] (page 61) Makes the screen settings according to the type of connecting jacks. -
Page 61: [Network Update]
You can update and improve the functions of the system. For information about update functions, refer to the following website: For customers in Europe: http://support.sony-europe.com For customers in other countries/regions: http://www.sony-asia.com/support During a software update, “UPDATING” appears in the front panel display. After the update completes, the main unit automatically turns off. -
Page 62: [Audio Settings]
• When connecting the HDMI OUT jack and the video output jack at the same time, select [Video]. • If no picture appears when setting [HDMI] resolution, select [Video]. x [BD/DVD-ROM 1080/24p Output] [Auto]: Outputs 1920 × 1080p/24 Hz video signals only when connecting a 1080/24p- compatible TV using the HDMI OUT jack. -
Page 63: [Bd/Dvd Viewing Settings]
• When [Control for HDMI] is set to [On] (page 65), [Audio Output] is set to [Speaker + HDMI] automatically and this setting cannot be changed. • Audio signals are not output from the HDMI OUT jack when [Audio Output] is set to [Speaker + HDMI] and [HDMI1 Audio Input Mode] (page 65) is set to [TV]. -
Page 64: [Parental Control Settings]
[Parental Control Settings] x [Password] Set or change the password for the Parental Control function. A password allows you to set a restriction on BD-ROM, DVD VIDEO, or Internet video playback. If necessary, you can differentiate the restriction levels for BD-ROMs and DVD VIDEOs. - Page 65 [Simple/Off]: The soft-touch buttons and the front panel display turn off when the system is not being operated. For BDV-L600 [Standard/On]: The soft-touch buttons and the front panel display stay illuminated. [Simple/Off]: The soft-touch buttons and the front panel display turn off when the system is not being operated.
-
Page 66: [Network Settings]
[Automatic Access Permission]: Sets whether or not to allow automatic access from newly detected DLNA controller. [Smart Select]: Allows a Sony DLNA controller to find the system as the target component to operate by using the infrared ray. You can set this function to on or off. -
Page 67: Additional Information
If you have any questions or problems concerning your system, please consult your nearest Sony dealer. • To remove fingerprints on the front panel of the main unit, wipe it with a slightly moistened, well-wrung soft cloth (BDV-L800 only). -
Page 68: Notes About The Discs
On AC adapter • Use the supplied AC adapter (AC-BD100) for this player, as other adapters may cause a malfunction. • Do not disassemble or reverse-engineer. • Do not confine the AC adapter in a closed place such as a bookshelf or an AV cabinet. •... -
Page 69: Troubleshooting
Sony dealer. Note that if service personnel changes some parts during repair, these parts may be retained. In the event of a problem with the wireless sound function, have a Sony dealer check the entire system together (main unit and subwoofer). - Page 70 Picture Symptom There is no picture. There is no picture when you make an HDMI cable connection. 3D images from the HDMI IN 1 or HDMI IN 2 jack do not appear on the TV screen. No picture appears when the video output resolution selected in [Output Video Format] is incorrect.
- Page 71 After checking the above items and fixing any problems, turn on the subwoofer. If the cause of the problem cannot be found even after checking all the above items, consult your nearest Sony dealer. – Make sure that the wireless transceiver is inserted correctly into the main unit.
- Page 72 Symptom Sound is unstable. Noise is heard from front speakers or sound from the front speakers skips. Tuner Symptom Radio stations cannot be tuned Playback Symptom The disc does not play. File names are not displayed correctly. A disc does not start playing from the beginning.
-
Page 73: Usb Device
• Picture/sound quality may be improved by changing the connection speed. detail, especially during fast- Sony recommends a connection speed of at least 2.5 Mbps for standard- motion or dark scenes. definition video and 10 Mbps for high-definition video. - Page 74 Built-in/USB wireless LAN connection Symptom You cannot connect your PC to the Internet after [Wi-Fi Protected Setup (WPS)] is performed. You cannot connect the system to your wireless LAN router. The desired wireless router is not detected even if [Scan] is performed.
-
Page 75: Playable Discs
Playable Discs Blu-ray Disc BD-ROM BD-R/BD-RE DVD-ROM DVD-R/DVD-RW DVD+R/DVD+RW CD-DA (Music CD) CD-ROM CD-R/CD-RW Super Audio CD Since the Blu-ray Disc specifications are new and evolving, some discs may not be playable depending on the disc type and the version. Also, the audio output differs depending on the source, connected output jack, and selected audio settings. -
Page 76: Playable Types Of Files
Playable Types of Files Video File format 2)5) MPEG-1 Video/PS MPEG-2 Video/PS, 2)6) Xvid 2)5) MPEG4/AVC 2)5) WMV9 AVCHD Music File format MP3 (MPEG-1 Audio Layer III) 2)4)5) 2)4) WMA9 Standard LPCM Photo File format JPEG The system does not play these files via the renderer function. -
Page 77: Supported Audio Formats
Supported Audio Formats Audio formats supported by this system are as follows. Format LPCM 2ch LPCM 5.1ch LPCM 7.1ch Function “BD/DVD” “HDMI1” – “HDMI2” “TV” – (DIGITAL IN) a: Supported format. –: Unsupported format. • HDMI IN 1 and HDMI IN 2 jacks do not input sound in the case of an audio format that contains copy protections such as Super Audio CD or DVD-Audio. -
Page 78: Specifications
Rated impedance 100BASE-TX Terminal Dimensions (approx.) Mass (approx.) IEEE 802.11 b/g/n Front Speaker (SS-TSL600) for BDV-L600 2.4 GHz - 2.4835 GHz Speaker system [CH1 -13] Speaker unit PLL quartz-locked digital synthesizer 87.5 MHz - 108.0 MHz (50... - Page 79 Dimensions (approx.) 112 mm × 320 mm × 112 mm (w/h/d) Mass (approx.) 0.9 kg Active Subwoofer (SA-WSL600) Speaker system Subwoofer Speaker unit 160 mm cone type Rated impedance 4 ohms Dimensions (approx.) 275 mm × 395 mm × 290 mm (w/h/d) Mass (approx.) 9 kg...
-
Page 80: Language Code List
Language Code List The language spellings conform to the ISO 639: 1988 (E/F) standard. Parental Control/Area Code List... -
Page 81: Index
Index Numerics 3D 36 3D Output Setting 61 A/V SYNC 44 Audio 63 Audio DRC 62 Audio Output 62 Audio Return Channel 65 Audio Settings 62 Auto Display 65 Auto Standby 65 BD Audio MIX Setting 62 BD Hybrid Disc Playback Layer 63 BD Internet Connection 63 BD Parental Control 64... - Page 84 The software of this system may be updated in the future. To find out details on any available updates, please visit the following URL. For customers in Europe: http://support.sony-europe.com For customers in other countries/regions: http://www.sony-asia.com/support (European models only) ©2011 Sony Corporation Printed in Malaysia...