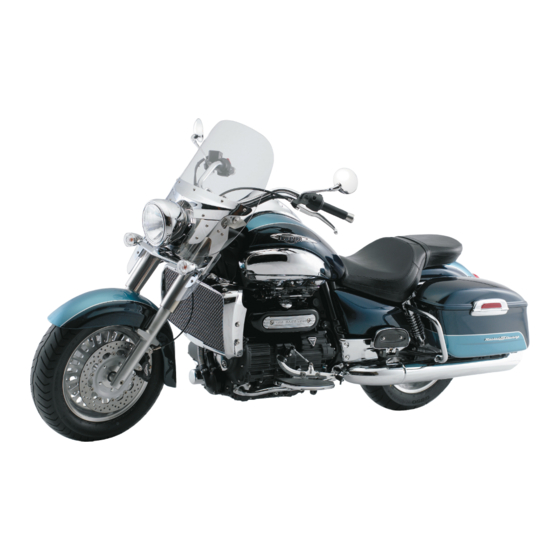
Triumph Rocket III Manual
Hide thumbs
Also See for Rocket III:
- Service manual (425 pages) ,
- Handbook (104 pages) ,
- Owner's handbook manual (102 pages)
Table of Contents
Advertisement
Quick Links
FOREWORD
This handbook contains information on the Triumph Rocket III motorcycle.
Always store this owner's handbook with the motorcycle and refer to it for
information whenever necessary.
Warning, Caution and
Note
Throughout this owner's handbook
particularly important information is
presented in the following form:
Warning
This
warning
special instructions or procedures,
which if not correctly followed could
result in personal injury, or loss of
life.
cblz
symbol identifies
Classic Cycles Technical Resources
Caution
This
caution
special instructions or procedures,
which, if not strictly observed, could
result in damage to, or destruction
of, equipment.
NOTE
•
This note symbol indicates
points of particular interest
for
more
convenient operation.
Foreword
symbol
identifies
efficient
and
1
Advertisement
Chapters
Table of Contents

Related Manuals for Triumph Rocket III


Summary of Contents for Triumph Rocket III
-
Page 1: Foreword
Foreword FOREWORD This handbook contains information on the Triumph Rocket III motorcycle. Always store this owner's handbook with the motorcycle and refer to it for information whenever necessary. cblz Warning, Caution and Note Caution Throughout this owner's handbook This caution... - Page 2 Triumph dealer. Owner's Handbook Only an authorised Triumph dealer Thank you for choosing a Triumph will have the necessary knowledge, motorcycle. This motorcycle is the...
- Page 3 This handbook includes safe riding printing. Triumph reserves the right tips, but does not contain all the to make changes at any time without techniques and skills necessary to prior notice, or obligation.
-
Page 4: Table Of Contents
Foreword Table of Contents This handbook contains a number of different sections. The table of contents below will help you find the beginning of each section where, in the case of the major sections, a further table of contents will help you find the specific subject required. - Page 5 Foreword - Safety First FOREWORD - SAFETY FIRST The Motorcycle Warning Warning This motorcycle is designed for use as a two-wheeled vehicle capable This motorcycle is designed for on- of carrying a rider on his/her own, road use only. It is not suitable for or a rider and one passenger off-road use.
- Page 6 Foreword - Safety First Fuel and Exhaust Fumes Warning Warning Never start your engine or let it run for any length of time in a closed PETROL IS HIGHLY area. The exhaust fumes are FLAMMABLE: poisonous and may cause loss of consciousness and death within a Always turn off the engine when short time.
- Page 7 Foreword - Safety First Safety Helmet and Clothing Warning A safety helmet is one of the most Warning important pieces of riding gear as it offers protection against head When riding the motorcycle, both injuries. You and your passenger's rider and passenger must always helmet should be carefully chosen wear a motorcycle safety helmet, should...
- Page 8 Owners should be aware that the remove the ignition key before only approved parts, accessories leaving the motorcycle unattended. and conversions for any Triumph By removing the key, the risk of use motorcycle are those which carry of the motorcycle by unauthorised official Triumph approval and are or untrained persons is reduced.
- Page 9 (when the bank angle accident, collision or fall, it must be indicator is worn to a minimum of taken to an authorised Triumph 5 mm in length) will allow the dealer for inspection and repair. motorcycle to be banked to an Any accident can cause damage to unsafe angle.
- Page 10 Riding when fatigued or under the influence of alcohol or other drugs Warning reduces rider's ability maintain control of the motorcycle This Triumph motorcycle should be and may lead to loss of control and operated within the legal speed an accident. limits particular road travelled.
- Page 11 Foreword - Safety First Handlebars and Footrests Warning Warning Continually observe and react to changes in road surface, traffic and The rider must maintain control of wind conditions. All two-wheeled the vehicle by keeping hands on vehicles are subject to external the handlebars at all times.
-
Page 12: Warning Labels
Warning Labels WARNING LABELS Warning Label Locations – Rocket III The labels detailed on this and the following pages draw your attention to important safety information in this handbook. Before riding, ensure that all riders have understood and complied with all the information to which these labels relate. - Page 13 Warning Labels Warning Label Locations – Rocket III (continued) Unleaded Fuel (page 30) Safety Helmet (page 7) Daily Safety Checks (page 33) Classic Cycles Technical Resources...
-
Page 14: Parts Identification
Parts Identification PARTS IDENTIFICATION 13 12 11 10 cbnt 1 Front Indicator 9 Side Stand 2 Headlamps 10 Gear Change Pedal 3 Coolant Expansion Tank 11 Clutch Cable 4 Oil Filler Cap/Dipstick 12 Radiator 5 Tool Kit beneath seat) 13 Coolant Pressure Cap 6 Rear Lamp 7 Rear Indicator 8 Transmission Shaft/Final Drive... - Page 15 Parts Identification 15 16 17 18 19 26 25 cbns 14 Rear Brake Caliper 22 Front Brake Caliper 15 Rear Suspension Unit 23 Rear Brake Pedal 16 Seat Lock 24 Rear Brake Fluid Reservoir 17 Battery (beneath seat) 25 Engine Management ECM (beneath right hand side panel) 18 Fuel Tank 26 Silencer...
- Page 16 Parts Identification 1 Clutch Lever 2 Clutch Lever Adjuster 3 Headlamp Dipswitch 4 Horn Button 5 Indicator Switch 6 Ignition Switch 7 Front Brake Fluid Reservoir 8 Front Brake Lever 9 Engine Stop Switch 10 Starter Button 11 Tachometer 12 Speedometer 13 Odometer www.ClassicCycles.org...
-
Page 17: Serial Numbers
Serial Numbers SERIAL NUMBERS Vehicle Identification Engine Serial Number Number (V.I.N.) The engine serial number is stamped on the engine crankcase, towards the The vehicle identification number is rear, on the right hand side. stamped into the steering head area of the frame. - Page 18 Serial Numbers This page intentionally left blank www.ClassicCycles.org...
-
Page 19: General Information
General Information GENERAL INFORMATION Table of Contents Instrument Panel Layout ................20 Speedometer .....................21 Tachometer....................21 Odometer/Trip Meter .................21 Warning Lights...................22 Low Oil Pressure Warning ..............22 Coolant Temperature ................22 Ignition Key....................24 Ignition Switch/Steering Lock ..............24 Ignition Switch Positions ..............24 Brake and Clutch Lever Adjuster...............25 Right Handlebar Switches .................26 Engine Stop Switch................26 Starter Button..................27... -
Page 20: Instrument Panel Layout
General Information Instrument Panel Layout 1 Speedometer 9 High Beam Indicator Light 2 Odometer/Trip Meter 10 Neutral Indicator Light 3 Trip reset knob 11 Low Fuel Level Indicator Light 4 Tachometer 12 Alarm Status Indicator Light (alarm is an accessory fit) 5 Tachometer ’red zone' 6 Engine Management Malfunction Indicator Light... -
Page 21: Speedometer
General Information Speedometer Odometer/Trip Meter The speedometer indicates the road speed of the motorcycle. Tachometer The tachometer shows the engine speed in revolutions per minute - rpm (r/min). On the right side of the tachometer face is the ’red zone' . Engine rpm (r/min) in the red zone is above maximum... -
Page 22: Warning Lights
General Information To reset either of the trip meters, NOTE select and display the trip meter to be • The high coolant temperature zeroed then turn the reset knob anti- /low oil pressure warning clockwise (as viewed from the left light will illuminate and an side of the motorcycle) and hold it in arrow will appear on the... - Page 23 Contact an authorised Triumph dealer as soon as possible to have the fault checked and rectified. Turn Indicators When the indicator switch is...
-
Page 24: Ignition Key
Your authorised Triumph dealer can supply a replacement key cut from details of the key number or can cut a new key using the original as a master. -
Page 25: Brake And Clutch Lever Adjuster
General Information Brake and Clutch Lever Adjuster Warning For reasons of security and safety, always move the ignition switch to the ’LOCK' or ’P’ position and remove the key, when leaving the motorcycle unattended. unauthorised motorcycle may cause injury to the rider, other road... -
Page 26: Right Handlebar Switches
General Information Engine Stop Switch Warning In addition to the ignition switch being turned to the ’ON' position, the engine stop switch must be in the Do not attempt to adjust the levers ‘run’ position for the motorcycle to with the motorcycle in motion as operate. -
Page 27: Starter Button
General Information Starter Button forward. To select low beam, push the switch rearwards. When the high The starter button operates the beam is turned on, the high beam electric starter. For the starter to indicator light will illuminate. operate, the clutch lever must be pulled to the handlebar. -
Page 28: Fuel Requirement/Refuelling
Fuel Grade territories. Use of leaded fuel will damage the catalytic converter (if Your Triumph engine is designed to fitted). use unleaded fuel and will give optimum performance if the correct grade of fuel is used. Always use unleaded fuel with an octane rating of 95 RON. -
Page 29: Fuel Tank Cap
General Information Fuel Tank Cap Warning To help reduce hazards associated with refuelling, always observe the following fuel safety instructions: Petrol (fuel) is highly flammable and can be explosive under certain conditions. When refuelling, turn the ignition switch to the `OFF' position. -
Page 30: Filling The Fuel Tank
General Information Filling the Fuel Tank After refuelling always check that the fuel filler cap is correctly closed and Avoid filling the tank in rainy or dusty locked. conditions where airborne material can contaminate the fuel. Warning Caution Overfilling the tank can lead to fuel spillage. -
Page 31: Stand
General Information Stand NOTE • When using the side stand, always turn the handlebars Side Stand fully to the left and leave the motorcycle in first gear. Whenever the side stand is used before riding, always ensure that the stand is fully up after first sitting on the motorcycle. -
Page 32: Seat Lock
General Information To gain access to the handbook, down at the rear to engage in the remove the rear seat (as described seat lock. elsewhere in this section) and pivot the toolbox upward towards the rear Warning of the motorcycle. The handbook is located in a vertical slot behind the To prevent detachment of the seat battery. -
Page 33: Safe Operation
3/4 of maximum Maintenance and Adjustment section speed. or see your authorised Triumph From 500 to 1000 miles (800 to 1500 dealer for the action required to kilometres): return the motorcycle to a safe operating condition. - Page 34 General Information Final drive: No oil leaks (page 75). Clutch: Smooth operation correct cable free-play (page 66). Tyres/Wheels: Correct inflation pressures (when cold). Tread depth/ Coolant: No coolant leakage. Check wear, tyre/wheel damage, punctures the coolant level in the expansion etc.
-
Page 35: How To Ride The Motorcycle
How to Ride the Motorcycle HOW TO RIDE THE MOTORCYCLE Table of Contents To Stop the Engine..................36 To Start the Engine ...................37 Moving Off ....................38 Changing Gears ..................38 Braking ......................39 Parking ......................42 Considerations for High Speed Operation..........43 General ....................44 Steering....................44 Luggage....................44 Brakes....................44 Tyres ....................44... -
Page 36: To Stop The Engine
How to Ride the Motorcycle To Stop the Engine Engine stop switch Ignition switch Caution Starter button Support the motorcycle on a firm, The engine should normally be level surface with the side stand. stopped by turning the ignition switch to the off position. Close the throttle completely. -
Page 37: To Start The Engine
How to Ride the Motorcycle To Start the Engine Caution Check that the engine stop switch is in the run position. operate starter Ensure the transmission is in neutral. continuously for more than 5 Pull the clutch lever fully into the seconds as the starter motor will handlebar. -
Page 38: Moving Off
How to Ride the Motorcycle Changing Gears • If the sidestand is extended whilst the engine is running, and the transmission is not in neutral then the engine will stop irrespective clutch position. Moving Off Pull in the clutch lever and select first gear. -
Page 39: Braking
How to Ride the Motorcycle Braking NOTE • The gear change mechanism is the ’positive stop' type. This means that, for each movement of the gear change pedal, you can only select each gear, one after the other, in ascending or descending order. - Page 40 Triumph strongly recommends that Change down one gear at a time riders take course such that the transmission is in first...
- Page 41 How to Ride the Motorcycle Warning Warning For your safety, always exercise When descending a long steep extreme caution when braking, gradient, use engine braking by accelerating or turning as any down changing and use the brakes incautious action can cause loss of intermittently.
-
Page 42: Parking
How to Ride the Motorcycle Parking NOTE • When parking near traffic at night, or when parking in a location where parking lights are required by law, leave the tail, licence plate and position lights turning ignition switch to P (Park). Do not leave the switch in the ’P' position for long periods-of-time as this will discharge the battery. -
Page 43: Considerations For High Speed Operation
Do not park on a soft or on a Warning steeply inclined surface as parking under these conditions may cause This Triumph motorcycle should be the motorcycle to fall over. operated within the legal speed Ensure that the stand is fully... -
Page 44: General
How to Ride the Motorcycle Luggage Warning Make certain that luggage containers are closed, locked and securely fitted to the motorcycle. The handling characteristics of a motorcycle at high speed may vary Brakes from those you are familiar with at legal road speeds. -
Page 45: Engine Oil
How to Ride the Motorcycle Electrical Equipment Caution Make certain that the headlight, rear/ brake light, direction indicators, horn etc., all work properly. In many countries, the exhaust system for this model is fitted with a Miscellaneous catalytic converter to help reduce exhaust emission levels. - Page 46 How to Ride the Motorcycle This page intentionally left blank www.ClassicCycles.org...
-
Page 47: Accessories, Loading And Passengers
Accessories and Loading ACCESSORIES AND LOADING The addition of accessories and carriage of additional weight can affect the motorcycle's handling characteristics causing changes in stability and necessitating a reduction in speed. The following information has been prepared as a guide to the potential hazards of adding accessories to a motorcycle and carrying passengers and additional loads. - Page 48 Accessories and Loading Warning Warning Never ride an accessory equipped Only operate this Triumph motorcycle at speeds above the motorcycle at high speed in closed- legal speed limit or at a speed course on-road competition or on inappropriate closed course racetracks.
- Page 49 Accessories and Loading Warning Warning Your passenger should handling braking thoroughly familiar with capabilities of a motorcycle will be motorcycle’s operation. affected by the presence of a passenger. The rider must make The passenger can cause loss of allowances these changes control motorcycle...
- Page 50 Accessories and Loading Warning Warning Never attempt to store any items If the passenger seat is used to between the frame and the fuel carry small objects, they must not tank. This can restrict the steering exceed 5 kg in weight, must not and will cause loss of control impair control of the motorcycle, leading to an accident.
-
Page 51: Maintenance And Adjustment
Maintenance and Adjustment MAINTENANCE AND ADJUSTMENT Table of Contents Scheduled Maintenance ................53 Engine Oil....................56 Oil Level Inspection ................56 Oil and Oil Filter Change ..............57 Disposal of Used Engine Oil and Oil Filters.........59 Oil Specification and Grade ..............60 Cooling System ..................60 Corrosion Inhibitors................60 Coolant Level Inspection ..............61 Coolant Level Adjustment..............61... - Page 52 Maintenance and Adjustment Suspension Adjustment ...............73 Suggested Suspension Settings............74 Final Drive Unit ..................75 Final Drive Oil Level Adjustment............75 Tyres......................76 Tyre Inflation Pressures ...............76 Tyre Wear ....................76 Minimum Recommended Tread Depth ..........77 Tyre Replacement ................78 Battery .......................81 Battery Removal ..................81 Battery Disposal...................82 Battery Maintenance................82 Battery Installation ................83 Fuse Box ....................83...
-
Page 53: Maintenance And Adjustment
Only maintenance improper an authorised Triumph dealer will adjustment carried out by the have this knowledge owner. equipment. Since incorrect neglected Since incorrect... - Page 54 Maintenance and Adjustment Odometer Reading in Miles (Kms) or time period, whichever comes first Operation Description Every 10,000 20,000 30,000 40,000 50,000 60,000 (800) (16,000) (3,2000) (48,000) (64,000) (80,000) (96,000) 1 month 1 year 2 years 3 years 4 years 5 years 6 years Engine - check for leaks...
- Page 55 Maintenance and Adjustment Odometer Reading in Miles (Kms) or time period, whichever comes first Operation Description Every 10,000 20,000 30,000 40,000 50,000 60,000 (800) (16,000) (3,2000) (48,000) (64,000) (80,000) (96,000) 1 month 1 year 2 years 3 years 4 years 5 years 6 years Brake pad wear - check...
-
Page 56: Engine Oil
Maintenance and Adjustment Engine Oil Oil Level Inspection In order for the engine, transmission, and clutch to function correctly, maintain the engine oil at the correct level, and change the oil and oil filter accordance with scheduled maintenance requirements. Warning Motorcycle operation with... -
Page 57: Oil And Oil Filter Change
Maintenance and Adjustment Oil and Oil Filter Change NOTE • The actual level is indicated when motorcycle upright, (not on the side stand) and when the filler cap/ dipstick has been pushed fully home. Remove the filler cap/dipstick. The maximum oil level is indicated by a mark on the filler cap/dipstick. - Page 58 Unscrew and remove the oil filter Incorporating a new washer, refit the using Triumph service tool oil tank drain plug, tightening it to T3880312. Dispose of the old filter in 25 Nm.
-
Page 59: Disposal Of Used Engine Oil And Oil Filters
Maintenance and Adjustment Apply a thin smear of clean engine oil Turn off the ignition, check the oil to the sealing ring of the new oil filter. level using the method previously Fit the oil filter and tighten to 10 Nm. described, and top up to between the minimum and maximum level lines on Fill the oil tank to the maximum mark... -
Page 60: Oil Specification And Grade
Maintenance and Adjustment Oil Specification and Grade inhibitor chemicals in the coolant is essential. Triumph high performance fuel If coolant containing a corrosion injected engines are designed to use inhibitor is not used, the cooling 10W/40 or 15W/50 semi or fully... -
Page 61: Coolant Level Inspection
Maintenance and Adjustment Coolant Level Inspection Coolant Level Adjustment Warning Do not remove the expansion tank or radiator pressure cap when the engine is hot. When the engine is hot, coolant inside expansion tank will be hot and also under pressure. Contact with this hot, pressurised coolant will cause scalds and skin damage. -
Page 62: Coolant Change
Maintenance and Adjustment Remove the cap from the expansion Triumph dealer replace any defective tank, coolant mixture items. through the filler opening until the level reaches the ‘MAX' mark. Refit Caution the cap. NOTE A year-round type of antifreeze is installed in the cooling system •... -
Page 63: Throttle Control
Maintenance and Adjustment Throttle Control Warning The fan operates automatically when engine running. Always keep hands and clothing away from the fan as contact with the rotating fan can cause injury. Caution Using high-pressure water sprays, such as from a car wash facility or household pressure washer, can Throttle grip damage the radiator fins, cause... -
Page 64: Inspection
‘feel' of the throttle and have the is detected or any doubt exists. throttle system checked by an authorised Triumph dealer if any Check that there is 2-3 mm of throttle changes are detected. Changes... - Page 65 Ride carefully your nearest Rotate the ‘opening' cable adjuster at authorised Triumph dealer and have the throttle body end of the cable to check throttle system give 2-3 mm of play at the twist grip. thoroughly before riding again.
-
Page 66: Clutch
Maintenance and Adjustment Clutch Inspection Check that there is 2-3 mm clutch lever free-play at the lever. If there is an incorrect amount of free- play, adjustments must be made. Adjustment Loosen the knurled locknut at the lever end of the clutch cable and turn the adjuster sleeve until the correct amount of clutch lever free-play is achieved. -
Page 67: Brakes
Maintenance and Adjustment Brakes Warning Brake Wear Inspection Brake pads must always replaced as a wheel set. At the front, where two callipers are fitted on the same wheel, replace all the brake pads in both callipers. Replacing individual pads will reduce braking efficiency and may cause an accident. -
Page 68: Disc Brake Fluid
It is dangerous to operate the braking efficiency. motorcycle under such conditions Because of this, always replace your authorised Triumph brake fluid in accordance with dealer must rectify the fault before scheduled maintenance riding. requirements. -
Page 69: Brake Fluid Level Inspection And Adjustment
Upper level line fluid reservoir, consult your The brake fluid level in the reservoirs authorised Triumph dealer must be kept between the upper and advice before riding. Riding with lower level lines (reservoir held depleted brake fluid levels, or with horizontal). -
Page 70: Brake Light Switches
Minor scratches can be pulled or the rear brake pedal is removed using commercial pressed, your authorised polishing compound suitable Triumph dealer to investigate and plastic. rectify the fault. The windscreen must be replaced if scratches cannot completely Warning removed. Riding motorcycle... -
Page 71: Steering/Wheel Bearings
If any free-play can be detected in the Ensure that the position of the steering (headstock) bearings, ask support block will cause your authorised Triumph dealer to damage to the sump. inspect and rectify any faults before riding. Classic Cycles Technical Resources... -
Page 72: Wheel Bearings Inspection
If any free-play can be detected, ask your authorised Triumph dealer to Remove the support and place the inspect and rectify any faults before motorcycle on the side stand. -
Page 73: Front Suspension
The front suspension is factory set If any damage or leakage is found and is not adjustable. consult authorised Triumph dealer. To check that the forks operate smoothly: • Position the motorcycle on level ground. -
Page 74: Suggested Suspension Settings
Maintenance and Adjustment Rear Suspension Warning Ensure that the adjusters are set to the same setting on both rear suspension units. Settings that vary from left to right may affect handling and stability resulting in loss of motorcycle control, and an accident. -
Page 75: Final Drive Unit
If Final drive unit a fault occurs with the final drive unit, Oil level/filler plug your Triumph dealer must replace the To check the oil level in the final drive complete assembly. unit, remove the filler/level plug. Fill... -
Page 76: Tyres
Maintenance and Adjustment Tyres Warning Incorrect tyre inflation will cause abnormal tread wear and instability problems that may lead to loss of control and an accident. Under-inflation may result in the tyre slipping on, or coming off the rim. Over-inflation will cause instability and accelerated tread wear. -
Page 77: Minimum Recommended Tread Depth
Depth Warning In accordance with the periodic Only operate this Triumph maintenance chart, measure the motorcycle at high speed in closed depth of the tread with a depth course on-road competition or on gauge, and replace any tyre that has closed course race tracks. -
Page 78: Tyre Replacement
Maintenance and Adjustment Tyre Replacement Warning All Triumph motorcycles are carefully and extensively tested in a range of Operation with excessively worn riding conditions to ensure that the most effective tyre combinations are tyres hazardous will approved for use on each model. It is... - Page 79 The bead will not required, consult your authorised seat and the tyres could slip on the Triumph dealer who will arrange for rims, causing rapid tyre deflation the tyres to be selected, in a correct that may result in a loss of vehicle combination, from the approved list control and an accident.
- Page 80 When wheel balancing is required, such as after tyre replacement, see Warning your authorised Triumph dealer. Only use self-adhesive weights. Tyres that have been used on a Clip on weights may damage the rolling road dynamometer may wheel and tyre resulting in tyre become damaged.
-
Page 81: Battery
Maintenance and Adjustment Battery Warning Warning battery contains harmful materials. Always keep children Under some circumstances, the away from the battery whether or battery can give off explosive not it is fitted in the motorcycle. gases; keep sparks, flames and Do not attach jump leads to the cigarettes away. -
Page 82: Battery Disposal
Maintenance and Adjustment Battery Maintenance Lift up the tool box at its front edge and pivot it towards the rear of the Clean the battery using a clean, dry, motorcycle. cloth. Be sure that the cable Remove the battery strap. connections are clean. -
Page 83: Battery Installation
Maintenance and Adjustment Fuse Box Battery Installation Warning Ensure that the battery terminals do not touch the motorcycle frame as this may cause a short circuit or spark, which would ignite battery gases causing a risk of personal injury. Place the battery in the battery case. Reconnect the battery, positive (red) lead first. -
Page 84: Fuse Identification
Maintenance and Adjustment Fuse Identification Warning A blown fuse is indicated when all of the systems protected by that fuse Always replace blown fuses with become inoperative. When checking for a blown fuse, use the table below new ones of the correct rating (as to establish which fuse has blown. -
Page 85: Headlights
Maintenance and Adjustment Headlights Headlight Vertical Adjustment Warning Adjust road speed to suit the visibility and weather conditions in which the motorcycle is being operated. Ensure that beams adjusted to illuminate the road surface sufficiently ahead without dazzling oncoming traffic. An incorrectly adjusted headlight may impair visibility causing an Vertical beam adjuster... -
Page 86: Headlight Horizontal Adjustment
Maintenance and Adjustment Headlight Horizontal Headlight Bulb Replacement Adjustment It is necessary to remove the headlight from the headlight bowl to gain access to the bulbs. Horizontal beam adjusters horizontal beams both Headlight bulb headlights adjusted Bulb clip individually. The same procedure is Position light bulb used to adjust either headlight. - Page 87 Maintenance and Adjustment Undo fixing securing headlight clamp to the headlight Caution body. Support the headlight while removing When reconnecting the battery, the clamp. connect the positive (red) lead first. Remove the headlight from its bowl while supporting it to prevent the Warning cables from being over extended.
-
Page 88: Rear Light
Maintenance and Adjustment Rear Light Rotate the bulb holder anti-clockwise to release it from the lamp body. Bulb Replacement To remove the bulb from the holder, gently pull on the bulb until it is released. Installation for the bulb is the reverse of the removal procedure. -
Page 89: Indicator Lights
Maintenance and Adjustment Indicator Lights Cleaning Frequent, regular cleaning is an Bulb Replacement essential part of the maintenance of your motorcycle. If regularly cleaned, the appearance will be preserved for many years. Cleaning with warm water containing automotive cleaner is essential at all times but particularly so after exposure to sea breezes, sea water, dusty or muddy roads and in winter when roads are... -
Page 90: Where To Be Careful
Maintenance and Adjustment Ignition switch: Cover the keyhole NOTE with tape. • Use of soaps that contain high levels of alkaline will Where to be Careful leave a residue on painted surfaces, and may also cause Avoid spraying water with any great water spotting. -
Page 91: Unpainted Aluminium Items
Maintenance and Adjustment Unpainted Aluminium Items Washing Items such as brake and clutch Prepare a mixture of water and mild levers must be correctly cleaned to soap. Do not use a high alkaline preserve their appearance. content soap as commonly found at commercial car washes because it Use a proprietary brand of aluminium leaves a residue. -
Page 92: Protecting
Maintenance and Adjustment Protecting It is recommended that regular protection be applied to the system When the exhaust system is dry, rub as this will both protect and enhance ’Motorex 645 Clean And Protect’ into the system' s appearance. the surface. Caution The use of silicone products such as WD40 will cause discolouration... -
Page 93: Storage
Storage STORAGE Preparation for Storage oil from getting on rubber parts, brake discs or in the brake callipers. Clean the entire vehicle thoroughly. Lubricate the control cables. Empty the fuel from the fuel tank into Remove the battery, and store it a secure container. - Page 94 Storage Preparation after Storage Charge the battery if necessary, and install it in the motorcycle. Fill the fuel tank with fuel. Change the engine oil and filter. Check all the points listed in the daily safety checks section. Before starting the engine, remove one of the spark plugs from each cylinder.
-
Page 95: Specifications
Specifications SPECIFICATIONS Specifications Rocket III Dimensions Main motorcycle dimensions are shown in the diagram below. Weights Dry Weight 320 kg Maximum Payload 235 kg Classic Cycles Technical Resources... - Page 96 Specifications Engine Type In-line 3 cyl. Displacement 2294 cc Bore x Stroke 101.6 x 94.3 mm Compression Ratio 8.7:1 Cylinder Sequence Number 1 at front. Firing Order 1-2-3 Performance Maximum Power (DIN) 142 PS at 5,750 rpm Maximum Torque 200 Nm at 2,500 rpm Lubrication Lubrication System Dry sump with remote oil tank...
- Page 97 Specifications Fuel System Type Sequential electronic fuel injection Fuel Pump Submerged Electric Fuel Pressure 3 Bar Fuel Type 95 RON unleaded Tank Capacity 23.5 litres Ignition Ignition System Digital electronic Spark Plug NGK DPR8EA9, 2 per cylinder 0.9 mm Transmission Transmission Type 5 speed, constant mesh with transmission damper...
- Page 98 Specifications Tyres Tyre Pressures (Cold) Front 2.34 Bar (34 lb/in Rear 2.90 Bar (42 lb/in Approved tyres Option 1 Front Metzeler ME880 Marathon 150/80 R17 Rear Metzeler ME880 Marathon 240/50 R16 Option 2 Front Bridgestone 150/80/17 Rear Bridgestone 240/50 R16 Warning Use the recommended tyres ONLY in the combinations given.
- Page 99 Specifications Tightening Torques Oil Filter 8-12 Nm Oil Tank Drain Plug 25 Nm Front Sump Plug 25 Nm Rear Sump Plug 25 Nm Spark Plug 20 Nm Fluids and Lubricants Engine Oil: Semi or fully synthetic 10W/40 or 15W/50 motorcycle engine oil which meets specification API SH (or higher) and JASO MA, such as Mobil 1 Racing 4T.
- Page 100 Specifications This page intentionally left blank www.ClassicCycles.org...
- Page 101 Index INDEX Coolant Change Corrosion Inhibitors Battery Level Adjustment Disposal Level Inspection Installation Radiator Hoses Maintenance Removal Brakes Dimensions Brake and Clutch Lever Adjuster Electrical Equipment Brake Wear Inspection Engine Braking Serial Number Disc Brake Fluid Specifications Fluid Inspection and To Start the Engine Adjustment To Stop the Engine...
- Page 102 Index Fuse Identification Bulb Replacement Right Handlebar Switches Engine Stop Switch Gears Starter Button Changing Safe Operation Headlights Daily Safety Checks Bulb Replacement Safety First Horizontal Adjustment Fuel and Exhaust Fumes Vertical Adjustment Handlebars and Footrests High Speed Operation Maintenance and Equipment Ignition Parking Ignition Switch/Steering Lock...
- Page 103 Index Throttle Control Inspection Tightening Torques Toolkit and Handbook Transmission Tyres Minimum Tread Depth Replacement Specifications Tyre Inflation Pressures Tyre Wear Vehicle Identification Number Warnings Information Maintenance Noise Control System Owner’s Handbook Warning Label Locations Warning Labels Warning Lights Warning, Caution and Note Weights Windscreen Cleaning Classic Cycles Technical Resources...
- Page 104 MOTORCYCLE PARTS & ACCESSORIES Click on links below Triumph Motorcycle History & Specifications Triumph Motorcycle Parts & Accessories Dirt Bike Parts & Accessories Motorcycle Helmet Closeout Sale Japanese Motorcycle Original Equipment Parts Save On All Motorcycle Tires Motorcycle Gear Closeout Sale High Visibility Motorcycle Safety Gear Cycle Gear –...