Table of Contents
Advertisement
Quick Links
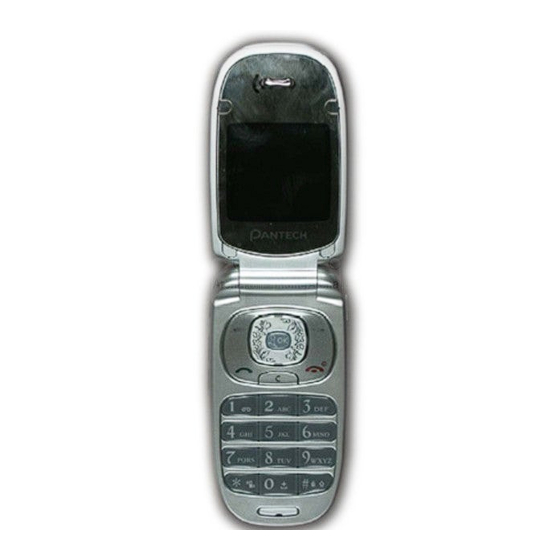
USER'S MANUAL PG-3310
Thank you for choosing Pantech PG-3310 and welcome to wireless mobile
communication networking with the PG-3310, our tri-band GSM mobile
phone.
.
Pantech is delighted to introduce this brand new portable phone which
will always keep you connected to the network.
This user manual explains in detail its unique features and how to use them.
NOTE: Some of the contents in this User Manual could vary from your
phone. It may vary depending on the S/W version and the network provider
you subscribed to.
Advertisement
Chapters
Table of Contents

Related Manuals for Pantech PG-3310


Summary of Contents for Pantech PG-3310
- Page 1 USER’S MANUAL PG-3310 Thank you for choosing Pantech PG-3310 and welcome to wireless mobile communication networking with the PG-3310, our tri-band GSM mobile phone. Pantech is delighted to introduce this brand new portable phone which will always keep you connected to the network.
- Page 2 Specification 3 image quality options: Fine, Normal, Low Auto white balance (AWB), Auto exposure(AE), Various effects Display Dimension & Weight Dual clamshell 262,144 TFT LCD internal and 65,536 STN Color LCD external. Weight: 68 g 26.112 mm x 28.16 mm display for 1.5” internal LCD Dimensions: 82.7 mm x 41.5 mm x 18.4 mm 18.71 mm x 18.71 mm display for 1.04”...
- Page 3 views Receiver Internal LCD Camera Infrared port Camera key Volume up/down Menu Scroll Left Soft key Right Soft key 4-way Menu Navigation Special Menu Short key Headset Jack Indicator LED WAP Access key DiaI key Select/Menu Confirm key Call Accept Power On/Off Menu exit key Cancel/Back...
- Page 4 Quick & Easy Quickly connects to the voice mail server if pressed and held in standby mode. Function Enters numbers, letters or special characters. Performs the functions shown at the bottom line of the Goes to the dial screen if pressed in standby mode. display.
- Page 5 Safety Precautions Boarding an Aircraft - Please turn your phone off when you are on the aircraft. The electronic Using a phone while driving is prohibited. wave from your phone may affect the electronic navigation device in the Please check local laws and regulations with regard to the prohibition of aircraft.
- Page 6 Menu Tree 1.7.2.6 Delivery Report 1.7.3 E-mail Messages 1.7.3.1 Max. Message Download Size Write New 1.7.3.2 Email Accounts 1.1.1 Text Msg. 1.7.3.3 Save Message 1.1.2 Multimedia Msg. 1.7.3.4 Saving Memory 1.1.3 E-mail 1.7.4 CB Msg. Inbox 1.7.4.1 Language Outbox 1.7.4.2 Info. Subjects Draft Box 1.7.4.3 Receive Sent Box...
- Page 7 2.6.2 SIM Card Call Cost 2.6.3 Phone 3.7.1 Last Call Cost Copy All 3.7.2 Total Call Cost Delete All 3.7.3 Clear Logs 2.8.1 Phone 3.7.4 Max. Cost 2.8.2 SIM Card 3.7.5 Cost Unit Memory Info. GPRS Info. 3.8.1 Current Info. Call Logs 3.8.2 Last Info.
- Page 8 5.1.4 Video Gallery 6.1.2.2 Idle 5.1.5 Settings 6.1.3 Back Light 5.1.5.1 Image Size 6.1.4 Service Light 5.1.5.2 Image Quality 6.1.5 Voice Light 5.1.5.3 White Balance Sound Settings 5.1.5.4 Self Timer 6.2.1 Ring Tone 5.1.5.5 Multi-Shot 6.2.2 Bell Sound 5.1.5.6 Shutter Sound 6.2.3 Message Alert 5.1.5.7 Auto Save 6.2.4 Key Tone...
- Page 9 6.3.3.4 Response Time 6.8.7 CUG 6.3.3.5 User Message 6.8.8 Fixed Dialling 6.3.4 Auto Redial 6.8.9 Change PIN2 6.3.5 Call Waiting 6.8.10 System Reset 6.3.5.1 Activate Flight Mode 6.3.5.2 Deactivate 6.10 Software Version 6.3.5.3 Status 6.3.6 Send Caller ID Organiser 6.3.7 Own Number Alarm 6.3.8 Active Line Calendar...
- Page 10 8.1.3 Bookmarks 8.1.4 Push Messages 8.1.4.1 Inbox 8.1.4.2 Receive Mode 8.1.5 Go to URL 8.1.6 Profiles 8.1.7 Cache 8.1.7.1 Cache Mode 8.1.7.2 Clear Cache 8.1.8 Security Cert 8.1.9 Version Infrared Port 8.2.1 Internet Connection 8.2.2 PC Sync Connection 8.2.3 Object Exchanging 8.2.4 Deactivate SIM Toolkit SIM Dependent...
-
Page 11: Table Of Contents
Table of Contents Using Contacts [2.4] Making an International Call [2.5] Getting Started Speed-dialling from Contacts [2.6] Making an Emergency Call [2.7] Package Contents Internal & External Displays Answering a Call SIM Card Answering a Call [3.1] Using the battery Viewing Missed Calls [3.2] Rejecting a Call [3.3] New Functions... - Page 12 Entering into Menu Functions [6.1] Searching a Name/Group [2.3] Using the Shortcut key in Standby Mode [6.2] Group Setting [2.4] Speed Dial Setting [2.5] Entering Text Delete All [2.6] Input Mode [7.1] Memory Info. [2.7] Changing Text Input Mode [7.2] Service Number [2.8] Using T9 Mode [7.3] Business Card...
- Page 13 Other Files [4.6] World Time [7.4] Memory Info. [4.7] Calculator [7.5] Converter [7.6] Multimedia Stop Watch [7.7] Camera [5.1] Timer [7.8] MP3 Player [5.2] Fatness Checker [7.9] Radio [5.3] Games [5.4] Advanced Functions Java [5.5] Navigating the WAP Browser [1.1] Settings Entering Text in the WAP Browser [1.2] Display Settings...
- Page 14 Appendix Access Code Check List Performance and safety Glossary...
-
Page 15: Getting Started
1. Getting Started Package Contents 1. Package Contents 2. Internal & External Displays 3. SIM Card 4. Using the battery Phone Battery User’s Manual Travel Charger ※ The contents can be vary by regions. - Page 16 Internal & External Displays (공용아이콘) (멕시코향에만 이 아이콘적용) If the multimedia message memory is full, the icon will look This phone has 2 displays (internal and external) and icons on the top of like ( 공용아이콘) (멕시코향에만 이 아이콘적용) the display indicate the phone status. If the email memory is full, the icon will look like Roaming indicator Internal Display [2.1]...
- Page 17 Battery level. The bar indicates the available battery charge. If your battery charge is low, this icon will look like 5. To return to Standby Mode, press the [ ] key. Display Off Mode. In some functions, you may be prompted for a password or PIN. Enter the required code and press the [OK] key.
- Page 18 - Turns the camera capture mode on, - Works as a camera shutter in the capture mode - Turns Video Mode on if pressed and held. - Selects a menu or moves to the sub-menu, if pressed while in the external menu. Extra Key - Exits from the menu screen and returns to the standby screen if pressed and held while in the external menu screen.
- Page 19 SIM Card SIM Card [3.1] When you subscribe to your network operator, you will get a SIM (Subscriber Identity Module) card containing your registration information. (PIN), the existence of additional service, etc. Like a credit card, it should be kept secure and handled carefully. Do not bend, scratch or expose it to moisture.
- Page 20 Using the battery battery and charger only. For more details, please inquire at your nearest dealer. Installing the battery [4.1] You can use the phone during battery recharging. When the battery is mounted within the phone, open the cover Put the contacts of the battery into the hole located at the bottom of the located at the bottom of the phone and connect the adapter.
- Page 21 You can use the following Li-ion battery types for your phone. (Contact - In order to prevent injury or burns, ensure that metal objects do not your local dealer for more information.) come into contact with the + and – terminals of the battery. Standard-type battery.
-
Page 22: New Functions
2. New Functions Video Caller ID Save the video clip of a contact or other video clips. Select and set a video clip to the corresponding contact in the address book. 1. Video Caller ID When a call is received from the contact, the corresponding video clip will 2. - Page 23 Setting MJPEG for Idle Screen Select the Video Album a nd press the [Option] soft key [ ] and You can set a video file to play on the screen when the phone is idle. select [Set as]. Select ‘2.Contact’ when the ‘Set as’...
- Page 24 OTA Settings Service WAP/ OTA Provisioning [3.1] In order to use the WAP Browser, you need to have proper connection settings on your phone. You may add and/or edit the WAP Profile manually or receive the settings directly as a configuration message according to the operators and/or service providers, at the latter case you need to save them on your phone.
-
Page 25: Basic Functions
Switching the Phone On or Off 3. Basic Functions Switching the Phone On [1.1] 1 Switching the Phone On or Off Open the folder. 2. Making a Call Press the [ ] key until the phone switches on. 3. Answering a Call If the phon e re quests you to input a PIN, enter t... -
Page 26: Making A Call [2.1]
Making a Call once, only the latest occurrence will be saved. Press the [ ] key to see the call log list aligned dialled, Making a Call [2.1] chronologically. Enter the area code and the phone number to make a call in standby Press the [Up/Down] key to select a number. -
Page 27: Making An International Call [2.5]
Making an International Call [2.5] Press and hold the [0] key for the international prefix until the ‘+’ character appears on the display or enter the outgoing national code. Enter the country code, area code and phone number you want to make a call to. -
Page 28: Answering A Call
Answering a Call If necessary, scroll to the number you want by pressing the [Up/Down] keys. Answering a Call [3.1] Press the [ ] key to call the missed call. When you receive a call, the phone rings (or vibrates) and the screen will display the name or the number of the caller (if the network supports the Press the [C] or [ ] key to close the missed call notification... -
Page 29: Calling Options
Calling Options To make a call while you have a call in progress: During a call, press the [ ] key to show the call options. Enter the phone number that you want to dial or look it up in Contacts. -
Page 30: Searching For A Number In Contacts [4.4]
The first call is automatically put on hold. Using DTMF Tones [4.5] To switch between two calls, press the [Swap] Soft key or [ ] key.. You can turn the DTMF key tones off on during a call. When the [DTMF Off] option is selected, your phone does not transmit To end the activate call, press the [... -
Page 31: Making A Multi-Party Call [4.8]
To write a new message, select the ‘Write New’ submenu. An icon indicates either Far Multiparty or Far Hold. Press the [OK] Soft key. (For further details, see Applications Menu 1.1) Having a Second Call During a Multi-party Call To answer or make a call when you have the multiparty call: Making a Multi-party Call [4.8] To place the multi-party call on hold, press the [Option] Soft key and A multi-party call feature is a network service that allows up to six people... -
Page 32: Using The Headset
[Select] Soft key or the [OK] key. selecting [Option] followed by [Speaker Off]. The call ends with that participant, but you can continue to talk with NOTE: 1. Please use EarMic and Speaker phone Carkit while driving as other participants. using the speaker phone may be dangerous for your safe driving. -
Page 33: Selecting Menu Functions
Selecting Menu Functions Using the Shortcut Key in Standby Mode [7.2] Menu selected If pressed and held Entering into Menu Functions [7.1] pressed Menu ] key Function View Names’ Goes to the main menu in standby mode. ] key ] key Messages Displays ‘Write New’... - Page 34 Entering Text a period mark in this mode. Input Mode [8.1] On many occasions you need to input text while you are using your phone, (e.g., storing a name in the Contacts, writing a new message, creating your greeting or scheduling events on your calendar). The available text input modes include.
- Page 35 Changing Text Input Mode [8.2] To move the cursor to the left or right within the text, press the [Left/Right] key. And also, to move the cursor to the up or down among When you are in the area where you can input the text, the text input the lines, press the [Up/Down] key.
- Page 36 Using T9 Mode [8.3] When typing in ABC mode, press the key labelled with the target letter: In the T9 alphabet Editor, each word is composed completely as you - Press the key once for the first letter. input the text. - Press twice for the second letter.
- Page 37 The symbol mode allows you to enter symbols into your text. - Initial capital ( ) To display more symbols, press the [Up/Down] key. - Capital lock ( ) To input a symbol, press the number for a symbol, and the text will appear in the input screen.
- Page 38 4. Applications 1. Messages 2. Contacts 3. Call Logs 4.Media Gallery 5.Multimedia 6. Settings 7. Organiser...
-
Page 39: Messages
Messages Multimedia Msg. Multimedia Message Service (MMS) is a messaging service quite similar to Short Message Service (SMS). It provides asynchronous Select ‘Menu>1.Messages’. . . or press the [ ] key in standby mode. delivery of personal multimedia messages. Adding to the familiar text content of the text message, the multimedia This menu allows you to create, send, read and save a message using message can contain an image, graphic, and/or sound. - Page 40 Add Subject or Edit Subject Editor options for Text Msg. [1.1.1] Edits subject. (For further details, see Basic Functions Menu 7) Add Text Enters a new message. (For further details, see Basic While entering your message, press the [Option] Soft key [ ] to use Functions Menu 7) the following options.
- Page 41 The options menu may not appear depending on situations. Edit: Edit Text Delete Text Add: Adds Image, Photo, Sound, or Slide, takes a photo. Deletes the selected text. Replace: Changes added objects. Add Object Add image, photo, sound or slide. Editor options for E-mail [1.1.3] Preview Select an E-mail and press the [Option] Soft key [Left...
- Page 42 Inbox [1.2] To send Text Msg. When you have completed entering the message, press the [OK] Select ‘Menu>1.Messages>2.Inbox’. key. [option menu 없으므로 삭제]... Text Msg. [1.2.1] Input the recipient’s phone number on the Number Screen. Press Select Inbox and press the [OK] key to view the received messages one by one.
- Page 43 Numbers: Selects any number in the received message. Select a message and press the [Option] Soft key [ ] on the left to Select a function from View to extract and list numbers in the messages. Press the [Save] Soft key to add each number to a new select one of the following menus.
- Page 44 Press the [Option] Soft key [Left ] to: Select a message and select [Option] Soft key [ ] at the left for the Check for E-mail: Allows you to check and verify the emails not associated options. read from POP server that are saved in the settings. The POP Edit: Sends the selected message.
- Page 45 Sent Box [1.5] full. 1. Text Msg.: Write a new Text Template. Sent Box saves the messages successfully sent. Press the [Resend] Soft 2. Multimedia Msg.: Write a new Multimedia Template. key at the bottom right corner to resend the sent message again. E-mail: Write a new E-mail Template.
- Page 46 Message Type: Allows you to set the message type to Normal, Login ID: Input the ID to sign into the gateway. Fax, Voicemail, ERMES, National Paging, X.400, or Internet. - Password: Input the password to sign into the gateway. The network will convert the messages into the selected format. Data Call Type: Press the [Left/Right] key to choose either ISDN Receive...
- Page 47 Auto Download [1.7.2.3] currently selected account can either be deleted, renamed, set as Allows you to set how you receive a message. You can select either On the default account or edited. The default account is the account or Off which is used to send emails with.
- Page 48 - SMTP Authentication Use this function to access the voice mailbox provided by the network If set to Yes then the username and password will be used to service provider. authenticate the user Id when sending a message with the Call: Call the predefined voice mail system to check a voice mail.
-
Page 49: Contacts
Contacts Group Search [2.1.2] You can store your personal contacts, which can be added or deleted at Select ‘Menu>2.Contact>1.Search>2.Group Search’. any time. You can save up to 800 contacts on the SIM or phone memory. Searches for the phone number of each group. Searching a Name/Group [2.1] Service Number [2.1.3]... - Page 50 Phone or SIM: Select the saving location – phone or SIM. Select ‘Menu>2.Contacts>4.Groups’. Changes the settings for the five predefined caller groups. Editing Contacts [2.2.1] Default Groups: No Group, Family, Friends, Business, and VIP. Edits the contact on the same screen with Add Contacts. You can change the group ring tone by pressing [Group Ring Tones] in...
- Page 51 You can choose from Phone/ SIM Card/ SIM Card. Copy All [2.7] Select ‘Menu>2.Contacts>7.Copy All Phone to SIM: Allows you to copy the numbers saved in the Phone unto the SIM. SIM to Phone: Allows you to copy the number saved in the SIM unto the Phone.
-
Page 52: Call Logs
Call Logs call. When the call is not found in Contacts, the [Save Number] option will be created. Press the [ ] key to see the recent calls in standby mode or select ‘Menu>3.Call Logs’. Received Calls [3.2] This function displays missed calls, received calls, and dialled calls. You can delete a call log and see the information for the call timer, call cost, Select ‘Menu>3.Call Logs>2.Received... - Page 53 It deletes the missed, received, or dialled calls or deletes all the call Press the [Option] Soft key [ ] to: records with ‘All Calls’. Delete : Deletes the dialled call records from the list. Delete All: Deletes all the dialled call records from the list. Press the [Yes] Soft key [ ] or [No] Soft key [ ] to execute or...
- Page 54 Max. Cost: Reads or sets up the maximum value of the call cost unit in the service area. Read Limit: Reads the maximum unit value. Limit: Sets up the maximum units. Cost Unit: Reads or sets up the unit defined in a service area. Read Unit: Reads the cost unit.
-
Page 55: Media Gallery
Media Gallery selected photo from the album. In this menu, you can perform tasks such as checking, deleting or editing Wallpaper – Adds a photo to ‘Wallpaper’ ‘Display Settings’. The the photos, images or sounds saved by you. photo is set as the background image of the main screen. Contact –... - Page 56 You can add up to 7 albums (including default album (‘My Video’). Press the [Option] Soft key [ ] to apply the option to the selected image. Press the [Option] Soft key [ ] to delete or add new user-defined album. Option: Set as Wallpaper, Set as Contact, Send via MMS, Send via 3.
- Page 57 Other Files [4.5] Sound, Java, and MMS and System used. NOTE: The 'System' memory information means the total used memory for Allows you to view or manage the list of the files of unsupported formats. the reserved objects, user-defined wallpapers, etc. Also, allows you to include in the list the files of supported formats via Bluethooth or other devices.
-
Page 58: Multimedia
Multimedia 3. Press the [ ] key or [ ] Key to take the picture in the current Camera [5.1] preview. Press the [Up / Down] key to zoom in/out of the image in proportion to the You can take a photo or video in various ways using your camera phone. original ratio. - Page 59 Press the [Side] key to zoom the image just taken image. Using the Camera Options [5.1.2] Press the [Option] Soft key [ ] in Capture mode to select the Press the [ ] key to zoom control. following information which will be applied to the image. Video: Moves to the Video Capture Mode.
- Page 60 Incandescent 4. Press the [ ] key to record the preview image. Self Timer: Select the delay time for all modes. When you press 5. Press the [Cancel] Soft key to cancel recording and return to the Preview screen. Press the [ ] key to stop recording. the [ ] key or [ ] Key shortly, the camera will shoot after the...
- Page 61 : Replays one music repetitively. Player Screen : Replays all the music in order and unlimitedly. Select ‘Menu>5.Multimedia>2.MP3 Player>1.Player’ in the menu in sequence. Music Album [5.2.2] Press the [Option] Soft key [ ] to: Select ‘Menu>5.Multimedia>2.MP3 Player>2. Music Album’ in the menu in Play All: Shows the music list in the...
- Page 62 Information: Shows information. View of Java Game List [5.4.1] Setting [5.2.4] Select ‘Menu>5.Multimedia>5.Java’ in the menu to select a Java menu. Select ‘1.Games’ to view the Java Application list stored in your phone. Select ‘Menu>5.Multimedia>2.MP3 Player>4.Setting’ in the menu in sequence.
-
Page 64: Settings
Settings Greeting [6.1.2] Select ‘Menu>6.Settings’. Select ‘Menu>6.Settings>1.Display Settings>2.Greeting’ and press the You can set up various handset functions at your choice in the settings [OK] key. menu. You can set up the greeting message during Startup Idle mode. Display Settings [6.1] Contrast [6.1.3] Allows you to set the color contrast chosen from level 1 to level 8 by using... - Page 65 Voice Light [6.1.6] Ring type: Ringing, Vibration, Vib then Ring, Vib and Ring, Ascending, None(Quiet) When this feature is set, the external LED blinks reacting to the voice of the Ring Volume: Controls the volume in 8 levels (0~7). other party during a call. Bell Sound [6.2.2] Select...
- Page 66 Once, Every 2 Mins, Every 5 Mins., Tone Type: Turns the key tone on or off. Ring Volume: Controls the volume in 8 levels (0~7). Ring Volume: Controls the volume by 8 levels. Sound: Use the [Left/Right] key to set Message Alert Tone to Sound: Sets Bell 1, Bell 2, Bell 3 to Flip Open/Close Tone.
- Page 67 key to save. Profile Name [6.2.7] Select a profile name menu from the Sound Setting editing screen to SEND key: You can answer the incoming call by pressing the rename it manually. ] key. Reset [6.2.8] Key: You can answer incoming calls by pressing any key, Select the Reset menu from the Sound Setting editing screen and press except the [ ] key and the [Reject] Soft key.
- Page 68 messages. Status: Informs the setup condition. Response Message: Depending on your current situation, a different answering message will played, including. Send Caller ID [6.3.6] [Absent/Meeting/Driving/User Message]. The User Message is the voice message of the local user that will be answered in the Select ‘Menu>6.Settings>3.Call Settings>6.Send Caller ID’.
- Page 69 Favorite [6.6] used to make calls. However, calls can be answered on both lines, regardless of the selected line. Select ‘Menu>6.Settings>6.Favorite’. NOTE: Please contact your service provider to check the availability of this Favorite menu designates your additional favourites. feature and how to subscribe to ALS(Alternate Line Service). You can access menus down to 2 levels but the Media Gallery (멕시코향...
- Page 70 Various codes and passwords are used to protect these features of your Change Password [6.8.4] phone. They are described in the following sections. See also Access Changes a password. Default Password is 1234. codes in the Appendix. The Security feature keeps your phone and SIM Card safe from Application Lock [6.8.5] unauthorised users and you may set up a password for your phone or...
- Page 71 Clear All: Cancels all the barring settings. Change Password: Replaces the old password with a new one. Changes PIN2. (Closed User Group) [6.8.7] System Reset [6.8.10] Sets up a group of numbers that you want to dial or receive. Select CUG name and press [OK] to see the CUG name list as you input.
-
Page 72: Organiser
Organiser Delete All: Deletes all Alarms from the list. Select ‘Menu>7.Organiser’. Press the [OK] key to edit the Alarm, and then press the [Up/Down] key Organiser provides various functions alarm setting, main event record, in the ‘Edit Alarm’ screen to set on Set, Time, or Melody. memo, world time, calculator, unit conversion, stopwatch and timer. - Page 73 Any event registered on a date will be displayed at the bottom of the Monthly View[7.2.1] display in form of an icon. Press: [Left] Previous Day Move to another day Daily View [7.2.2] [Right] Next Day [Up] Previous Week Move to another week [Down] Next Week Shows the schedule registered for a date.
- Page 74 Upon appearance of the New Event screen, select and input an Record, Stop, Play, and Save for voice recording and playback. You can event item by item for registration. use the Text Editor for title input. After input, press the [OK] key to save the event. Record NOTE: Maximum Quantity of Schedule for Registration: 50Maximum Daily Press the [New] Soft key from the Option menu and press the [...
- Page 75 World Time [7.4] Press the [C] key short to delete the text of a formula and press and briefly hold the [C] key to delete the whole formula. Select ‘Menu>7.Organiser>4.World Time’. This function informs you of world time. Converter [7.6] Press the [Option] Soft key [ ] to: On/Off Day Light...
- Page 76 Whenever you select the [Lap] Soft key, the 4 lap times as a maximum affected by your weight changes, by displaying the fatness level and BMI are displayed and when you select the fourth [Lap], the Stop Watch index based on your height and weight data input by you. stops.
- Page 77 5. Advanced Functions Select ‘Menu>8.Connectivity>1.WAP Infrared Port You can access the Internet with a WAP (Wireless Application Protocol) browser. 3. SIM Toolkit That means you can connect to the Internet anywhere and anytime where you have network coverage. The descriptions below can vary according to your Network provider. Therefore, ask your Network provider for detailed information.
- Page 78 When you are prompted to enter text, the current text input mode not be available if the manufacturer provides a default bookmark. appears above the right Soft key. Delete: Deletes a bookmark from the List. (For further details, see Basic Functions Menu 7) NOTE: This feature will not be available if the manufacturer provides a default bookmark.
- Page 79 Gateway appears. If you set it for HTTP, Proxy appears. Pressing the [OK] key allows you to access the submenus such as Go to URL [1.7] Address, IP Port, Login ID and Password. For each submenu, pressing the OK button lets you enter edit mode to edit every item Allows you to directly input and connect to the desired URL.
- Page 80 change this item. You can see the saved security certificate. Settings: Enter the IP address for the Domain Name Press the [Option] Soft key [ ] to; Server. You may enter primary and secondary DNS. This function is available only when you are connected to HTTP. Delete: Deletes a security certificate.
- Page 81 Infrared Port To send an object using “Send via Infrared” 사진대체요망 Align the object with the other device Select “Send via Infrared” from the option menu for the file you want to send Check the progress and completeness of the process with the Progress screen To receive an object Activate...
- Page 82 SIM Toolkit Appendix This menu depends on SIM and the network services Access Code Check List Performance and safety Glossary...
- Page 83 Access Code You can change the following codes: lock code, PIN code, and PIN2 The following section describes various security codes. code. These codes can include the numbers from 0 to 9 only. NOTE: Avoid using access codes similar to the emergency numbers, such as 112, to prevent accidental dialling of the emergency number.
- Page 84 Check List When audio quality is poor: End a call and try again. If you experience any problem while using your mobile phone, please refer to the following checklist. If the problem still persists, contact your dealer or When the other party cannot hear you speaking: nearest service centre.
- Page 85 temperature. Try changing the charging environment. 3. Your battery may have not been connected to the charger properly. Check the connector. When you are unable to input data into the Phone Book: Your Phone Book memory may be full. Try deleting some entries from your Phone Book.
- Page 86 Performance and safety The following list shows how to maintain your mobile phone, together with precautions to take. - Keep your mobile phone and its accessories out of the reach of children. - Maintain your mobile phone in dry condition and keep it within normal operating temperatures.
- Page 87 Glossary the correspondent. To help you understand the main technical terms and abbreviations used in this booklet and take full advantage of the features of your mobile phone, GPRS (General Packet Radio Service) here are a few definitions. New non-voice value-added service that allows information to be sent and received across a mobile telephone network.
- Page 88 and records a message. Roaming Use of your phone when you are outside your home area (when travelling FCC & Industry Canada Regulatory Compliance for example). This device complies with Part 15 of the FCC Rules. Operation is subject to the following two conditions: (1) this device may not cause harmful SIM (Subscriber Identification Module) interference, and (2) this device must accept any interference received,...
- Page 89 had been tested in accordance with the measurement procedures specified occur in a particular installation. If this equipment does cause harmful in FCC/OET Bulletin 65 Supplement C (2001) and IEEE Std. 1528-2003 interference to radio or television reception, which can be determined by Ministry of Health (Canada), Safety Code 6.
- Page 90 Memo...