Samsung HT-AS720S Instruction Manual
Digital surround av receiver system
Hide thumbs
Also See for HT-AS720S:
- Instruction manual (52 pages) ,
- Instruction manual (25 pages) ,
- Instruction manual (25 pages)
Table of Contents
Advertisement
Advertisement
Table of Contents

Related Manuals for Samsung HT-AS720S


Summary of Contents for Samsung HT-AS720S
- Page 1 Digital Surround AV Receiver System HT-AS720S Instruction Manual...
-
Page 2: Safety Warnings
Safety Warnings CAUTION RISK OF ELECTRIC SHOCK. DO NOT OPEN CAUTION: TO REDUCE THE RISK OF ELECTRIC SHOCK, DO NOT REMOVE REAR COVER (OR BACK) NO USER SERVICEABLE PARTS INSIDE. REFER SERVICING TO QUALIFIED SERVICE PERSONNEL. This symbol indicates that dangerous voltage consisting a risk of electric shock is present within this unit. - Page 3 FCC NOTE (for U.S.A): This equipment has been tested and found to comply with the limits for a Class B digital device, pursuant to Part 15 of the FCC Rules. These limits are designed to provide reasonable protection against harmful interference in a residential installation.
-
Page 4: Safety Instructions
Safety Instructions Read these operating instructions carefully 12) Use only with the cart, stand, before using the unit. Follow all the safety tripod, bracket, or table instructions listed below. specified by the manufacturer, Keep these operating instructions handy for or sold with the apparatus. future reference. -
Page 5: Precautions
Precautions Ensure that the AC power supply in your house complies with the identification sticker located on the back of your player. Install your player horizontally, on a suitable base (furniture), with enough space around it for ventilation (3~4inches). Make sure the ventilation slots are not covered. -
Page 6: Features
Provides more realistic surround sound with normal stereo audio sources. Anynet+ (HDMI-CEC) Function Anynet+ is a function that can be used to operate this AV Receiver with a Samsung TV remote control, by connecting the receiver to a SAMSUNG TV using an HDMI Cable. -
Page 7: Table Of Contents
Contents PREPARATION Safety Warnings ......................2 Safety Instructions ......................4 Precautions........................5 Features ..........................6 Description ........................8 CONNECTIONS Connecting speakers.......................12 Connecting external devices ...................14 Anynet+ ...........................18 Connecting the FM antenna ....................19 OPERATION Before using the AV receiver ...................20 Selecting digital/analog input ..................21 Setting the speaker mode....................22 Setting the speaker listening distance ................24 Setting digital input ......................25 Setting HDMI AUDIO.......................26... -
Page 8: Description
Description [ Front panel ] TONE CONTROL button Remote control sensor SURROUND button POWER STANDBY Indicator 7.1CH IN STEREO POWER button AUX IN Jack FUNCTION button VOLUME CONTROL INPUT MODE button HEADPHONE Jack SETUP button TUNING MODE button SELECT( ) button [ Display ] DOLBY DIGITAL EX INDICATOR LIVE SURROUND... - Page 9 [ Rear panel ] CD AUDIO INPUT JACKS HDMI OUTPUT JACK VCR AUDIO VCR VIDEO INPUT JACK FM ANTENNA JACK INPUT JACKS VCR VIDEO OUTPUT JACK HDMI INPUT 7.1 CH ANALOG FRONT SPEAKER TERMINALS JACKS AUDIO INPUT JACKS SURROUND SPEAKER TERMINALS CENTER SPEAKER TERMINALS SURROUND BACK SPEAKER DVD OPTICAL DIGITAL TERMINALS...
- Page 10 Description (Cont'd) [ Remote control ] TV button DVD button AMP button VCR button DIMMER button POWER button TV/VIDEO, FUNCTION button CD button 7.1 CH button NUMBER (0~9) buttons VCR button SAT button DVD button AUX button SLEEP button INPUT MODE button SUBWOOFER button MO/ST button EX/ES button...
- Page 11 Insert remote control batteries Remove the battery Insert two 1.5V AAA Replace the battery cover in the direction batteries, paying cover. of the arrow. attention to the correct polarities (+ and –). Follow these precautions to avoid leaking or cracking batteries: •...
-
Page 12: Connecting Speakers
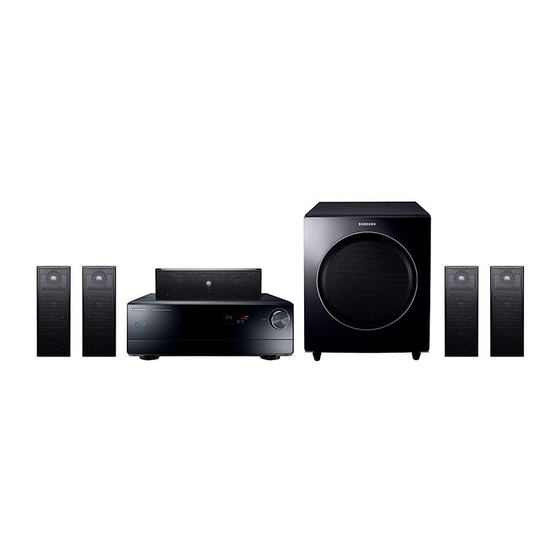
Connecting speakers Before moving or installing the product, be sure to turn off the power and disconnect the power cord. Position of AV Receiver Surround Speakers • Place AV Receiver on a dedicated stand or rack. • Place these speakers behind your listening position. •... - Page 13 FRONT (L) SURROUND (R) SURROUND (L) BACK (R) BACK (R) PS-AF720S PS-AF720S PS-AR720S PS-AR720S (Not supplied) MAIN UNIT AV-R720 SYSTEM MODEL NAME : HT-AS720S MAIN UNIT AV-R720 FRONT SPEAKER PS-AF720S CENTER SPEAKER PS-AC720S SURROUND SPEAKER PS-AR720S CENTER PS-AC720S ACTIVE SUBWOOFER PS-AW720S √...
-
Page 14: Connecting External Devices
Connecting external devices Connecting video devices Before moving or installing the product, be sure to turn off the power and disconnect the power cord. DVD or Blu-RAY Player • Disconnect the power plug from the outlet if you will not use this unit for a long period of time. •... - Page 15 SAT( Cable/Satellite/Settop Box) • If the external component has only one audio output jack, connect it to either the right or left audio input jack of the main unit. • Connect the audio cable's red plug to the red jack and white cable to the white jack.
- Page 16 Connecting external devices (Cont'd) Connecting audio/7.1 channel devices Before moving or installing the product, be sure to turn off the power and disconnect the power cord. CD Player DVD/Blu-RAY or 7.1 channel player...
- Page 17 Video A TV with a DVI-D jack (TV not supporting HDCP) If you use an HDMI cable to connect a Samsung TV to the DVD Player, you can operate the AV receiver using the TV’s remote • control. This function is available only in connection with Samsung TV and DVD player supporting Anynet +(HDMI-CEC).
-
Page 18: Anynet
Anynet+ Using Anynet+(HDMI-CEC) Connect the AV receiver to a Samsung TV with an HDMI cable. (See page 17) Set the Anynet+ function on your TV. (See the TV instruction manual for more information.) • You can operate the AV receiver by using the TV remote control. -
Page 19: Connecting The Fm Antenna
Connecting external devices (Cont'd) Connecting AUX components You can connect external devices you use (camcorder, game console, mobile equipment,etc.) to the front of this unit for convenience. Camcorder Connecting the FM antenna FM antenna (supplied) FM antenna connection 1. Connect the FM antenna supplied to the FM 75Ω COAXIAL terminal as a temporary measure. 2. -
Page 20: Before Using The Av Receiver
Before using the AV receiver Turning On/Off Connect the power plug to the outlet. Press the POWER button of the remote control. This unit will be turned on or set to Standby mode. • Remote control functions You can operate your AMP (this AV receiver), TV, DVD and VCR with this remote control. -
Page 21: Selecting Digital/Analog Input
Selecting digital/analog Input You can listen to sound in 2 channel analog , Dolby Digital or DTS using this unit. REMOTE CONTROL MAIN UNIT Press the INPUT MODE button. Press the INPUT MODE button. Each time the button is pressed, input mode changes Each time you press this button, input mode changes •... -
Page 22: Setting The Speaker Mode
Setting the speaker mode Signal outputs and frequency response from the speaker will be adjusted according to your speaker configuration and whether certain speakers are used or not. √ REMOTE CONTROL Press SETUP/MENU button, and then press the ENTER button. “SETUP MODE”... - Page 23 MAIN UNIT Press SETUP button, and then press the ENTER ( ) button. “SETUP MODE” appears on the display and goes into Setup Mode. • Press button to select the “SPK SETUP”, and then press the ENTER ( ) button. Press button to select the speaker you want.
-
Page 24: Setting The Speaker Listening Distance
Setting the speaker listening distance If the speakers cannot be placed at equal distances from the listening position, you can adjust the delay time of the audio signals from the center and surround speakers. √ Press SETUP/MENU button, and then press the ENTER button. “SETUP MODE”... -
Page 25: Setting Digital Input
Setting digital input You can set the digital input for a DVD/SAT/CD player to either OPTICAL or COAXIAL to match the connections you've made . √ Press SETUP/MENU button, and then press the ENTER button. “SETUP MODE” appears on the display and goes into Setup Mode. •... -
Page 26: Setting Hdmi Audio
Setting HDMI AUDIO You can set HDMI audio settings. √ Before using! Press the INPUT MODE button to select HDMI1 or HDMI2. (see page 21) • If you select Digital (Optical, Coaxial) or Analog, the HDMI audio setting will be •... -
Page 27: Setting Drc (Dynamic Range Compression)
Setting DRC (Dynamic Range Compression) You can use this function to enjoy Dolby Digital sound when watching movies at low volume at night. DRC compresses the audio to make the loudest sounds quieter and the quietest sounds louder. √ Press SETUP/MENU button, and then press the ENTER button. -
Page 28: Test Tone
Test tone Use the test tone check the speaker connection status or level. To automatically output test tone √ Press SETUP/MENU button, and then press the ENTER button. “SETUP MODE” appears on the display and the unit goes into Setup Mode. •... - Page 29 To Manually Output Test Tone √ Press SETUP/MENU button, and then press the ENTER button. “SETUP MODE” appears on the display and goes into Setup Mode. • Press ➛¤❿ button to select the “TEST-T MANU”, and then press the ENTER button. Press ➛¤❿...
-
Page 30: Setting Speaker Level
Setting speaker level You can set the balance and level of speakers. √ Press SETUP/MENU button, and then press the ENTER button. “SETUP MODE” appears on the display and goes into Setup Mode. • Press button to select the “LEVEL SETUP”, and then press the ENTER button. -
Page 31: Dolby Pro Logic Llx Mode
Dolby Pro Logic llx mode This mode provides 7.1 channel sound from 2 channel sources. REMOTE CONTROL Press MODE button. Each time you press this button, CINEMA ➝ MATRIX ➝ GAME • ➝ PL ➝ MUSIC will be selected in turn. MAIN UNIT Press SURROUND button to select “DPLIIx”... -
Page 32: Setting Dolby Pro Logic Llx Effect
Setting Dolby Pro Logic llx effect This function works only in Dolby PRO LOGIC IIx MUSIC Mode. Press SETUP/MENU button, and then press the ENTER button. “SETUP MODE” appears on the display and goes into Setup Mode. • Press button to select the “ MODE”, and then press the ENTER button. -
Page 33: Setting Neo:6 Mode
Setting NEO:6 mode You can play back 2 channel sound over 6.1 channels when enjoying music or a movie. REMOTE CONTROL Press NEO:6 MODE button. Each time you press this button, MUSIC ➝ CINEMA will be selected in turn. • MAIN UNIT Press SURROUND button briefly to select “NEO:6”... -
Page 34: Setting Ex/Es Mode
Setting EX/ES mode When surround back speakers are connected, you can listen to 6.1 or 7.1 multi-channel sound using the built-in Dolby Digital Surround EX or DTS ES decoder. This function works when a Dolby Digital or DTS source (such as a DVD player) is input, and does not work with L.PCM and Dolby Digital 2 channel sources. Press SETUP/MENU button, and then press the ENTER button. -
Page 35: Setting Tone Control
Setting Tone Control This function allows setting up the tone quality of the front speakers. Press SETUP/MENU button, and then press the ENTER button. “SETUP MODE” appears on the display and goes into Setup Mode. • Press button to select “TONE CONTROL”, and then press the ENTER button. -
Page 36: Sfe Mode
SFE mode The SFE (Sound Field Effect) function uses 7 different DSP sound field effects to digitally simulate actual music environments such as concert halls or cinemas. REMOTE CONTROL Press SFE MODE button. Each time you press this button, HALL ➝ THEATER ➝ ARENA ➝ CLUB ➝ •... -
Page 37: Stereo Mode
Stereo mode You can select this mode when listening to sound through the front left and right speakers and subwoofer. REMOTE CONTROL Press STEREO button. “STEREO” appears in the display and • Stereo Mode is selected. MAIN UNIT Press SURROUND button to select ‘STEREO’. Each time you press this button, DPLIIx ➝... -
Page 38: Listening To Radio
Listening to radio You can listen to the chosen band (FM) by using either automatic or manual tuning. REMOTE CONTROL Press TUNER button. Selected frequency. Automatic tuning 1 • 1) Press TUNING MODE button to select PRESET. 2) Press TUNING/CH ( ) button to select the preset frequency. -
Page 39: Presetting Radio Stations
Presetting radio Stations You can preset up to 30 FM stations. E.g.: Setting station FM 89.10 in preset 2 . Press TUNER button. Press TUNING MODE button to select MANUAL and then press TUNING/CH( ) button to select 89.10. Refer to step 2, page 38, to tune in •... -
Page 40: Convenient Functions
Convenient functions Sleep timer function You can set the time that this unit will shut itself off. Press the SLEEP button. SLEEP : OFF ➝ 15 ➝ 30 ➝ 45 ➝ 60 ➝ 90 ➝ 120 M (MIN) will be selected in turn. •... - Page 41 Reset function REMOTE CONTROL Press the MUTE button. MUTE appears on the display. • Press “0” button five times and then press the ENTER button. “INITIAL : NO” appears on the display. • Press …† buttons to select “YES”. The unit will turn off after 5 seconds. •...
- Page 42 Convenient functions (cont’d) Adjust the display You can adjust the brightness of the display. Press the DIMMER button. Each time you press this, the brightness changes as follows : DARK ➝ BRIGHT. • Using headphones Use headphones (not supplied) for private listening pleasure. Connect the headphones to the headphone jack and listen to music.
-
Page 43: Operating Your Tv With The Remote Control
• Numeric buttons (0~9). The remote control may not work on some brands of TVs. Also, some operations • may not be possible depending on your brand of TV. The remote control will work with Samsung TVs by default. •... - Page 44 078, 092, 093, 094 REALISTIC 003, 019 IMPERIAL FISHER 019, 065, 103 SAMPO MIVAR FUNAI SAMSUNG 000, 015, 016, 017, 040, SABA FUTURETECH 043, 046, 047, 048, 049, BANG&OLUFSEN GENERAL ELECTRIC (GE) 006, 040, 056, 059, 066, 054, 059, 060, 098 BRIONVEGA...
-
Page 45: Operating Your Dvd Or Vcr With The Remote Control
STOP, SKIP, MENU and Numeric button (0~9). The remote control may not work on some brands of DVD (VCR). • Also, some operations may not be possible depending on your brand of DVD (VCR). The remote control will work with Samsung DVD (VCR) by default. •... - Page 46 059, 060, 061 044, 048, 054, 091, 010, 013 HARMAN KARDON 101, 105 KENWOOD HITACHI 020, 021, 049, 054, 062, SAMSUNG 000, 006, 031, 032, 057, 058, 071, 072, 073, 074, MAGNAVOX 075, 076, 077, 078, 079, MITSUBISHI 005, 016 INSTANT REPLAY...
-
Page 47: Before Calling For Service
Before calling for service Check Remedy Symptom The unit will not turn on. Connect the power plug to the outlet. Is the power cord plugged into the outlet? • • A function does not work Is there static electricity in the air? Disconnect the power plug and connect it •... - Page 48 Before calling for service (cont’d) Symptom Check Remedy Are the surround back speakers Refer to pages 12~13 to connect it properly. • • connected properly? There is no sound from Is the S.BACK(Surround Back) selected Refer to pages 22~23 to select LARGE or •...
-
Page 49: Specifications
Specifications Power supply 120V, 60 Hz Standby power consumption 0.9W Main unit 100W Power consumption Subwoofer GENERAL Weight 12.7 Ibs Dimensions (W x H x D) 16.9 x 5.7 x 13.7 inches Operating temperature range 41°F~+95°F Operating humidity range 10%~75% Frequency response 87.5~108.0MHz Usable sensitivity... - Page 50 SAMSUNG will repair or replace this product, at our option and at no charge as stipulated herein, with new or reconditioned parts or products if found to be defective during the limited warranty period specified above. All replaced parts and products become the property of SAMSUNG and must be returned to SAMSUNG.
- Page 52 If you have any questions or comments relating to Samsung products, please contact the SAMSUNG customer care center. Samsung Electronics America, Inc. 1-800-SAMSUNG (7267864) www.samsung.com AH68-01989R...