Table of Contents
Advertisement
Advertisement
Table of Contents

Related Manuals for NextBase Mirror


Summary of Contents for NextBase Mirror
- Page 1 Instruction Manual...
-
Page 2: Introduction To Using A Dash Cam
INTRODUCTION TO USING A DASH CAM The iN-CAR CAM range of Dash Cams have been designed specifically with ease of use in mind, it is recommended NOT to change the default settings, which have been carefully selected to give the best performance for day to day use. - Page 3 1.3 To improve dash board glare, a Nextbase Reflection free lens can be purchased. 2. Tips for stable memory card performance: 2.1 Periodically reformat the memory card. Every 2-3 weeks we recommend that you reformat the memory card.
-
Page 4: Table Of Contents
TABLE OF CONTENTS INTRODUCTION TO USING A DASH CAM ..............TABLE OF CONTENTS ....................PRECAUTIONS ......................CAUTIONS ON USING THIS PRODUCT ..............PRODUCT SPECIFICATION ..................PACKAGE CONTENTS ....................PRODUCT FEATURES ....................PARTS & CONTROLS ....................IN VEHICLE INSTALLATION ..................FIRST TIME USE ...................... -
Page 5: Precautions
PRECAUTIONS Please read this manual carefully before operation and keep it for future reference. It will be helpful should you encounter any operational problem. WARNING: Do not expose this product to rain, moisture or water under any circumstances, doing so may result in the risk of electric shock or fire. CAUTION: To reduce the risk of electric shock, do not perform any servicing other than that contained in the instruction manual unless you are qualified to do so. -
Page 6: Product Specification
Windows is a registered trademark of Microsoft Corporation in the United States and other countries. NEXTBASE Replay 3™ is a registered trademark of Portable Multimedia LTD in the United Kingdom. NEXTBASE Cam Viewer™ is a registered trademark of Portable Multimedia LTD in the United Kingdom. -
Page 7: Package Contents
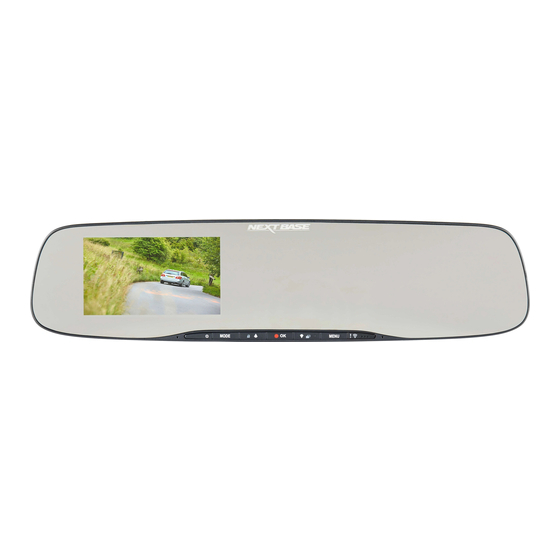
Guide Product appearance may differ slightly to that shown above. PRODUCT FEATURES Thank you for purchasing this NEXTBASE Dash Cam, in this section we will outline some of the features available with this Dash Cam. 4.0" HD LCD Colour Screen The screen is used for playback of the recorded video files and settings adjustment. -
Page 8: Parts & Controls
PARTS & CONTROLS Please see below to identify the parts and controls of your Dash Cam. Front: 9 10 Screen 4.0'' LCD colour screen for the viewing of recorded files on the Dash Cam. Battery Charging LED Indicator The blue LED will be seen when the battery is charging, this will only occur when power is connected to the Dash Cam. - Page 9 PARTS & CONTROLS (CONTD.) Continued from previous page. 9 10 Down / Screen Off,On Down: Press to navigate down within menus and to move to the next file when in playback mode. Screen Off: Press to turn Off / On the screen, only available whilst in video mode. Note: - To help locate the Screen Off/On button, there is a ‘pip’...
- Page 10 Integral speaker for audio playback directly from the Dash Cam. 12. Suction Cups Used to attach the Dash Cam to the vehicles existing rear-view mirror. 13. Reset button In the unlikely event the Dash Cam becomes unresponsive, press the RESET button to restart the Dash Cam.
-
Page 11: In Vehicle Installation
Due to the card slot mechanism the card will spring from the slot when released. Step 2: Clean rear-view mirror Ensure the vehicles existing rear-view mirror is clean and free of grease or dirt; this is so the Dash Cam suckers achieve maximum grip. - Page 12 Holding the plastic edges of the Dash Cam place it onto the vehicle's rear-view mirror. Take care that all five suckers are placed onto the rear-view mirror's glass, not sitting upon the plastic edge of the rear-view mirror. Also take care that the Dash Cam lens support is clear of the edge of the existing rear-view mirror.
- Page 13 Select the size to best suit your vehicle's rear-view mirror. Attach the upper end of the straps to the retaining hooks on the top of the rear-view mirror, then extend the straps around the back of the rear-view mirror and attach them to the bottom retaining hooks.
- Page 14 IN VEHICLE INSTALLATION (CONTD.) Step 5: Route cable and connect power Plug the supplied car power cable into the 12-24Vdc outlet of your vehicle and then connect the Mini USB plug to the Dash Cam. 12-24Vdc The Dash Cam will automatically power on and start recording once power is available. In some vehicles this will be when connections are made, for others the Dash Cam will power on once the ignition has been turned on.
- Page 15 - Do NOT wire the Dash Cam directly to a 12V supply by cutting the cigarette plug off the end of the cable, or damage will result. - A Nextbase hardwire kit is available from your retailer. This connects directly to the vehicle fusebox and hence leaves your cigarette socket available for Phone / Sat Nav charging.
-
Page 16: First Time Use
FIRST TIME USE To ensure the set up of this Dash Cam is as quick and simple as possible, there is an easy to follow ‘First Time Use’ menu. This menu is used to set your preferred Language, Country (this defines your time zone) and speed units. -
Page 17: Video Mode
VIDEO MODE The key below explains the various information displayed on the screen when your Dash Cam is in Video mode, some icons will only be displayed once the relevant function has been selected within the Video menu, as described below. 2:37 1080P 16:04:37... - Page 18 VIDEO MODE (CONTD.) Video Menu The Video Menu is accessed by pressing the MENU button whilst in video mode. Video Menu Resolution Exposure Audio Recording Number / Licence Plate Video Length Back Enter MENU The default settings have been carefully selected to allow you to use the Dash Cam without the need to change any settings.
- Page 19 VIDEO MODE (CONTD.) Continued from previous page. Video Menu Audio Recording Number / Licence Plate Video Length Time Lapse Recording Parking Mode Back Enter MENU Audio Recording Turn On / Off the microphone. Options: On and Off Default Setting: On Number / Licence Plate Enter the registration number for your vehicle, this will then be shown on the video file.
- Page 20 VIDEO MODE (CONTD.) Continued from previous page. Video Menu Time Lapse Recording Parking Mode Rotate Display Time & Date Stamp Speed Stamp Back Enter MENU Time Lapse Recording Time Lapse recording is a technique whereby the frequency at which file frames are captured (frame rate) is lower than that used when playing back the recording.
- Page 21 11. GPS Location Stamp Turn On / Off both the GPS co-ordinates and speed stamp that are shown on recorded files. When a recording is viewed using the supplied NEXTBASE Replay playback software both the GPS co-ordinates and speed information remains available.
- Page 22 VIDEO MODE (CONTD.) Continued from previous page. Video Menu G Sensor Back Enter MENU 13. G Sensor Turn Off or adjust the sensitivity of the built in G Sensor. The G Sensor detects forces which will automatically protect the current recording in event of a collision. Note: - This does not affect Parking mode sensitivity.
-
Page 23: Photo Mode
PHOTO MODE Press the MODE button to select Photo mode. The key below explains the information displayed on the screen when your Dash Cam is in Photo mode. 16:04:37 14/10/2015 Mode: indicates the Dash Cam is in Photo mode. Exposure: displays current exposure level setting. Date: current date. - Page 24 PHOTO MODE (CONTD.) Photo Menu The Photo Menu is accessed by pressing the MENU button whilst in photo mode. Photo Menu Exposure Time & Date Stamp Back Enter MENU The default settings have been carefully selected to allow you to use the Dash Cam without the need to change any settings.
-
Page 25: Playback Mode
PLAYBACK MODE Press the MODE button to select Playback mode, the Dash Cam will display the last recorded file. Dependent on the type of file, the on-screen information and playback functions differ. Video Files: 170419_102024_001 1:39 HH:MM:SS DD/MM/YYYY Mode: indicates the Dash Cam is in Playback mode. File type: indicates whether a video or photo file is being viewed. - Page 26 PLAYBACK MODE Photo Files: 170419_102024_001 HH:MM:SS DD/MM/YYYY Mode: indicates the Dash Cam is in Playback mode. File type: indicates whether a video or photo file is being viewed. File number: displays current file number. Time: displays the time that the current image was taken. Date: displays the date that the current image was taken.
- Page 27 PLAYBACK MODE (CONTD.) Deleting files: Highlight the Delete Files option and press the OK button. Playback Menu Delete Files Protect Files Back Enter MENU This will then give you two options: Delete File Delete ALL Files Delete Files Delete Files Delete File Delete File Delete ALL Files...
- Page 28 PLAYBACK MODE (CONTD.) Protecting files: Highlight the Protect Files option and press the OK button. Playback Menu Delete Files Protect Files Back Enter MENU This will then give you two options: Protect File Unprotect File Protect Files Protect Files Protect File Protect File Unprotect File Unprotect File...
-
Page 29: Setup Menu
SETUP MENU Setup Menu The Setup Menu is accessed by pressing the MENU button twice. Setup Menu Wi-Fi Format SD Card Time & Date Time Zone / DST Language Back Enter MENU The default settings have been carefully selected to allow you to use the Dash Cam without the need to change any settings. - Page 30 SETUP MENU (CONTD.) Continued from previous page. Setup Menu Language Country Speed Units Speed Display Screen Saver Back Enter MENU Language Select preferred language. Options: English, Danish, German, Spanish, French, Italian, Dutch, Norwegian, Finnish and Swedish Default Setting: English Country Select your current Country, this will then automatically adjust the Time Zone / DST setting to your Time Zone, i.e.
- Page 31 SETUP MENU (CONTD.) Continued from previous page. Setup Menu Screen Saver Device Sounds Announcements Auto Power Off System Info Back Enter MENU Screen Saver Turn on the Screen Saver function to shut down the screen after 30 seconds of button inactivity, press any button to re-activate the display.
- Page 32 SETUP MENU (CONTD.) Continued from previous page. Setup Menu Auto Power Off System Info Keep User Settings Default Settings Back Enter MENU 12. Auto Power Off Adjust the timing of the Auto Power Off function, this can be used to continue recording in event of loss of power within the vehicle.
-
Page 33: Pc Connection
Please see details within the NEXTBASE Replay 3 Playback software for more information. Wi-Fi CONNECTION The Mirror dash cam can share the files on the SD card with a mobile phone or tablet (minimum operating system requires Android 5.1 or above and iOS 10.3 or above) using the Cam Viewer App. -
Page 34: Trouble Shooting
TROUBLE SHOOTING PROBLEM SOLUTION The Dash Cam will not stay Make sure that the mirror is clean and then slightly moisten the fixed to the mirror, using the suction cups. Apply the Dash Cam to the existing mirror making suckers alone. - Page 35 Restart the PC, as this may be required for the necessary driver to be loaded correctly. Disconnect and reconnect the Dash Cam. Contact NEXTBASE for the required driver. Video files cannot be played. The video files from the iN CAR CAM are in .MOV format and may not be compatible with your PC if suitable playback software is not installed.
- Page 36 The Codecs upon your PC may not be compatible or the latest with video during playback. standard. Download the latest Codecs from: www.nextbase.co.uk Video has no sound. Ensure that “Record Audio” setting is turned ON within the Video Menu of the Dash Cam.
- Page 37 When Wi-Fi Mode is turned on the screen of the Dash Cam will display the Network Name and Password. This password is case sensitive. The NEXTBASE Cam Viewer Please uninstall the NEXTBASE Cam Viewer app and re-download app will not open. again from your devices App Store. When I open the NEXTBASE...
- Page 38 NBDVRMIRROR-IM-ENG-R4...