Table of Contents
Advertisement
Advertisement
Table of Contents

Related Manuals for Fujitsu PalmSecure ID Match

Summary of Contents for Fujitsu PalmSecure ID Match
- Page 1 Operating Manual Component PalmSecure ID Match...
- Page 2 You can find driver updates at: http://support.ts.fujitsu.com/download Should you have any technical questions, please contact ● our Hotline/Service Desk (see the Service Desk list or visit: http://support.ts.fujitsu.com/contact/servicedesk) ● Your authorized distributor ● your sales office We hope you enjoy using your new Fujitsu system!
- Page 4 Published by / Contact address in the EU Fujitsu Technology Solutions GmbH Mies-van-der-Rohe-Straße 8 80807 Munich, Germany http://www.fujitsu.com/fts Copyright © Fujitsu Technology Solutions GmbH 2015. All rights reserved. Edition date 11/2015 Order no.: A26361-K1500-Z320-1-7619, edition 2...
-
Page 5: Table Of Contents
PalmSecure ID Match Operating Manual PalmSecure ID Match Important notes Ports and control elements Initial startup Using the palm scanner Restore factory default settings Using the SmartCard reader Using the magnetic card reader (optional) Using the Security Lock Technical data... - Page 6 Trademarks Fujitsu and the Fujitsu logo are registered trade marks of Fujitsu Limited or its subsidiaries in the United States and other countries. Microsoft and Windows are trademarks or registered trademarks of Microsoft Corporation in the United States and/or other countries.
- Page 7 Contents PalmSecure ID Match ......................... 2 Notational conventions ......................... 3 Important notes ..........................4 Safety notes............................4 Power cable and mains adapter ......................4 Transporting the device ........................4 Cleaning the device ..........................5 CE mark..............................5 FCC and Industry Canada compliance statements for unintentional radiators ........7 Ports and control elements .......................
-
Page 8: Palmsecure Id Match
PalmSecure ID Match PalmSecure ID Match FUJITSU PalmSecure ID Match adds a whole new dimension of security to your security solution, whether it is for access protection, protection of data or payment processes. The device offers the facility to record the unique palm scan and store it depending on the desired application, such as on a personal SmartCard. -
Page 9: Notational Conventions
PalmSecure ID Match Notational conventions The following notational conventions apply in this manual: Refers to important information which must be read. Non-compliance can lead to personal injury, damage to the device or loss of data. If there is any damage to the device which occurs through failure to comply with such warnings, the warranty loses its validity. -
Page 10: Important Notes
Important notes Important notes In this chapter you will find information regarding safety which it is essential to take note of when working with your device. Safety notes ● Pay attention to the information provided in the "Safety/Regulations" manual and in the following safety notes. -
Page 11: Cleaning The Device
Important notes Cleaning the device ● Switch off the device and all equipment connected to it and remove the mains plug from the mains supply socket. ● Do not clean any interior parts yourself, leave this job to a service technician. ●... - Page 12 Important notes Notes/information about the "Ecodesign directive" Regulation 1275/2008, based on the EU Ecodesign Directive (2009/125/EC), defines requirements for the power consumption of electrical and electronic domestic and office devices in stand-by and off mode. Generally, the PalmSecure device was developed for energy-efficient operation and low stand-by losses.
-
Page 13: Fcc And Industry Canada Compliance Statements For Unintentional Radiators
Fujitsu. The correction of interferences caused by such unauthorized modification, substitution or attachment will be the responsibility of the user. The use of shielded I/O cables is required when connecting this equipment to any and all optional peripheral or host devices. -
Page 14: Ports And Control Elements
Ports and control elements Ports and control elements Front Touch screen for messages and status Magnetic card reader indicators RFID antenna with card placement area SmartCard slot (contact-based cards) Status LED Hand placement area for palm scanning Position LED (yellow) for SmartCard slot process (contact-based cards) Palm scanner... -
Page 15: Bottom
Ports and control elements Bottom Cable cover latch Cover with further ports, see following page Cable feedthrough for the ports located Openings for mounting with screws under the cover (3) On/Off switch Opening for security lock device... -
Page 16: Bottom (Under Cover)
Ports and control elements Bottom (under cover) USB A 2.0 host mode ports Mains connection / power supply Mini USB 2.0 device mode port LAN port with PoE function... -
Page 17: Initial Startup
Initial startup Initial startup Unpacking and checking the delivery You can operate the device upright e. g. on a table or counter, you can also secure it against slipping and theft using the two screw connections. These screws are not included in the delivery. Please follow the safety instructions, see "Safety notes". -
Page 18: Setting Up The Device
Initial startup Setting up the device You can operate the device upright e. g. on a table or counter, you can also secure it against slipping and theft using the two screw connections. These screws are not included in the delivery. When setting up, make sure to allow the necessary space for the air supply and discharge, see "Technical data“. -
Page 19: Inserting Sam Cards (Secure Access Module)
Initial startup Inserting SAM cards (Secure Access Module) Your device is equipped at the front with 2 slots for SAM cards. A SAM card (Secure Access Module) is a microcontroller in the form of a chip card or integrated circuit containing cryptographic functions such as key exchange functions, signature functions and encryptions and is used for the secure transport and storage of cryptographic keys. - Page 20 Initial startup ► Insert SAM cards in the slot provided (1) or (2) with the chip contacts downwards and with the bevelled corner to the left as shown. ► Close the cover again.
-
Page 21: Open The Bottom Cover (Lan, Usb, Power)
Initial startup Open the bottom cover (LAN, USB, power) To be able to access the ports on the bottom, you must first open the bottom cover: ► Press into the recess (1) and lift the cover. You can now connect external devices to the USB ports, connect the device to a LAN network or connect the mains adapter. -
Page 22: Connecting External Devices To The Usb Port
You have the option to connect external USB devices to the device. To find out which USB devices are supported, please refer to the SDK documentation or ask your Fujitsu distributor. The USB devices must be connected or detached while they are switched off, otherwise they will not be recognised. -
Page 23: Connecting The Device To The Power Supply
Initial startup Connecting the device to the power supply You have the following options for connecting the device to the power supply: ● Use the supplied mains adapter via an earthed mains supply socket (see Connect the mains adapter (option 1)). ●... -
Page 24: Connect The Mains Adapter (Option 1)
Initial startup Connect the mains adapter (option 1) ► Open the cover on the bottom (see "Open the bottom cover (LAN, USB, power)"). ► Connect the power cable (2) to the mains adapter. ► Plug the mains supply plug into an earthed mains supply socket (3). ►... -
Page 25: Connect The Device To The Lan Port (Option 2)
Initial startup Connect the device to the LAN port (option 2) Provided the appropriate network infrastructure with Power over Ethernet is available, the device is supplied with power via the LAN port. In addition, you can use it to establish a connection to a local network (LAN = Local Area Network). -
Page 26: Switching The Device On
Initial startup Switching the device on ► Press the ON/OFF switch (1) on the bottom of the device. The green LED lights up. The example software appears. The example software shows you options for biometric data capture and storage, as well as the matching of this data in a demonstration version. -
Page 27: Switching The Device Off
Initial startup Switching the device off Depending on the operating system or application software, you can shut down the system by command. You will find information about this in the documentation for the operating system or the application software. If you shut down the device by pressing the On/Off switch for 4 seconds, this may lead to loss of data. -
Page 28: Using The Palm Scanner
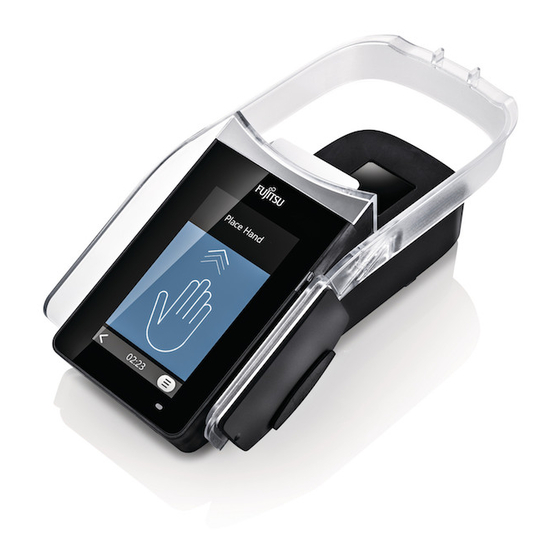
Using the palm scanner Using the palm scanner The Fujitsu PalmSecure OEM sensor captures a person's palm pattern using near infra-red light. The surface of the hand must be positioned on the hand placement area so that the palm of the hand lies centrally over the palm scanner. -
Page 29: Restore Factory Default Settings
Restore factory default settings Restore factory default settings If the software no longer works correctly, the device can either be returned to the delivery state manually or it can automatically activate a system restore process. In addition, it is possible to reset the configuration of the device or perform a software update. -
Page 30: Using The Smartcard Reader
Using the SmartCard reader Using the SmartCard reader The card reader can read and write contact-based cards of type ISO 7816-4 (2) in the SmartCard slot (1), and also RFID cards of type ISO 14443A (3) via the sensitive placement area (4). Depending on the variant of SmartCard reader that was ordered, cards of type Mifare Classic and Desfire are also supported. -
Page 31: Using The Magnetic Card Reader (Optional)
Using the magnetic card reader (optional) Using the magnetic card reader (optional) If your device is equipped with a magnetic card reader (optional), follow the instructions on the display and slide the magnetic strip of the card through the slot at an even speed between the display frame and the RFID card placement area that is indicated with a yellow position LED. -
Page 32: Using The Security Lock
Using the Security Lock Using the Security Lock Your device has a Security Lock device. You can protect your device against theft using the Security Lock device and the Kensington Lock cable. Please consult the manual for your Kensington Lock. -
Page 33: Technical Data
Minimum of 200 mm / 7.87 inches on all sides ventilation: The formation of condensation is not permitted while the device is in operation! The data sheet for this device contains further technical data. You can find the data sheet on the Internet at http://fujitsu.com/fts/support. -
Page 34: Mains Adapter
Technical data Mains adapter Electrical data Rated voltage: 100 - 240 V Max. rated current: Rated frequency: 50 - 60 Hz Only the following adapters with Limited Power Source may be used: 36W: P/N: CP531960-01 Model: A13-036N2A...