Table of Contents
Advertisement
Quick Links
Advertisement
Table of Contents

Related Manuals for Elation PLATINUM HFX

Summary of Contents for Elation PLATINUM HFX
- Page 1 PLATINUM HFX™ user manual...
- Page 2 +31 45 546 85 66 | +31 45 546 85 96 fax | www.elationlighting.eu | info@elationlighting.eu Elation Professional Mexico | AV Santa Ana 30 | Parque Industrial Lerma, Lerma, Mexico 52000 +52 (728) 282-7070 D O C U M E N T V E R S I O N Due to additional product features and/or enhancements, an updated version of this document may be available online.
-
Page 3: Table Of Contents
C O N T E N T S General Information Limited Warranty (USA Only) Safety Guidelines Discharge Lamp Warning Maintenance Guidelines Fixture Overview Lamp Installation Installation Guidelines System Menu DMX Channel Functions And Values Error Codes Specifications Optional Accessories... -
Page 4: General Information
BOX CONTENTS powerCON Cable Safety Cable Omega Brackets (x2) CUSTOMER SUPPORT Contact ELATION Service for any product related service and support needs. Also visit forums.elationlighting.com with questions, comments or suggestions. ELATION SERVICE USA - Monday - Friday 8:00am to 4:30pm PST 323-582-3322 | Fax 323-832-9142 | support@elationlighting.com... -
Page 5: Limited Warranty (Usa Only)
No accessories should be shipped with the product. If any accessories are shipped with the product, Elation Professional shall have no liability what so ever for loss and/or or damage to any such accessories, nor for the safe return thereof. C. This warranty is void if the product serial number and/or labels are altered or removed;... -
Page 6: Safety Guidelines
This fixture is a sophisticated piece of electronic equipment. To guarantee a smooth operation, it is important to follow all instructions and guidelines in this manual. Elation Professional is not responsible for injury and/or damages resulting from the misuse of this fixture due to the disregard of the information printed in this manual. - Page 7 S A F E T Y G U I D E L I N E S RISK GROUP 3 - RISK OF EXPOSURE TO ULTRAVIOLET UV RADIATION! FIXTURE EMITS HIGH INTENSITY WAVELENGTH OF ULTRAVIOLET UV LIGHT FROM THE UV COLOR FILTER. WEAR PROPER EYE AND SKIN PROTECTION. AVOID PROLONGED PERIODS OF EXPOSURE TO UV COLOR FILTER.
-
Page 8: Discharge Lamp Warning
D I S C H A R G E L A M P W A R N I N G This fixture is fitted with a DISCHARGE LAMP, which is highly susceptible to damage if improperly handled. NEVER touch the lamp with your bare hands, as the oil from your hands will shorten the life of the lamp. -
Page 9: Maintenance Guidelines
Regular inspections are recommended to insure proper function and extended life. There are no user serviceable parts inside this fixture, please refer all other service issues to an authorized Elation service technician. Should you need any spare parts, please order genuine parts from your local Elation dealer. -
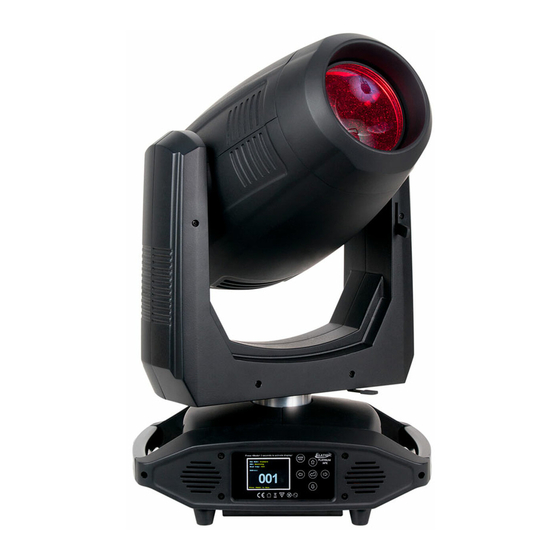
Page 10: Fixture Overview
F I X T U R E O V E R V I E W 1. Lens 2. Control Panel 3. LCD Menu Function Display 4. LEFT Button 5. DOWN Button 6. ENTER Button 7. RIGHT Button 8. MODE/ESC Button 9. -
Page 11: Lamp Installation
L A M P I N S T A L L A T I O N L A M P R E P L A C E M E N T Please note that due to the nature of the Philips™ Platinum 14R Lamp and the optical path of the fixture, the lamp MUST BE replaced at 2,000 hours. - Page 12 LAMP SAFETY INSTRUCTIONS •! ALWAYS replace lamp every 2,000 Hours. •! Use only Genuine Original Philips™ Platinum 14R lamps. Other brand lamps may cause damage and void the warranty! •! NEVER touch the lamp with your bare hands! Oil from your hands will shorten the life of the lamp. •! Always disconnect the fixture’s main power supply before replacing lamp.
- Page 13 LAMP INSTALLATION PROCEDURE - [Continued] 2.! Unlock retention clip and pull clip towards you away from the lamp. (See below) 3.! Gently grab lamp base with thumb and index finger and pull towards you. (See below) 4.! Gently remove (2) Wires connected to spade terminals on lamp. (See below)
- Page 14 LAMP INSTALLATION PROCEDURE - [Continued] 5.! Gently pull lamp out towards you away from the fixture. (See below) 6.! Using thumb and index finger, gently install new lamp into the fixture. (See below) 7.! Gently attach (2) Wires to spade terminals on the base of the lamp. (See below)
- Page 15 LAMP INSTALLATION PROCEDURE - [Continued] 8.! Make sure both wires are securely attached to the lamp. (See below) 9.! Install and position lamp so it is seated properly, then secure retention clip. (See below) 10.! Replace lamp cover and secure (3) screws marked “A”, “B”, and “C”. (See below)
- Page 16 LAMP INSTALLATION PROCEDURE - [Continued] 11.!Be sure to reset the LAMP HOURS in the system menu to prevent the protection circuitry from accidently shutting off the lamp during normal operation. 12.!If the lamp protection circuitry has already been initiated and the LAMP HOURS is not reset, the “Replace the Lamp”...
-
Page 17: Installation Guidelines
I N S T A L L A T I O N G U I D E L I N E S F L A M M A B L E M A T E R I A L W A R N I N G Keep fixture at least 5.0 feet (1.5m) away from any flammable materials, decorations, pyrotechnics, etc. - Page 18 I N S T A L L A T I O N G U I D E L I N E S OMEGA BRACKETS INSTALLATION Insert the included Omega Brackets into the matching holes on the bottom of the fixture. Secure the Omega Brackets to the fixture by turning each quick-lock fastener ¼...
- Page 19 I N S T A L L A T I O N G U I D E L I N E S RIGGING Overhead rigging requires extensive experience, including amongst others calculating working load limits, installation material being used, and periodic safety inspection of all installation material and the device.
- Page 20 LEDs. This issue is not specific only to ELATION lighting fixtures, it is a common issue with lighting fixtures from all manufacturers. Although there is no true way to fully prevent this issue from happening, the guidelines below can prevent any potential damage from occurring if followed.
-
Page 21: System Menu
S Y S T E M M E N U The fixture includes an easy to navigate system menu control panel display where all necessary setting adjustments are made. (See image below) During normal operation, pressing MODE/ESC button once will access the fixture’s main menu. Once in the main menu you can navigate through the different functions and access the sub-menus with the UP, DOWN, RIGHT, and LEFT buttons. - Page 22 ELATION PLATINUM HFX S Y S T E M M E N U Supports Software Versions: ≥ 1.3.5 MAIN MENU SUB MENU OPTIONS / VALUES DESCRIPTION (Default Settings in BOLD) Set DMX Address A001~AXXX DMX Address Setting DMX Value ALL……...
- Page 23 ELATION PLATINUM HFX S Y S T E M M E N U Supports Software Versions: ≥ 1.3.5 MAIN MENU SUB MENU OPTIONS / VALUES DESCRIPTION (Default Settings in BOLD) Reset All Reset All Motors Reset Pan&Tilt Reset Pan/Tilt Reset Colors...
- Page 24 LAMP CONTROL - Lamp OFF Temp The fixture is designed to shut the lamp OFF when an excessive temperature is sensed inside the head by the on-board CPU. The lamp is shut OFF to prevent damage to the lamp and avoid possible internal damage to the fixture head. This function sets the MAX internal operating temperature of the fixture head when the lamp will automatically be shut OFF.
- Page 25 PERSONALITY – Service Setting - RDM PID Select various submenus via RDM (Remote Device Management), which provides the ability to control the device remotely while connected to a DMX-bus. ANSI E1.20-2006 by ESTA specifies the RDM standard as an extension of the DMX512 protocol. Manual settings like adjusting the DMX starting address are no longer needed.
- Page 26 USER MODE SET – Edit User Mode Create user defined channel orders allowing the fixture to match the channel order of other fixtures on the market for easier operation. A total of three user modes may be configured: User Mode A, User Mode B, and User Mode C. EDIT PROGRAM –...
- Page 27 EDIT PROGRAM – Record Controller – Working With Built-In Program [continued] 2. Automatic Program Run • Select “Function Mode”. • Press ENTER to confirm. • Select “Auto Program”. • Press ENTER to confirm. • Select “Master” or “Alone”. • Press ENTER to confirm. •...
- Page 28 EDIT PROGRAM – Record Controller – Working With Built-In Program [continued] 5. Automatic Scene Recording • Select “Edit Program”. • Press ENTER to confirm. • Select “Edit Scenes”. • Select desired scene numbers. A maximum of 250 scenes can be programmed. •...
-
Page 29: Dmx Channel Functions And Values
D M X C H A N N E L F U N C T I O N S A N D V A L U E S ELATION PLATINUM HFX DMX Channel Values / Functions (26 DMX Channels) Features are subject to change without any prior written notice. - Page 30 ELATION PLATINUM HFX DMX Channel Values / Functions (26 DMX Channels) Features are subject to change without any prior written notice. *Rotation direction (Clockwise or Counterclockwise) of COLOR, GOBO, and PRISM effects depends on orientation of the fixture head. MODE / CHANNEL...
- Page 31 ELATION PLATINUM HFX DMX Channel Values / Functions (26 DMX Channels) Features are subject to change without any prior written notice. *Rotation direction (Clockwise or Counterclockwise) of COLOR, GOBO, and PRISM effects depends on orientation of the fixture head. MODE / CHANNEL...
- Page 32 ELATION PLATINUM HFX DMX Channel Values / Functions (26 DMX Channels) Features are subject to change without any prior written notice. *Rotation direction (Clockwise or Counterclockwise) of COLOR, GOBO, and PRISM effects depends on orientation of the fixture head. MODE / CHANNEL...
- Page 33 ELATION PLATINUM HFX DMX Channel Values / Functions (26 DMX Channels) Features are subject to change without any prior written notice. *Rotation direction (Clockwise or Counterclockwise) of COLOR, GOBO, and PRISM effects depends on orientation of the fixture head. MODE / CHANNEL...
-
Page 34: Error Codes
E R R O R C O D E S When power is applied, the unit will automatically enter a “Reset/Test” mode. This mode brings all the internal motors to a home position. If there is an internal problem with one or more of the motors an error code will flash in the display in the form of “XXer”... - Page 35 ELATION PLATINUM HFX E R R O R C O D E S Error Codes are subject to change without any prior written notice. ERROR CODE DESCRIPTION The PAN movement is not located in the default position after the reset.
- Page 36 ELATION PLATINUM HFX E R R O R C O D E S Specifications and features are subject to change without any prior written notice. ERROR CODE DESCRIPTION The Zoom movement is not located in the default position after the reset.
- Page 37 ELATION PLATINUM HFX E R R O R C O D E S Specifications and features are subject to change without any prior written notice. ERROR CODE DESCRIPTION Error information from JB2 port on 4U01 PCB. 4U_Fan2Fault Displayed as 4U_Fan2 RPM <2500.
-
Page 38: Specifications
S P E C I F I C A T I O N S SOURCE Phillips™ MSD Platinum 14R 280W Lamp 2,000 Hour Average Lamp Life* *May vary depending on several factors including but not limited to: Environmental Conditions, Power/Voltage, Usage Patterns (On-Off Cycling), Control, and Dimming. EFFECTS 8-Facet and Linear Rotating and 10-Facet Static Prisms Strobe and Electronic Dimming... - Page 39 COLORS AND GOBOS **IMPORTANT NOTICE REGARDING GOBO DIMENSIONS AND CUSTOM GOBOS OD = Outside Diameter | ID = Image Diameter Due to varying manufacturing processes, it is highly recommended to provide a gobo and holder sample from the fixture to 3rd party custom gobo vendors for accurate sizing.
- Page 40 DIMENSIONAL DRAWINGS Please Note: Specifications and improvements in the design of this unit and this manual are subject to change without any prior written notice. FCC STATEMENT This device complies with Part 15 of the FCC Rules. Operation is subject to the following two conditions: (1) this device may not cause harmful interference, and (2) this device must accept any interference received, including interference that may cause undesired operation.
-
Page 41: Optional Accessories
ZB-MSD PLATINUM 14R Philips MSD Platinum 14R Lamp TRIGGER CLAMP Heavy Duty Wrap Around Hook Style Clamp DRCHFX Dual Road Case For Platinum HFX™ AC5PDMX5PRO 5 ft. (1.5m) 5pin PRO DMX Cable CAT6PRO5 5 ft. (1.5m) CAT6 EtherCON Cable PLC6 6 ft.