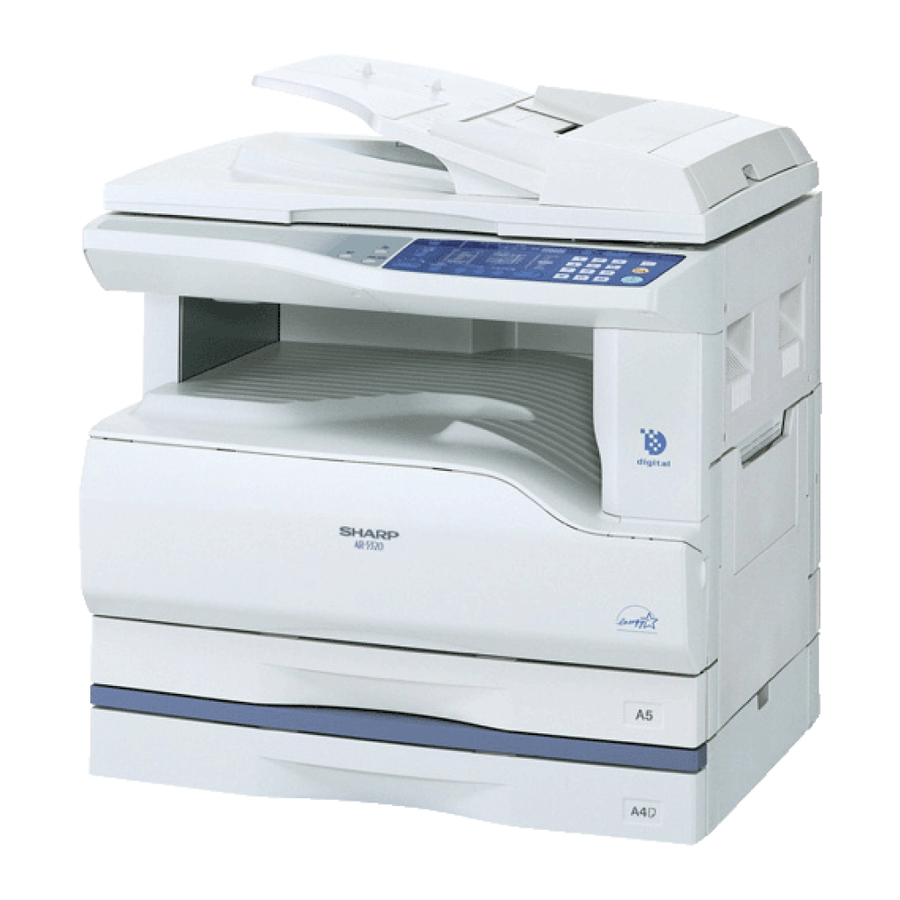
Sharp AR-5316 Operation Manual
Digital copying machine
Hide thumbs
Also See for AR-5316:
- Service manual (56 pages) ,
- Software setup manual (16 pages) ,
- Quick reference manual (15 pages)
Table of Contents
Advertisement
Quick Links
Advertisement
Chapters
Table of Contents

Related Manuals for Sharp AR-5316


Summary of Contents for Sharp AR-5316
- Page 1 MODEL AR-5316 DIGITAL MULTIFUNCTIONAL SYSTEM OPERATION MANUAL • BEFORE USING THE MACHINE • COPY FUNCTIONS • PRINTER FUNCTIONS • USER SETTINGS • TROUBLESHOOTING • ROUTINE MAINTENANCE • PERIPHERAL DEVICES AND SUPPLIES • APPENDIX Page...
- Page 2 Model Number Serial Number Date of Purchase Place of Purchase Authorized Sharp Copier Service Department Number ➣➢➣➢➣➢➣➢➣➢➣➢➣➢➣➢➣➢➣➢➣➢➣➢➣➢➣➢➣➢➣➢➣ Do not make copies of anything which is prohibited from copying by law. The following items are normally prohibited from copying by national law. Other items may be prohibited by local law.
-
Page 3: Table Of Contents
CONTENTS CAUTIONS... 3 G CAUTIONS ON USING... 3 G IMPORTANT POINTS WHEN SELECTING AN INSTALLATION SITE ... 3 G CAUTIONS ON HANDLING ... 4 G ENVIRONMENTAL INFORMATION... 5 USING THE MANUAL ... 5 G ABOUT THE OPERATION MANUALS... 5 G THE MEANING OF "R" IN ORIGINAL AND PAPER SIZE INDICATIONS ... 5 G CONVENTIONS USED IN THIS MANUAL... - Page 4 ROUTINE MAINTENANCE CHECKING THE TOTAL OUTPUT COUNT AND TONER LEVEL... 56 G CHECKING THE TOTAL OUTPUT COUNT...56 CHECKING THE TONER LEVEL AND DRUM CARTRIDGE LIFE ... 57 G TONER LEVEL ...57 G DRUM CARTRIDGE LIFE ...57 ROUTINE MAINTENANCE... 58 G CLEANING THE DOCUMENT GLASS AND SPF/DOCUMENT COVER ...58 G CLEANING THE ORIGINAL SCANNING GLASS (ONLY WHEN A SPF IS INSTALLED)...58...
-
Page 5: Cautions
CAUTIONS Follow the cautions below when using this machine. CAUTIONS ON USING Warning: • The fusing area is hot. Exercise care in this area when removing misfed paper. • Do not look directly at the light source. Doing so may damage your eyes. Caution: •... -
Page 6: Cautions On Handling
The machine should be installed near an accessible power outlet for easy connection and disconnection. Be sure to connect the power cord only to a power outlet that meets the specified voltage and current requirements. Also make certain the outlet is properly grounded. Connect the machine to a power outlet which is not used for other electric appliances. -
Page 7: Environmental Information
Sizes that can be placed only in the horizontal (landscape) orientation (8-1/2" x 14", 11" x 17") do not contain the "R" in their size indication. ® Partner, SHARP has determined that this product meets ® guidelines for energy efficiency. -
Page 8: Conventions Used In This Manual
CONVENTIONS USED IN THIS MANUAL Warns the user that injury may result if the contents of the warning are not properly followed. Warning Cautions the user that damage to the machine or one of its components may result if the contents Caution of the caution are not properly followed. -
Page 9: Main Features
MAIN FEATURES High-speed laser copying • First-copy time* at 300 dpi* is only 7.2 seconds . • Copying speed is 16 copies per minute. This is ideal for business use and provides a big boost to workplace productivity. First-Copy time may vary depending on the power-supply voltage, ambient temperature, and other operating conditions. "dpi"... -
Page 10: The Machine
Chapter 1 BEFORE USING THE MACHINE This chapter contains basic information that should be read before using the machine. PART NAMES AND FUNCTIONS Glass cleaner Use to clean the original scanning glass. Document feeder cover (when the SPF is installed) /document cover Open to make copies from the document glass. - Page 11 Parallel connector Connect to your computer to use the printer function. (Software Setup Guide) Document feeder tray (when the SPF is installed) Place the original(s) that you wish to scan face up here. Holds up to 40 originals. Original guides (when the SPF is installed) Adjust to the size of the originals.
-
Page 12: G Operation Panel
BEFORE USING THE MACHINE OPERATION PANEL ON LINE key / indicator Press to toggle the machine between online and off-line. The indicator lights up when the machine is online, and goes off when the machine is off-line. The indicator blinks while the machine is receiving print data and while printing is paused. - Page 13 AUDIT CLEAR POWER SAVE ORIGINAL PAPER AUTO SIZE SIZE TEXT PHOTO 8½ 8½ 8½ 5½ 8½ EXTRA 1 3 5 ORIGINAL SIZE TRAY AUTO IMAGE ENTER SELECT 15 16 17 18 19 20 PAPER SIZE indicators 16 15 Light up to show the selected copy paper size. (p.16) PAPER SIZE ENTER key Use to set the paper size in the paper tray.
-
Page 14: Power On And Off
POWER ON AND OFF The power switch is located on the left side of the machine. POWER ON Turn the power switch to the "ON" position. It will take about 45 seconds for the machine to warm up. While the machine is warming up, the POWER SAVE indicator will blink. -
Page 15: Loading Paper
G G G G There are many varieties of special paper available on the market, and some cannot be used with this machine. Before using special paper, contact a SHARP service center. G G G G Before using other than SHARP recommended paper, make a test copy to see if the paper is suitable. Size 5-1/2"... -
Page 16: G Loading Paper
BEFORE USING THE MACHINE LOADING PAPER Make sure that the machine is not copying or printing, and then follow these steps to load paper. Loading the paper tray Gently lift and pull out the paper tray until it stops. Push the pressure plate down until it locks in place. -
Page 17: Loading The Bypass Tray
• When loading envelopes, make sure that they are straight and flat and do not have loosely glued construction flaps (not the closure flap). • Special papers except SHARP recommended transparency film, labels, and envelopes must be fed one sheet at a time through the bypass tray. -
Page 18: Changing A Tray's Paper Size Setting
BEFORE USING THE MACHINE Envelopes Do not use the following envelopes, as misfeeds will occur. • Envelopes with metal tabs, clasps, strings, holes, or windows. • Envelopes with rough fibers, carbon paper, or glossy surfaces. • Envelopes with two or more flaps. •... - Page 19 Press the [START] key ( the [PAPER SIZE ENTER] key. To change the paper size START setting of another tray, repeat steps 2 to 5 after pressing the [START] key ( Affix the paper size label for the paper size Note selected in step 3 to the label position on the right end of the tray.
-
Page 20: Copy Functions
Chapter 2 COPY FUNCTIONS This chapter explains basic copying functions such as normal copying, reduction or enlargement, and exposure adjustment. NORMAL COPYING This section explains how to make a regular copy. If "Auditing mode" has been enabled (p.39), enter your 3-digit account number. Copying from the document glass Open the document cover/SPF, and place the original. -
Page 21: Document Feeder Tray
Copying from the SPF Make sure that an original has not been left on the document glass. Close the SPF. Adjust the original guides to the size of the original(s). Set the original(s) face up in the document feeder tray. G Insert the original into the document feeder tray as far as it will go. -
Page 22: Removing The Document Cover
COPY FUNCTIONS Removing the document cover To copy large originals like newspapers, remove the document cover. To remove the cover, lift straight up as shown. To replace the cover, do the reverse. The SPF cannot be removed. Copying books or originals with folds or creases Press down on the document cover/SPF while copying as shown. -
Page 23: G Making A Copy Darker Or Lighter
MAKING A COPY DARKER OR LIGHTER Automatic exposure adjustment is initially enabled. This function automatically adjusts the copy image according to the original being copied. If you wish to select the exposure level yourself, follow the steps below. (Select from two original types and five exposure levels for each original type.) The exposure level used in automatic exposure adjustment can also be changed. -
Page 24: G Setting The Number Of Copies
COPY FUNCTIONS SETTING THE NUMBER OF COPIES Press the numeric keys to set the number of copies. G The set number of copies appears in the display. A maximum of 999 copies (factory default setting) can be set. G If you wish to make only a single copy, copying is possible with the display showing "0". -
Page 25: Manual Ratio Selection
Press the [AUTO IMAGE] key. The AUTO IMAGE indicator lights up and the AUTO appropriate ratio for the IMAGE original size and paper size is selected. (The indicator of the selected ratio will light up.) • If the ORIGINAL SIZE indicator blinks, Note change the orientation of the placed original. -
Page 26: Selecting The Vertical And Horizontal Copy Ratios Separately
COPY FUNCTIONS SELECTING THE VERTICAL AND HORIZONTAL COPY RATIOS SEPARATELY The XY ZOOM feature allows the horizontal and vertical copy ratios to be changed independently. Example: Reduction only in the horizontal direction. • To use the XY ZOOM feature with the DUAL PAGE COPY feature, set the DUAL PAGE COPY feature first and Note then the XY ZOOM feature. -
Page 27: Tray
Use the [PRESET RATIO] selector keys ( ) and [Zoom] keys ( to change the copy ratio in the horizontal direction. Press the [PRESET RATIO] selector keys ( ) to select a ratio close to the desired ratio, and then press the [Zoom] keys ( the ratio in increments of 1%. -
Page 28: Two-Sided Copying Using The Bypass Tray
TWO-SIDED COPYING USING THE BYPASS TRAY To perform manual two-sided copying, follow these steps. Example: Copying originals A and B onto each side of one sheet of paper Copy original A. Copied original A Original A Copied original A Original A Place original B as shown below. -
Page 29: Dual
DUAL PAGE COPYING A dual page original can be automatically separated into two pages during copying. This feature is convenient for making copies of books and other dual page originals on individual sheets of paper. • 8-1/2" x 11" paper is used for dual page copying. Note •... -
Page 30: Interrupting A Copy Run
INTERRUPTING A COPY RUN A copy run can be temporarily interrupted to allow another copy job to be performed. When the other job is finished, the copy run will resume using the original copy settings. Note Interrupt copying is not possible when the user programs are being configured. Press the [INTERRUPT] key ( interrupt the copy run. -
Page 31: Printer Functions
Chapter 3 PRINTER FUNCTIONS The machine includes a USB 1.1 connector and a parallel connector as standard equipment. A computer can be connected to these connectors to use the machine as a printer. To use the machine as a printer, the printer driver must first be installed as explained in the "Software Setup Guide". •... -
Page 32: G Operation In Copy And Printer Modes
PRINTER FUNCTIONS Pausing a print job To pause a print job during printing, press the [ON LINE] key on the operation panel to switch the machine off-line. Printing will be paused and the ON LINE indicator will blink. To cancel a print job, press the [CLEAR] key ( To resume printing, press the [ON LINE] key to switch the machine online. -
Page 33: User Settings
Chapter 4 USER SETTINGS This chapter explains how to set the automatic exposure level, toner save mode/high image quality mode, and the user programs, which are custom settings that control fine points of the machine’s operation. ADJUSTING THE AUTOMATIC EXPOSURE LEVEL The exposure level used in automatic exposure adjustment, which automatically adjusts the copy exposure according to the original, can be adjusted. -
Page 34: Toner Save Mode And High Image Quality Mode
TONER SAVE MODE AND HIGH IMAGE QUALITY MODE Toner save mode can be enabled to reduce toner consumption by about 10%. The high image quality mode improves copy image quality in the automatic and manual exposure modes by increasing copy density with a slight increase of toner consumption. To switch between toner save mode and high image quality mode, follow the steps below. -
Page 35: Customizing Settings
CUSTOMIZING SETTINGS The user programs allow you to customize the machine to match your needs. USER PROGRAMS Program Program name number Auto clear time Preheat mode Auto power shut-off timer Stream feeding mode Auto power shut-off setting 10 to 15 Auditing mode When the SPF is installed. - Page 36 USER SETTINGS Program Program name number Resolution in Auto/Text mode Key auto repeat Key press time Audible signals volume Base setting beep signal Number of copies limit Use close paper size Default tray setting Default exposure mode Setting codes (factory default setting appears in bold) •...
-
Page 37: Program
SELECTING A SETTING FOR A USER PROGRAM Hold down the [Light] key ( the alarm indicators ( , blink. The display shows "- -" with the left hyphen blinking. 1 3 5 Enter the program number with the numeric keys. •... -
Page 38: Settings For Auditing Mode
SETTINGS FOR AUDITING MODE AUDITING MODE When "Auditing mode" is enabled, a count is kept of the number of copies made by each account (up to 20 accounts can be established), and the counts can be displayed and totaled as necessary. In "Auditing mode", the display shows "- - -", and this indicates that a 3-digit account number must be entered in order to use the machine for copying. -
Page 39: G Selecting Auditing Mode Settings
SELECTING AUDITING MODE SETTINGS Hold down the [Light] key ( the alarm indicators ( , blink. The display shows "- -" with the left hyphen blinking. 1 3 5 Enter the program number with the numeric keys. • See "AUDITING MODE SETTINGS"... -
Page 40: Auditing Mode
USER SETTINGS Auditing mode (program No.10) 1 Press the [1] key to enable "Auditing mode" or the [0] key to disable it, and then press the [START] key ( After enabling "Auditing mode", use "Account Note number entry" to establish account numbers for each account (up 20 accounts can be established). -
Page 41: Resetting Account
Resetting account (program No.15) The copy count of a single account or all accounts can be reset to 0. If no account numbers have been established, the error code "15E" will appear in the display. [Resetting all accounts] Press the [1] key and then press the [START] key ( The copy counts of all accounts will be deleted. -
Page 42: Two-Sided Copying Using The Bypass Troubleshooting
If you experience difficulty using the machine, check the following troubleshooting guide before calling for service. Many problems can be easily resolved by the user. If you are unable to solve the problem using the troubleshooting guide, turn off the power switch and unplug the machine, and contact your SHARP service center. MACHINE/COPYING PROBLEMS The machine does not operate. -
Page 43: G Machine/Copying Problems
MACHINE/COPYING PROBLEMS The following problems are related to the general operation of the machine and copying. Problem The machine does not operate. Copies are too dark or too light. Blank copies. Part of the image is cut off or there is too much blank space. -
Page 44: Paper Misfeed
Problem Paper misfeed. Original size not selected automatically. (When the SPF is installed.) Cause and solution Misfeed occurs. → To remove the misfeed, see "MISFEED REMOVAL". The paper is outside of the specified size and weight range. → Use copy paper within the specified range. Paper curled or damp. -
Page 45: Copies Are Smudged Or Dirty
Problem Copies are smudged or dirty. White or black lines appear on copies. Paper size for a paper tray cannot be set. A copy job stops before it is finished. The POWER SAVE indicator is lit. Any one of the alarm indicators ) is lit or blinking. -
Page 46: G Printing Problems
(On Windows 95/98/Me/NT 4.0/2000, click the "Start" button, select "Settings" and then click "Printers".) 2 The "SHARP AR-5316" printer driver icon is not shown. 3 If the icon is shown but you still cannot print, the printer driver may not have been installed correctly. In this case, delete AR-5316 Software and then reinstall it. -
Page 47: Printing Is Slow
See "INDICATORS AND DISPLAY MESSAGES" to check the meaning of the alarm indicator and error message in the display, and take appropriate action. Select "SHARP AR-5316 Series Printer Driver" from the list, and remove the software. For more information, refer to your operating manual or to the help files for your operating system. -
Page 48: Indicators And Display Messages
If this does not clear the message, write down the code that appears and then unplug the power cord and contact your SHARP service center. Tell your SHARP service center what code appeared and the circumstances under which it appeared. -
Page 49: Misfeed Removal
MISFEED REMOVAL When a misfeed occurs, the misfeed indicator ( will automatically stop. Check the blinking misfeed location indicator to identify the location of the misfeed and remove it. The paper may tear when you remove a misfeed. In this event, be sure to remove all torn pieces of paper from the Note machine, taking care not to touch the drum cartridge (the green part). -
Page 50: Misfeed In The Bypass Tray
TROUBLESHOOTING Section C Remove the misfed original from the exit area. If the misfed original cannot be easily removed from the exit area, open the moveable part of the document feeder tray and remove the original. MISFEED IN THE BYPASS TRAY Gently pull the misfed paper out. -
Page 51: Misfeed In The Machine
MISFEED IN THE MACHINE Open the bypass tray and the side cover. If the misfed paper is visible here, go to "C. Misfeed in the transport area". If paper is misfed here, go to "A. Misfeed in the paper feed area". A. - Page 52 TROUBLESHOOTING B. Misfeed in the fusing area Push gently on both ends of the front cover. Turn the roller rotating knob in the direction of the arrow. Roller rotating knob Carefully remove the misfed paper. Lower the fusing unit release levers to allow easier removal.
- Page 53 C. Misfeed in the transport area Open the fusing paper guide by pressing down the projection on either side of the guide and remove the misfed paper. Be careful not to tear the misfed paper during removal. The fusing unit is hot. Do not touch Warning the fusing unit when removing misfed paper.
-
Page 54: Misfeed In The Paper Tray
TROUBLESHOOTING MISFEED IN THE PAPER TRAY Note Make sure that there is no misfed paper in the tray before pulling it out. (p.49) Lift and pull out the paper tray and remove the misfed paper. Be careful not to tear the misfed paper during removal. -
Page 55: Replacing The Td Cartridge
REPLACING THE TD CARTRIDGE When the TD cartridge replacement required indicator ( Obtain a new cartridge. When the TD cartridge replacement required indicator ( be replaced before copying can be resumed. Replace the TD cartridge by following the procedure below. Note When the TD cartridge replacement indicator ( Push on both ends of the front cover... -
Page 56: Replacing The Drum Cartridge
TROUBLESHOOTING Close the front cover. The TD cartridge replacement required indicator ( out. REPLACING THE DRUM CARTRIDGE The useful life of the drum cartridge is approximately 30,000 copies. When the internal counter reaches approximately 29,000 copies, the drum cartridge replacement required indicator ( replacement of the drum cartridge will be needed soon. - Page 57 Remove the new drum cartridge from the protective bag and gently insert the lead end of the drum cartridge along the guides. Do not touch the drum cartridge (green portion). Doing so may damage the drum and Caution cause smudges on copies. Remove the protective cover from the drum cartridge and then push the cartridge all the way into the machine.
-
Page 58: Routine Maintenance
Chapter 6 ROUTINE MAINTENANCE This chapter explains how to keep the machine operating smoothly, including viewing copy count, the toner level indicator, and cleaning the machine. CHECKING THE TOTAL OUTPUT COUNT AND TONER LEVEL CHECKING THE TOTAL OUTPUT COUNT From the "0" display, you can check the total output count, total copy count, as explained below. The total output count is all pages (for both printing and copying) printed by the machine and the total output count can be counted up to 999,999. -
Page 59: Checking The Toner Level And Drum Cartridge Life
CHECKING THE TONER LEVEL AND DRUM CARTRIDGE LIFE TONER LEVEL The toner level is indicated by a 6-level display. Use it as a guideline for replacing the TD cartridge. Hold down the [Light] key ( the alarm indicators ( , blink. -
Page 60: Routine Maintenance
ROUTINE MAINTENANCE CLEANING THE DOCUMENT GLASS AND SPF/ DOCUMENT COVER If the document glass, SPF, underside of the document cover, or the scanner for originals coming from the SPF (the long narrow glass surface on the right side of the document glass) become dirty, the dirt may appear on copies. Always keep these parts clean. -
Page 61: Cleaning The Bypass Tray Paper Feed Roller
CLEANING THE BYPASS TRAY PAPER FEED ROLLER If misfeeds occur frequently when feeding envelopes, thick paper, etc. through the bypass tray, wipe the paper feed roller at the feed slot of the bypass tray with a soft, clean cloth dampened with alcohol or water. CLEANING THE TRANSFER CHARGER If copies start becoming streaky or blotchy, the transfer charger may be dirty. -
Page 62: Peripheral Devices And Supplies
Optional equipment and supplies are explained in this chapter. To purchase optional equipment and supplies, contact SHARP service. PERIPHERAL DEVICES As a part of our policy of continuous improvement, SHARP reserves the right to make design and specification Note changes for product improvement without prior notice. The performance specification figures indicated are nominal values of production units. -
Page 63: Storage Of Supplies
Standard supplies for this product that are to be replaced by the user are paper and TD cartridge. For best copying results, be sure to use only SHARP Genuine Supplies which are designed, engineered and tested to maximize the life and performance of SHARP copiers. Look for the Genuine Supplies label on the toner package. -
Page 64: Appendix
Chapter 8 APPENDIX SPECIFICATIONS Type Photoconductive type Document glass type Copy system Originals Original sizes Copy size Copying speed (one-sided copying at 100% copy ratio) Continuous copy First-copy time Warm-up time Copy ratio Exposure system Paper feed Fusing system Developing system Light source Resolution Gradation... -
Page 65: Printer Function
* Print speed during printing of the second sheet and following sheets when using 8-1/2" x 11" plain paper and performing continuous one-sided printing of the same page. As a part of our policy of continuous improvement, SHARP reserves the right to make design and specification Note changes for product improvement without prior notice. -
Page 66: Software License
(the "Software") and related documentation are licensed to you by SHARP. You own the disk on which the Software is recorded but SHARP and/or SHARP's Licensors retain title to the Software and related documentation. This License allows you to use the Software on one or more computers connected to a single printer and make one copy of the Software in machine-readable form for backup purposes only. - Page 67 Clause 6. A disk will be replaced when it is returned to SHARP or a SHARP authorized representative with a copy of the receipt. SHARP will have no responsibility to replace a disk damaged by accident, abuse or misapplication.
-
Page 76: Index
INDEX Symbols ] key...11, 56 About the operation manuals - Online Manual...5 - Operation Manual ...5 - Software Setup Guide...5 Adjusting the automatic exposure level...31 Alarm indicators ...10, 35, 37, 43, 45, 46 Appendix ...62 Audible signals ...34, 35 AUDIT CLEAR key...10, 39 Auditing mode ...33, 36, 37, 38, 39 Auto clear ...12, 18, 19, 33 AUTO IMAGE indicator ...11, 21... - Page 77 ON LINE indicator ...10, 29 ON LINE key ...10, 29 Operation in copy and printer modes ...30 Operation panel...8, 10 Original guides ...9, 19 ORIGINAL SIZE ENTER key ...10, 16, 18 ORIGINAL SIZE indicator ...10, 19 Original types - AUTO ...21 - PHOTO ...21 - TEXT...21 Paper...13...
- Page 78 Copying Automatic ratio selection ...22 Canceling a copy run ...18, 19 Copying, starting ...18, 19 Dual page copying ... 27 Enlargement/reduction ... 22 Exposure adjustment ... 21 Exposure selector ... 21 Interrupt copying ... 28 Manual ratio selection ... 23 Number of copies, setting ...
- Page 79 Sharp. You should be aware, however, that Sharp does not itself extend any warranties, either express or implied, directly to you, the end-user, and no one is authorized to make any representations or warranties on behalf of Sharp.
-
Page 80: Sharp Corporation
AR-5316 SHARP ELECTRONICS CORPORATION Sharp Plaza, Mahwah, New Jersey 07430-1163. www.sharp-usa.com SHARP ELECTRONICS OF CANADA LTD. 335 Britannia Road East, Mississauga, Ontario, L4Z 1W9 SHARP CORPORATION This manual has been printed using a vegetable-based soy oil ink to help protect the environment.