Table of Contents
Advertisement
Available languages
Available languages
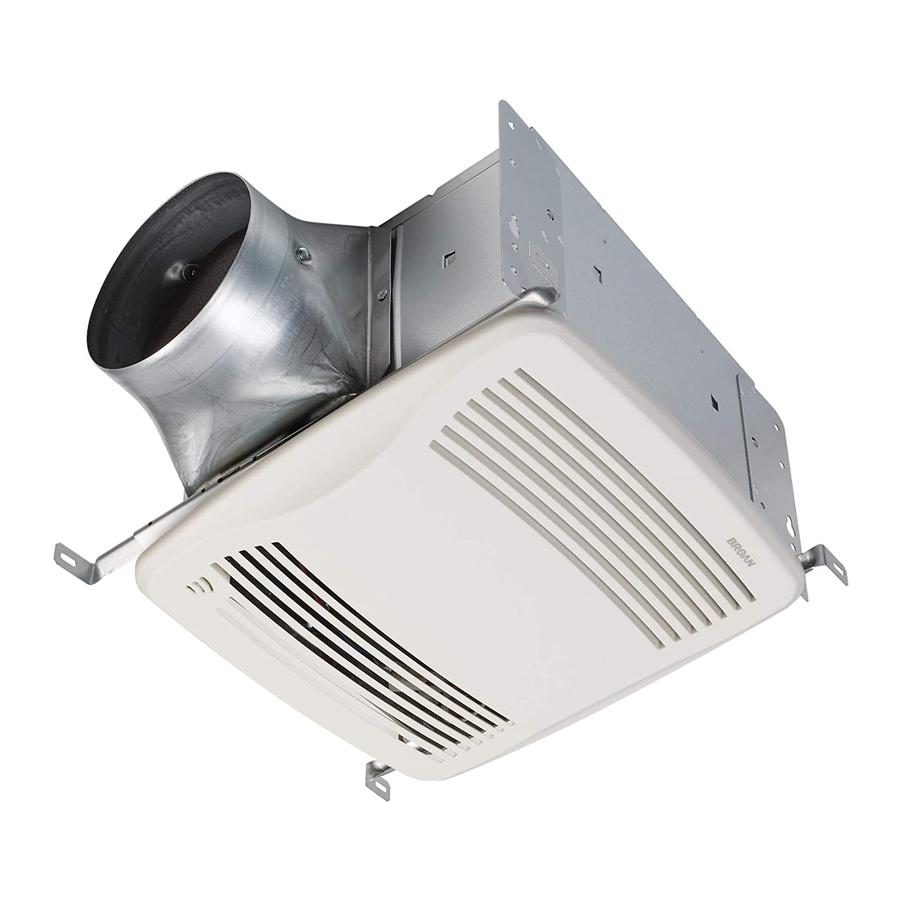
HUMIDITY SENSING FAN
READ AND SAVE THESE INSTRUCTIONS
WARNING
TO REDUCE THE RISK OF FIRE, ELEC-
TRIC SHOCK, OR INJURY TO PERSONS,
OBSERVE THE FOLLOWING:
1. Use this unit only in the manner intended
by the manufacturer. If you have questions,
contact the manufacturer at the address or
telephone number listed in the warranty.
2. Before servicing or cleaning unit, switch
power off at service panel and lock the ser-
vice disconnecting means to prevent power
from being switched on accidentally. When
the service disconnecting means cannot be
locked, securely fasten a prominent warning
device, such as a tag, to the service panel.
3. Installation work and electrical wiring must be
done by a qualified person(s) in accordance
with all applicable codes and standards,
including fire-rated construction codes and
standards.
4. Sufficient air is needed for proper combus-
tion and exhausting of gases through the
flue (chimney) of fuel burning equipment to
prevent backdrafting. Follow the heating equip-
ment manufacturer's guideline and safety
standards such as those published by the
National Fire Protection Association (NFPA),
and the American Society for Heating, Re-
frigeration and Air Conditioning Engineers
(ASHRAE), and the local code authorities.
5. When cutting or drilling into wall or ceiling, do
not damage electrical wiring and other hidden
utilities.
6. Ducted fans must always be vented to the
outdoors.
7 . Acceptable for use over a tub or shower when
connected to a GFCI (Ground Fault Circuit
Interrupter) - protected branch circuit.
8. This unit must be grounded.
CAUTION
1. For general ventilating use only. Do not use
to exhaust hazardous or explosive materials
and vapors.
2. This product is designed for installation in flat
ceilings only. DO NOT MOUNT THIS PROD-
UCT IN A WALL.
3. To avoid motor bearing damage and noisy
and/or unbalanced impellers, keep drywall
spray, construction dust, etc. off power unit.
4. Please read specification label on product for
further information and requirements.
Installer: Leave this manual
with the homeowner.
To register this product visit:
www.broan.com
OPERATION
The humidity control and fan can be op-
erated separately. Use a 1 or 2-function
wall control. Do not use a dimmer switch
to operate the humidity control or light.
See "Connect Wiring" for details.
SENSOR OPERATION
This humidity-sensing fan responds to: (a)
rapid to moderate humidity increases and
(b) humidity above a 50%-80% relative
humidity (RH) set-point. (a) and (b) are
set with "HUMIDITY" adjustment. Fan may
occasionally turn on when environmental
conditions change. If the fan continuously
responds to changing environmental con-
ditions, "HUMIDITY" adjustment may be
required (see section below).
STATUS INDICATOR
This indicator can only be seen by looking
directly at it. Normal mode is 5-seconds on
and off. If it blinks rapidly for 5-seconds and
then off, check sensor connections on grille
and fan housing.
MANUAL ON WITH TIMED OFF
For odor or vapor control, the fan can be
energized by cycling its wall-mounted switch
if one is installed. Once the fan has been
turned on in this manner, it will remain on
for the set "MINUTES" period.
To manually energize the fan:
1. Go to Step 2 if switch is already on;
otherwise, turn switch on for more than
1 second.
2. Switch off for less than 1 second.
3. Switch back on and fan will turn on.
HUMIDITY ADJUSTMENT
"HUMIDITY" has been factory set for most
shower applications. If the fan is in a tub
area or is used for dampness control, the
"HUMIDITY" may need to be decreased
toward 50% RH. If the control is responding
too often to changing environmental condi-
tions, adjustment toward 80% RH may be
required. To adjust the "HUMIDITY":
1. Turn power off at electrical service
panel.
2. Through the grille, locate the "HUMIDITY"
screwdriver slot.
3. Using a small, flat-blade screwdriver,
carefully rotate "HUMIDITY" adjustment
toward 50 or 80.
4. Turn power on and check operation by
turning on shower or other humidity
source until fan turns on.
5. Repeat above steps if necessary.
MODELS QTXE110S • QTXE110S2
TIMER ADJUSTMENT
This humidity-sensing fan has a timer. It is
user-adjustable from 5 to 60 minutes and is
factory-set at 20 minutes. The timer controls
how long the fan remains on (a) after rise
in humidity and (b) humidity level are both
below the user-adjustable "HUMIDITY"
setting or after being energized by cycling
power switch.
To adjust the timer:
1. Disconnect power at electrical service
panel.
2. Through the grille, locate the "MINUTES"
screwdriver slot.
3. Using a small, flat-blade screwdriver,
carefully rotate "MINUTES" adjustment
to desired setting (5 to 60 minutes).
4. Check operation by cycling power switch
as instructed under "MANUAL ON WITH
TIMED OFF" or by turning on a humidity
source until fan turns on.
5. Check timer setting with watch or clock
after turning humidity source off if it was
turned on it Step 4.
6. Repeat above steps if necessary.
CLEANING &
MAINTENANCE
For quiet and efficient operation, long life,
and attractive appearance - lower or remove
grille and vacuum interior of unit with the
dusting brush attachment.
The motor is permanently lubricated and
never needs oiling. If the motor bearings
are making excessive or unusual noises,
replace the motor/blower wheel assembly.
SENSOR CLEANING
The humidity sensor is mounted in the grille.
The sensor will operate most reliably when
cleaned occasionally as follows:
1. Disconnect power at service entrance.
2. Remove the grille. Use a dry dustcloth,
clean toothbrush, or lightly vacuum to
clean sensor and grille. DO NOT USE
ABRASIVE CLOTH, STEEL WOOL
PADS, OR SCOURING POWDERS.
3. DO NOT USE cleaning sprays, solvents,
or water on or near the sensor!
Page 1
Advertisement
Table of Contents

Related Manuals for Broan QTXE110S


Summary of Contents for Broan QTXE110S
- Page 1 MODELS QTXE110S • QTXE110S2 Page 1 To register this product visit: HUMIDITY SENSING FAN www.broan.com READ AND SAVE THESE INSTRUCTIONS WARNING OPERATION TO REDUCE THE RISK OF FIRE, ELEC- TIMER ADJUSTMENT The humidity control and fan can be op- TRIC SHOCK, OR INJURY TO PERSONS, erated separately.
-
Page 2: Typical Installations
MODELS QTXE110S • QTXE110S2 Page 2 TYPICAL INSTALLATIONS • Locate unit above (GFCI protected circuit required) or within 5 feet of shower head. • Locate unit away from heating or cooling sources which can affect humidity levels. • Do not locate near window. Unit may respond to the outdoor humidity level. • Unit must be installed in ceiling to properly sense moisture. • Locate unit only on flat ceilings up to 12 feet high for proper sensing. • The ducting from this fan to the outside of the building has a strong effect on the air flow, noise and energy use of the fan. -
Page 3: Connect Wiring
MODELS QTXE110S • QTXE110S2 Page 3 1b. Mount housing anywhere between 2. Attach damper/ trusses, joists, or I-joists using hanger duct connector. bars. Snap damper / duct con- nector onto housing. Make sure connector is flush Sliding hanger bars are provided to allow for accurate posi- with top of housing and tioning of housing anywhere between framing. - Page 4 MODELS QTXE110S • QTXE110S2 Page 4 INSTALL GRILLE 6. Finish ceiling. Install ceiling material. Cut out around housing. 7. Plug in wiring. Plug wiring into the proper receptacles. 8. Attach grille to housing. Squeeze grille springs and insert them into slots on each side of housing.
-
Page 5: Nettoyage Et Entretien
MODÈLES QTXE110S • QTXE110S2 Page 5 Pour enregistrer ce produit, visitez : VENTILATEUR À DÉTECTEUR www.broan.com D’HUMIDITÉ LISEZ CES DIRECTIVES ET CONSERVEZ-LES AVERTISSEMENT FONCTIONNEMENT Le dispositif de contrôle d’humidité et le RÉGLAGE DE LA MINUTERIE ventilateur peuvent fonctionner séparément. Ce ventilateur à détecteur d’humidité comporte une Utilisez une commande murale à... -
Page 6: Planification De L'installation
MODÈLES QTXE110S • QTXE110S2 Page 6 INSTALLATIONS TYPE • Situez l’appareil au-dessus (circuit protégé par disjoncteur de fuite à la terre requis) ou à moins de 1,5 mètres (5 pieds) de la pomme de douche. • Situez l’appareil loin de sources de chaleur ou de CÂBLE CALE DE SOLIVE BARRES DE SUSPENSION refroidissement pouvant affecter les niveaux d’humidité. - Page 7 MODÈLES QTXE110S • QTXE110S2 Page 7 1b. Fixez le boîtier n’importe où entre les 2. Fixer le clapet / fermes, solives ou solives en « I » avec raccord de les barres de suspension. conduit. Enclenchez le clapet / Les barres de suspension fournies permettent de positionner raccord de conduit sur le avec précision le boîtier entre la charpente.
- Page 8 MODÈLES QTXE110S • QTXE110S2 Page 8 INSTALLER LA GRILLE 6. Finissez la surface du plafond. Installez le matériau du plafond. Coupez-le autour du boîtier. 7. Branchez les fils. Branchez les fils dans les prises appropriées. 8. Fixez la grille au boîtier.
-
Page 9: Operación
MODELOS QTXE110S • QTXE110S2 Página 9 Para registrar este producto, visite: www.broan.com VENTILADOR CON SENSOR DE HUMEDAD LEA Y CONSERVE ESTAS INSTRUCCIONES OPERACIÓN ADVERTENCIA PARA REDUCIR EL RIESGO DE INCENDIOS, El control de humedad y el ventilador pueden AJUSTE DEL TEMPORIZADOR DESCARGAS ELÉCTRICAS O LESIONES PER-... -
Page 10: Instalaciones Típicas
MODELOS QTXE110S • QTXE110S2 Página 10 INSTALACIONES TÍPICAS • C oloque la unidad sobre o dentro de una distancia de 1.5 m (5 pies) de la cabeza de la regadera (se requiere un circuito protegido con un GFCI). • U bique la unidad lejos de fuentes de calefacción o enfriamiento que puedan afectar los niveles de humedad. -
Page 11: Conexión Eléctrica
MODELOS QTXE110S • QTXE110S2 Página 11 1b. Instale la cubierta en cualquier parte 2. Acople el conectador entre las armaduras, viguetas o viguetas del regulador de tiro/ “I” por medio de barras de suspensión. conducto. Conecte a presión el Se proporcionan barras de suspensión deslizantes para facilitar conectador del regulador de la colocación adecuada de la cubierta en cualquier parte entre la... - Page 12 MODELOS QTXE110S • QTXE110S2 Página 12 INSTALE LA REJILLA 6. Termine el cielo raso. Instale el material del cielo raso. Recorte alrededor de la cubierta. 7. Conecte el cableado. Enchufe las conexiones en los receptáculos adecuados. 8. Acople la rejilla a la cubierta.