Table of Contents
Advertisement
Advertisement
Table of Contents

Related Manuals for Native Instruments A Series


Summary of Contents for Native Instruments A Series
- Page 1 MANUAL...
- Page 2 The information in this document is subject to change without notice and does not represent a commitment on the part of Native Instruments GmbH. The software described by this docu- ment is subject to a License Agreement and may not be copied to other media. No part of this...
- Page 3 Japan www.native-instruments.co.uk www.native-instruments.co.jp NATIVE INSTRUMENTS FRANCE SARL SHENZHEN NATIVE INSTRUMENTS COMPANY Limited 113 Rue Saint-Maur 5F, Shenzhen Zimao Center 75011 Paris 111 Taizi Road, Nanshan District, Shenzhen, France Guangdong www.native-instruments.com China www.native-instruments.com © NATIVE INSTRUMENTS GmbH, 2018. All rights reserved.
-
Page 4: Table Of Contents
Table of Contents Table of Contents Welcome to KOMPLETE KONTROL ................10 Document Conventions ....................... 10 Box Contents ..........................12 System Requirements ......................... 12 New Features in KOMPLETE KONTROL 2.0.4 ..............13 Setting up KOMPLETE KONTROL .................. 14 Connecting the Keyboard to the Computer .................. 15 Setting up the Stand-Alone Application .................. - Page 5 Table of Contents Navigation and Mode Buttons ....................43 Transpose Buttons ........................44 Global Controls and Preferences ................45 Instrument Views ........................45 6.1.1 Default View ......................46 6.1.2 Additional View ......................46 6.1.3 Edit View ........................48 Switching Instances ........................49 Transport and Tempo ........................
- Page 6 Table of Contents Choosing Between Factory Content and User Content ..............76 Filtering Preset Files by Product ....................76 Filtering Product Preset Files by Bank ..................80 Resetting the Product Selection ....................82 Types and Modes Tag Filters ....................... 83 7.8.1 Filtering Preset Files by Types and Modes ..............
- Page 7 Table of Contents Customizing Parameter Mappings using the Plug-in Panel ............104 10 Smart Play – Playing and Editing Scales and Chords ........... 107 10.1 A Note about Music Theory ......................107 10.2 Activating the Scale Engine ......................109 10.3 Selecting and Playing a Scale ....................
- Page 8 Table of Contents 11.5.1 OTHER Octaves ......................137 11.5.2 OTHER Dynamic ......................138 11.5.3 OTHER Gate ....................... 138 11.6 ADVANCED Parameters ....................... 138 11.6.1 ADVANCED Retrigger ....................139 11.6.2 ADVANCED Repeat ..................... 139 11.6.3 ADVANCED Offset ...................... 140 11.6.4 ADVANCED Inversion ....................140 11.7 RANGE Parameters ........................
- Page 9 Table of Contents 13.1.1 Recording Automation ....................161 13.1.2 Automation IDs for the Perform Panel ................ 163 14 Host Integration ......................165 14.1 Integration with MASCHINE ......................165 14.2 Integration with Apple Logic Pro X and GarageBand ..............166 14.3 Integration with Ableton Live ......................
-
Page 10: Welcome To Komplete Kontrol
KOMPLETE KONTROL offers advanced integration with a number of hosts and provides full control of any Instruments supporting NKS, both from Native Instruments and partners. The keyboard lets you browse your Instruments and Effects in an intuitive way and play them crea- tively with KOMPLETE KONTROL’s unique Scale engine and Arpeggiator. - Page 11 Welcome to KOMPLETE KONTROL Document Conventions ▪ Text appearing in (drop-down) menus (such as Open…, Save as… etc.) in the software and paths to locations on your hard disk or other storage devices is printed in italics. ▪ Text appearing elsewhere (labels of buttons, controls, text next to checkboxes etc.) in the software is printed in blue.
-
Page 12: Box Contents
Welcome to KOMPLETE KONTROL Box Contents Box Contents The box contains the following items: ▪ KOMPLETE KONTROL keyboard ▪ USB cable ▪ Information flyer providing: ◦ the hardware serial number of the KOMPLETE KONTROL keyboard ◦ a web link for downloading the KOMPLETE KONTROL software and the KOMPLETE SELECT software bundle ▪... -
Page 13: New Features In Komplete Kontrol 2.0.4
New Features in KOMPLETE KONTROL 2.0.4 New Features in KOMPLETE KONTROL 2.0.4 The release of KOMPLETE KONTROL 2.0.4 brings the following new features, improvements, and changes: KOMPLETE KONTROL A-Series Keyboards now Available The KOMPLETE KONTROL A-Series keyboardsare now available and fully supported by the KOMPLETE KONTROL software. -
Page 14: Setting Up Komplete Kontrol
Setting up KOMPLETE KONTROL Setting up KOMPLETE KONTROL This section provides basic setup information for using the KOMPLETE KONTROL stand-alone software, and guides you through the process of integrating KOMPLETE KONTROL in support- ed hosts. The KOMPLETE KONTROL software is installed both as a stand-alone application as well as a VST, Audio Unit, and AAX plug-in. -
Page 15: Connecting The Keyboard To The Computer
Setting up KOMPLETE KONTROL Connecting the Keyboard to the Computer Connecting the Keyboard to the Computer To connect the KOMPLETE KONTROL keyboard to your computer: Attach the device end of the included USB cable to the USB socket on the rear panel of the keyboard. -
Page 16: Setting Up The Stand-Alone Application
Setting up KOMPLETE KONTROL Setting up the Stand-Alone Application Setting up the Stand-Alone Application When you launch the KOMPLETE KONTROL software from its installation directory, it starts as a stand-alone application independently from a host. By default, the application uses the standard audio interface of your computer. In order to use another audio interface, and receive MIDI notes from the keyboard, you need to configure the application in the Preferences. - Page 17 Setting up KOMPLETE KONTROL Setting up the Stand-Alone Application Preferences panel — Audio page Enabling MIDI Control Click on MIDI to display the MIDI page. Click on Input to display the available devices for incoming MIDI signals. Click the checkbox representing your keyboard, e.g., Komplete KontrolA25 MIDI to acti- vate incoming MIDI signals from the keyboard.
-
Page 18: Setting Up Host Integration
Setting up KOMPLETE KONTROL Setting up Host Integration Preferences panel — MIDI page (entries may vary on your computer) The software is configured and ready to be controlled with the keyboard. → The MIDI Output settings are required for using KOMPLETE KONTROL’s Smart Play features with other MIDI instruments. -
Page 19: Setting Up Apple Logic Pro X And Garageband
Setting up KOMPLETE KONTROL Setting up Host Integration Advanced integration of KOMPLETE KONTROL is available in the following hosts: ▪ MASCHINE 2 ▪ Apple Logic Pro X ▪ Apple GarageBand ▪ Ableton Live Before using the KOMPLETE KONTROL keyboard to control a supported host, a few configura- tion steps are required: 3.3.1 Setting up Apple Logic Pro X and GarageBand... - Page 20 Setting up KOMPLETE KONTROL Setting up Host Integration Navigate to the following folder: Macintosh HD/Library/Application Support/Native Instru- ments/Host Integration/Ableton Live/ Copy the _NativeInstruments folder, as well as the Komplete_Kontrol_Mk2 folder to the clipboard. Open your Applications folder and right-click the Ableton Live application symbol. In the context menu, click Show Package Contents.
-
Page 21: Setting Up Ableton Live (Windows)
The MIDI Remote Script allows Ableton Live to recognize KOMPLETE KONTROL as a control surface. It must be copied into Live’s MIDI Remote Scripts directory: Ensure that Ableton Live is not running. Navigate to the following folder: C:\Program Files\Common Files\Native Instruments\Host Integration\Ableton Live\ Copy the... - Page 22 KOMPLETE KONTROL is loaded into Ableton Live in the form of an Instrument Rack. In order to make the required Instrument Rack available in Ableton Live’s browser, it must be added to your Ableton Live User Library: Navigate to the following folder: C:\Program Files\Common Files\Native Instruments\Host Integration\Ableton Live\ Copy the KOMPLETE KONTROL VST.adg...
- Page 23 Setting up KOMPLETE KONTROL Setting up Host Integration For a detailed overview of Integration controls for Ableton Live refer to ↑14.3, Integration with Ableton Live. KOMPLETE KONTROL A-Series - Manual - 23...
-
Page 24: Software Overview
Software Overview Software Overview This section gives an overview of the areas and controls of the KOMPLETE KONTROL software. Overview of the KOMPLETE KONTROL software. (1) Header: Provides access to general functions like the Main menu, the Preset display, the Transport and Master Volume controls, as well as options to show and hide user interface areas. -
Page 25: Header
Software Overview Header Header The header is where you find general settings that affect KOMPLETE KONTROL globally. It al- so lets you access additional user interface areas. The header. (1) KOMPLETE KONTROL logo: Opens the About screen, which shows the version number of the KOMPLETE KONTROL software. - Page 26 Software Overview Header (9) Keyboard button: Shows the currently connected keyboard, S25, S49, S61, or S88. If multi- ple instances of the KOMPLETE KONTROL software are running (for example in a host), click- ing the button connects the keyboard to this instance. This indicator only appears if at least one compatible device is connected.
-
Page 27: Browser
Software Overview Browser Browser The Browser provides you access to your KOMPLETE KONTROL Library and lets you add, edit, and organize Preset files. It consists of the Library pane together with the Product selector, and of the Files pane which are explained in the following overviews. For more information on using the Browser and managing your Preset files, refer to ↑7, Brows- ing the... -
Page 28: Library Pane
Software Overview Browser 4.2.1 Library Pane Library pane is where you browse for Instruments, Effects, and Preset files. It consists of the following elements: Library pane. (1) Library: Displays the Library pane. (2) Product Type icon: Displays the current context either of browsing for Instruments or brows- ing for Effects. - Page 29 Software Overview Browser (4) Product selector: Selects a particular Instrument or Effect, Instrument category, and Bank of the selected Product. Only Preset files matching your selection are displayed in the Results list (8). For more information, refer to ↑4.2.2, Product Selector.
-
Page 30: Product Selector
Software Overview Browser 4.2.2 Product Selector When browsing for Instruments or Effects the Product selector allows you to limit your search to a certain category, a particular Product, and Banks of Instruments. The Product selector. (1) Product selector header: The header displays the selected Product. If there is no selection it shows a generic label (All Instruments Effects). - Page 31 Software Overview Browser (2) Category / Vendor selector: Allows you to sort the Product list by Category or by Vendor. (3) Product list: Displays all Products that are available in your KOMPLETE KONTROL Library. Category is selected in the Category / Vendor selector, the Product list is sorted by the follow- ing categories: DRUMS &...
-
Page 32: Files Pane
Software Overview Browser 4.2.3 Files Pane Files pane contains following elements: Files pane in the Browser. (1) Files: Displays the Files pane. For more information, refer to ↑12.4, Working with the Files Pane. KOMPLETE KONTROL A-Series - Manual - 32... - Page 33 Software Overview Browser (2) Favorite bar: Displays all your favorite folders. A click on any favorite folder lets you jump directly to that particular path and display its content in the Result list (5). For more informa- tion, refer to ↑12.4.4, Working with File Location Favorites.
-
Page 34: Perform Panel
Software Overview Perform Panel Perform Panel The Perform panel. (1) SCALE: Clicking the round button left of SCALE switches the Scale engine on or off. Click- ing the SCALE label displays the Scale engine’s parameters. See ↑10, Smart Play – Playing and Editing Scales and Chords for details. - Page 35 Software Overview Plug-in Panel The Plug-in Panel. For more information, refer to ↑9.4, Customizing Parameter Mappings using the Plug-in Panel. KOMPLETE KONTROL A-Series - Manual - 35...
-
Page 36: Plug-In Chain Panel
Software Overview Plug-in Chain Panel Plug-in Chain Panel At the top of the Plug-in area there is situated the Plug-in chain panel with the Plug-in chain. The Plug-in chain is the place where you can directly load Instrument Plug-ins (Plug-in slot 1) and Effect Plug-ins (Plug-in slot 2 onwards) and arrange them in horizontal series. -
Page 37: Plug-In Area
Software Overview Plug-in Area Plug-in Area The Plug-in area of the KOMPLETE KONTROL software is where your Instruments and Effects are displayed once you have loaded them from the Browser. Each Instrument offers a different set of controls and parameters that are all easily controlled directly on the computer screen or from the keyboard. -
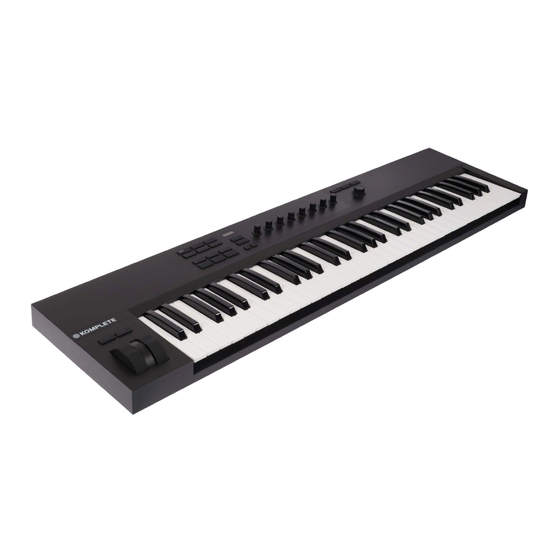
Page 38: Keyboard Overview
Keyboard Overview Keyboard Overview The KOMPLETE KONTROL keyboard is tightly integrated into the software and can be used to browse, control and play your Products as well as to control supported hosts. The keyboard is available in three sizes: The A25, A49, and A61 are equipped with the same top-quality semi-weighted Fatar keybed. - Page 39 Keyboard Overview (2) Display: The two lines display provides you information about current context of, e.g., the Browser, the parameter assigned to a knob in the Control section, and the settings of the Per- form and Edit section. (3) Preset buttons: The PRESET up / down buttons let you skip to the next or previous Preset file of the loaded Product.
- Page 40 Keyboard Overview Rear View KOMPLETE KONTROL A25 Rear View. (1) Kensington Lock slot: Allows you to attach a Kensington Lock to secure your device from theft. Foot Pedal socket: Connects a sustain or expression pedal. connector: Connects the keyboard to your computer with the supplied USB cable. KOMPLETE KONTROL A-Series - Manual - 40...
-
Page 41: Perform And Edit Section
Keyboard Overview Perform and Edit Section Perform and Edit Section The buttons in the Perform and Edit section on the far left of the KOMPLETE KONTROL key- board let you switch the Scale engine and the Arpeggiator on or off and access their parameter for editing. -
Page 42: Transport Section
Keyboard Overview Transport Section Transport Section TRANSPORT section at the far left on the keyboard provides you quick and easy access to functions like play, record, loop, etc. in supported hosts. Transport section. (1) LOOP: Switches between standard and loop playback. (2) METRO: Switches the metronome on or off. -
Page 43: Navigation And Mode Buttons
Keyboard Overview Navigation and Mode Buttons Navigation and Mode Buttons The Navigation and Mode buttons let you browse your KOMPLETE KONTROL Library and navi- gate in your DAW with the 4-D encoder, as well as directly access functions like the Plug-in view and Track view. -
Page 44: Transpose Buttons
Keyboard Overview Transpose Buttons Depending on the menu or context, the available actions differ: ▪ The display is navigated by pushing the 4-D encoder in a direction. ▪ Entries in a list are browsed by turning the 4-D encoder. ▪ The value of a highlighted parameter is adjusted by turning the 4-D encoder. ▪... -
Page 45: Global Controls And Preferences
Global Controls and Preferences Instrument Views Global Controls and Preferences This sections introduces the global controls and the Preferences you can access via the Header of KOMPLETE KONTROL. Instrument Views Once you have loaded an Instrument from the Browser, it appears in the Plug-in area of the KOMPLETE KONTROL software. -
Page 46: Default View
Global Controls and Preferences Instrument Views 6.1.1 Default View The Default View is the view that first appears when you load an Instrument from the Browser. It gives you access to some of the most important features of each NKS Instrument with an easy-to-use interface. - Page 47 Global Controls and Preferences Instrument Views POLYPLEX in Additional View. Besides of selecting Additional View via the KOMPLETE KONTROL Menu and the application menu, you can also do this by clicking the button in the KOMPLETE KONTROL header. Clicking it again will return to the Default View. The + button opens and closes the Additional View.
-
Page 48: Edit View
Global Controls and Preferences Instrument Views 6.1.3 Edit View Edit view is only available for Instruments powered by KONTAKT or REAKTOR. In the Edit View you have also the possibility to open any KOMPLETE Instrument that can be loaded or played by either the KONTAKT PLAYER or REAKTOR PLAYER. This gives you access to all the flexible controls and features you would normally have when using KONTAKT or RE- AKTOR in stand-alone mode. -
Page 49: Switching Instances
Global Controls and Preferences Switching Instances Switching Instances When two or more instances of the KOMPLETE KONTROL software are running (e.g., as a plug-in on different tracks of the host), you can choose which instance you want to control from the KOMPLETE KONTROL keyboard. Switching to an Instance from the Software To switch the keyboard to a particular instance of the KOMPLETE KONTROL software, ►... - Page 50 Global Controls and Preferences Switching Instances Switching to an Instance from the Keyboard If you use KOMPLETE KONTROL as a plug-in in a host without advanced integration, you can- not rely on automatic switching between instances. However, you can still select a particular instance of the KOMPLETE KONTROL software from the keyboard using its displays and 4-D encoder.
-
Page 51: Transport And Tempo
Global Controls and Preferences Transport and Tempo Transport and Tempo If KOMPLETE KONTROL is used as a stand-alone application, it features its own Transport and Tempo controls. They are used by sequenced KONTAKT and REAKTOR Instruments as well as the Arpeggiator. Additionally, the tempo is used by all Instruments that allow you to set timing parameters in relation to the musical tempo (e.g., rhythmic modulation, delay effects). -
Page 52: Resetting The Clock
Global Controls and Preferences Transport and Tempo 6.3.1 Resetting the Clock Resetting the Clock in the Software ▪ When the internal clock is stopped, clicking the Reset button allows you to reset the inter- nal clock. Clicking the Play button will start playback from the beginning. ▪... -
Page 53: Adjusting Master Volume
Global Controls and Preferences Adjusting Master Volume Adjusting Tempo from the Keyboard You can also use the KOMPLETE KONTROL keyboard to set the tempo in BPM (beats per mi- nute): Hold TEMPO turn Knob 1 in the Control section. ► The tempo is adjusted in increments of 1 BPM. -
Page 54: Preferences
Global Controls and Preferences Preferences Preferences In the Preferences you can specify various settings for KOMPLETE KONTROL. To open the Preferences: Click Edit > Preferences in the KOMPLETE KONTROL menu: ► 6.5.1 Preferences – Audio Page Audio page holds settings related to your audio interface when KOMPLETE KONTROL is running as a stand-alone application. - Page 55 Global Controls and Preferences Preferences Preferences panel — Audio page Setting Description Driver Here you can select the audio driver. Device This allows you to choose from the available devices if you have connected more than one audio interface. Status This shows you whether your audio interface is currently running.
- Page 56 Global Controls and Preferences Preferences Setting Description Buffer Size macOS: This slider allows you to adjust the buffer size of your audio interface in samples. Lower values result in a more immediate playing response but increase the CPU load, and may result in audible clicks and pops.
-
Page 57: Preferences - Midi Page
Global Controls and Preferences Preferences 6.5.2 Preferences – MIDI Page MIDI page allows you to set up the MIDI input and output ports that you want to use when KOMPLETE KONTROL is running as a stand-alone application. When using KOMPLETE KONTROL as a plug-in, the MIDI configuration is managed by the host, and the MIDI page is not available. -
Page 58: Preferences - General Page
Native Instruments ap- plications when they are used in real life situations. The data sent to Native Instruments is one hundred percent anonymous and will not affect performance. - Page 59 Global Controls and Preferences Preferences Usage Data Tracking in the KOMPLETE KONTROL Preferences. Enabling or Disabling Usage Data Tracking To enable or disable Usage Data Tracking: Open the General page of the Preferences by clicking Preferences… in the KOM- PLETE KONTROL menu. Click the Allow usage data tracking checkbox to enable or disable user data tracking.
-
Page 60: Preferences - Library Page
Global Controls and Preferences Preferences 6.5.4 Preferences – Library Page Library page allows you to edit the locations of all KOMPLETE KONTROL Library files (both Factory and User) that appear in the Library pane of the Browser. At the top of the page, the Factory User buttons allow you to switch between the... - Page 61 Global Controls and Preferences Preferences Element Description Location column Shows the path of each library. If you have moved any library to another location on your computer, click the folder icon on the left of that library and select its new path. Product column Shows the name of each product.
- Page 62 Global Controls and Preferences Preferences User Pane User pane shows all user libraries currently used. These include KOMPLETE KONTROL’s standard user directory as well as any other user directory you might have defined. These libra- ries will appear in the User view of the Browser’s Library pane.
- Page 63 Alias column to set the alias for that new location. The alias of the default user folder, Native Instruments User Directory, cannot be edited — this is the location where all your user files will be stored by default. Scan user content...
- Page 64 Removing Folders from the User Library You can also remove any user folder from your library—except the default user content directo- Native Instruments User Content. KOMPLETE KONTROL A-Series - Manual - 64...
-
Page 65: Preferences - Plug-Ins Page
Global Controls and Preferences Preferences 6.5.5 Preferences – Plug-ins Page Plug-ins page allows you to manage your VST plug-ins in KOMPLETE KONTROL. At the top of the page, the Manager Locations buttons allow you to switch between the Manager pane and the Locations pane. - Page 66 Global Controls and Preferences Preferences Preferences panel — the Plug-ins page's Manager pane. Element Description Checkbox column Activates or deactivates a plug-in for use in KOMPLETE KONTROL. Plug-in column Lists all available VST plug-ins in KOMPLETE KONTROL. Always use latest If this option is enabled (default), Library content is loaded version of NI Plug- with the latest version of the associated plug-in.
- Page 67 Global Controls and Preferences Preferences Locations Pane Locations pane allows you manage the folders containing your plug-ins on the hard drive. KOMPLETE KONTROL scans these folders for VST plug-ins and adds them to the Manager pane. You can Remove folders from the list, as well as use the Rescan function to update the available plug-ins in KOMPLETE KONTROL according to any changes made to the...
-
Page 68: Loading A Plug-In In Default State
Loading a Plug-in in Default State You can load a Plug-in in default state directly from the KOMPLETE KONTROL menu: In the KOMPLETE KONTROL menu select e.g., Plug-ins > Native Instruments > Massive. ► KOMPLETE KONTROL A-Series - Manual - 68... - Page 69 Global Controls and Preferences Loading a Plug-in in Default State The Plug-in is loaded. All parameters are set to their default values. → Loading Plug-ins in default state is only possible in the software. KOMPLETE KONTROL A-Series - Manual - 69...
-
Page 70: Browsing The Library
Browsing the Library Browsing the Library The Browser is where you access your KOMPLETE KONTROL Library with all its Instruments and Effects. You can search, filter, and load Instrument and Effect Preset files as well as add them to your personal Favorites from the KOMPLETE KONTROL software, but also use your KOMPLETE KONTROL keyboard to access the Browser. -
Page 71: Browser Basics
Browsing the Library Browser Basics Browser Basics This section describes general concepts related to the Browser. 7.1.1 Product Types: Instrument and Effect Although the Library contains Instruments and Effects, it is not possible to browse for these two Product Types at the same time. Depending on the selected Plug-in slot the Product Type in the Browser switches either to “Instrument”... -
Page 72: Browsing The Library Vs. Browsing Your Hard Disks
Browsing the Library Browser Basics Tags To help you find the right Preset file quickly and efficiently, the Library implements various techniques that go far beyond the classic folder structure of your operating system—the usage of tags. For example, each Preset file included in the Library contains tags which describe the Preset file according to following aspects: ▪... - Page 73 Browsing the Library Browser Basics Library pane respectively the Files pane can be accessed by clicking the corresponding tab at the top of the Browser. Click the desired tab to show the corresponding pane of the Browser. Browsing and loading files from the file system using the KOMPLETE KONTROL keyboard is not possible.
-
Page 74: Opening The Browser
Browsing the Library Opening the Browser Opening the Browser To open the Browser: Click on the Browser button (the magnifier symbol) in the header. ► Alternatively you can also open the Browser by selecting View > Browser in the KOM- PLETE KONTROL menu. - Page 75 Browsing the Library Loading Preset Files To load a Preset file, double click the corresponding entry in the Results list. ► The Preset file and the corresponding Product is opens in the Plug-in area. → Loading a Preset File Using the Keyboard To load a Preset file using the Keyboard you need navigate to the Results list in the Browser: Open the Browser by pressing the BROWSER...
-
Page 76: Choosing Between Factory Content And User Content
Browsing the Library Choosing Between Factory Content and User Content Choosing Between Factory Content and User Content The Content selector shows two icons, one representing the factory content on the left, and one representing the user content on the right: The Content selector. - Page 77 Browsing the Library Filtering Preset Files by Product Click on the arrow in Product selector header. ⇨ The Product selector expands, showing you the Product list with all the Instruments or Ef- fects available in your KOMPLETE KONTROL Library. Select either Category Vendor in the Category / Vendor selector to filter the Products ac-...
- Page 78 Browsing the Library Filtering Preset Files by Product Click on the Product image to select it. KOMPLETE KONTROL A-Series - Manual - 78...
- Page 79 Browsing the Library Filtering Preset Files by Product The Product selector header shows the Product name. You can now browse for all Preset → files associated with the selected Product in the Results list. KOMPLETE KONTROL A-Series - Manual - 79...
-
Page 80: Filtering Product Preset Files By Bank
Browsing the Library Filtering Product Preset Files by Bank Loading a Product with its Default Preset File You can also directly load a Product with its default Preset File: Hover the mouse over the Instrument entry in the Product selector Click on the arrow symbol that appears in the upper right corner of the Instrument entry. - Page 81 Browsing the Library Filtering Product Preset Files by Bank The Bank menu showing All Banks for POLYPLEX To select a particular Bank of Preset files for the selected Product: Click the arrow in the Banks menu to expand it. Choose a Bank from the available entries. Upon your selection the Bank menu closes and displays the selected Bank.
-
Page 82: Resetting The Product Selection
Browsing the Library Resetting the Product Selection Resetting the Product Selection In order to select another Product, or show Preset files for all Products in your KOM- PLETE KONTROL Library, you have to reset the selection. To reset the selection the Product Selector: Click the little cross at the right of the Product name. -
Page 83: Types And Modes Tag Filters
Browsing the Library Types and Modes Tag Filters Types and Modes Tag Filters MODES tag filter is not available when browsing Effects. TYPES MODES tag filter menus appear under the Product selector allow you to search for Preset files according to particular characteristics of a sound. Recommended but not man- datorily the TYPES MODES... - Page 84 Browsing the Library Types and Modes Tag Filters TYPES The tags of the TYPE filter are structured into two hierarchical levels—top-level tags and sub- level tags. ▪ At first the TYPES filter displays the available top-level tags only. ▪ As soon as a tag in the top level selected, the second level appears underneath with sub- tags of the selected top-tag.
-
Page 85: Filtering Preset Files By Types And Modes
Browsing the Library Types and Modes Tag Filters Expanded TYPES and MODES tag filter menus. Collapsed TYPES and MODES tag filter menus. 7.8.1 Filtering Preset Files by Types and Modes MODES tag filter is not available when browsing Effects. In this tutorial you will learn how to filter find a bass line Preset file exemplary from the MON- ARK Instrument using the Types filter. - Page 86 Browsing the Library Types and Modes Tag Filters The MONARK Instrument is selected in the Product selector. In order to find a bass sound: Select the Bass tag from the TYPES filter. ⇨ Upon your selection the second level of tags appears underneath with Sub-Types like Ana- Bass, Fingered...
- Page 87 Browsing the Library Types and Modes Tag Filters Select the Sub-Type matching the desired characteristic for your bass line. By selecting any of these tags, e.g., Distorted Bass, you will narrow your search to this particular Sub- Type of bass sounds. Select the Synthetic tag from the...
-
Page 88: Selecting Multiple Tags From The Same Level
Browsing the Library Types and Modes Tag Filters Turn the 4-D encoder to select the Bass tag from the Types filter. Press the 4D encoder or push it to the right to select the MODES filter. Turn the 4-D encoder to select a MODE tag matching the desired characteristic for your bass line, e.g., Dry. -
Page 89: Working With Favorites
Browsing the Library Working with Favorites Working with Favorites Favorites in the KOMPLETE KONTROL Browser allow you to quickly view and browse your most frequently used Preset files. Any Preset file can be assigned to be a Favorite. The Favorites serve as an additional filter in the Library pane. - Page 90 Browsing the Library Working with Favorites ⇨ The entry is highlighted and the Set Favorite icon on right appears. Click on the Set Favorite icon to add the corresponding Preset file to the Favorites. The Preset file is added to the Favorites, indicated by the lit Set Favorite icon next to its →...
-
Page 91: Displaying Favorites In The Results List
Browsing the Library Working with Favorites 7.9.2 Displaying Favorites in the Results List To activate the Favorites filter: Click on the Favorites icon next to the search field to activate the Favorites filter. ► The Favorites icon is now lit and the Results list shows all favorite Preset Files. →... -
Page 92: Removing Preset Files From The Favorites
Browsing the Library Working with Favorites 7.9.3 Removing Preset Files from the Favorites To remove a Preset file from the Favorites: Click on the lit Set Favorite icon to remove the corresponding Preset file from the Favor- ► ites. The Preset file is removed from the Favorites, indicated by the hidden Set Favorite icon. →... -
Page 93: Performing A Text Search
Browsing the Library Performing a Text Search Press and hold SHIFT+ press the 4-D encoder to remove the corresponding Preset file from the Favorites. The Preset File has been removed from the Favorites. → 7.10 Performing a Text Search In the search field you can enter your search query. The search considers all properties such as Preset file names, Instruments, Banks, Type and Mode tags, directly as you type. -
Page 94: Auditioning Your Preset Files
Browsing the Library Auditioning your Preset Files The Information box provides various information on the selected file(s). If the selected files have different characteristics, the corresponding fields in the Information box will read multi. 7.12 Auditioning your Preset Files When you are browsing Preset Files, you can audition Preset Files by using the Prehear feature at the bottom of the Browser. -
Page 95: Working With Effects
Working with Effects Opening the Plug-in Chain Panel Working with Effects In this section you learn how to work with the Plug-in chain in terms of adding Effects, and organizing the Plug-in chain. Also, this section assumes you are familiar using the Browser and already loaded an Instrument. -
Page 96: Adding Effects
Working with Effects Adding Effects The Plug-in chain panel and the loaded Instrument are displayed. You can now add Ef- → fects to the Plug-in chain. Adding Effects Assuming an Instrument has already been loaded into the first Plug-in slot you can then add Effects to the Plug-in chain. - Page 97 Working with Effects Adding Effects Click on the empty Plug-in slot to select it. Browse for an Effect to your liking. KOMPLETE KONTROL A-Series - Manual - 97...
- Page 98 Working with Effects Adding Effects The Effect is loaded. Its image (or a generic icon for non-NKS Plug-ins) and name are → shown in the second Plug-in slot. To add more Effects to the Plug-in chain, repeat the aforementioned steps. Adding Effects using the Keyboard Assuming an Instrument has already been loaded into the first Plug-in slot perform the follow- ing actions in order to add an Effect to the Plug-in chain:...
-
Page 99: Selecting Plug-In Slots
Working with Effects Selecting Plug-in Slots Selecting Plug-in Slots When you have several Effects added to the Plug-in chain you can directly jump to a Plug-in slot in order for adjusting the included Effect. In order to jump to another Plug-in slot and display the Effect’s controls: Click on the Plug-in slot you want to select. -
Page 100: Scrolling The Plug-In Chain
Working with Effects Scrolling the Plug-in Chain Drop the Effect into a new position in the effects chain. The Plug-in slot now sits at another position in the Plug-in chain and the other Plug-in → slots have moved accordingly. Reordering Effects on the Keyboard In order to move an Effect in the Plug-in chain: Press the PLUG-IN... -
Page 101: Bypassing Effects
Working with Effects Bypassing Effects Click the scroll arrow for the respective direction. ► Bypassing Effects If you temporarily want to listen to the Instrument without a specific Effect for an A/B compari- son but do not want to delete it from the Plug-in chain, you can bypass Effects. In order to bypass an Effect: Hover the mouse over the Plug-in slot containing the Effect you want to bypass. -
Page 102: Removing Effects
Working with Effects Removing Effects Removing Effects In order to remove an Effect from the Plug-in chain: Hover the mouse over the Plug-in slot containing the Effect you want to remove. ⇨ Additional controls are displayed. Click the Remove button at the top right of the Plug-in slot. The Effect is now removed from the Plug-in chain. -
Page 103: Controlling Instrument And Effect Parameters
Controlling Instrument and Effect Parameters About Pre-Mapped Instruments and Effects Controlling Instrument and Effect Parameters This section introduces you to controlling Instrument and Effect parameters using the KOM- PLETE KONTROL keyboard and explains how to customize parameter mappings. About Pre-Mapped Instruments and Effects All KOMPLETE and NKS Instruments and Effects are pre-mapped, which means that the key- board’s knobs and Touch Strips are automatically assigned to key parameters as soon as you load an Instrument in KOMPLETE KONTROL. -
Page 104: Switching Parameter
Controlling Instrument and Effect Parameters Switching Parameter Pages Switching Parameter Pages Many Instruments and Effects are equipped with much more than eight parameters. To provide quick access to additional parameters, the Page buttons (left and right arrows) to the left of the Control section let you skip through parameter pages. - Page 105 Controlling Instrument and Effect Parameters Customizing Parameter Mappings using the Plug-in Panel ▪ Add pages to the Control section, or delete existing pages. ▪ Add and rename sections on the pages to group controls. In order to make your changes permanent, you have to save the Preset file to the KOMPLETE KON- TROL User Library.
- Page 106 Controlling Instrument and Effect Parameters Customizing Parameter Mappings using the Plug-in Panel Double-click on the empty space above a parameter, enter a name, and then press [enter] or click elsewhere to create a new section starting with the chosen parameter. To rename an existing section, double-click on it and enter a new name.
-
Page 107: Smart Play - Playing And Editing Scales And Chords
Smart Play – Playing and Editing Scales and Chords A Note about Music Theory Smart Play – Playing and Editing Scales and Chords KOMPLETE KONTROL’s Scale engine comes equipped with a vast amount of scales that you can select and use to play your Instruments. This opens up possibilities to play an Instrument such as a piano according to, e.g., the minor pentatonic scale without hitting a “false”... - Page 108 Smart Play – Playing and Editing Scales and Chords A Note about Music Theory white and black keys (each representing a semitone) within an octave. By playing only the keys belonging to some scale, you are certain to stay “in key” within that scale. Important to note though, is that scales are not made up by absolute note values, but rather consist of relative changes in pitch—or steps along the scale.
-
Page 109: Activating The Scale Engine
Smart Play – Playing and Editing Scales and Chords Activating the Scale Engine 10.2 Activating the Scale Engine In order to activate the Scale engine: Click the Perform panel button in the Header to show the Perform panel. ⇨ The Perform panel appears. To switch on the Scale engine, click the check box next to SCALE in the Perform section... -
Page 110: Selecting And Playing A Scale
Smart Play – Playing and Editing Scales and Chords Selecting and Playing a Scale 10.3 Selecting and Playing a Scale To select and play a scale on the KOMPLETE KONTROL keyboard, follow these instructions: Press SHIFT SCALE (Edit) to map the knobs of the Control section to the Scale engine parameters. -
Page 111: Editing Scales And Chords
Smart Play – Playing and Editing Scales and Chords Editing Scales and Chords To activate Chord mode, set MODE HARM by turning Knob 5 (by default set to OFF). Define the intervals of your chord with the TYPE parameter by turning Knob 6 (by default set to 1-3-5). -
Page 112: Setting The Scale Parameters
Smart Play – Playing and Editing Scales and Chords Setting the SCALE Parameters Available SCALE Parameters ▪ To select the scale to be mapped to the keys of the keyboard and set its root note, use the SCALE parameters Root Note, Bank, and Type. -
Page 113: Scale Bank And Type
Smart Play – Playing and Editing Scales and Chords Setting the SCALE Parameters ▪ C ▪ C# ▪ D ▪ D# ▪ E ▪ F ▪ F# ▪ G ▪ G# ▪ A ▪ A# ▪ B 10.6.2 SCALE Bank and Type The second and third SCALE parameters from the left are... - Page 114 Smart Play – Playing and Editing Scales and Chords Setting the SCALE Parameters If you are triggering an Instrument via an incoming MIDI pattern from the host, the notes of the MIDI pattern will be mapped onto the closest keys belonging to the selected Type. This means that, for example (with Root Note set to C) a MIDI pattern consisting of the notes C-D-...
- Page 115 Smart Play – Playing and Editing Scales and Chords Setting the SCALE Parameters Scale Bank Type Degree Formula 1 ♭2 2 ♭3 3 4 ♭5 5 ♭6 6 ♭7 7 Chromatic Main Chrom Major Main Major 1 2 3 4 5 6 7 1 2 ♭3 4 5 ♭6 ♭7 Minor Main...
- Page 116 Smart Play – Playing and Editing Scales and Chords Setting the SCALE Parameters Scale Bank Type Degree Formula 1 2 ♭3 4 ♭5 6 ♭7 Dorian b5 Modes Dor b5 1 ♭2 ♭3 4 5 ♭6 7 Harm Phryg Modes Har Phry 1 ♭2 ♭3 4 5 6 7 Phryg Major...
- Page 117 Smart Play – Playing and Editing Scales and Chords Setting the SCALE Parameters Scale Bank Type Degree Formula 1 ♯2 3 ♯4 5 6 ♭7 Hungarian Maj World Hung Maj 1 ♭2 ♭3 4 5 ♭6 7 Neapolitan World Neapoltn 1 ♭2 ♭3 3 4 5 ♭6 ♭7 Spanish World...
- Page 118 Smart Play – Playing and Editing Scales and Chords Setting the SCALE Parameters Scale Bank Type Degree Formula Ryukuan 5-Tone Ryukuan 1 3 4 5 7 1 2 ♭3 4 6 Abhogi 5-Tone Abhogi Bhupathi 5-Tone Bhupkali 1 2 3 5 b6 1 ♭3 4 ♭6 ♭7 Hindolam 5-Tone...
- Page 119 Smart Play – Playing and Editing Scales and Chords Setting the SCALE Parameters Scale Bank Type Degree Formula 1 2 3 4 5 6 ♭7 Mixolydian Major Mixolyd 1 2 3 4 5 ♭6 ♭7 Major Minor Major Maj Min 1 2 3 4 5 ♭6 7 Harmonic Major Major...
-
Page 120: Setting The Key Mode Parameter
Smart Play – Playing and Editing Scales and Chords Setting the KEY MODE Parameter Scale Bank Type Degree Formula 1 2 ♭3 5 ♭6 ♭7 Hexa 1 Minor Hexa 1 1 2 ♭3 4 5 b6 Hexa 2 Minor Hexa 2 1 2 ♭3 5 b6 Penta 1 Minor... - Page 121 Smart Play – Playing and Editing Scales and Chords Setting the KEY MODE Parameter Mapped Mode (Default) In Mapped mode, the notes are mapped to the keyboard according to the selected scale. Notes outside of the selected scale are not active. Pressing the corresponding keys will trigger the next available note in the selected scale.
-
Page 122: Setting The Chord Parameters
Smart Play – Playing and Editing Scales and Chords Setting the CHORD Parameters Scale Type Mapping in Key Mode: Easy White Keys Major Corresponding Mapping R Example with Root Note: C Minor Corresponding Mapping R Example with Root Note: C 10.8 Setting the CHORD Parameters 10.8.1... - Page 123 Smart Play – Playing and Editing Scales and Chords Setting the CHORD Parameters CHORD Mode has one inactive (Off) and two active states, which are described in detail below: ▪ Off ▪ Harm ▪ Chd Set Harm CHORD Mode is set to Harm, the CHORD Type menu allows you to specify the interval of notes in the selected...
-
Page 124: Chord Type
Smart Play – Playing and Editing Scales and Chords Setting the CHORD Parameters 10.8.2 CHORD Type The second CHORD parameter is Type. On the keyboard, it is mapped to Knob 6 of the Control section in Scale Edit mode. Use it to define a chord that will be generated from a single note used as input. - Page 125 Smart Play – Playing and Editing Scales and Chords Setting the CHORD Parameters When CHORD Mode is set to Harm, the CHORD Type setting includes the following values: Chord Type Interval Added to Played Note Octave Octave 1-3-5 3rd and 5th 1-4-5 4th and 5th 1-3-5-7...
- Page 126 Smart Play – Playing and Editing Scales and Chords Setting the CHORD Parameters CHORD Type, CHORD Mode Set to Chd Set CHORD parameter Type, set value Maj 1 (Mode set to Chd Set). CHORD Mode is set to Chd Set and, for example, the Root Note is set to C, then the CHORD...
- Page 127 Smart Play – Playing and Editing Scales and Chords Setting the CHORD Parameters ▪ Min 7 ▪ Min 8 CHORD Type and the Chromatic Scale The Chrom scale consists of every semitone in an octave. This means that when you play every white key and every black key of an octave up or down, you are playing the 12-step Chrom scale.
-
Page 128: Chord Position
Smart Play – Playing and Editing Scales and Chords Setting the CHORD Parameters 10.8.3 CHORD Position The third CHORD parameter is Position. On the keyboard, it is mapped to Knob 7 of the Con- trol section in Scale Edit mode. Use it to spread the notes of a chord generated from a single note and to aid a more musical transition between chords. -
Page 129: Smart Play - Playing And Editing Arpeggiator Sequences
Smart Play – Playing and Editing Arpeggiator Sequences Smart Play – Playing and Editing Arpeggiator Sequences Smart Play features a flexible and versatile Arpeggiator that lets you play your Instruments in note sequences according to the keys you press on the keyboard. You can also use the Arpeg- giator in combination with the scales and chords created with the Scale engine. -
Page 130: Playing Arpeggiator Sequences
Smart Play – Playing and Editing Arpeggiator Sequences Playing Arpeggiator Sequences Activating the Arpeggiator on the Keyboard To switch on the Arpeggiator, press (Edit) in the Perform and Edit section on the key- ► board. 11.1 Playing Arpeggiator Sequences KOMPLETE KONTROL lets you create and play complex arpeggiator sequences using Smart Play. -
Page 131: Editing The Arpeggiator
Smart Play – Playing and Editing Arpeggiator Sequences Editing the Arpeggiator 11.2 Editing the Arpeggiator The Arpeggiator’s parameters give you many possibilities to shape your own note sequences. To edit the Arpeggiator parameters in the KOMPLETE KONTROL software, click on ►... -
Page 132: Main Parameters
Smart Play – Playing and Editing Arpeggiator Sequences MAIN Parameters 11.3 MAIN Parameters MAIN parameters Mode Type allow you to switch between Arp and Note Repeat mode and change the playback direction of the arpeggiator sequence. MAIN parameters Mode and Type. 11.3.1 MAIN Mode The first... -
Page 133: Main Type
Smart Play – Playing and Editing Arpeggiator Sequences MAIN Parameters 11.3.2 MAIN Type The second MAIN parameter, Type, is only available in Arp mode. On the keyboard, it is map- ped to Knob 2 of the Control section in Arp Edit mode. It sets the sequential order of the ar- peggiated notes. -
Page 134: Rhythm Rate
Smart Play – Playing and Editing Arpeggiator Sequences RHYTHM Parameters 11.4.1 RHYTHM Rate The first RHYTHM parameter, Rate, is available in both Arp and Note Repeat mode. On the keyboard, it is mapped to Knob 3 of the Control section in Arp Edit mode. It sets the beat of the Arpeggiator in relation to global tempo in musical values, ranging from 1/1 to 1/128. -
Page 135: Rhythm Sequence
Smart Play – Playing and Editing Arpeggiator Sequences RHYTHM Parameters ▪ 1/32 Triplet (1/32 ▪ 1/64 ▪ 1/128 Dotted (1/128 ▪ 1/64 Triplet (1/64 ▪ 1/128 11.4.2 RHYTHM Sequence The second RHYTHM parameter, Sequence, is only available in Arp mode. On the keyboard, it is mapped to Knob 4 of the Control section in Arp Edit mode. -
Page 136: Rhythm Swing
Smart Play – Playing and Editing Arpeggiator Sequences RHYTHM Parameters To display the set value of the SEQUENCE parameter, tap Knob 4. 11.4.3 RHYTHM Swing The third RHYTHM parameter, Swing, is available in both Arp and Note Repeat mode. On the keyboard, it is mapped to Knob 5 of the Control section in Arp Edit mode. -
Page 137: Other Octaves
Smart Play – Playing and Editing Arpeggiator Sequences OTHER Parameters OTHER parameters Octaves, Dynamic, and Gate. 11.5.1 OTHER Octaves The first OTHER parameter, Octaves, is only available in Arp mode. On the keyboard, it is map- ped to Knob 6 of the Control section in Arp Edit mode. It lets you decide the range of the ar- peggiator sequence. -
Page 138: Other Dynamic
Smart Play – Playing and Editing Arpeggiator Sequences OTHER Parameters 11.5.2 OTHER Dynamic The second OTHER parameter, Dynamic, is only available in Arp mode. On the keyboard it is mapped to Knob 7 of the Control section in Arp Edit mode. It reads the velocity of the input— e.g., a key you pressed on the KOMPLETE KONTROL keyboard or an incoming MIDI note from the host—and scales it by the factor you set with the Dynamic... -
Page 139: Advanced Retrigger
Smart Play – Playing and Editing Arpeggiator Sequences ADVANCED Parameters ADVANCED parameters Retrigger, Repeat, Offset, and Inversion. 11.6.1 ADVANCED Retrigger The first ADVANCED parameter, Retrigger, is only available in Arp mode. On the keyboard, it is mapped to Knob 1 of the Control section when page 2 is selected in Arp Edit mode. Retrigger sets a number of steps in the arpeggiator sequence after which the sequence restarts its cycle, regardless of the number of pitches in the sequence. -
Page 140: Advanced Offset
Smart Play – Playing and Editing Arpeggiator Sequences ADVANCED Parameters 11.6.3 ADVANCED Offset The third ADVANCED parameter, Offset, is only available in Arp mode. On the keyboard, it is mapped to Knob 3 of the Control section when page 2 is selected in Arp Edit mode. Offset sets a number by which the steps in the arpeggiator sequence are shifted in the cycle. -
Page 141: Range Min. Key
Smart Play – Playing and Editing Arpeggiator Sequences RANGE Parameters RANGE parameters Min. Key Max. Key. 11.7.1 RANGE Min. Key The first RANGE parameter, Min. Key, is only available in Arp mode. On the keyboard, it is mapped to Knob 5 of the Control section when page 2 is selected in Arp Edit mode. Min. -
Page 142: Hold Parameter
Smart Play – Playing and Editing Arpeggiator Sequences HOLD Parameter 11.8 HOLD Parameter HOLD parameter On/Off is available in both Arp and Note Repeat mode. On the keyboard, it is mapped to Knob 8 of the Control section when page 2 is selected in Arp Edit mode. The HOLD function allows you to latch the notes played by the Arpeggiator. -
Page 143: Managing The Library
Preset file in the KOMPLETE KONTROL Library. On your hard drive, the user Preset files are saved in the following folder (sorted by Instrument, in corresponding subfolders): ▪ Windows: C:\Users\<your user name>\Documents\Native Instruments\User Content\ ▪ macOS: Macintosh HD/Users/<your user name>/Documents/Native Instruments/User Con- tent/ The Preset files saved for KOMPLETE Instruments with KOMPLETE KONTROL are compatible with the stand-alone and plug-in versions. - Page 144 Managing the Library Saving Preset Files to the User Library Saving a Preset File Follow the instructions to save a sound in a new Preset file: Select the Instrument or Effect Plug-in slot for which you wish to save a Preset file. In the File submenu of the KOMPLETE KONTROL menu, click on Save : Or, if you want to save a Preset file you are working on with a new name, click on Save As…...
-
Page 145: Deleting User Preset Files From The User Library
Managing the Library Deleting User Preset Files from the User Library Your new Preset file immediately appears in the user content section of the Library pane. → 12.2 Deleting User Preset Files from the User Library You can delete user Preset files directly from the Results list: Right-click the desired Preset file and select Delete from the context menu. -
Page 146: Editing The Tags And Properties Of User Preset Files
Managing the Library Editing the Tags and Properties of User Preset Files 12.3 Editing the Tags and Properties of User Preset Files When you save user Preset files in KOMPLETE KONTROL, they are automatically assigned to Instruments and Banks depending on the Instrument you are using. To further define the at- tributes of your user Preset files, you can edit the Type and Mode tags as well as the general properties of the file. - Page 147 Managing the Library Editing the Tags and Properties of User Preset Files Click on TYPES to edit the Type tags for your Preset file: Click and drag the upper edge of the Attribute Editor upwards to increase its size. This makes it easier to navigate in the list of available tags.
- Page 148 Managing the Library Editing the Tags and Properties of User Preset Files Assign the appropriate tags to your Preset file by clicking the checkboxes next to their names. Click on MODES to edit the Mode tags for your Preset file. You can assign them in the same way you assigned the Type tags before, by clicking on the checkboxes next to their names.
-
Page 149: Working With The Files Pane
Managing the Library Working with the Files Pane Click on PROPERTIES to edit additional information included in your Preset file. You can enter your name in the Author field, or, in case you intend to share the Preset file, leave a note in the Comment field for other users to read. -
Page 150: Additional Results List Features List In The Files Pane
Managing the Library Working with the Files Pane The Results list of the Files pane. 12.4.1 Additional Results List Features List in the Files Pane In the Files pane the Results list offers a context menu with additional commands. You can open it with a right-click on the selected entry or entries, respectively. -
Page 151: Navigating To File Locations With The Location Bar
Managing the Library Working with the Files Pane Command Description Refresh Refreshes the display of the list, in case items have been modified in that folder. Find in Explorer / Find in Finder Opens an Explorer/Finder window pointing to the selected folder. -
Page 152: Navigating To Recent File Locations
Managing the Library Working with the Files Pane ◦ If all the levels cannot be displayed in the path, click the double left-pointing arrow left of the path to display the remaining upper levels (up to the Workspace, representing the highest level in your file system), and select any entry in the list to jump to that location. -
Page 153: Working With File Location Favorites
Managing the Library Working with the Files Pane 12.4.4 Working with File Location Favorites Located at the top of the Files pane, the favorite bar displays all your favorites folders. Favorite folders are shortcuts to specific locations in your file system. The Favorite bar, at the top of the Files pane. -
Page 154: Loading Vst Plug-Ins
Managing the Library Loading VST Plug-ins In the Results list, right-click the desired folder and select Add to Favorites from the con- text menu. You can also remove any Favorite from the Favorite bar: To remove a favorite folder, right-click it in the Favorite bar and select Remove from Fa- ►... -
Page 155: Installing Nks Instruments
Managing the Library Installing NKS Instruments Select the plug-in you want to load in the Plug-ins submenu of the KOMPLETE KONTROL ► menu. If your VST plug-ins do not show up in the Plug-ins submenu, check if the VST plug-in folders on your hard drive are correctly added to the Locations pane on the Preferences’... - Page 156 Managing the Library Installing NKS Instruments Installing VST Plug-ins with NKS Support VST plug-ins with NKS support are automatically added to your Library when you start KOM- PLETE KONTROL for the first time after completing their installation. The folders containing the Preset files for NKS support can be managed in the Factory pane on the...
- Page 157 Managing the Library Installing NKS Instruments Click on Add a serial in the top-left corner of Native Access. Enter the serial number of the Instrument and click SERIAL. Click BROWSE and open the folder containing the Instrument files in the file dialog. KOMPLETE KONTROL A-Series - Manual - 157...
-
Page 158: Importing Komplete Kontrol-Compatible User Files
Managing the Library Importing KOMPLETE KONTROL-Compatible User Files Click on INSTALL to add the Instrument to your KOMPLETE KONTROL Library. The Instrument is installed. KOMPLETE KONTROL automatically scans for the new con- → tent and adds it to the KOMPLETE KONTROL Browser. The KOMPLETE KONTROL Library and the KONTAKT Browser reference the Instrument files con- tained in the folder. - Page 159 Managing the Library Importing KOMPLETE KONTROL-Compatible User Files For this you will have to import the files into the Library first. Importing files does not mean they will be moved from the directory they currently reside in, they will only be referenced by the Browser.
-
Page 160: Midi Communication
MIDI Communication MIDI Communication KOMPLETE KONTROL provides you with flexible MIDI control and host automation capabili- ties for easy integration with your MIDI environment. In this section you are provided with over- all information about MIDI communication and Host automation. Incoming MIDI KOMPLETE KONTROL and the Instruments you load inside it can be controlled via MIDI and the host (when KOMPLETE KONTROL is loaded as a plug-in):... -
Page 161: Host Automation
MIDI Communication Host Automation 13.1 Host Automation When you load KOMPLETE KONTROL as a plug-in in a host, the parameters of the loaded In- strument, the Scale engine, and the Arpeggiator become available for automation from the host. Available Parameters for Host Automation All parameters available for automation are found in the Perform panel and the Plug-in panel. - Page 162 MIDI Communication Host Automation Selecting Another Entry from a Drop-Down Menu To select another entry from a drop-down menu: Click the corresponding menu with your computer mouse and select an entry. Turn the knob on the keyboard currently assigned to the corresponding parameter. Changing the Value of a Drag Control To change the value of a drag control: Click and drag the corresponding drag control with your computer mouse.
-
Page 163: Automation Ids For The Perform Panel
MIDI Communication Host Automation Turn the knob on the keyboard currently assigned to the corresponding parameter. Some hosts let you handle automation by using automation IDs that are mapped to specific parameters of the plug-in. KOMPLETE KONTROL comes with a predefined list of automation IDs which allows the host find them automatically. - Page 164 MIDI Communication Host Automation Automation ID Parameter Retrigger (Arp) Repeat (Arp) Offset (Arp) Inversion (Arp) Min. Key (Arp) Max. Key (Arp) Hold (Arp) KOMPLETE KONTROL A-Series - Manual - 164...
-
Page 165: Host Integration
Host Integration Integration with MASCHINE Host Integration When using advanced host integration, the KOMPLETE KONTROL keyboard becomes the cen- terpiece of your studio setup. You can use it to control not only the Instrument or Effect loaded in KOMPLETE KONTROL but also core functionality of supported hosts. Before you can make use of advanced host integration you need to set it up first. -
Page 166: Integration With Apple Logic Pro X And Garageband
Host Integration Integration with Apple Logic Pro X and GarageBand Click on the Keyboard icon in the Header. ► Connect to MASCHINE using the Keyboard Press SHIFT TRACK (Instance) on the keyboard. Select the MASCHINE instance shown in the dialog. Press the 4-D Encoder to connect the keyboard to MASCHINE. - Page 167 Host Integration Integration with Apple Logic Pro X and GarageBand Transport Control Action in Logic Pro X and GarageBand Button on KOMPLETE KONTROL S-Series Start playback PLAY (Restart) Restart playback SHIFT PLAY (Restart) Start recording (Count-In) Punch out when recording PLAY (Restart) Punch in when playing...
- Page 168 Host Integration Integration with Apple Logic Pro X and GarageBand Edit Control Action in Logic Pro X and GarageBand Button on KOMPLETE KONTROL A-Series Undo action UNDO (Redo) Redo action SHIFT UNDO (Redo) Quantize to grid value QUANTIZE (Auto) Toggle automation between Read mode and SHIFT + QUANTIZE (Auto) Touch mode...
- Page 169 Host Integration Integration with Apple Logic Pro X and GarageBand Plug-in Control Action in Logic Pro X and GarageBand Button on KOMPLETE KONTROL A-Series Control Instrument and Plug-in parameters Knob 1–8 Navigate Plug-in Chain Push 4-D encoder left/right Add FX Plug-in on empty Plug-in slot BROWSER Move selected FX Plug-in left or right in the SHIFT...
-
Page 170: Integration With Ableton Live
Host Integration Integration with Ableton Live 14.3 Integration with Ableton Live If you own Ableton Live, you can control many of its functions directly from the KOM- PLETE KONTROL keyboard. The available functions mapped to the sections of the keyboard are listed below. - Page 171 Host Integration Integration with Ableton Live Edit Control Action in Ableton Live Button on KOMPLETE KONTROL A-Series Undo action UNDO (Redo) Redo action SHIFT UNDO (Redo) Quantize to grid value QUANTIZE Toggle automation for selected Track on/off AUTO Enable/disable Scale engine SCALE (Edit) Change Scale engine parameters...
- Page 172 Host Integration Integration with Ableton Live Arranger Control Action in Ableton Live Button on KOMPLETE KONTROL A-Series Select previous/next Track Push 4-D encoder left/right Select previous/next Clip Slot in Track Push 4-D encoder down/up Start/stop selected Clip Push 4-D encoder Mute/unmute selected Track SHIFT + Page Left (M)
- Page 173 Host Integration Integration with Ableton Live Plug-in Control Action in Logic Pro X and GarageBand Button on KOMPLETE KONTROL A-Series Control Instrument and Plug-in parameters Knob 1–8 Navigate Plug-in Chain Push 4-D encoder left/right Add FX Plug-in on empty Plug-in slot BROWSER Move selected FX Plug-in left or right in the SHIFT...
-
Page 174: Index
Index Index Numerics 4-D encoder [43] ARP (Edit) button [41] Arpeggiator [131] advanced parameters [138] [138] Dynamic [131] editing [138] Gate Groove [136] [142] Hold [140] Inversion [132] Main Main mode [132] [133] Main type [141] Max. Key [141] Min. Key note value [134] [137]... - Page 175 Index Retrigger [139] [133] [135] rhythm Browser [24] [135] Sequence [32] Files pane [136] Swing Library pane [28] [134] tempo [74] Loading Preset files [138] Velocity [30] Product selector Arpeggiator Mode [74] showing and hiding [132] Note Repeat Browsing Arpeggiator sequence [108] [131] [76] choosing factory or user content...
- Page 176 Index Chord mode [122] Effects [95] Chord position [128] [101] bypassing Chord type [124] reordering [99] [127] chromatic Scale Chords [108] Favorites [122] Chord Set [89] adding [111] editing Chords [91] displaying [122] [124] [128] generating [92] removing [122] Harmonizer [89] working with Favorites [110]...
- Page 177 Index setting up Ableton Live on Windows [21] [19] setting up Apple GarageBand Header [19] setting up Apple Logic ProX [25] Browser [19] [165] supported hosts CPU meter [26] Host Transport Control [42] [26] Keyboard button [25] Main menu [26] Master Volume control IMPORT button [159]...
- Page 178 Index Keyboard Latency [56] [38] Library [71] controls overview [38] [158] importing your own files Keyboard overview [38] [143] organizing [39] [143] Control section saving Preset files Kensington Lock [40] tags [72] [39] Library pane [28] Light Guide [39] [28] Navigation and Mode buttons Content selector [40]...
- Page 179 Index adding and removing file location favorites [153] Master Volume [153] jumping to file location favorites [53] adjusting in the software navigating to recent file locations [152] Master Volume control [26] LOOP button [42] METRO button [42] MIDI [161] automation [57] configuration Controlling MIDI applications and devices...
- Page 180 Index Arpeggiator sequence [108] [108] Chords Perform and Edit Section [41] [107] Scales Perform panel [107] Scale PLAY (Restart) button [42] Native Kontrol Standard [155] Plug-in area [37] Plug-in chain installing KONTAKT and REAKTOR Instru- [156] [101] ments with NKS Support bypassing Effects [155] installing NKS Intruments...
- Page 181 Index Preferences [54] [54] Audio page REC (Count-in) button [42] [54] Audio Routings Removing Effects [102] [58] General page Reordering Effects [99] [60] Library page Resetting the clock [57] MIDI page [52] from the Keyboard [65] Plug-ins page [52] in the software [58] Usage Data Tracking Results list...
- Page 182 Index connecting the keyboard to the computer [15] Sample rate [18] Host integration [55] selecting Stand-alone application [16] Scale [107] SHIFT button [41] [112] available Scale parameters Software Overview [24] [122] Chord [24] [27] Browser Chord mode [122] [24] [25] Header [128] Chord Position...
- Page 183 Index Tags UNDO (Redo) button [41] [72] Usage Data Tracking categories of using tags to find Preset files [72] [59] enabling/disabling Tempo User Library [53] adjusting Tempo from the keyboard adding folders [64] adjusting Tempo in the software [52] [64] removing folders TEMPO button [42]...