
Related Manuals for VTech DM111 BU


Summary of Contents for VTech DM111 BU
- Page 1 ® Safe & Sound audio monitor User’s manual w w w.v t e c h p h o n e s . c o m POWER Models: DM111 BU/DM111 PU DM111-2 BU/DM111-2 PU...
- Page 2 Important safety instructions on page iii of this manual. This manual has all the feature operations and troubleshooting necessary to install and operate your new VTech product. Please review this manual thoroughly to ensure proper installation and operation of this innovative and feature rich VTech product.
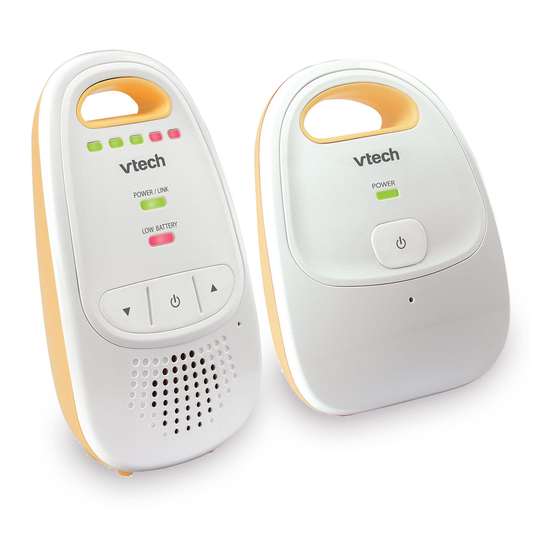
- Page 3 Product introduction DM111 is an audio monitor which consists of one baby unit (DM111 BU) and one parent unit (DM111 PU). POWER DM111-2 is an audio monitor which consists of one baby unit (DM111-2 BU) and two parent units (DM111-2 PU).
- Page 4 Important safety instructions When using your equipment, basic safety precautions should always be followed to reduce the risk of fire, electric shock and injury, including the following: Follow all warnings and instructions marked on the product. Adult setup is required. This product is intended as an aid.
- Page 5 Important safety instructions (continued) To reduce the risk of electric shock, do not disassemble this product, but take it to an authorized service facility. Opening or removing parts of the product other than specified access doors may expose you to dangerous voltages or other risks.
- Page 6 Electromagnetic fields (EMF) This VTech product complies with all standards regarding electromagnetic fields (EMF). If handled properly and according to the instructions in this user’s manual, the product is safe to be used based on scientific evidence available today.
-
Page 7: Table Of Contents
Table of contents Getting started ..............1 Parts checklist ..............1 Baby unit installation ............2 Parent unit battery installation ..........3 Parent unit installation ............4 Baby unit overview ...............5 Parent unit overview .............6 Parent unit lights..............7 Positioning and operating range ..........8 Positioning the audio monitor ..........8 Audio settings ...............8 Operating range ..............8 Test your audio monitor before use ........9... -
Page 8: Getting Started
Save your sales receipt and original packaging in the event warranty service is necessary. POWER Baby unit Parent unit (DM111 BU/DM111-2 BU) (DM111 PU/DM111-2 PU) (1 for DM111 PU and 2 for DM111-2 PU) Power adapter for Power adapter for... -
Page 9: Baby Unit Installation
Getting started Baby unit installation You can power up the baby unit by connecting it to AC power. Install the baby unit as shown below. Make sure that the power outlet is not controlled by a wall switch. Bundle the power adapter cord neatly with a twist tie. -
Page 10: Parent Unit Battery Installation
Getting started Parent unit battery installation You can power up the parent unit by connecting it to AC power or installing 2 AAA alkaline batteries (not included) into it. Even if the parent unit is connected to AC power, we recommend you also install the batteries. This guarantees continued operation in case of a power outage. -
Page 11: Parent Unit Installation
Getting started Parent unit installation Install the parent unit as shown below. Make sure that the power outlet is not controlled by a wall switch. Bundle the power adapter cord neatly with a twist tie. Power outlet not controlled by a wall switch Power adapter Parent unit... -
Page 12: Baby Unit Overview
Getting started Baby unit overview 1. POWER Light On when the baby unit turns on. (On/off) Press and hold to turn on or off the baby unit. 3. Microphone 4. Power Jack... -
Page 13: Parent Unit Overview
Getting started Parent unit overview 1. LOW BATTERY Light (On/off) Press and hold to turn on or off the parent unit. (Volume down) Press to decrease the speaker volume. 4. Speaker To listen to sounds transmitted from the baby unit. 5. -
Page 14: Parent Unit Lights
Getting started Parent unit overview Parent unit lights 3 green lights and 2 red lights indicating the sound level detected by the baby unit. Green lights indicate a moderate level of sound is detected. Red lights indicate a higher level of sound is detected. More lights turn on when the sound level detected increases. -
Page 15: Positioning And Operating Range
Getting started Positioning and operating range Positioning the audio monitor Place the parent unit within the operating range (see below) of the baby unit. We recommend you place the parent unit at least 1 metre away from the baby unit to avoid audio feedback. If you still experience audio feedback, move the parent unit and the baby unit farther apart. -
Page 16: Test Your Audio Monitor Before Use
Getting started Test your audio monitor before use It is important to test the audio monitor when it is installed initially, and at regular times thereafter. Test your parent units and baby unit if they have not been used for a long time or you suspect they are defective. To test your audio monitor: Place the parent unit and the baby unit in the same room to test the product. -
Page 17: Using Your Audio Monitor
Using your audio monitor Power on or off the baby unit • Press and hold for 2 seconds to turn on the baby unit. The POWER light turns on. POWER • Press and hold for 2 seconds again to turn off the baby unit. -
Page 18: Appendix
Appendix Parent unit battery When the battery is full, you can expect the following performance: Operation Operating time While in standby* mode Up to 8 days * The parent unit is not connected to the power supply. There is no sound detected from the baby unit. -
Page 19: Troubleshooting
Appendix Troubleshooting If you have difficulty with this product, please try the suggestions below. For customer service, visit our website at www.vtechphones.com or call 1 (800) 595-9511. In Canada, go to www.vtechcanada.com or call 1 (800) 267-7377. My audio monitor does not work at all. •... - Page 20 Appendix Troubleshooting (continued) My parent unit does not play any sound when there is noise from the baby unit. • Make sure the parent unit is powered up by connecting it to AC power (page (page 4) or installing the AAA alkaline batteries into it ( (page 3). •...
- Page 21 Appendix Troubleshooting (continued) The link between the baby unit and the parent unit is lost every now and then, and I’m experiencing sound interruptions. • Move the parent unit closer to the baby unit (but not less than 1 metre). The parent unit may be out of range.
-
Page 22: Operating Range
Appendix Operating range This product operates with the maximum power allowed by the Federal Communications Commission (FCC). Even so, the baby unit and the parent unit can communicate over only a certain distance - which can vary with the locations of the baby unit, the parent unit, the weather, and the layout of your home. -
Page 23: Precautions For Users Of Implanted Cardiac Pacemakers
Appendix Precautions for users of implanted cardiac pacemakers Cardiac pacemakers (applies only to digital cordless devices): Wireless Technology Research, LLC (WTR), an independent research entity, led a multidisciplinary evaluation of the interference between portable wireless devices and implanted cardiac pacemakers. Supported by the U.S. Food and Drug Administration, WTR recommends to physicians that: Pacemaker patients •... -
Page 24: Limited Warranty
Limited warranty What does this limited warranty cover? The manufacturer of this VTech Product warrants to the holder of a valid proof of purchase (“Consumer” or “you”) that the Product and all accessories provided in the sales package (“Product”) are free from defects in material and workmanship, pursuant to the following terms and conditions, when installed and used normally and in accordance with the Product operating instructions. - Page 25 If the Product failure is not covered by this limited warranty, or proof of purchase does not meet the terms of this limited warranty, VTech will notify you and will request that you authorize the cost of repair prior to any further repair activity. You must pay for the cost of repair and return shipping costs for the repair of Products that are not covered by this limited warranty.
-
Page 26: Fcc And Ic Regulations
Appendix FCC and IC regulations FCC Part 15 This equipment has been tested and found to comply with the requirements for a Class B digital device under Part 15 of the Federal Communications Commission (FCC) rules. These requirements are intended to provide reasonable protection against harmful interference in a residential installation. -
Page 27: Rf Radiation Exposure Statement
Appendix FCC and IC regulations (continued) RF radiation exposure statement The baby unit complies with FCC RF radiation exposure limits set forth for an uncontrolled environment. The baby unit should be installed and operated with a minimum distance of 8 in (20 cm) between the baby unit and the baby’s body. For hand held operation, the parent unit has been tested and meets the FCC RF exposure guidelines. -
Page 28: Technical Specifications
Appendix Technical specifications Frequency control Crystal controlled PLL synthesizer Transmit frequency Baby unit: 1921.536-1928.448 MHz Parent unit: 1921.536-1928.448 MHz Channels Nominal effective range Maximum power allowed by FCC and IC. Actual operating range may vary according to environmental conditions at the time of use. -
Page 29: Index
Index Audio settings 8 Range 8, 15 Baby unit installation 2 Safety instructions iii–iv Baby unit operation 10 Speaker volume 10 Baby unit overview 5 Battery 11 Battery installation 3 Technical specifications 21 Test your baby monitor 9 Troubleshooting 12–14 Cardiac pacemakers 16 Turn off the baby unit 10 Cautions v... - Page 30 VTECH TELECOMMUNICATIONS LTD. A member of THE VTECH GROUP OF COMPANIES. VTech is the registered trademark of VTech Holdings Limited. Copyright © 2013 for VTECH TELECOMMUNICATIONS LTD. All rights reserved. Version 1 09/13.