GE JVM1750 Technical Service Manual
Spacemaker
over-the-range
Hide thumbs
Also See for JVM1750:
- Owner's manual (192 pages) ,
- Owner's manual (48 pages) ,
- Owner's manual (48 pages)
Table of Contents
Advertisement
GE Consumer & Industrial
Technical Service Guide
SEPTEMBER 2009
GE Spacemaker
Over-the-Range
Microwave Oven
JVM1750
JVM1540
31-9190
GE Appliances
General Electric Company
Louisville, Kentucky 40225
®
– 1 –
Sensor Cooking
Popcorn
Beverage
Reheat
Potato
Vegetable
Time
Defrost
Delay
Timer
Cook
Start
Auto/Time
On/Off
Beeper
Turn
Reminder
Help
Volume
Table
Express Cook
1
2
3
Start
Pause
4
5
6
Clear
Off
Control Lock
7
8
9
0
Power
Add
AM/PM
Level
30 Sec.
Display
Scroll Speed
Vent
Auto Nite
Surface
Clock
Fan
Light
Light
Convenience Cooking
Popcorn
Beverage
Reheat
Potato
Vegetable
Time
Defrost
Reminder Timer
Cook
Auto/Time
On/Off
Express Cook
1
2
3
Start
Pause
4
5
6
Clear
Off
7
8
9
Delay
Start
Power
0
Add
Level
Clock
30 Sec.
Display
AM/PM
Turn
Surface
Vent
Table
Light
Fan
Scroll Speed
Advertisement
Table of Contents

Related Manuals for GE JVM1750


Summary of Contents for GE JVM1750
- Page 1 GE Consumer & Industrial Technical Service Guide SEPTEMBER 2009 GE Spacemaker ® Over-the-Range Microwave Oven Sensor Cooking Popcorn Beverage Reheat Potato Vegetable Time Defrost Delay Timer Cook Start Auto/Time On/Off Beeper Turn Reminder Help Volume Table Express Cook JVM1750 Start...
- Page 2 OWNER. A MICROWAVE LEAKAGE CHECK TO VERIFY COMPLIANCE WITH THE FEDERAL PERFORMANCE STANDARD SHOULD BE PERFORMED ON EACH OVEN PRIOR TO RELEASE TO THE OWNER. GE Consumer & Industrial Technical Service Guide Copyright © 2009 All rights reserved. This service guide may not be reproduced in whole or in part in any form without written permission from the General Electric Company.
-
Page 3: Table Of Contents
Components ..................................15 Control Boards and Panel Connections .........................13 Control Features ................................6 Control Panel Assembly ..............................17 Cooling Fan Motor ................................21 Demo Mode (JVM1750) ..............................10 Diagnostics and Service Information ........................26 Door Assembly ...................................25 Door Interlock Switches ..............................24 Duct Assembly ...................................18 Grill Assembly ..................................16 High Voltage Transformer ............................23... -
Page 4: Nomenclature
Nomenclature Model Number J V M 1 7 5 0 D P 1 B B Product J = GE Cooking Product Product Color BB = Black Microwave Oven WW = White V = Externally Vented SS = Stainless Steel Over-the-Range... -
Page 5: Introduction
Introduction The GE Spacemaker Over-the-Range Microwave Oven is a versatile appliance for any kitchen. Features and Benefi ts: Sensor Cook - The microwave oven automatically adjusts the cooking time to various types and amounts of food. Auto and Time Defrost - Auto defrost sets the defrosting time and power levels to deliver even defrosting results for up to 6 pounds of meats, poultry, and fi... -
Page 6: Control Features
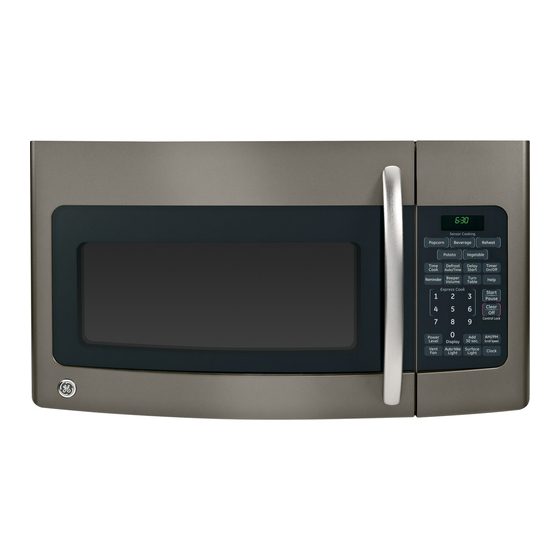
Control Features JVM1750 Features 1 Door Handle. Pull to 4 Shelf. Lets you 8 Removable Turntable. open the door. The microwave several Turntable and support door must be securely foods at once. Food must be in place latched for the microwaves best when when using the oven. - Page 7 4 Touch Control Panel. Available at an extra 5 Cooktop Light. cost from your GE 6 Grease Filter. supplier, or see GE Service Numbers. 10 Rating Plate . Located on the inside wall of the microwave oven.
- Page 8 JVM1750 Controls Time Features Time Cooking Press Enter TIME COOK I & II (Press once or twice) Amount of cooking time. DEFROST AUTO/TIME (Press twice) Amount of defrosting time. EXPRESS COOK Starts immediately! POWER LEVEL Power level 1–10. ADD 30 SEC...
- Page 9 JVM1540 Controls You can microwave by time, temperature or with the convenience features. Time Features Time Cooking Press Enter TIME COOK I & II (Press once or twice) Amount of cooking time. DEFROST AUTO/TIME (Press twice) Amount of defrosting time. EXPRESS COOK Starts immediately! POWER LEVEL...
-
Page 10: Demo Mode (Jvm1750)
Demo Mode (JVM1750) • To enter the Demo Mode, touch and hold the HELP pad for a full 3 seconds. • To end the Demo Mode, touch and hold the HELP pad for a full 3 seconds. • As pads are pressed in the Demo Mode, explanations of the pads' functions will be scrolled across the display screen. -
Page 11: Component Locator Views
Component Locator Views Front View Grill Assembly Control Panel Assembly Turntable Shaft Front View - Control Panel Assembly Removed Cooling Fan Motor Hood TCO Bottom TCO (Continued Next Page) – 11 –... - Page 12 Right Side View Fuse High Voltage Capacitor Diode Vent Motor Capacitor Magnetron TCO Magnetron Cooling Fan Motor Cooling Fan High Voltage Transformer Hood TCO Bottom TCO – 12 –...
-
Page 13: Control Boards And Panel Connections
Control Boards and Panel Connections JVM1750 Smart Board CN301 CN401 RY203 CN201 CN202 (Back Side) CN201 - Vent Motor CN202 - Turntable Motor, Cooktop Lamp CN301 - Gas Sensor CN401 - Hood TCO & Door Sensing Switch RY203 - Secondary Relay (Power Relay) - Page 14 JVM1540 Smart Board CN401 RY203 CN201 CN202 (Back Side) CN201 - Vent Motor CN202 - Turntable Motor, Cooktop Lamp CN401 - Hood TCO & Door Sensing Switch RY203 - Secondary Relay (Power Relay) (Front Side) – 14 –...
-
Page 15: Components
Components Oven Removal The oven is hooked on metal tabs at the bottom of the wall mounting plate and fastened to the cabinet with 3 top cabinet bolts. To remove the oven from the cabinet or wall opening: WARNING: This oven requires 2 people for complete 3. -
Page 16: Grill Assembly
6. Remove 2 Phillips-head screws from the left side 4. Lift out the vent blower and place it on top of the of the oven. oven side as shown below and disconnect the electrical connector to the vent blower. Electrical Connector View From Rear 7. -
Page 17: Control Panel Assembly
To remove the grill assembly (Model JVM1750): 4. Gently remove the bulb. Open the door. Remove 2 Phillips-head screws from the top, front of the oven cabinet. Remove 1 Phillips-head screw from the right, rear corner of the grill. 4. Slide grill to the left and remove. -
Page 18: Cavity Thermal Cutout
5. Tilt the top of the control panel out, and Cavity Thermal Cutout mark and disconnect all the wiring harnesses connected to the smart board. The cavity thermal cutout is located on the top side of the oven cavity beside the exhaust duct. The 6. -
Page 19: Bottom Thermal Cutout (Tco)
4. Disconnect wiring to the magnetron TCO. Bottom Thermal Cutout (TCO) 5. Remove 2 Phillips-head screws that attach the The bottom TCO is located on the bottom, right side magnetron TCO to the magnetron. of the oven behind the control panel. The bottom TCO is not resettable. -
Page 20: Line Fuse
Check to make sure the fuse is not open. Check the Stirrer Assembly noise fi lter for approximate resistance value at the following locations: The stirrer assembly consists of a blade, pin, and cover. The blade is air driven and rotates on a shaft White (neutral input) to white (neutral output) - 0 Ω. -
Page 21: Cooling Fan Motor
Magnetron WARNING: Prior to servicing the magnetron, be Disconnect certain the capacitor is discharged. Manually discharge by placing an insulated-handle screwdriver between the diode connection of the capacitor and the oven chassis ground. To remove the magnetron: Remove the outer cover. (See Outer Cover Disconnect wiring to the magnetron. - Page 22 5. Disconnect wiring to the primary of the high 8. Using a small fl at blade screwdriver, carefully voltage transformer. remove the fan retainer. Fan Retainer Disconnect View From Right Side 6. Remove 3 Phillips-head screws attaching the cooling fan frame to the microwave. 9.
-
Page 23: Capacitor And Diode
Capacitor and Diode Disconnect The capacitor has an internal shunt resistor to automatically discharge the capacitor when the oven turns "off". Under normal operation, the capacitor should fully discharge within 30 seconds. WARNING: Always be certain the capacitor is Disconnect discharged before servicing. -
Page 24: Door Interlock Switches
3. Remove the 2 Phillips-head screws that attach Door Interlock Switches the door switch bracket to the microwave oven frame and remove the door switch bracket. The door has 3 interlock switches. All switches are removed the same way. Door Sensing and Primary Interlock Switches The power relay is mounted on the smart board. -
Page 25: Door Assembly
Surface Lamps The surface lamps are 120V, 40-watt incandescent bulbs (part number WB06X10823). Note: Model JVM1750 has two bulbs. The JVM1540 model has a single bulb. To remove the surface lamp assemblies: Disconnect Remove the Phillips-head screw from the surface lens panel, then open the panel. -
Page 26: Diagnostics And Service Information
Diagnostics and Service Information JVM1750 Diagnosis Flow Chart SMPS SWITCHING MODE POWER SUPPLY (Continued next page) – 26 –... - Page 27 JVM1540 Diagnosis Flow Chart SMPS SWITCHING MODE POWER SUPPLY – 27 –...
-
Page 28: Interlocks (Door Latch Switches)
6. Test the circuit operation: Interlocks (Door Latch Switches) a. Connect temporary jumper across relay The interlocks are designed as follows: contacts and primary switch to simulate shorted switch contacts. Locate convenient Primary - Bottom switch operated by bottom latch connections in circuit to be certain COM pawl connected to line (L) leg. -
Page 29: Key Panel Test
If necessary, the key panel pads can be verifi ed by a continuity test. For ease of handling, the key panel should be removed and placed on a fl at surface. Check the continuity between the connections at the end of the ribbon. (Use high Ω scale.) RIBBON (JVM1750, HVM1750, EVM1750) CONN. CONN. -
Page 30: Schematics And Wiring Diagrams
Schematics and Wiring Diagrams JVM1750 Schematic Diagram (Continued Next Page) – 30 –... - Page 31 JVM1750 Wiring Diagram – 31 –...
- Page 32 JVM1540 Schematic Diagram – 32 –...
- Page 33 JVM1540 Wiring Diagram – 33 –...
-
Page 34: Warranty
This warranty is extended to the original purchaser and any succeeding owner for products purchased for home use within the USA. If the product is located in an area where service by a GE Authorized Servicer is not available, you may be responsible for a trip charge or you may be required to bring the product to an Authorized GE Service Location for service.