
Related Manuals for Sanyo SCP-400


Summary of Contents for Sanyo SCP-400
- Page 1 SANYO Dual-Mode Phone SCP - 400 Manufactured by SANYO User Guide Please read this manual before operating the phone, and keep it for future reference.
- Page 2 ©1999 SANYO Electric Co., Ltd. All rights reserved. Printed in Japan...
-
Page 3: Table Of Contents
Table of Contents Getting to know your phone Highlights Easy Menu Navigation Control Alpha Entry Using Keypad Front View of Phone Display icons: What they tell you Using the battery Installing and removing the battery Charging the battery Charging with the AC Adapter Using Your Phone: Basic operations to place and receive calls Turning your phone on and off... - Page 4 Handy tips for easier everyday usage: Adjusting the Volume Displaying Your Phone Number Banner Backlight/Contrast Setting Using Caller ID Saving and Storing a Phone Number in your Internal Phone Book Searching a Name in the Internal Phone Book Setting the Vibrating Ringer Getting the most from Network Service Voicemail and Text Messages Setting Up Your Voicemail...
- Page 5 Speed Dialing Prepend Dialing Pause Feature Storing a Number With Pauses Displaying/Erasing a Long Number Setting Your Phone’s Mode A/B System Selection Nam Name Nam Change Analog Mode Setting Voice Privacy Tones: Volume Setting (Ringer and Key Beep) Volume (Earpiece) Ringer Types Tone Length Alerts...
- Page 6 Accessories LiIon Batteries AC Adapter Charger Cigarette Lighter Adapter Dual-Slot Desktop Charger Leather Case Wireless Modem Connection Kit Charging Times with Accessories Usage guidelines: All about performance and safety Keeping tabs on signal strength Understanding Power Save mode Understanding how your phone operates Radio frequency safety Maintaining your phone’s peak performance Protecting your battery...
- Page 7 FCC RF EXPOSURE INFORMATION WARNING! Read this information before using your phone In August 1996 the Federal Communications Commission (FCC) of the United States with its action in Report and Order FCC 96-326 adopted an updated safety standard for human exposure to radio frequency (RF) electromagnetic energy emitted by FCC regulated transmitters.
-
Page 8: Getting To Know Your Phone
Getting to know your phone Highlights Congratulations on your purchase of a SANYO Dual-Mode Phone. This phone is lightweight, easy-to-use, reliable, and offers many significant features: • The display screen features five alphanumeric lines, one line of icons and EL (Electro-Luminescence) backlight for easy reading •... -
Page 9: Easy Menu Navigation Control
Intuitive prompts are displayed to guide you through each step. For example: If you want to view your last incoming call, use your Navigation key to display and press SCP-400 12:30p Oct 15,99 2/11 Call History Then display... -
Page 10: Alpha Entry Using Keypad
Alpha Entry Using Keypad Press a number several times until the desired letter appears. Letters scroll in the following order: . ? , ’ & - @ ( ) \ ~ 1 P Q R S 7 p q r s 7 PQRS A B C 2 a b c 2 T U V 8 t u v 8... -
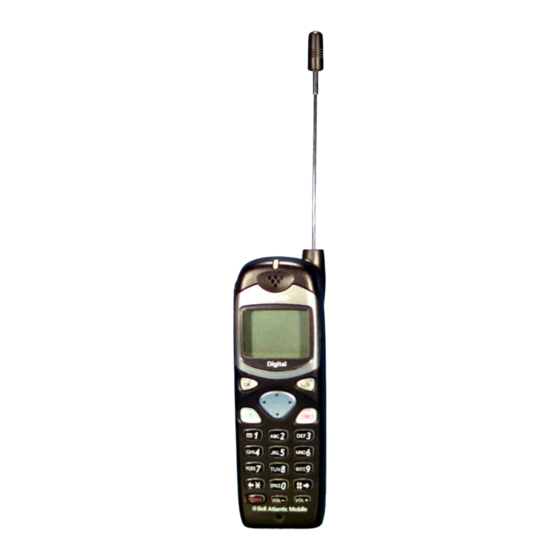
Page 11: Front View Of Phone
Front View of Phone 1. Red Light:Illuminates when is pressed and when you POWER have incoming calls or messages. 2. Headset Jack: Insert the plug of the headset (must be purchased separately) for hands-free listening. 3. OK: Lets you place a call, receive a call and select menu options. 4. - Page 12 10. Antenna 1. Red Light 2. Headset Jack SCP-400 12:30p Oct 15,99 1/11 1/11 Phone Book 9. CLR 3. OK (Clear) 4. Navigation SEND 8. END 5. SEND PQRS PQRS WXYZ WXYZ SPACE 6. POWER POWER 7. VOL (Volume)
-
Page 13: Display Icons: What They Tell You
What they tell you Display icons are all the graphic symbols that show up on your display screen. In short, they tell you what’s happening with your SANYO Dual-Mode Phone. See below for a description. Signal Measures your current signal strength. The more lines there are, the stronger the signal. -
Page 14: Using The Battery
Using the battery Your SANYO Dual-Mode Phone comes with a rechargeable Lithium Ion battery. Remember to fully charge your battery as soon as the charge becomes low in order to maximize your talk and standby times. Installing and removing the battery The battery snaps easily onto the back of the phone (bottom end first) for quick installation and removal. -
Page 15: Charging With The Ac Adapter
Use only approved adapter, with your SANYO Dual-Mode Phone. Plug the AC adapter into a wall outlet. Plug the other end into the bottom of your SANYO Dual- Mode Phone, with the battery attached. Charging a completely discharged standard Lithium Ion battery takes up to three hours. -
Page 16: Using Your Phone
Turning your phone on and off When you’re ready to turn your SANYO Dual-Mode Phone on, check to see that the charged battery has been installed on the back of the phone or that you have an external power (ie; the cigarette lighter adapter, hands-free car kit or AC adapter) with the battery installed. -
Page 17: Standby Mode
Standby mode is the most basic state of the phone. The phone goes into Standby mode soon after you turn it on or whenever you press . When your SANYO Dual-Mode Phone is on but no call is in progress, the phone is in Standby mode. -
Page 18: Making A Call
Making a call Whenever you make a call, follow these simple steps: First, check to see that your phone is on. If you see the display indicators on the screen, that means the power is on. Enter the phone number you’re calling. Press SEND When you’re finished with your call, press... -
Page 19: Answering Calls
To disconnect the call when you’re through, press Where you can use your phone Your SANYO Phone is dual-mode, which means you can use it to make and receive calls in many places: In any city where your cellular service carrier provides CDMA and analog cellular services. -
Page 20: What You Will See
What you will see You should always check your phone’s display because it will let you know when you are outside the Home Area and whether your phone is operating in analog service or digital service mode. The chart below indicates what you will see, depending on where you’re using your phone. -
Page 21: Mute
Mute The mute function on your SANYO Dual-Mode Phone works just like your phone at home. While your call is muted the party on the other end of your call will not be able to hear you. To enable mute during a call:... -
Page 22: Handy Tips For Easier Everyday Usage
Handy tips for easier everyday usage: Adjusting the Volume The volume keys of your SANYO Dual-Mode Phone can perform two different functions. They let you: • Adjust the earpiece volume during a call. • Adjust the ringer volume in the Standby mode. -
Page 23: Backlight/Contrast Setting
Backlight/Contrast Setting Your SANYO Dual-Mode Phone allows you to customize the backlight and contrast setting. To change the backlight setting: From the menu, display and press Display and press Depending on your preference, display, by using the Navigation key, and press Note: For maximum battery life the backlight setting should be set to “Always Off”. -
Page 24: Using Caller Id
To display the version number of the software and the PRL (Preferred Roaming List) installed on your SANYO Dual-Mode Phone: 1. From the menu, display and press Display and press Press , or to return to the initial display. Using Caller ID This feature tells you who is calling by displaying the caller’s... -
Page 25: Saving And Storing A Phone Number In Your Internal Phone Book
Saving and Storing a Phone Number in your Internal Phone Book Your SANYO Dual-Mode Phone provides you with multiple ways of adding numbers to your Internal Phone Book. An easy way to get started with your Internal Phone Book is to follow these simple... -
Page 26: Setting The Vibrating Ringer
For the shortcut to the below step 3, press of the Navigation key instead of the above steps 1 and 2. Enter name you want to search. Once a letter is entered, the Phone Book will be automatically stored in alphabetical order that start with that particular letter. -
Page 27: Getting The Most From Network Service
, display press Follow the system prompts. The first time you access the voicemail system from your SANYO Dual-Mode Phone, it will prompt you to: Create your own personal pass code. Make sure that you pick a number that is easy to remember. -
Page 28: Finding Out You Have A Message
Finding Out You Have A Message Your SANYO Dual-Mode Phone alerts you when you have new messages. If you have new messages, your phone will ring and you will be notified with a icon, and message notification on your screen, along with a red flashing LED light. -
Page 29: Message Erase Icon
Message Erase Icon In the rare circumstances that the network does not clear the icon even when you don’t have any new voicemail, you can use this feature to reset the icon. To erase the voice message icon: From the menu, display and press Display and press... -
Page 30: Page/Text Number Extraction
After selecting any header of messages, display and press Page/Text Number Extraction When you receive a page/text message on your SANYO Dual- Mode Phone that contains phone numbers you can extract those numbers, making it easy to place a call or save the numbers. - Page 31 To send the massages: Display and press Display and press Display and press Enter a message using Alphanumeric keys, and press Enter the telephone number directly, or using “Phone Book” menu for selecting stored number. Display and press You can also have the option of saving the message, by displaying instead of You can pick up the phone while proceeding above steps 1 through...
-
Page 32: Message Storage
Message Storage Your SANYO Dual-Mode Phone is capable of storing up to 20 received and 10 sent text messages and numeric pages. When the received message memory is 75 percent full, a warning message will be displayed, prompting you to erase messages in order to obtain more memory space. -
Page 33: Three-Way Calling
Three-Way Calling Three-Way Calling lets you talk with two people at the same time. Dial the first number, and press SEND When connected, display and press Dial the second number, display and press When the second party answers, display and press again to begin your three-way call. -
Page 34: Getting The Most From Your Phone
Getting The Most From Your Phone Menu Map 1/11 Phone Book Search Name Add New Entry Speed Dial Long Numbers My Number 2/11 Call History Outgoing Calls Incoming Calls Missed Calls Erase History Outgoing Calls Incoming Calls Missed Calls All Calls Call Time 3/11 Messages... - Page 35 Menu Map (cont’d) 4/11 Browser 5/11 Tones Volume Setting Ringer Volume Earpiece Volume Key Beep Car/Headset Use Ringer Type Tone Length Alerts Message Alert Msg Alert Type Minute Beep Service 6/11 Display Backlight Banner Contrast Version...
- Page 36 Menu Map (cont’d) 7/11 System A/B sw Nam Name Nam Change Analog Voice Privacy 8/11 Security Lock Phone Change Code Restricted Use Outgoing Incoming Emergency #s Erase PhoneBook Reset Phone 9/11 Keypad Lock...
- Page 37 Menu Map (cont’d) 10/11 Others Data/Fax (In) Any Key Answer Car/Headset Use Browser Call Forwarding 11/11 Special Game Calculator...
-
Page 38: Call History
Call History Your SANYO Dual-Mode Phone captures the last 10 incoming, 10 outgoing, and 10 missed calls in the Call History menu. You can place calls through the Call History menu, providing a quick and easy way to call frequently used numbers. -
Page 39: Missed Call Notification
To view time and date information: Display the call you wish to receive information about and press Once you’ve selected a number in the Call History menu, display and press to display the date and time that particular call was made, received or missed. To place a call from this list simply following these steps: Display the number you want to call and press Display... -
Page 40: Erasing Individual Or All Call History
Erasing Individual or All Call History To erase an individual call: From the menu, display and press Display the call you wish to erase ( , or ) and press Select the number you want to erase using the Navigation key, and press Display and press... -
Page 41: Call Time
Call Time Your SANYO Dual-Mode Phone allows you to check the total air time usage of your calls since it was last reset. From the menu, display and press Display either and press Then the display shows the total number of calls and times of all calls. -
Page 42: Internal Phone Book
Internal Phone Book Your SANYO Dual-Mode Phone has capability of storing up to 300 phone numbers. This allows you to organize your Internal Phone Book, storing up to seven phone numbers under one person’s name. You will no longer have to look for a person’s home number one place and their work number in another. -
Page 43: Search Name
If you entered the letters manually, and press , your SANYO Dual-Mode Phone will automatically search for entries with those letters and display a list of matches. To place a call, display the number you wish to call and press... -
Page 44: Add New Entry
Add New Entry – see pg. 18 a. From the menu, display and press b. Display and press c. Enter a name to correspond with the number (use the alphaentry method described on page 3.) d. Once the name is entered correctly, display and press e. -
Page 45: Adding Multiple Phone Numbers To An Existing Entry
a. Once you have ended your call, display , and press b. Follow the phone’s prompts. a. From the menu, display and press b. Display , or , and press c. Display the number you want to save and press d. -
Page 46: Editing An Existing Phone Book Entry
Follow the phone’s intuitive prompts. Secret Phone Book Entries Your SANYO Dual-Mode Phone allows you to make certain Phone Book entries “secret”. Once “secret”, the entry will still be displayed in your Phone Book, however, the entry’s phone number will not be displayed. -
Page 47: Speed Dialing
To make a secret Phone Book entry not secret: Select the secret Phone Book entry you wish to change (See “Search Name” for detailed instructions.) Display and press Display and press Enter security code. Display and press Speed Dialing To dial a Phone Book entry using the entry’s speed-dialing number, 2 through 9 simply: Press and hold the one digit speed-dialing number (2 through 9) assigned to the Phone Book entry you wish to call. -
Page 48: Prepend Dialing
To overwrite an assigned speed dial number. Display , and press Display , and press Display an appropriate speed dial number assigned, and press Display , and press Display the name you wish to store, and press Now the certain speed dial number is overwritten. Prepend Dialing Prepend dialing allows you to alter a phone number in your Phone Book by adding additional numbers. -
Page 49: Pause Feature
Pause Feature When you call automated systems (such as voicemail or credit card billing numbers,) you often have to enter a series of numbers. Instead of entering the numbers by hand, you can store the numbers in your Internal Phone Book separated by special characters called pauses: •... -
Page 50: Displaying/Erasing A Long Number
Displaying / Erasing a Long Number From the menu, display , and press Display , and press Display the name you wish to display or erase its phone number, and press 4a. To display, display , and press of the Navigation key to display all digits of number. - Page 51 To select possible settings: From the main menu, display , and press Display , and press Display by pressing of the Navigation key, and press Preferred Only - The phone will scan the preferred system only and prevents switching over to the non-preferred system.
-
Page 52: Nam Name
Nam Name Some Cellular users may find it beneficial to register their phones with multiple numbers, for different cities where they may frequently travel. To provide this ability, your phone has two Nams (Number Assignment Modules) enabling up to two registrations. To register Nam Name: Display , and press... -
Page 53: Analog Mode Setting
Analog Mode Setting To select the Analog mode: Display , and press Display , and press Display , and press Voice Privacy This feature requests the cellular system to provide the enhanced voice privacy service. This service can only be provided in the Digital Mode, and its availability depends on the cellular system and your service provider. -
Page 54: Tones
Tones: Volume Setting (Ringer and Key Beep) From the menu, display , and press Display , and press Display , and press Display (Not applicable to Key Beep,) and press Volume (Earpiece) Follow the above steps 1 and 2. Display , and press Display , or... -
Page 55: Ringer Types
Ringer Types Your SANYO Dual-Mode Phone provides you with multiple ringer types including five different melodies. Select a ringer type by following these simple directions: From the menu, display and press Display , and press Using your Navigation key scroll through the list of ringer types. -
Page 56: Alerts
Alerts Your SANYO Dual-Mode Phone comes with several different options to keep you aware of what’s going on. Message Alert: This option is a tone that alerts you only once or every two minutes whenever you receive a message. Settings are: “Once”, “+ Reminder” (every 2 minutes that a message is waiting) and “Off”. - Page 57 For setting “Minute Beep” or “Service” Alerts From the menu, display and press Display , and press Display , and press Display , and press For setting “Message Alert” Follow the above steps 1 and 2. Display , and press Display if you want an alert only, press Display...
-
Page 58: How To Lock Your Phone
How to Lock Your Phone You must enter your security code to view the security menu. Typical default values are either the last 4 digits of your phone number or Social Security number. When your phone is locked, you can only make emergency calls (9-1-1, and your user-specified Special Numbers) or receive incoming calls. -
Page 59: Change The Security Code
Change the Security Code To change your Security Code: Display and press Enter the existing security code. Display and press Enter new security code. Re-enter your code and your new code will be saved. Restrict Calls The Restrict Call feature is an added security item, because this allows you to not receive calls from the outside or not send calls from your phone. - Page 60 By selecting “Phone Book Only” , your phone will restrict you from making or receiving calls to any number other than your Phone Book entries. By selecting “Emer. #s Only”, you will not be able to make or receive calls to any number other than special numbers and 911.
-
Page 61: Special Numbers
Special Numbers This feature allows you to store three important phone numbers that you would like access to even if your phone is locked. To add a phone number to your Special Numbers: Display and press Enter security code. Display and press Display the entry number where you would like to store the number and press... -
Page 62: Reset Phone
Reset Phone Resetting your SANYO Dual-Mode Phone will restore all the factory defaults, including ringer types, display settings, etc. However, your Call History, Internal Phone Book and Messages will not be affected. From the menu, display and press Enter security code. -
Page 63: Auto Answer For The Hands-Free Car Kit Or Headset
Auto Answer for The Hands-Free Car Kit or Headset While your phone is connected to your hands-free car kit or headset you can set your phone to auto answer. This feature will enable your phone to answer incoming calls automatically after 1 ring or 3 rings;... -
Page 64: Advanced Phone Features
Advanced Phone Features Wireless Modem - Data and Fax Calls (CDMA service only) Your phone may function like a wireless modem when connected to your laptop PC* computer or fax capable palm-size computing device if your service provider supplies wireless modem. You must purchase kit to send and receive data or faxes through your phone. - Page 65 To start a data or fax call on your wireless modem Your phone must be connected to your laptop PC or fax capable palm-size computing device via the data cable, which is included in the wireless modem connection kit. Initiate a data or fax call using your dial-up software (included in your kit).
- Page 66 To receive a call via your Wireless Modem Your phone must be connected to your laptop PC or fax capable palm-size computing device via the data cable. From the main menu, display and press Display ,and press Display and press The appropriate dial-up software must be running.
-
Page 67: The Wireless Internet Browser
The Wireless Internet Browser NOTE: PLEASE CHECK WITH YOUR SERVICE PROVIDER TO SEE IF THIS FEATURE IS AVAILABLE IN YOUR AREA. The Wireless Internet Browser will allow you to access information such as stock quotes, sport scores, weather and news via the Internet in those areas where your service provider supports it. - Page 68 Display , and press Press of the Navigation key to display , and press Starting the Browser NOTE: PLEASE CHECK WITH YOUR SERVICE PROVIDER TO SEE IF THIS SERVICE IS AVAILABLE IN YOUR AREA. The first time you access the Wireless Internet Browser, you will go through a security setup process that takes 3 to 5 minutes.
-
Page 69: Playing The "Crab Catch" Game
Ending the Wireless Browser Session If you want to end a Browser session, display and press Playing the “Crab Catch” Game Your SANYO Dual-Mode Phone allows you to take time out to enjoy a game. From the menu, display , and press... -
Page 70: Using Your Phone As A Calculator
Using Your Phone as a Calculator You can use your SANYO Dual-Mode Phone as a calculator. From the menu, display , and press Display , and press . Now, you can start calculating, by using numerical keys and the Navigation key. -
Page 71: Accessories
Figure 2: AC Adapter Charger Cigarette Lighter Adapter The cigarette lighter adapter charges your SANYO Dual-Mode Phone in a vehicle from the cigarette lighter socket or power outlet while driving. Figure 3: Cigarette Lighter Adapter... -
Page 72: Dual-Slot Desktop Charger
SANYO Dual-Mode Phones. Figure 5: Leather Case Wireless Modem Connection The data cable allows you to transmit and receive data by connecting your SANYO Dual- Mode Phone to a laptop computer or palm-sized computing device-separate service is required. -
Page 73: Charging Times With Accessories
Charging Times with Accessories Standard Lithium Extended Lithium Ion Battery Ion Battery AC Adapter Charger 3.0 hrs. 5.0 hrs. Cigarette Lighter Adapter 3.0 hrs. 5.0 hrs. Dual-Slot Desktop Charger 3.0 hrs. 5.0 hrs. The accessories listed above are available for purchase at your dealer. -
Page 74: Usage Guidelines: All About Performance And Safety
All about performance and safety Keeping tabs on signal strength The voice quality of your SANYO Dual-Mode Phone will always be at its best when the antenna is fully raised. If you’re inside a building, reception may be better near a window. -
Page 75: Understanding How Your Phone Operates
National Council of Radiation Protection and Measurements (NCRP). The design of this SANYO Dual-Mode Phone complies with these updated standards. Of course, if you want to limit RF exposure even further than the updated standard, you can choose to control the duration of your calls and operate your phone in the most power-efficient manner. -
Page 76: Maintaining Your Phone's Peak Performance
Maintaining your phone’s peak performance To operate your phone properly – that is, to maintain safe and satisfactory service – you should follow these rules: For best reception, fully extend the antenna. Hold the phone with the antenna up and over your shoulder. Do not hold the phone antenna at any time. -
Page 77: Protecting Your Battery
Protecting your battery For best battery performance, you should follow these guidelines: Use only SANYO-approved batteries and AC adapter, cigarette lighter adapter, and desktop charger. These chargers are designed to maximize battery life. Using other batteries or chargers will invalidate your warranty and may cause damage as well. -
Page 78: Driving
Replace the battery when it no longer provides acceptable performance. It can be recharged hundreds of times before it will need to be replaced. Do not store the battery in high temperature areas for long periods of time. Follow these storage rules: Less than one month: -4˚F to 131˚F (-20˚C to 55˚C) More than one month: -4˚F to 95˚F (-20˚C to 35˚C) Driving... -
Page 79: Disposal Of Lithium Ion Batteries
Disposal of Lithium Ion batteries This product contains a Lithium Ion battery. Please ensure that disposal of this battery is in accordance with applicable laws and regulations. Do not dispose of the battery in a fire; the cell may explode. Do not open or puncture the battery;... -
Page 80: Turn Off Your Phone Before Flying
Turn off the phone in healthcare facilities and request permission before using the phone near medical equipment. Turn off your phone before flying You should turn off your SANYO Dual-Mode Phone before boarding any aircraft. To prevent possible interference with aircraft systems, U.S. Federal Aviation Administration (FAA) regulations require you to have permission from a crew member to use your phone while the plane is on the ground. -
Page 81: Turn Off Your Phone In Dangerous Areas
Cautions Any changes or modifications to your SANYO Dual-Mode Phone not expressly approved in this document could void your warranty for this equipment and void your authority to operate this equipment. -
Page 82: Fcc Notice
FCC notice The phone may cause TV or radio interference if used in close proximity to receiving equipment. The FCC can require you to stop using the telephone if such interference cannot be eliminated. If you need assistance, contact your local dealer. And last, but certainly not least, vehicles using liquefied petroleum gas (such as propane or butane) must comply with the National Fire Protection Standard (NFPA-58). -
Page 83: Warning
can be determined by turning the equipment off and on, the user is encouraged to try to correct the interference by one or more of the following measures: -Reorient or relocate the receiving antenna. -Increase the separation between the equipment and receiver. -Connect the equipment into an outlet on circuit different from that to which the receiver is connected. - Page 84 PATENT INFORMATION The products/Equipment described in the attached documentation are manufactured under one or more of the following U.S. Patents: 4,901,307, D356,560, 5,506,865, 5,566,357, 5,608,722, 5,056,109, 5,408,697, 5,509,015, 5,568,483, 5,614,806, 5,099,204, 5,414,728, 5,509,035, 5,574,773, 5,617,060, 5,101,501, 5,414,796, 5,511,067, 5,574,987, 5,621,752, 5,103,459, 5,416,797, 5,511,073,...