
Related Manuals for iHome Hello Kitty Si-B62


Summary of Contents for iHome Hello Kitty Si-B62
- Page 1 Si-B62 Eng IB Size: 153mm x 120mm Printing color: Black June 6, 2014 Si-B62 Bluetooth FM Clock Radio with USB Charging instruction manual...
- Page 2 This equipment complies with FCC RF radiation exposure limits set forth for an uncontrolled environment. Thank you for purchasing the iHome Si-B62. This product is designed to provide high quality wireless sound from your iPad, iPhone, iPod or other Bluetooth audio device.
-
Page 3: Table Of Contents
Si-B62 Si-B62 Table of Contents Included Meet Your Si-B62 ........................5 • Si-B62 unit The Display/Setting Up the Unit ....................6 • 100V-240V universal AC adaptor Replacing and Installing Clock Backup Batteries ................7 • 12 inch audio cable Setting the Clock/ FM Radio .....................8 Setting and Using FM Presets.....................9 Setting and Using the Alarms ....................10 Previewing Alarms and Turning Alarms On/Off ................10... -
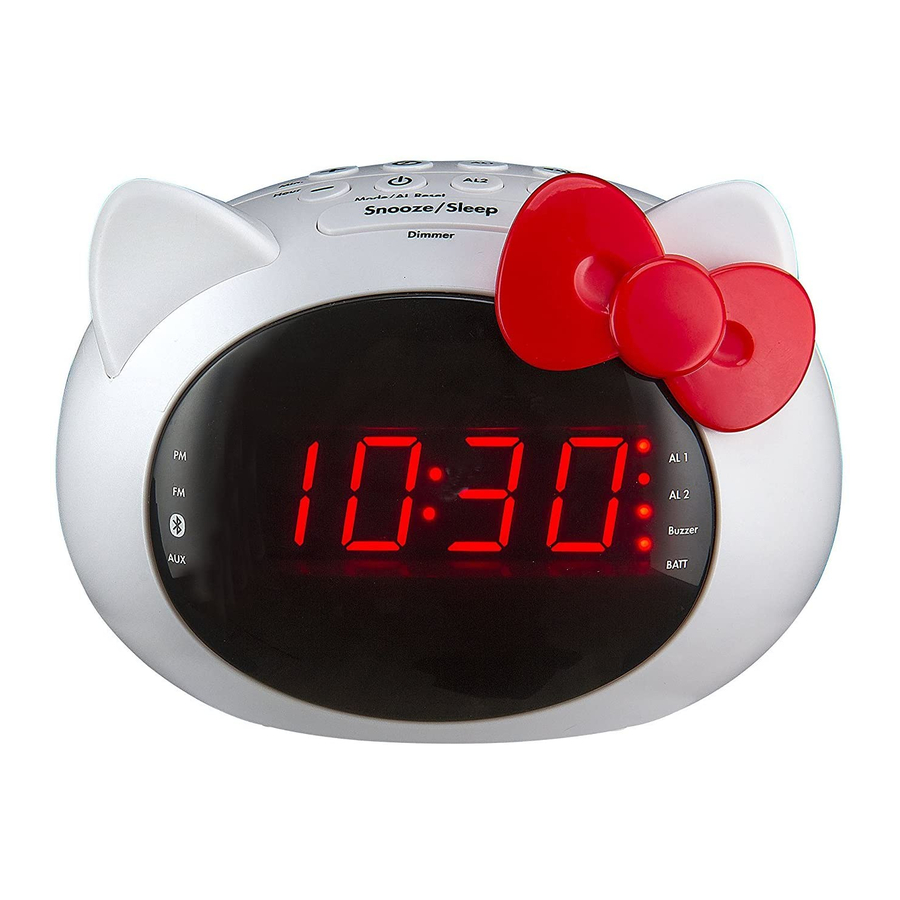
Page 4: Meet Your Si-B62
Si-B62 Si-B62 Using the The Display Meet Your Si-B62 Sleep Button Tuning Up Button Volume Up/Alarm 1 Button PM Indicator Alarm 1 Indicator Clock/Preset button Radio FM Indicator Alarm 2 Indicator Tuning down Button Volume Down/Alarm 2 Button Bluetooth Pairing Alarm Buzzer Indicator Power/Mode Button Pairing Button... -
Page 5: Replacing And Installing Clock Backup Batteries
Si-B62 Si-B62 Using the Using the Replacing and Installing Clock Backup Batteries Setting the Clock Note: 2 AAA batteries are included with the unit. Install them before using the unit. This model is equipped with a battery backup circuit that will maintain the time and alarm time settings in the event of 1. -
Page 6: Setting And Using Fm Presets
Si-B62 Si-B62 Using the Using the Setting and Using FM Presets Setting and Using the Alarms This unit has 2 separate alarms, each set the same way. Below we explain how to set Alarm 1. The unit allows you to store up to 10 FM radio station presets /Alarm 1 Button. -
Page 7: Using Bluetooth Pairing Your Device
Si-B62 Si-B62 Using the Using the Snooze/Dimmer Button Using Bluetooth Pairing Your Device 1. While the alarm is sounding, press and release the Snooze/Dimmer Button to temporarily silence the 1. Turn on your Bluetooth-enabled device and turn on Bluetooth capability as described in the device’s user alarm for 9 minutes. -
Page 8: Playing Audio Via Bluetooth/Playing Audio Via Aux-In
Si-B62 Si-B62 Using the Using the Charging Devices via USB Port Playing Audio Via Bluetooth 1. Connect the standard size end of a USB cable (not included) to the USB Port on back of the unit and 1. Press and release the Power/Mode Button as needed until the Bluetooth indicator icon appears on the connect the other end to the charging port on your device. -
Page 9: Troubleshooting
E. the unit exhibits a marked change in performance or does not operate normally. For further information and to see the latest instructions, visit www.ihome.com/support 12. Periods of Nonuse – If the unit is to be left unused for an extended period of time, such as a month or longer, the backup batteries should be removed from the unit to prevent damage or corrosion. -
Page 10: Warranty
Limited 1 Year Warranty iHome Products, a division of SDI Technologies Inc. (hereafter referred to as SDI), warrants this product to be free from defects in workmanship and materials, under normal use and conditions, for a period of one (1) year from the date of original purchase.