Table of Contents
Advertisement
Advertisement
Table of Contents

Related Manuals for Garmin RV-BBT600 Series

Summary of Contents for Garmin RV-BBT600 Series
- Page 1 RV-BBT600 SERIES Owner’s Manual...
- Page 2 © 2017 Garmin Ltd. or its subsidiaries All rights reserved. Under the copyright laws, this manual may not be copied, in whole or in part, without the written consent of Garmin. Garmin reserves the right to change or improve its products and to make changes in the content of this manual without obligation to notify any person or organization of such changes or improvements.
-
Page 3: Table Of Contents
Table of Contents Going Home ................7 Editing Your Home Location ..........7 Your Route on the Map ............... 7 Getting Started............... 1 Viewing a List of Turns ............8 RV HUB Dock Overview ............. 1 Viewing the Entire Route on the Map ........8 RV HUB Remote Overview ............ - Page 4 Device Care ................18 Cleaning the Outer Casing ........... 18 Cleaning the Touchscreen ........... 18 Device Information............18 Charging the RV HUB Remote Battery ........18 RV-BBT600 Dock Specifications ..........18 RV-BBT600 Series Remote Specifications ......18 Appendix............... 19 Table of Contents...
-
Page 5: Getting Started
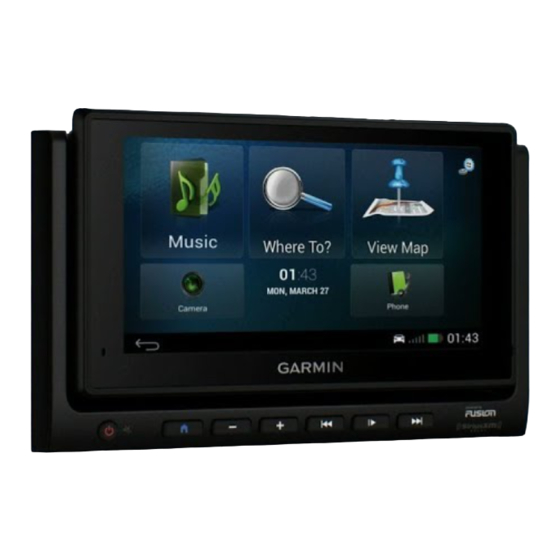
Getting Started Power key Microphone WARNING Volume keys See the Important Safety and Product Information guide in the microSD ® memory card slot product box for product warnings and other important Headphone jack information. micro USB port RV HUB Dock Overview Docking the RV HUB Remote The RV HUB remote provides a touchscreen interface for the RV HUB Infotainment system. -
Page 6: Acquiring Gps Signals
Zones 1 and 2 are powered by the on-board amplifier. To use Date and time Select to set the time, alarms, or timer. the RCA line outputs and the RCA subwoofer outputs, you must Phone Select to place a phone call using hands-free calling. connect external amplifiers. -
Page 7: Bluetooth Source Settings
Pair your phone or media player (Pairing Your Phone or dock. Media Player, page For more information, see the RV-BBT600 Series Select Music > BT. Installation Instructions. Connect the USB device to the USB port. If music does not start playing automatically, start playing music using your phone or media player. -
Page 8: Repeating Or Shuffling The Play Queue
• My_Music The SiriusXM Radio ID does not include the letters I, O, S, or F. • mobile Activating a SiriusXM Subscription • Music Before you can activate the SiriusXM subscription, you must have the Radio ID (Locating the SiriusXM Radio ID, page These guidelines also apply to memory cards installed in the MTP device. -
Page 9: Clearing All Locked Channels
The parental controls remain unlocked until you turn off the Changing the Parental Control Passcode vehicle or until you lock them again. With the SiriusXM source selected, select > Parental > Unlock. Clearing All Locked Channels Enter the passcode. With the SiriusXM source selected, select >... -
Page 10: Saving A Preset
• Locate the auxiliary inputs on the back of the stereo. NOTE: To play call audio from a hands-free kit, the audio For more information, see the RV-BBT600 Series output from the kit must be connected to the Aux 1 input on Installation Instructions. -
Page 11: Activating A Vehicle Profile
Select an option to enable or disable audible alerts while Select a location. using this profile. Select an option: Audible alerts can help to inform you of changes in the • To start navigating using the recommended route, select driving conditions, such as an upcoming speed limit change Go!. -
Page 12: Viewing A List Of Turns
next turn or exit, or other actions appear across the top of the • Use search tools to find specific locations, such as map. addresses, intersections, or geographic coordinates (Search Tools, page • Search near a different city or area (Changing the Search Area, page •... -
Page 13: Finding Rv Parks
The quick search list provides a list of recently found Viewing Current Location Information locations in the selected category. You can use the Where Am I? page to view information about your current location. This feature is helpful if you need to tell •... -
Page 14: Assigning Categories To A Saved Location
• Select Phone Number. Viewing a Map Tool From the map, select • Select Categories to assign categories to the saved location. Select a map tool. • Select Change Map Symbol to change the symbol used The map tool appears in a panel at the edge of the map. to mark the saved location on a map. -
Page 15: Warning And Alert Symbols
Warning and Alert Symbols • Select Reset Max. Speed to reset the maximum speed. • Select Reset Trip B to reset the odometer. WARNING Viewing the Trip Log Entering your vehicle profile characteristics does not guarantee Your device keeps a trip log, which is a record of the path you that your vehicle's characteristics will be accounted for in all have traveled. -
Page 16: Avoiding Road Features
Traffic data is not available in all areas. For information about the manufacturer. traffic coverage areas, go to www.garmin.com/traffic. If you are installing your own backup camera kit, you must connect the camera video to the video input on the back of the... -
Page 17: Viewing A Vehicle Camera
stereo, and the camera microphone to the Aux 2 input (if connection, the music playback pauses until the download is applicable). To show the camera automatically, you must complete. connect the camera to the camera trigger wire. For more TIP: If the stereo cannot download contacts and call logs, you information about the stereo connections, see the RV-BBT600 should go to the Bluetooth settings on your smartphone and Series Installation Instructions. -
Page 18: Muting Instructions
Select The app drawer is sorted into three tabs. Select an option: Garmin: Contains Garmin apps for navigation and • Select Rename Trip. customization, including the trip planner, voice command • Select Edit Destinations to add and delete a location, or settings, last parking spot app, and others. -
Page 19: Viewing Previous Routes And Destinations
Optimize Route: Enables the device to use optimized alternate TIP: To purchase additional map products, go to routes automatically or upon request (Avoiding Traffic Delays http://buy.garmin.com. on Your Route, page 11). Select Settings > Map & Vehicle > myMaps. Traffic Alerts: Sets the traffic delay severity for which the device displays a traffic alert. -
Page 20: Proximity Alerts Settings
Voice Language: Sets the language for voice prompts. Select Settings > Wi-Fi > RV HUB DOCK. Text Language: Sets all on-screen text to the selected Select the mode switch at the top of the screen to enable language. Station mode. NOTE: Changing the text language does not change the A list of nearby networks and access points appears. -
Page 21: Device And Privacy Settings
™ • Locate the 2.1 A USB port on the back of the RV HUB /express). dock. This provides easy access to these services for Garmin devices: For more information, see the RV-BBT600 Series Installation Instructions. • Software updates Plug the USB flash drive into the USB port. -
Page 22: Installing Downloaded Updates Onto The Rv Hub Dock
You can purchase an approved Garmin AC-DC adapter RV HUB dock. suitable for home or office use from a Garmin dealer or The dock must be receiving power to install the updates. garmin.com. The device may charge slowly when connected to a third-party adapter. -
Page 23: Appendix
• If the dock is in station mode, verify the selected wi-fi network place. is available (Connecting the Dock and Remote to a Wi-Fi The Garmin logo on the mount should face right-side up. Network, page 16). Press the suction cup to the windshield, and flip the lever If the dock cannot connect to the selected Wi-Fi network back toward the windshield. -
Page 24: Index
FM 4, 5 answering 13 fuel, stations 9 photos 14 unit ID 17 viewing 14 ahead 10 points of interest (POI) 8 gain 6 customizing 10 power cables 18 Garmin Express, updating software 17, 18 finding services 10 vehicle 19 geocaching 9 updating presets 5, 6 going home 7 maps 17 profiles, camper 6, 7 GPS 2 software 17, 18 proximity points alerts, settings 16... - Page 25 vehicle power cable 19 vehicle profile 6 camper 6, 7 video, playing 14 voice command 13, 14 activating 13 navigating with 13 tips for using 13 wakeup phrase 14 volume 2 adjusting 2 warning icons 11 Where Am I? 9 wi-fi 16 connecting 16, 19 widgets 15 Index...
- Page 26 July 2018 190-02206-00_0B...